
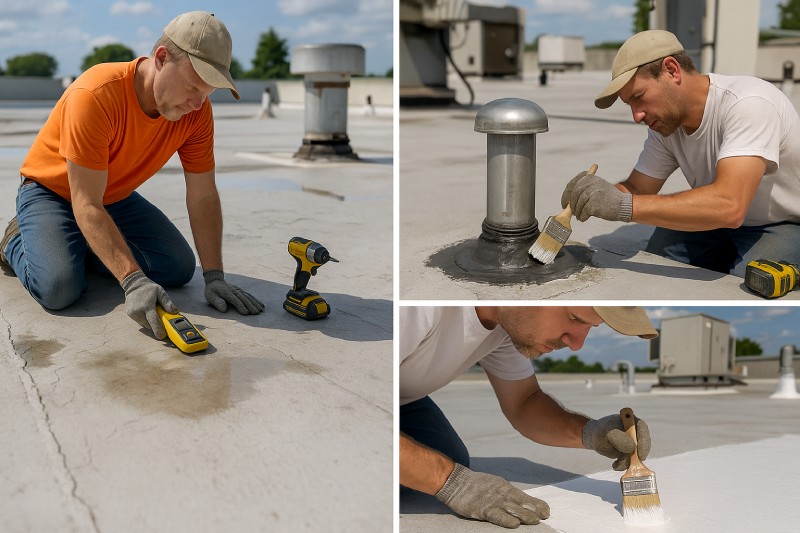
You discover water dripping from a ceiling tile during a busy day, it’s every facility manager’s nightmare. Left unchecked, that drop can lead to costly damage, emergency repairs, and frustrated occupants.
When water invades your workspace, it becomes a health hazard and an expensive structural issue in record time.
Imagine reopening after a leak-related shutdown because every filing cabinet and office space needs drying out. It’s a risk no one wants.
The good news is you can prevent that scenario before it starts by tackling the leak at its source and implementing smart repair strategies.
In the following tips, you’ll learn how to diagnose leaks, fix urgent issues effectively, reinforce membrane and drainage systems, and set up a proactive maintenance plan, so your roof stays dry and your operations keep moving forward.
1. Diagnose the Leak Before You Dive In

You wouldn’t prescribe medicine without a proper diagnosis. The same logic applies to flat roof repair, identifying the leak’s root keeps you from wasting time and money on band-aid fixes.
Full-Roof Audit
Start by walking the entire rooftop: inspect drains, flashings, seams, and roof edges.
Keep an eye out for ponding water, visible cracks, punctures, or bubbling.
Use a moisture meter or infrared scan to check under the membrane, identifying wet insulation or active leak channels.
Correct diagnosis allows you to prioritize the most vulnerable areas first.
Leak Severity Classification
Once you locate a suspected leak area, classify it:
- Minor punctures may need a simple patch.
- Seam failures often require heat welding or resealing.
- Widespread membrane degradation could require a full overlay or replacement.
Creating a clear picture helps you assign repair urgency and budget accordingly.
Record Everything
Document what you find: date, location, photos, type of damage. These details prove helpful later, especially when filing roof insurance claims, validating warranties, or planning future roof maintenance.
2. Prioritize Drainage & Eliminate Ponding
Stagnant water is a flat roof’s worst enemy, it accelerates membrane wear and often becomes the source of leaks.
Clear and Upgrade Roof Drains
Make sure drains and scuppers are free of leaves, debris, or sediment.
Clogged drains back water onto the deck, softening insulation and degrading seams.
Consider installing secondary siphonic drains or overflow scuppers if drainage is persistently slow.
Re-Pitch or Add Crickets
Sometimes ponding is due to low spots in the roof slope.
Strategic installation of tapered insulation crickets or saddle cuts helps direct water toward drains.
Simple adjustments in roof pitch can save thousands in repairs down the line.
Inspect Gutters and Downspouts
Don’t stop at the roof edge,check gutters and downspouts too.
If they’re blocked or disconnected water will overflow back onto the roof or walls.
A seamless drainage flow is essential for preventing backups and structural damage.
3. Repair Flashing and Penetration Seals
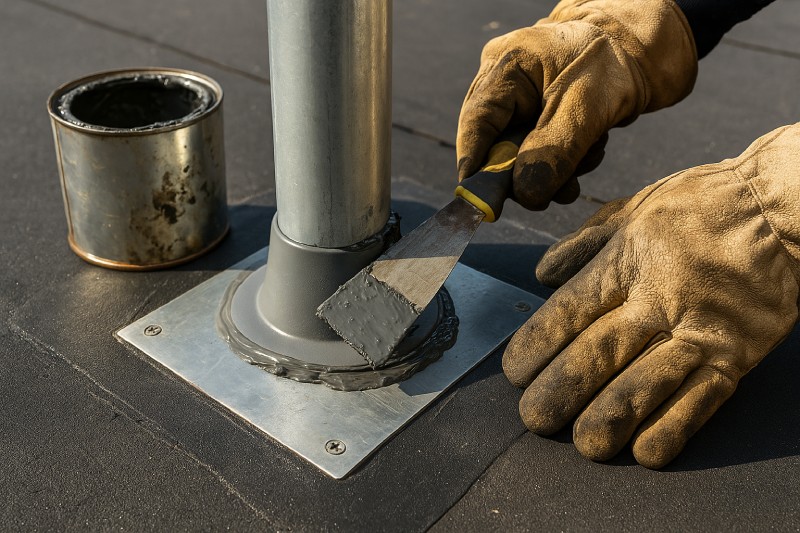
Leaks often start around rooftop penetrations like HVAC curbs, vents, pipes, or parapets. That’s why stopping water intrusion at these vulnerable junctures is essential.
Reinforce Pipe and Vent Flashings
Flashings that sit loose or have split edges let water sneak under the membrane. Carefully remove old sealant, then clean and dry the flange.
Apply a flashing cement compatible with your membrane-TPO, EPDM, or Modified Bitumen-and press a new matching patch into place.
For round pipes, a custom-fitted boot is ideal to maintain a strong seal and reduce tear risks.
Address Expansion Joint Failures
Buildings shift with temperature swings. Expansion joints are designed to accommodate movement, but if they’re cracked or rigid, they’ll fail.
Replace brittle sealants with flexible materials rated for outdoor use, and install protective metal covers to leave room for expansion and prevent seam stress.
Re‑cap Roof Edges and Wall Transitions
Edges and parapet walls are another common leak location. Remove deteriorated gravel stops, install new metal coping or edge metal, and seal transitions with a high-performance elastomeric sealant.
Reinforce corners with pre-cut flashing strips to maintain a continuous moisture barrier.
By focusing on flashings, you prevent leaks before they form, and avoid hidden damage that can weaken the entire roof system.
4. Mend Membrane Tears, Seams & Blisters
Once the roof membrane is damaged, addressing it quickly avoids bigger problems like insulation saturation or structural decay.
Patch Small Tears and Punctures
Tiny holes from hail, dropped tools, or HVAC work can be repaired on the spot. For TPO and PVC systems, prepare a matching patch, clean the surface, and weld it in place for a seamless bond. On Modified Bitumen roofs, use heat-welded patches or peel-and-stick versions, ensuring edges are pressed firmly with a roller.
Reseat or Resecure Loose Seams
Seams come apart over time from weathering or thermal cycling. Inspect all seams, especially across high-traffic areas or rooftop equipment.
Re-weld TPO or PVC seams with a hot-air gun, or add granule patches over asphalt seams to improve cohesion. Proper seam repair is core to lasting leak resistance.
Reduce Blisters Before They Burst
Blisters form when trapped moisture or air expands under the membrane.
Carefully pierce each blister, drain moisture, then flatten, dry, and patch with compatible membrane.
Adding a breathable patch allows residual vapor to escape, preventing recurrence.
5. Apply Protective Coatings for Longevity
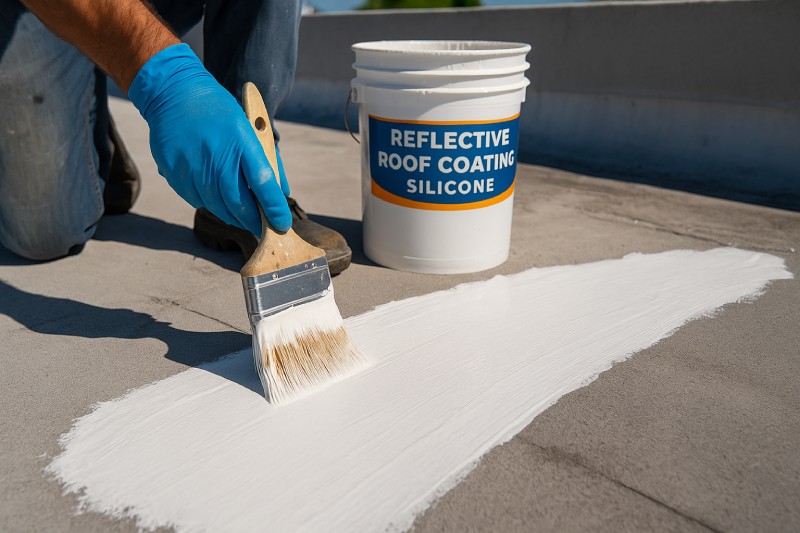
Once repairs are complete, it’s time to protect what’s underfoot, coatings greatly extend membrane life and performance.
Choose the Right System – Silicone or Acrylic
A reflective silicone coating builds a waterproof seal and resists fading under intense sun.
In Fresno’s climate, hot days, high UV exposure, cool roof coatings can cut energy use and protect your investment.
Energy Star–rated TPO membranes already offer good reflectance, but an added coating boosts performance even more
Brush-On Detail Treatments
Areas around drains, flashings, and edges are prone to ponding or accumulated dirt.
Apply a thick brush-on sealant layer in these zones, it fills in microscopic gaps and maintains UV protection. Think of it as targeted armor.
Reinforce High-Stress Zones
Corners, rooftop walkways, and spots next to heavy mechanical equipment endure strain.
Embed roofing fabric into the sealcoat in these hotspots, it reinforces stress points and reduces risk of cracking or tears. With added protection, your roof stands up to foot traffic and weather extremes.
6. Maintain a Proactive Roof Management Plan
A one-time repair isn’t enough. The roofs that last decades are those with ongoing checks, documentation, and follow-through.
Schedule Biannual Inspections
Inspect your commercial flat roof in spring after winter rains, and just before summer.
Florida study guidance suggests items like flashings and ponding get detailed attention.
Early detection prevents small issues from becoming emergencies.
Create a Roof Log with Photos & Dates
Develop a spreadsheet or work order system to track when and where inspections or repairs happen. Include images and notes, date, weather conditions, roof area, so you have a record of actions taken.
Good record-keeping supports insurance claims and helps forecast when parts of your roof are due for replacement.
Budget for Preventive Upkeep
After inspection, identify upcoming needs like re‑sealing seams or recoating patches.
Budget annually for maintenance, set aside 5-10% of the roof value to stay ahead. Preventive care costs less than emergency repair and extends warranty coverage.
Sample Maintenance Budget Table
| Item | Frequency | Estimated Cost ($/sq.ft) |
| Biannual inspection | 2× per year | 0.10 – 0.20 |
| Cleaning & debris removal | 2× per year | 0.05 – 0.10 |
| Flashing and sealant repairs | As needed | 0.50 – 1.00 |
| Reflective coating application | Every 5 years | 1.50 – 2.50 |
| Roof log & documentation system | Ongoing upkeep | 0.02 – 0.05 |
Frequently Asked Questions
What is the cost of commercial flat roof repair in Fresno?
Minor repairs like patching a membrane tear or resealing flashing typically run between $1.50–$3.50 per square foot.
Larger projects-such as recoating or overlay, can go from $3 to $7 per square foot, depending on membrane type (TPO, Modified Bitumen) and labor involved
How often should I inspect my commercial flat roof?
Twice yearly is best, spring and fall, plus after heavy storms. Track all findings and repairs in a roof log to support warranty and insurance claims.
Why choose TPO roofing in Fresno?
TPO offers high reflectivity, energy efficiency, and UV resistance, ideal for Fresno’s sun.
Local contractors are well-versed in proper TPO installation to avoid seam failures and maximize cool-roof benefits
Can I add a coating instead of replacing my flat roof?
Yes. Reflective coatings like silicone or acrylic can extend life by 5-10 years when membrane integrity remains solid.
Seal small repairs first, then apply coating.
Just make sure surfaces are dry and clean for optimal adhesion.
Final Thoughts
From pinpointing leak sources to strengthening membranes and building a maintenance plan, these six tips cover every step-diagnose, repair, protect, maintain.
With proactive care, you’ll avoid dreaded emergency repairs, insurance headaches, and unnecessary downtime.
Interested in a tailored solution? Fresno Roof Repair is licensed, insured, and certified to handle commercial flat roof repair, TPO roofing, roof coatings, and insurance claims consultation.
Visit our commercial roofing page to request a free property evaluation and join the growing list of satisfied facility managers who trust us to keep their roofs-and businesses-dry.
Let’s keep your roof leak-free for years to come.

Alexander Johnson is an experienced roofing professional with more than 25 years in the industry and serves as CEO of Fresno Roof Repair. His expertise combines traditional craftsmanship with modern technology, with a focus on durable roofing solutions designed for Fresno’s diverse climate.