Picture this: you’re parked at a picturesque campground, the crackling sound of a campfire fills the air, and the excitement of outdoor adventures lingers. But suddenly, dark storm clouds start rolling in, threatening to turn your camping bliss into a soggy mess. As raindrops begin to pelt your camper’s roof, you realize it’s time for some serious roof repair. Whether it’s due to wear and tear, leaks, or damage, knowing how to replace a camper roof?”>camper roof is essential for any avid camper or RV enthusiast. In this informative article, we’ll guide you through the process, step by step, so that you can restore your roof’s integrity and get back to enjoying the great outdoors with peace of mind. So grab your toolbox, roll up your sleeves, and let’s dive into the world of camper roof replacements.
Preparation: Assessing the condition of your camper roof
Assessing the condition of your camper roof is an essential first step in the process of replacing it. Before you begin any work, it’s important to thoroughly inspect the roof to determine the extent of the damage and assess whether a repair or replacement is necessary. This will ensure that you’re properly prepared and have a clear idea of what needs to be done.
To assess the condition of your camper roof, start by carefully examining the surface for any signs of damage, such as cracks, leaks, or sagging areas. Additionally, check for any soft spots or areas of delamination, as these indicate underlying structural issues. It’s also important to inspect the seams and edges of the roof, as these can be prone to leaks and may require additional attention.
During your assessment, take note of any issues you discover and make a list of the necessary repairs or replacements. This will help you determine the extent of the work that needs to be done and guide you in gathering the appropriate tools and materials. Keep in mind that if the damage is extensive or the roof is in poor condition overall, it may be more cost-effective and practical to replace the entire roof rather than attempting to repair it.
Remember, proper assessment is crucial for a successful camper roof replacement take?”>roof replacement project. Taking the time to thoroughly inspect your roof will ensure that you have a clear understanding of its condition and allow you to approach the next steps with confidence and accuracy.
Gathering the necessary tools and materials for replacing your camper roof
In order to successfully replace your camper roof, it is essential to gather the necessary tools and materials. This step is crucial to ensure that you have everything you need before starting the roof replacement process. By having all the tools and materials readily available, you can save time and avoid any unnecessary delays or interruptions during the project.
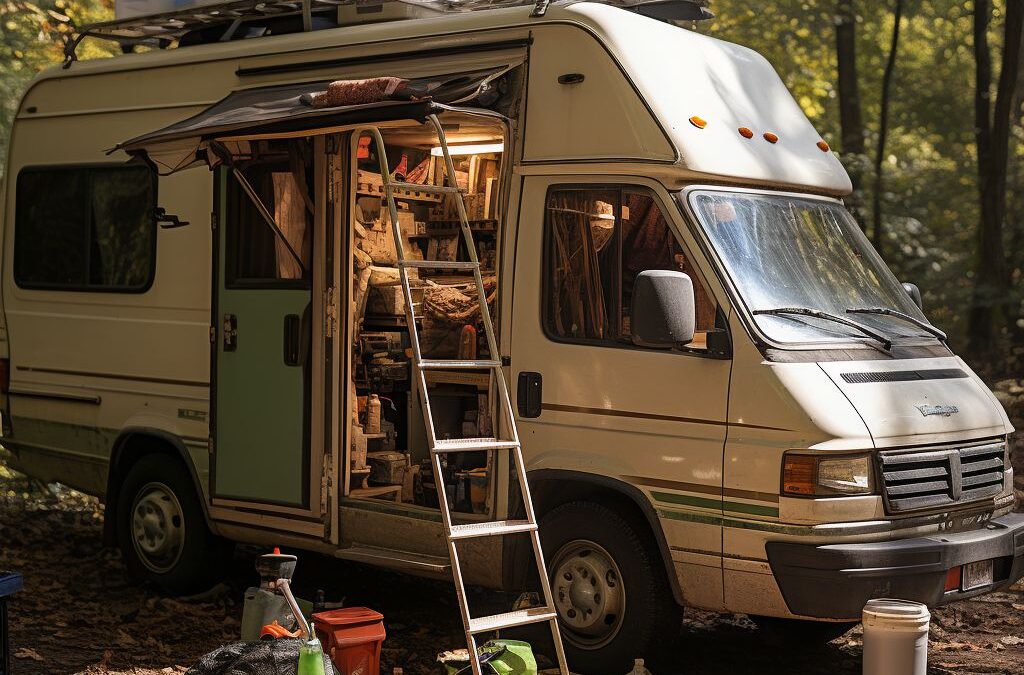
To begin, you will need a set of basic hand tools such as a hammer, screwdriver, utility knife, and pry bar. These tools will come in handy when removing the old roof as well as installing the new one. Additionally, you will need a ladder or scaffolding to safely access the top of your camper.
Next, gather the materials required for the roof replacement. This will depend on the type of roof you choose for your camper. Options include rubber, fiberglass, or aluminum roofs. Each material has its own benefits and considerations, so it is important to choose the one that best suits your needs. You will also need adhesive or sealant designed specifically for RV roofs, as well as screws or nails to secure the new roof in place.
In addition to the essential tools and materials, it is a good idea to have some additional items on hand. These include safety equipment such as gloves, safety goggles, and a dust mask to protect yourself during the roof replacement process. It is also recommended to have a tarp or drop cloth to cover the interior of your camper and protect it from any debris or potential water damage.
By gathering all the necessary tools and materials ahead of time, you can streamline the process of replacing your camper roof. This ensures that you have everything you need at your fingertips, allowing you to work efficiently and effectively. Remember to always follow safety precautions and consult the manufacturer’s instructions for any specific tools or materials required for your particular camper roof replacement.
Step-by-step guide to removing the old roof from your camper
Removing the old roof from your camper is a crucial step in replacing it with a new one. This process requires careful attention and should be done step-by-step to ensure a smooth and successful roof replacement. Here is a guide on how to remove the old roof from your camper.
First, make sure you have all the necessary tools and equipment ready for this task. You will need a ladder, pry bar, screwdriver, utility knife, pliers, and a bucket to collect any debris that falls during the process. Additionally, it is essential to wear protective gear such as gloves and safety glasses to prevent any injuries.
Start by removing any accessories or attachments on the roof, such as antennas, air conditioning units, or vents. Carefully disconnect any wiring or connections related to these components. This will allow for easier removal of the roof without damaging any of the accessories.
Next, identify the seams and edges of the roof. Using a pry bar or screwdriver, gently remove any trim or moldings that secure the roof to the camper. Take your time and be cautious not to damage surrounding areas.
Once the trim and moldings are removed, locate and remove any screws or fasteners holding the roof in place. These are typically found along the edges and corners of the roof. Use a screwdriver or pliers to unscrew or remove these fasteners.
After all the fasteners are removed, carefully lift the old roof off the camper. It may be necessary to have a helping hand or use a lifting mechanism, depending on the size and weight of the roof. Take caution not to damage the sides or interior of the camper during this process.
Finally, inspect the underlying structure and make any necessary repairs or replacements before proceeding with the installation of the new roof. Look for any rot, water damage, or weak spots that may compromise the integrity of the new roof.
Remember, each camper may have specific nuances or additional steps required for roof removal. It is essential to consult the manufacturer’s guidelines or seek professional advice if you encounter any difficulties or uncertainties during the process.
Choosing the right type of roof for your camper and understanding the installation process
Choosing the right type of roof for your camper is crucial in ensuring its durability and protection against the elements. Understanding the installation process is equally important to ensure a successful replacement. Here’s what you need to know:
When it comes to choosing a camper roof, there are a few options to consider. One popular choice is a rubber roof?”>rubber roof, also known as EPDM (Ethylene Propylene Diene Monomer). Rubber roofs are highly durable, lightweight, and resistant to UV rays, making them ideal for camper roofs. They are also relatively easy to install, making it a popular choice among DIY enthusiasts.
Another option to consider is a fiberglass roof?”>fiberglass roof. Fiberglass roofs offer excellent insulation properties and are known for their strength and longevity. They are also resistant to impact and can withstand harsh weather conditions. However, fiberglass roofs can be more challenging to install compared to rubber roofs and may require professional assistance.
Once you have chosen the type of roof for your camper, understanding the installation process is crucial. The first step is to thoroughly clean and prepare the roof surface before installation. This includes removing any old sealant, debris, and damaged sections of the old roof.
Next, apply a layer of adhesive or sealant to the roof surface. This will help create a secure bond between the new roof and the camper. Carefully roll out the new roof material, ensuring it covers the entire roof surface. Use a roller to smooth out any wrinkles or air bubbles.
Tip: Before applying the new roof, consider reinforcing critical areas such as corners and edges with extra layers of adhesive or sealant. This will provide added protection against potential leaks.
Once the new roof is in place, secure it with screws or staples along the edges. Be sure to follow the manufacturer’s guidelines for proper fastening methods.
Tip: Consider using a self-leveling sealant around any protrusions such as vents or antennas to ensure a watertight seal.
Proper installation is essential for a long-lasting camper roof. If you’re not confident in your DIY skills, it’s advisable to seek professional assistance to ensure the job is done correctly.
Remember, choosing the right roof for your camper and understanding the installation process are crucial steps towards a successful replacement. Take the time to research and gather the necessary information before embarking on this project for a seamless camper roof replacement experience.
Expert tips for a seamless camper roof replacement
:
Replacing a camper roof can be a challenging task, but with the right knowledge and expertise, you can ensure a seamless and successful replacement. Here are some expert tips to help you achieve a professional-level camper roof replacement:
1. Properly clean and prepare the surface: Before installing the new roof, it is vital to thoroughly clean and prepare the surface of your camper. Use a mild cleaning solution and scrub away any dirt, debris, or old adhesive. This will ensure better adhesion of the new roof material and prevent any future issues.
2. Invest in high-quality materials: When it comes to a camper roof replacement, quality matters. Invest in high-quality roofing materials that are durable, weather-resistant, and specifically designed for campers. This will ensure that your new roof can withstand the elements and last for years to come.
3. Follow manufacturer instructions: Each camper roof material and brand may have specific installation instructions. It is crucial to carefully read and follow the manufacturer’s guidelines to ensure a proper and secure installation. Familiarize yourself with the recommended tools, adhesives, and techniques to achieve the best results.
4. Pay attention to seals and caulking: Proper sealing and caulking are crucial to prevent leaks and water damage. Take extra care when installing seals around vents, air conditioners, antennas, and any other protrusions. Use a high-quality sealant that is compatible with your roof material, and regularly inspect and maintain the seals to prolong the lifespan of your camper roof.
5. Consider professional help for complex repairs: While replacing a camper roof is a DIY project for many enthusiasts, some repairs may require professional assistance. If you encounter complex repairs, such as extensive water damage or structural issues, it is advisable to consult with a professional who specializes in camper roof replacements. They have the expertise and experience to handle complex repairs and ensure a seamless and long-lasting solution.
Remember, a proper camper roof replacement requires careful planning, attention to detail, and adherence to best practices. By following these expert tips, you can successfully replace your camper roof and enjoy the benefits of a sturdy and leak-free camping experience.
Maintenance and care tips to prolong the lifespan of your new camper roof
Proper maintenance and regular care are essential for extending the lifespan of your new camper roof. By following these tips, you can ensure that your roof remains in excellent condition for years to come.
1. Regular Cleaning: One of the easiest ways to maintain your camper roof is by keeping it clean. Remove any debris, leaves, or branches that may accumulate on the surface, as they can cause damage over time. Use a soft-bristle brush or a low-pressure water hose to gently clean the roof. Avoid using harsh chemicals or abrasive tools that can cause scratches or weaken the roof’s protective coatings.
2. Inspecting Seals and Joints: It is crucial to regularly inspect the seals and joints of your camper roof to prevent water leaks. Check for any signs of cracking, gaps, or deterioration in the seals around vents, skylights, and AC units. If you notice any issues, repair them promptly using appropriate sealing materials and techniques. Ignoring these small problems can lead to significant water damage and costly repairs in the future.
3. UV Protection: The sun’s UV rays can be particularly damaging to camper roofs, causing them to deteriorate over time. To protect your roof from UV damage, consider applying a roof coating or using a UV-resistant cover when you’re not using the camper. These protective measures can help preserve the roof’s integrity and prevent premature aging.
4. Regular Inspections: It’s important to inspect your camper roof at least twice a year, ideally before and after the camping season. Look for any signs of wear and tear, such as loose seams, bubbles, or soft spots. Catching and addressing these issues early on can prevent further damage and prolong the lifespan of your roof.
5. Avoid Overloading: Be mindful of the weight you place on your camper roof. Excessive weight or pressure can cause structural damage and compromise the roof’s integrity. Avoid storing heavy items on the roof and take care when walking or placing objects on it.
By following these maintenance and care tips, you can make sure your new camper roof remains in optimal condition, enhancing its longevity and protecting your investment in your outdoor adventures. Remember, a well-maintained roof will keep you safe and dry for many camping trips to come.
People Also Ask
1. What is the best material for replacing a camper roof?
The best material for replacing a camper roof depends on personal preference and budget. Some popular options include EPDM rubber, TPO, and aluminum. Each material has its advantages, such as durability, cost-effectiveness, and resistance to UV rays, so research and consider your specific needs before choosing.
2. How much does it cost to replace a camper roof?
The cost of replacing a camper roof can vary widely depending on factors such as the size of the roof, the chosen material, and any additional repairs required. On average, you can expect to spend between $1,000 to $5,000 for a camper roof replacement.
3. Can I replace a camper roof myself?
While it is possible to replace a camper roof yourself, it can be a challenging and time-consuming task. It requires knowledge of roofing techniques and materials, as well as specialized tools. If you are not confident in your abilities, consulting a professional is recommended to ensure the job is done correctly and to avoid any potential damage to your camper.
4. What steps are involved in replacing a camper roof?
The exact steps for replacing a camper roof may vary depending on the specific model and material being used. However, generally, the process involves removing the old roof, inspecting and repairing any underlying damage, applying a waterproof membrane or sealant, and then installing the new roof material while ensuring proper sealing.
5. How long does it take to replace a camper roof?
The duration of a camper roof replacement can vary based on factors such as the complexity of the job, the size of the camper, and the weather conditions. On average, it can take anywhere from a few days to a week to complete a camper roof replacement project.
In Summary
In conclusion, replacing a camper roof is a complex task that requires careful planning and attention to detail. By following the steps outlined in this guide, you can successfully replace your camper roof and ensure that it is sturdy and weatherproof.
Remember to begin by preparing the area and removing the old roof, taking care to identify any structural damage that may need repair. Then, select the appropriate materials and follow the manufacturer’s instructions for installation. It is essential to properly seal all seams and edges to prevent leaks.
Regular maintenance and inspections are crucial to prolonging the lifespan of your new camper roof. Be sure to address any signs of damage promptly to avoid further issues down the line. And if you’re unsure about any aspect of the process, don’t hesitate to seek professional assistance.
By following these steps and staying vigilant in caring for your camper roof, you can enjoy many more adventures on the road without worry. May your camper roof replacement project be a success!

Customer Relations Manager
Benjamin Turner is a customer-centric professional, placing emphasis on open communication and transparency throughout the roofing process. His dedication to client satisfaction ensures a smooth and collaborative experience.