If you have a clay roof, you’ve made a timeless and durable investment in your home’s aesthetic appeal and protection. After years of enduring nature’s elements, it’s not uncommon for clay roof tiles?”>clay roof tiles to crack or become damaged, compromising their functionality and looking a bit worse for wear. While it may seem like a daunting task, with the right guidance and a little perseverance, replacing clay roof tiles can be a manageable DIY project for homeowners. In this article, we will walk you through the step-by-step process of replacing a clay roof tile, helping you restore the beauty and integrity of your roof while keeping your repair budget intact. From choosing the right replacement tile to safely removing the damaged one and correctly installing the new tile, we’ve got you covered with all the essential tips and tricks to make this restoration project a success. So, let’s dive in and discover the secrets of replacing a clay roof tile like a pro!
Preparing to Replace a Clay Roof Tile
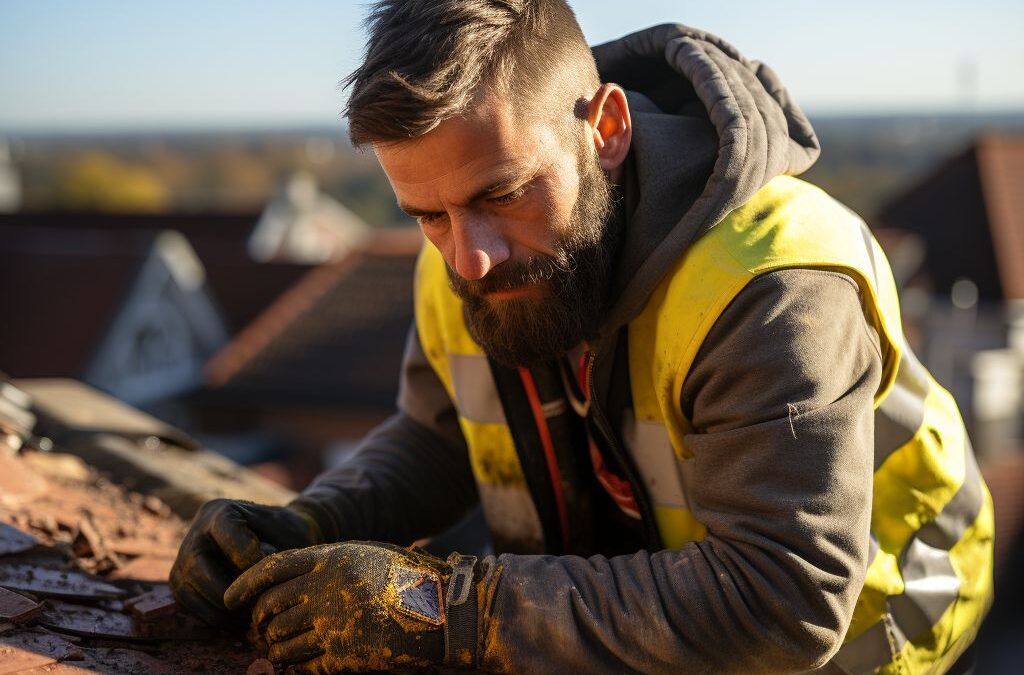
Before you begin replacing a clay roof tile, it is essential to take the necessary preparations to ensure a smooth and successful repair process. This involves inspecting the roof for any damaged tiles, gathering the required tools and materials, and ensuring safety measures are in place.
To start, inspecting the roof is crucial to identify any damaged or broken clay roof tiles. Carefully climb up to the roof using a ladder, making sure it is stable and securely anchored. Once you are on the roof, visually scan the area for any signs of cracked or chipped tiles. Additionally, look out for loose or displaced tiles that may need attention.
Once you have identified the damaged tiles, it is time to gather the necessary tools and materials for the replacement process. You will need a ladder, roofing hammer, crowbar or flat pry bar, safety goggles, gloves, replacement clay roof tile, roofing cement, and roofing nails. Ensure that the replacement tile matches the existing ones in terms of size, shape, and color for a uniform appearance.
Safety should always be a top priority when working on a roof. Before starting the repair, it is essential to have a sturdy ladder that reaches the necessary height. Furthermore, wearing safety goggles and gloves will protect your eyes and hands from any debris or sharp edges. Take caution and be mindful of your surroundings to prevent any accidents or injuries.
By adequately preparing for the replacement of a clay roof tile, you can ensure a successful repair process. Inspecting the roof for damaged tiles, gathering the necessary tools and materials, and prioritizing safety will contribute to a smooth and efficient replacement. With these preparations in place, you will be ready to move on to the next steps of removing the broken tile and installing the new one.
Inspecting the Roof for Damaged Tiles
Before beginning the process of replacing a clay roof tile, it is important to carefully inspect the roof for any damaged tiles. This step is crucial as it helps identify which tiles need to be replaced and ensures that the overall structural integrity of the roof is maintained.
Start by visually examining the roof from the ground level using binoculars or by climbing a ladder to get a closer look. Look for any cracked, chipped, or broken tiles. Pay close attention to areas where the tiles may have shifted, such as around chimneys or where the roof meets a wall.
In addition to a visual inspection, it is recommended to physically touch the tiles to check for any loose or dislodged ones. Gently tap on each tile with a rubber mallet or your knuckles to listen for any hollow sounds, which might indicate that the tile is loose or cracked. Keep in mind that the damaged tiles may not always be easily visible, especially if they are closer to the edges or are covered by debris.
To ensure a thorough inspection, consider dividing the roof into sections and methodically examine each area. It is important to document any damaged tiles and their locations for reference during the replacement process. Take pictures or make drawings to help you keep track of the damaged tiles and their positions on the roof.
Signs of Water Damage
During the inspection, it is crucial to also look for signs of water damage that may be a result of a damaged tile. Check the area surrounding the clay tiles for any discoloration, mold growth, or water stains. These signs indicate that water has penetrated through the damaged tile and potentially caused further issues, such as rot or structural damage.
If you notice any signs of water damage, it is best to consult with a professional roofer to assess the extent of the damage and determine the necessary repairs. Addressing water damage promptly can help prevent further deterioration of the roof and ensure its longevity.
- Inspect the roof visually from the ground or by climbing a ladder.
- Physically touch each tile to check for looseness or cracks.
- Tap on the tiles to listen for hollow sounds.
- Create a systematic approach by dividing the roof into sections.
- Document the damaged tiles and their locations for reference.
- Look for signs of water damage, such as discoloration or mold growth.
Remember, a thorough inspection of the roof is essential before replacing any clay roof tiles. This step not only helps identify the damaged tiles but also ensures that the correct replacements are obtained and that the overall roof structure remains strong and intact.
Gathering the Necessary Tools and Materials
Before replacing a clay roof tile, it is essential to gather all the necessary tools and materials to ensure a smooth and efficient repair process. Here is a list of items you will need:
1. Safety equipment: Safety should always be a top priority when working on a roof. Make sure to have safety goggles, work gloves, and sturdy shoes to protect yourself from any potential hazards.
2. Ladder: Depending on the height of your roof, you may need a ladder to access the damaged tile. Choose a ladder that is tall enough to reach the area safely and securely.
3. Replacement clay roof tile: Purchase a new clay roof tile that matches the existing tiles on your roof. It is crucial to find a match in terms of shape, color, and size to maintain the visual integrity of your roof.
4. Pry bar: A pry bar will come in handy for gently removing the broken tile without causing any further damage.
5. Roofing adhesive: To secure the new tile in place, you will need roofing adhesive or mortar. This will ensure a secure bond between the new tile and the roof.
6. Roofing nails: In some cases, you may need roofing nails to reinforce the tile and provide extra stability. Check if your particular tile requires the use of nails, as some clay tiles are designed to simply interlock without the need for additional fasteners.
7. Hammer: A hammer is necessary for driving in roofing nails if required.
8. Roofing cement: To seal any gaps or small cracks around the replacement tile, you will need roofing cement. This will provide an extra layer of protection against water penetration.
Ensure that you have all these tools and materials ready before starting the replacement process to avoid any delays or interruptions. Having everything at hand will allow you to work efficiently and complete the repair in a timely manner. Remember to follow proper safety precautions and exercise caution while handling the tools and materials.
Removing the Broken Clay Roof Tile
To begin the process of replacing a clay roof tile, the first step is to safely remove the broken tile from the roof. This step requires caution and precision to prevent any further damage to the roof and surrounding tiles.
Before starting, it’s crucial to ensure personal safety by wearing appropriate protective gear, such as gloves and a hard hat. Additionally, using a sturdy ladder and having someone else present to assist is highly recommended.
To remove the broken clay roof tile, follow these steps:
1. Clear the area: Before accessing the damaged tile, clear any debris or loose tiles around it. This will provide better visibility and prevent any obstruction during the removal process.
2. Locate the support baton or batten: The baton or batten is the wooden strip that holds the clay roof tiles in place. Look for the support baton that corresponds to the damaged tile you need to remove. It typically runs horizontally beneath the tile.
3. Lift the tile above: Carefully lift the tile situated directly above the damaged one. Use caution to avoid causing any further damage to adjacent tiles. If needed, use a pry bar to gently lift the tile and provide enough space to access the damaged tile.
4. Secure the lifted tile: Once the tile above the damaged one is lifted, secure it in position by placing wooden blocks beneath it. This prevents it from accidentally falling or causing damage to surrounding tiles.
5. Remove the damaged tile: To remove the broken clay tile, locate the nails securing it in place. These nails are generally inserted near the bottom of the tile, so check along the lower edge. Using a flat pry bar, carefully pry the nails out of the support baton. Take your time to avoid breaking adjacent tiles.
6. Lift and slide out the tile: With the nails removed, gently lift and slide the damaged clay tile out from under the lifted tile above. Take care not to drop the broken tile or cause any additional damage.
Remember to dispose of the broken tile properly and clean the area before proceeding to the installation of the new clay roof tile.
Installing the New Clay Roof Tile
After successfully removing the broken clay roof tile, it’s now time to proceed with installing the new one. Paying careful attention to the steps involved in this process will ensure that the new tile fits securely and seamlessly into place, providing maximum protection for your roof.
1. Positioning the Tile: Begin by carefully placing the new clay roof tile into the empty slot left by the broken one. Make sure the tile is aligned with the surrounding tiles and sits flat on the roof surface. Double-check that the tile’s orientation matches the surrounding tiles, ensuring a consistent appearance.
2. Nailing the Tile: Once the tile is properly positioned, use a hammer and roofing nails to secure it in place. Hammer the nails in the designated nail holes on the edges of the clay tile, driving them into the underlying roof structure. Be cautious not to overdrive the nails, as that can cause damage to the tile or compromise its integrity.
3. Adhering the Tile: Apply a thin layer of roofing adhesive or mortar to the underside of the replacement tile before setting it in place. This will provide additional stability and help prevent water penetration. Use a putty knife or a trowel to evenly spread the adhesive, ensuring full coverage across the tile’s surface. Allow the adhesive to dry according to the manufacturer’s instructions.
4. Checking for Proper Fit: After securing the new clay roof tile, visually inspect its position and alignment. Ensure that it sits flush with the surrounding tiles and does not interfere with the neighboring tiles’ interlocking mechanism. The new tile should seamlessly integrate into the existing roof arrangement, maintaining the roof’s structural integrity.
5. Replacing Adjacent Tiles (Optional): Depending on the condition of the adjacent tiles, you may choose to replace any damaged ones as well. Follow the same process outlined above for each replacement tile, ensuring a consistent and aesthetically pleasing result.
By following these steps, you can confidently install a new clay roof tile and contribute to the long-term integrity of your roof. Remember, it’s crucial to handle roof repairs with care and precision to maintain the protection and overall quality of your home. Always prioritize safety and, if in doubt, consult a professional roofing contractor for guidance.
Sealing and Finishing the Replacement Tile
After successfully installing the new clay roof tile, it is crucial to properly seal and finish the replacement to ensure its longevity and effectiveness in protecting your roof. Sealing the tile will not only provide a waterproof barrier but also help to secure it firmly in place.
To begin, make sure the replacement tile is positioned correctly and aligned with the surrounding tiles. Use a caulking gun to apply a generous amount of roofing sealant along the edges and underside of the tile. This will create a watertight seal and prevent any water infiltration that could potentially damage your roof.
Next, carefully press down on the replacement tile to ensure proper adhesion. Apply gentle pressure to evenly distribute the sealant and ensure it adheres firmly to the roof surface. It is essential to be cautious and avoid applying excessive force, as this may cause the tile to crack or shift out of place.
Once the sealant has been applied and the tile has been secured, it is time to finish the replacement by addressing any visible gaps or exposed edges. This is important for both aesthetic purposes and to prevent any potential water damage.
Inspect the area around the replacement tile for any gaps or unevenness. If necessary, use a putty knife or a trowel to fill in any gaps with roofing caulk or concrete. Smooth out the surface with the appropriate tool to create a seamless finish.
Additionally, it is recommended to check the alignment and placement of the surrounding tiles. Make any necessary adjustments to ensure they are properly aligned and spaced, as this will contribute to a cohesive look and prevent further damage in the future.
In conclusion, sealing and finishing the replacement clay roof tile is a crucial step in the repair process. By properly applying the roofing sealant, ensuring proper adhesion, and addressing any gaps or exposed edges, you can ensure the longevity and effectiveness of the replacement tile. Taking the time and effort to complete this step will contribute to the overall durability and aesthetic appeal of your roof.
People Also Ask
1. How do you remove a clay roof tile without breaking it?
To remove a clay roof tile without breaking it, start by carefully lifting the tile above with a flat pry bar. Then, slide the tile you want to replace to the side and gently lift it out. Take care not to use excessive force or twist the tile, as this can cause it to crack.
2. Can you replace a clay roof tile yourself?
Yes, it is possible to replace a clay roof tile yourself. However, it is important to take necessary safety precautions and have the right tools before attempting the task. It is recommended to consult professional roofers if you are unsure or uncomfortable with the process.
3. What tools are needed to replace a clay roof tile?
To replace a clay roof tile, you will typically need a flat pry bar, a hammer, a slate or tile ripper, a replacement tile, roofing cement or adhesive, and a ladder. Additional tools may be required depending on the specific situation and the type of roof you have.
4. How long does it take to replace a clay roof tile?
The time required to replace a clay roof tile can vary depending on several factors, such as the accessibility of the tile, the complexity of the roof structure, and the experience of the person doing the replacement. Generally, it can take anywhere from a few minutes to an hour or more to replace a single tile.
5. Can you walk on a clay tile roof?
While clay tile roofs are durable, it is generally not recommended to walk directly on them, as they can be fragile and prone to breakage under excessive weight or pressure. If you need to inspect or repair your clay roof, it is advisable to use a walkway or scaffold to distribute your weight evenly and protect the tiles.
Key Takeaways
In conclusion, replacing a clay roof tile requires careful planning and attention to detail. It is important to gather the necessary tools and materials, as well as take safety precautions before starting the process. By following the step-by-step instructions provided, one can successfully replace a damaged or broken clay roof tile.
Remember to use caution when working at heights and always prioritize safety. If you are unsure about the process or if the roof is too steep to handle on your own, it is advisable to seek professional assistance. Regularly inspecting and addressing any issues with your clay roof tiles will ensure the longevity and integrity of your roof.
By taking the time to replace damaged tiles promptly, you will prevent further damage to your roof and maintain the aesthetic appeal of your home. Don’t hesitate to reach out to a professional roofer if you have any questions or concerns. With proper care and maintenance, your clay roof will continue to protect your home for years to come.

Lead Roofing Specialist
Michael Thompson brings over two decades of roofing expertise to Fresno Roof Repair. His dedication to quality craftsmanship and customer satisfaction has earned him a reputation as a reliable authority in the roofing industry.