Picture yourself sitting under the stars, nestled comfortably in your pop up camper, when suddenly a soft drizzle turns into a relentless downpour. As the rain pounds against the roof, you hear a slow, dreaded dripping sound that sends shivers down your spine. Yes, roof leaks are an all-too-common headache for pop up camper owners. But fear not! With a little know-how and some handy tools, replacing a pop up camper roof can be a straightforward and rewarding DIY project. In this guide, we’ll walk you through the step-by-step process, from assessing the damage to installing a new roof, ensuring that you can enjoy your outdoor adventures with peace of mind and a dry sanctuary above. So grab your toolkit, don your work gloves, and let’s dive into the world of pop up camper roof repairs!
Preparing for the Roof Replacement Process
Before diving into the roof replacement process for your pop up camper, it is important to make necessary preparations to ensure a smooth and successful project. Taking the necessary steps beforehand will help you save time and avoid potential problems along the way.
Firstly, it is crucial to find a suitable location to carry out the roof replacement process. This area should have ample space to comfortably work on the camper and provide easy access to essential tools and materials. A flat and level surface, such as a driveway or garage, is ideal for this purpose.
Next, gather all the necessary tools and materials you will need for the roof replacement. This includes a ladder, utility knife, screwdriver, pliers, tape measure, caulking gun, roofing adhesive, roofing membrane, and any other specific materials recommended by the manufacturer of your pop-up camper. It is important to have all the required equipment readily available to avoid interruptions and delays during the roof replacement process.
Additionally, it is essential to inspect the area surrounding your pop up camper and ensure there are no potential obstructions or hazards. Clear away any debris, such as tree branches or large rocks, that could impede your work or pose a safety risk. Creating a clean and organized workspace will help you stay focused and work efficiently.
Lastly, consider enlisting the help of a friend or family member. The process of replacing a pop-up camper roof can be physically demanding and having an extra set of hands can make the job easier and more enjoyable. It is also beneficial to have someone available to assist with certain tasks, such as holding the ladder securely or passing tools and materials when needed.
By taking the time to adequately prepare for the roof replacement process, you are setting yourself up for success. A well-organized workspace, proper tools and materials, and a helping hand will ensure a seamless and efficient roof replacement for your pop-up camper.
Inspecting and Assessing the Damage to Your Pop Up Camper Roof
Before you begin the process of replacing the roof on your pop up camper, it is important to thoroughly inspect and assess the damage. This will help you determine the extent of the repairs needed and ensure that you have all the necessary materials and tools on hand.
Start by carefully examining the surface of your camper roof, paying close attention to any visible signs of damage such as cracks, leaks, or sagging. Use a flashlight to inspect the underside of the roof as well, as some issues may not be immediately visible from the outside.
Next, check the condition of the roof seams and seals. These areas are prone to wear and tear and can often be the source of leaks. Look for any signs of deterioration, such as peeling or cracking sealant, and take note of any areas that may require resealing.
Once you have identified the damage, you can determine the best course of action for repair. In some cases, a patch or sealant may be sufficient to fix small cracks or leaks. However, if the damage is more extensive, a full roof replacement may be necessary.
It is also essential to assess the underlying structure of the roof. Check for any signs of rot or water damage, as these issues can compromise the integrity of the entire roof. If you discover any structural damage, it is important to address it before proceeding with the replacement process.
Taking the time to thoroughly inspect and assess the damage to your pop up camper roof will ensure that you are fully prepared for the repairs ahead. By identifying any issues early on, you can prevent further damage and ensure a successful roof replacement.
Gathering the Necessary Tools and Materials
Before beginning the pop-up camper roof replacement process, it’s essential to gather all the necessary tools and materials to ensure a smooth and successful project. Having everything at hand will save you time and frustration, allowing you to focus on the task at hand.
When it comes to tools, you’ll need a variety of items to complete the roof replacement. Some essential tools include a utility knife, a pry bar, a hammer, a drill with various drill bits, a putty knife, a caulking gun, and a rubber mallet. Additionally, having a ladder or scaffolding will make it easier to access the roof securely.
For materials, you’ll need to purchase a new roof for your pop-up camper. It’s important to choose a roof that matches the dimensions and style of your current roof. This may involve measuring the dimensions of your existing roof and seeking guidance from a professional or a knowledgeable salesperson.
In addition to the roof itself, you’ll need adhesive or sealant specifically designed for campers and outdoor use. There are various options available, so be sure to select one that is compatible with your new roof material and provides excellent waterproofing capabilities.
To ensure a secure and tight seal, you may also need self-adhesive roof repair tape, roof vent covers, and any additional accessories that may be required for your specific pop-up camper model. It’s always a good idea to consult the manufacturer’s recommendations or seek advice from experienced RV enthusiasts or professionals.
By gathering all the necessary tools and materials before starting your pop-up camper roof replacement, you’ll set yourself up for a successful project. Having everything within reach will save you time and give you peace of mind, ensuring a smooth and hassle-free DIY experience. Remember to double-check your list and make sure you have everything you need before proceeding with the next steps.
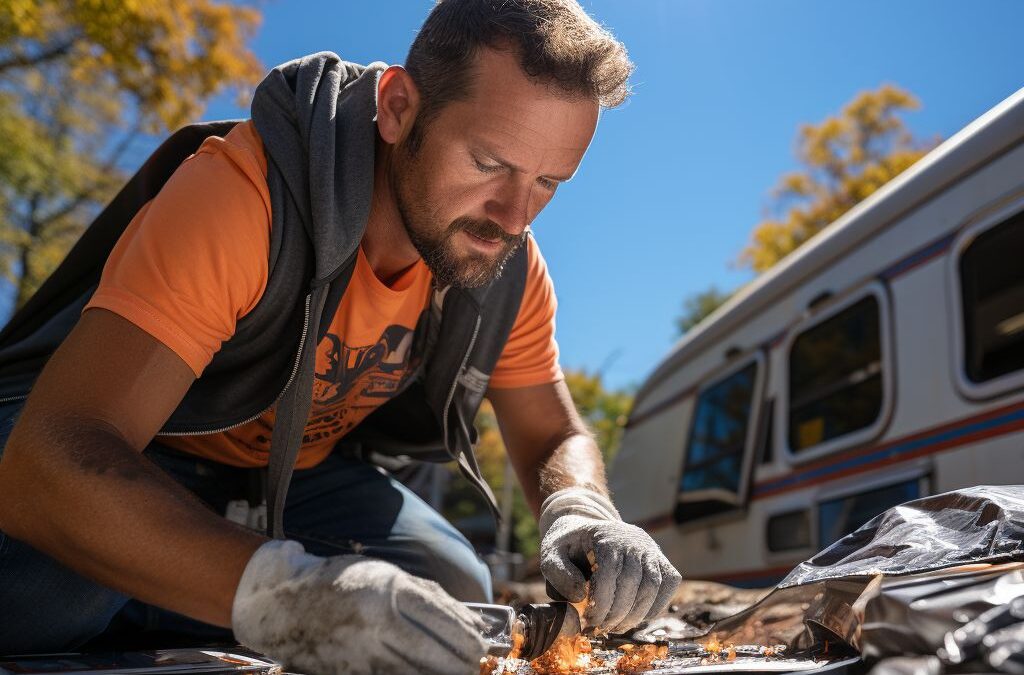
Removing the Old Roof of Your Pop Up Camper
When it comes to replacing the roof of your pop up camper, the first step is to remove the old roof. This is a crucial part of the process as it allows you to start fresh with a new, sturdy roof that will provide better protection from the elements. For a successful roof replacement, follow these steps.
Firstly, begin by ensuring that you have a safe and stable working environment. This means parking your pop up camper on level ground and using stabilizer jacks to secure it in place. Safety should always be a priority during any DIY project.
Next, gather all the necessary tools and materials needed for removing the old roof. This may include a pry bar, screwdrivers, utility knife, wire brush, safety goggles, gloves, and a sturdy ladder. It is crucial to have the right tools on hand to ensure a smooth and efficient process.
Before starting the removal process, thoroughly inspect the old roof for any signs of damage or leaks. This will help you determine the extent of the problem and whether the entire roof needs to be replaced or just specific sections. Take note of any areas that require extra attention during the installation of the new roof.
To remove the old roof, start by carefully removing any accessories or attachments, such as roof vents or air conditioners. Then, using a pry bar or screwdriver, gently remove any screws or fasteners that secure the roof to the camper. Take your time to ensure that all fasteners are removed to prevent any damage to the camper’s structure.
Once all fasteners have been removed, carefully lift away the old roof, being mindful of any remaining adhesive or sealant. It is essential to take precautions while removing the old roof to avoid further damage and potential injuries. Work methodically and take your time to ensure a clean removal.
Pro Tip: It is always a good idea to have a friend or family member assist you during this process, as they can provide an extra pair of hands and help support the weight of the old roof.
By following these steps, you will be well on your way to successfully . Remember to take your time and work carefully to minimize any potential damage or injuries.
Installing the New Roof on Your Pop Up Camper
Once you have inspected and assessed the damage to your pop up camper roof, it’s time to move on to the installation process for the new roof. This step is crucial in ensuring that your camper is watertight and protected from the elements.
To begin, gather all the necessary tools and materials you will need for the installation. This may include a power drill, screws, adhesive sealant, a putty knife, and a ladder. It’s important to have everything readily available to make the installation process as smooth as possible.
Next, carefully remove the old roof of your pop up camper. Start by unscrewing any attachments or fixtures that are holding the roof in place. Use caution when doing this to prevent damaging the camper’s walls or other components. Once all the attachments are removed, carefully lift the old roof off and set it aside.
Now, it’s time to install the new roof. Begin by positioning it on top of the camper, making sure it aligns properly with the walls and any existing screw holes. Use a power drill and screws to secure the new roof in place. It’s a good idea to have someone assist you with this step to ensure that the roof is held securely while you work.
After the new roof is in position, it’s important to seal and waterproof it to prevent any potential leaks or water damage. Use an adhesive sealant to create a watertight seal along the edges of the roof. Apply the sealant evenly and use a putty knife to smooth out any excess. This will help to ensure that the new roof is properly sealed and protected.
Taking the necessary steps to maintain and prolong the life of your pop up camper roof is essential. Regularly inspect the roof for any signs of damage or wear and tear, and address any issues promptly. Keep the roof clean and free from debris, as this can cause damage over time. Additionally, consider applying a protective coating or sealant to further enhance the durability and longevity of your camper’s roof.
By following these steps, you can successfully install a new roof on your pop up camper, providing you with a secure and well-protected camping experience. Remember to take your time, follow instructions carefully, and if needed, consult a professional for further guidance.
Sealing and Waterproofing Your New Pop Up Camper Roof
After successfully installing the new roof on your pop-up camper, it is essential to seal and waterproof it properly to ensure long-lasting protection against the elements. This step is crucial to prevent any leaks or water damage that could undermine the structural integrity of your camper. Here are some important tips to follow when sealing and waterproofing your new pop-up camper roof.
Firstly, make sure to choose the right sealant for your camper roof. There are various options available, such as silicone-based or elastomeric sealants, which both provide excellent waterproofing properties. These sealants create a flexible barrier, allowing for expansion and contraction due to temperature changes, without compromising the integrity of the seal.
Before applying the sealant, thoroughly clean the surface of the roof to remove any dirt, debris, or old adhesive. Use a mild detergent and water solution, along with a soft-bristle brush, to scrub away any grime. Rinse the roof thoroughly and allow it to dry completely before proceeding.
Once the roof is clean and dry, carefully apply the sealant according to the manufacturer’s instructions. Start from one end of the roof and work your way to the other, ensuring an even and consistent application. Pay special attention to areas where the roof meets the sidewalls and any protrusions such as vents or skylights, as these are common sources of leaks.
For added protection, consider applying a second coat of sealant after the initial one has dried. This extra layer will provide an additional barrier against water infiltration and enhance the longevity of your roof.
To ensure that the sealant has properly adhered to the roof, inspect the surface for any gaps or areas that may need touch-ups. Use a small brush or your finger to fill in any imperfections with more sealant, ensuring a seamless and watertight finish.
Remember, regular maintenance is key to prolonging the life of your pop-up camper roof. Schedule regular inspections and reapply sealant as needed to prevent any potential leaks from causing extensive damage.
By following these steps and taking the necessary precautions, you can seal and waterproof your new pop-up camper roof effectively. Enjoy peace of mind knowing that your camper is well-protected against the elements and ready for your next adventure.
Taking Steps to Maintain and Prolong the Life of Your Pop Up Camper Roof
Proper maintenance and care of your pop up camper roof can significantly extend its lifespan and ensure its durability. By following a few simple steps, you can keep your roof in top condition and avoid costly repairs or replacements in the future.
1. Regular Cleaning:
Regularly cleaning your pop up camper roof is essential to prevent the buildup of dirt, debris, and other contaminants that can lead to deterioration. Use a soft brush or sponge and mild soap to gently scrub the roof surface. Avoid using harsh chemicals or abrasive materials that can cause damage. Rinse thoroughly with clean water and allow it to air dry before folding up the camper.
2. Inspect for Damage:
Perform routine inspections of your pop up camper roof to catch any signs of damage early on. Look for cracks, tears, or loose seams that could lead to leaks or further problems. Pay close attention to areas where the roof meets the sides of the camper, as these joints are prone to wear and tear. Address any issues promptly to prevent them from worsening.
3. Sealant Maintenance:
Regularly inspect and maintain the sealant on your pop up camper roof to ensure it remains watertight. Over time, the sealant may deteriorate or become damaged, allowing water to seep in. Check for any cracks or gaps in the sealant and reapply as necessary. It’s also a good idea to reseal the roof periodically, following the manufacturer’s recommendations.
4. Store Properly:
When not in use, store your pop up camper in a dry environment to protect the roof from moisture and other elements. If possible, keep it covered with a breathable fabric cover that will provide added protection against UV rays and debris. Ensure that the camper is properly folded and secured to prevent any stress or damage to the roof structure.
5. Avoid Overloading:
Be mindful of the weight you place on your pop up camper roof. Excessive weight can lead to sagging, structural damage, or even a complete roof collapse. Limit the number of items you store on the roof and distribute the weight evenly to avoid putting unnecessary strain on the roof structure.
By following these maintenance steps, you can prolong the life of your pop up camper roof and enjoy worry-free camping adventures for years to come. Remember to always refer to the manufacturer’s guidelines for specific maintenance instructions and consult a professional if you encounter any significant roof damage or issues. Protecting your investment and ensuring the safety of your camping experience starts with taking care of your pop up camper roof.
People Also Ask
1. What are the steps to replace a pop-up camper roof?
To replace a pop-up camper roof, start by removing any accessories or components mounted on the roof. Then, carefully remove the old roof by unscrewing or cutting it off. Install the new roof by carefully aligning it and securing it with screws, adhesive, or other appropriate methods. Finally, reassemble any accessories or components that were removed.
2. Can I replace a pop-up camper roof myself?
Yes, it is possible to replace a pop-up camper roof yourself if you have the necessary skillset and tools. However, it is a complex task that requires careful attention to detail and knowledge of construction techniques. It is recommended to consult professional guidance or seek help from experienced individuals if you are unsure about the process.
3. How long does it take to replace a pop-up camper roof?
The time required to replace a pop-up camper roof can vary depending on several factors, such as the complexity of the roof design and the skill level of the person performing the replacement. On average, it can take several hours or even a few days, taking into account the removal of the old roof, the installation of the new one, and any additional repairs or adjustments needed.
4. What are the common materials used for pop-up camper roof replacement?
The common materials used for pop-up camper roof replacement include fiberglass, aluminum, and rubber membranes. Fiberglass is often used for its durability and strength, while aluminum is lightweight and corrosion-resistant. Rubber membranes, such as EPDM, are commonly used for their waterproofing properties. The choice of material may depend on factors such as budget, personal preference, and the specific requirements of the camper.
5. Is it necessary to replace the entire pop-up camper roof?
Whether it is necessary to replace the entire pop-up camper roof depends on the extent of the damage or deterioration. In some cases, only certain sections or components of the roof may need to be replaced. It is recommended to assess the condition of the roof thoroughly before making a decision. Consulting with a professional or experienced individual can provide valuable insights into the best course of action.
To Conclude
In conclusion, replacing a pop-up camper roof is a challenging task that requires careful planning, preparation, and attention to detail. By following the steps outlined in this guide, you can successfully remove the old roof and install a new one, ensuring the structural integrity and longevity of your camper.
Remember to thoroughly inspect the roof for any potential issues or damages before starting the replacement process. Take the time to gather all the necessary materials and tools, and ensure you have a safe and suitable work area.
Throughout the process, it is crucial to follow the manufacturer’s instructions and guidelines specific to your camper model. Seek professional assistance if needed, especially if you encounter difficulties or lack the required skills.
By replacing the pop-up camper roof, you can extend the life of your camper while maintaining a comfortable and secure camping experience. Good luck with your project, and enjoy many more adventures with your renewed pop-up camper!

Alexander Johnson is a seasoned roofing professional with over 25 years in the industry and CEO at Fresno Roof Repair. His expertise blends traditional craftsmanship with cutting-edge technology, focusing on resilient roofing solutions tailored to Fresno’s diverse climate. As a leader at Fresno Roof Repair, Alexander emphasizes open communication, teamwork, and continual education, ensuring every client receives exceptional service. Beyond his role, Alexander is deeply committed to the Fresno community, supporting local initiatives. His dedication, technical proficiency, and customer-centric approach make him an invaluable asset to Fresno Roof Repair, embodying the company’s commitment to excellence and quality roofing solutions.