Are you an adventurous soul who loves hitting the open road in your trusty RV? If so, you understand the importance of maintaining every aspect of your beloved mobile home, especially its roof. Over time, constant exposure to the elements and wear and tear can lead to pesky leaks and damage that may compromise your comfort on the road. But fear not! In this article, we will guide you through the process of replacing your RV roof, ensuring it stays as sturdy and leak-free as the day you first embarked on your unforgettable scenic adventures. So grab a cup of coffee, sit back, and let’s dive into the world of RV roof replacement together!
Preparing for the Replacement
When it comes to replacing the roof of your RV, proper preparation is essential. This will not only ensure a smooth and efficient replacement process but also help to minimize potential damage and maximize the lifespan of your new roof. Here are a few steps to take in preparation for replacing the roof of your RV.
1. Inspect and assess the current roof condition: Before jumping into the replacement process, thoroughly inspect your RV’s roof to assess its condition. Look for signs of leaks, cracks, sagging, or any other damages that may have occurred over time. This evaluation will help you determine the extent of the replacement required and whether any underlying structural repairs are needed.
2. Gather the necessary tools and materials: To ensure a successful roof replacement, gather all the tools and materials you’ll need beforehand. This includes roofing membrane, adhesive, tape, caulking, screws, and any additional accessories specific to the type of roof you are installing. Additionally, have a ladder, safety harness, gloves, and safety goggles to protect yourself during the process.
3. Determine the right time for replacement: Timing is crucial when it comes to replacing an RV roof. Choose a day when the weather forecast predicts a clear sky and moderate temperatures. Avoid working in extreme heat, cold, rain, or wind, as these conditions can make the installation more difficult and affect the quality of the end result.
4. Plan for proper ventilation:
Adequate ventilation is vital for preventing moisture buildup and promoting air circulation in your RV. Before the roof replacement, assess the existing vents and ventilation system, and ensure they are in good working condition. Consider upgrading or adding additional vents if necessary.
- 5. Move or protect your belongings:
Clear out the interior of your RV and move any valuable or delicate belongings to a safe location. The roof replacement process can create vibrations, dust, and debris that may potentially damage your belongings or result in a messy cleanup. Taking this extra precautionary step will provide a stress-free environment for both you and your belongings.
By following these steps and adequately preparing for the roof replacement, you’ll be well on your way to a successful outcome. Consulting manufacturer guidelines and seeking professional advice if needed can further ensure a smooth transition to the next stage of your RV roof replacement journey.
Choosing the Right Type of Roof for Your RV
When it comes to replacing your RV roof, one of the most important decisions you’ll make is choosing the right type of roof material. The type of roof you choose can significantly impact the performance, durability, and lifespan of your RV, so it’s crucial to make an informed decision.
There are several different options available for RV roofs, each with its own set of advantages and considerations. One popular choice is a rubber or EPDM (Ethylene Propylene Diene Monomer) roof. This type of roof is highly durable, flexible, and resistant to wear and tear. It can provide excellent protection against the elements, including UV rays, which can cause damage and deterioration over time. EPDM roofs are also relatively easy to install and maintain, making them a popular choice among RV owners.
Another option to consider is a fiberglass roof. Fiberglass roofs are lightweight, yet incredibly strong and durable. They are resistant to water and UV rays, making them an excellent choice for protecting your RV against leaks and sun damage. Fiberglass roofs also have a smooth surface, which can help improve the aerodynamics of your RV and potentially improve fuel efficiency.
Lastly, metal roofs are another option worth considering. Metal roofs are incredibly durable, long-lasting, and resistant to fire, hail, and other extreme weather conditions. They are also lightweight, which can help reduce the overall weight of your RV and potentially improve gas mileage. However, metal roofs can be more expensive than other options and may require more maintenance to prevent corrosion.
When , it’s essential to consider factors such as your budget, the climate you’ll be traveling in, and your personal preferences. Consulting with a professional RV roof repair specialist can also be helpful in guiding you towards the best choice for your specific needs.
Key Considerations for Choosing the Right Type of Roof:
- Your budget
- The climate you’ll be traveling in
- The overall durability and lifespan of the roof
- Maintenance requirements
- Personal preferences
Remember, selecting the right type of roof for your RV is a crucial step in ensuring the long-term performance and protection of your vehicle. Take the time to research and consider all your options before making a decision, and consult with a professional if needed.
Removing the Old Roof Safely and Efficiently
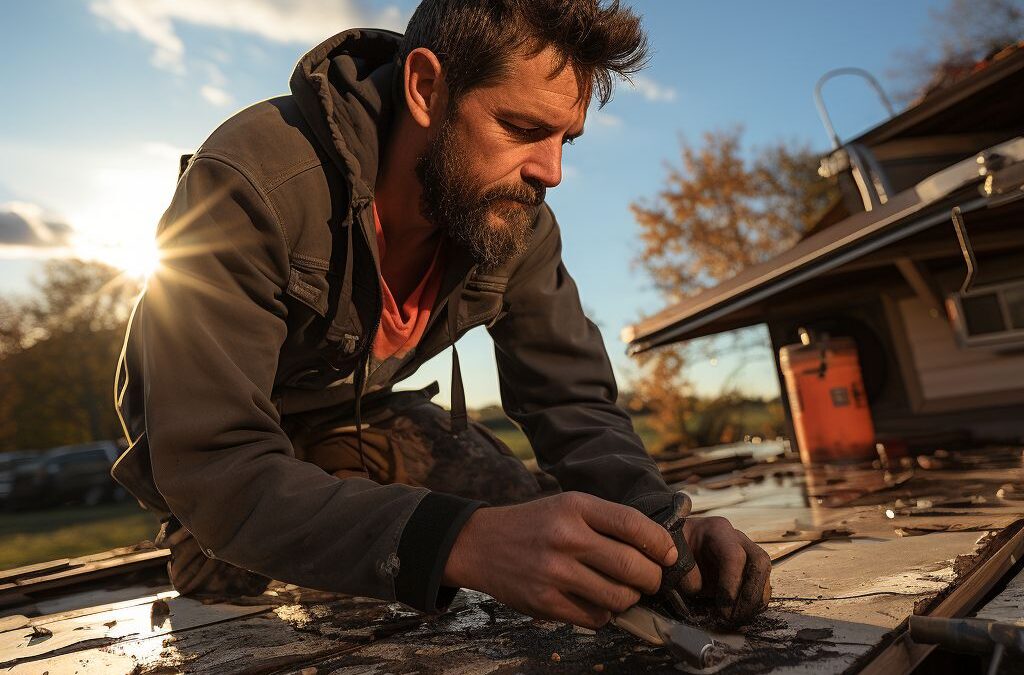
When it comes to replacing the roof of your RV, the first step is to safely and efficiently remove the old roof. This process is crucial as it ensures proper installation of the new roof and prevents any damage or accidents during the replacement. By following these steps, you can remove the old roof without any hassle.
Firstly, gather all the necessary tools and equipment for the job. This includes safety gear such as gloves, goggles, and a sturdy ladder. Additionally, you will need a utility knife, pry bar, and a screwdriver to help with the removal process. Ensure that you have all the tools at hand before starting to avoid any interruptions during the removal.
Before getting up on the roof, inspect the area carefully to identify any potential hazards. Look out for loose or damaged sections that may pose a risk while removing the old roof. Take note of any electrical wires or protruding objects that could interfere with the process. It is essential to address these issues before starting the removal to ensure a safe working environment.
Once you have assessed the area, begin by removing any fixtures or accessories attached to the roof. This may include air conditioning units, skylights, or vents. Use a screwdriver or wrench to carefully detach them from the roof, taking note of their location for easier reinstallation later on.
Next, start removing the roof material. Begin at one corner and slowly work your way across the roof, using a pry bar to gently lift and separate the old roofing material. Take your time and be cautious not to damage the underlying structure or any wiring that may be housed beneath.
If the roof is covered in adhesive, use a utility knife to score and cut through the adhesive, allowing for easier removal. Use caution during this step to avoid any accidents or injuries. Once the old roof material has been completely removed, ensure that the surface is clean and free from any debris or remnants.
Remember, safety should always be your top priority during the removal process. Take breaks as needed, stay hydrated, and adhere to all safety precautions. By , you can move on to the next step with confidence, ensuring a successful and long-lasting replacement for your RV.
Installing the New Roof: Step-by-Step Guide
When it comes time to replace the roof of your RV, following a proper step-by-step guide is essential to ensure a successful installation. With the right tools and materials, along with careful attention to detail, you can have a new roof on your RV that will provide years of protection and enjoyment. Here is a comprehensive guide on how to install a new roof for your RV.
First, gather all the necessary tools and materials for the installation. This may include a utility knife, tape measure, screwdriver, roofing adhesive, roofing sealant, and new roofing material such as EPDM rubber or fiberglass. Ensure that you have all the items on hand before beginning the installation process.
Next, start by removing any existing roofing materials and cleaning the roof surface thoroughly. This will provide a clean and stable base for the new roof installation. Use a utility knife to carefully cut away the old roof material, taking care not to damage the underlying structure. Once the old roof is removed, use a broom or brush to sweep away any debris or loose material.
Before installing the new roof, it’s important to ensure that the roof surface is properly prepared. This may involve applying a primer or adhesive to improve adhesion, or repairing any damaged areas on the RV roof. Follow the manufacturer’s instructions for any specific preparations required for the type of roofing material you are using.
Once the roof surface is prepared, carefully install the new roofing material according to the manufacturer’s instructions. This may involve cutting the material to size, applying adhesive or sealant, and securing it in place with screws or other fasteners. Pay careful attention to overlap seams and edges to ensure a watertight seal. If using EPDM rubber, you may need to use a roofing adhesive to secure the material firmly in place.
During the installation process, it’s important to constantly check for any signs of leaks or areas that may need additional sealing. Inspect the roof for any gaps or areas where water could potentially penetrate. Use roofing sealant to seal these areas and ensure a fully waterproof roof. Pay attention to any specific instructions provided by the manufacturer for sealing and waterproofing the type of roofing material you are using.
Once the new roof is installed and sealed, it’s important to properly maintain and care for it to extend its lifespan. Regularly inspect the roof for any signs of damage or wear and make necessary repairs promptly. Clean the roof surface regularly to remove dirt and debris that could cause damage over time. By taking proper care of your new RV roof, you can enjoy peace of mind knowing that it will provide reliable protection for many years to come.
In conclusion, the installation process is a crucial step when replacing an RV roof. By following a step-by-step guide and paying attention to the details, you can successfully install a new roof that provides excellent protection against the elements. Be sure to choose the right materials for your RV and take proper care of your new roof to maximize its lifespan. With a well-installed and well-maintained roof, you can continue to enjoy your RV adventures for years to come.
Ensuring Proper Sealing and Waterproofing
Proper sealing and waterproofing are crucial steps when replacing an RV roof. This ensures that your new roof is protected from water damage, leaks, and potential structural issues. By taking the time to carefully seal and waterproof your RV roof, you can extend its lifespan and enjoy a worry-free camping experience.
One important step in is to use high-quality sealants and adhesives. These products are specifically designed to create a strong and durable bond between the roofing materials, preventing any water from seeping through. When choosing sealants and adhesives, be sure to select products that are compatible with the type of roof you have chosen for your RV.
Before applying any sealants, it is essential to thoroughly clean and prepare the roof surface. Remove any dirt, debris, or old sealant remnants, as these can interfere with the effectiveness of the new sealant. Use a soft brush or a pressure washer to clean the roof, and let it dry completely before proceeding.
Once the roof is clean and dry, begin applying the sealant. Start by carefully applying the sealant along seams, edges, and any areas where there may be gaps or potential entry points for water. Use a caulking gun or a putty knife to ensure a smooth and even application. Be generous with the sealant, but avoid over-application to prevent excess buildup.
Additionally, consider reinforcing the sealing and waterproofing process by using reinforcing fabric or tape. These materials can provide extra protection and strengthen the integrity of the sealant. Apply them over the sealant in high-stress areas such as corners, vents, and skylights.
After completing the sealing and waterproofing process, allow the sealant to cure according to the manufacturer’s instructions. This will ensure that it properly sets and creates a strong barrier against water intrusion. Regularly inspect your RV roof for any signs of wear or damage to the sealant, and reapply as necessary to maintain its effectiveness.
Taking the time to properly seal and waterproof your RV roof will help prevent costly repairs and potential water damage. By following these steps and using high-quality sealants and adhesives, you can ensure that your RV roof remains leak-free and protected for years to come.
Maintaining and Extending the Lifespan of Your New RV Roof
Proper maintenance is essential for ensuring the longevity and durability of your new RV roof. By following the right practices, you can not only extend its lifespan but also avoid costly repairs or replacements in the future. Here are some key tips to help you maintain your new RV roof and protect your investment.
Regular Inspections: It is important to inspect your RV roof at least twice a year, preferably in spring and fall, as well as after any severe weather events. Look for any signs of damage, such as cracks, tears, or leaks. Pay close attention to the seals around vents, skylights, and any other openings. Detecting and addressing issues early on can prevent further damage and save you money in the long run.
Cleaning and Debris Removal: Keeping your RV roof clean is crucial for preventing dirt, debris, and moisture from accumulating and causing damage. Use a soft brush or sponge with a mild detergent to gently clean the roof surface. Avoid scrubbing with abrasive materials that can scratch or weaken the roof material. Additionally, regularly remove any leaves, twigs, or other debris that may have accumulated on the roof to prevent clogging of drains and gutters.
UV Protection: Exposure to the sun’s harsh UV rays can cause premature aging and deterioration of your RV roof. To protect it, consider applying a UV protectant or roof coating specifically designed for your roof material. These products help to reflect sunlight, reduce heat buildup, and prevent cracking or fading. Consult the manufacturer’s recommendations to choose the right product for your roof type.
Sealing and Re-sealing: Over time, the seals around vents, skylights, and other roof components can deteriorate due to constant exposure to the elements. Regularly inspect these seals and reseal as needed using a compatible sealant. This will help prevent water intrusion and maintain a watertight seal. Don’t forget to follow the manufacturer’s instructions when applying sealants, ensuring proper adhesion and longevity.
Cover and Protect: If your RV is not in use for an extended period, consider covering it with a specialized RV cover. This provides an additional layer of protection against the elements, including UV rays, debris, and harsh weather conditions. Investing in a quality cover that fits properly can help preserve the condition of your RV roof and extend its lifespan.
By following these maintenance tips, you can ensure the continued integrity and longevity of your new RV roof. Regular inspections, cleaning, protection from UV rays, sealing, and covering when not in use are all essential practices to uphold. Remember, taking care of your RV roof is an investment in the long-term enjoyment of your RV and helps maintain its value.
People Also Ask
1. Can I replace my RV roof myself?
Yes, it is possible to replace an RV roof yourself with the right tools and materials. However, it is a complex task that requires knowledge of roofing techniques and working at heights, so it is advisable to consult professional guides or seek assistance from experienced individuals.
2. What materials are needed to replace an RV roof?
To replace an RV roof, you will need materials such as a new roof membrane, roofing adhesive, seam tape, roof sealant, screws, and a heat gun. It is important to choose materials specifically designed for RV roofs to ensure proper functionality and durability.
3. How much does it cost to replace an RV roof?
The cost of replacing an RV roof can vary depending on factors such as the size of the RV, type of roofing material, and whether you hire professionals or do it yourself. Generally, it can range from a few hundred to several thousand dollars.
4. Can I repair a damaged RV roof instead of replacing it?
Yes, in some cases, minor damages to an RV roof can be repaired instead of replacing the entire roof. Small leaks or cracks can be patched using roof sealant or specialized repair kits. However, extensive damage or age-related wear might require a complete roof replacement.
5. How long does it take to replace an RV roof?
The time required to replace an RV roof can vary depending on factors such as the size of the RV, complexity of the roof structure, and your level of experience. Generally, it can take a few days to a week to complete the replacement process.
Closing Remarks
In conclusion, replacing an RV roof can be a complex task, but with the right knowledge and tools, it is achievable. It is important to first determine the type of roof on your RV and then choose the appropriate replacement material. Ensure that you prepare the roof properly, removing any damage or old material before installing the new roof.
Take your time to carefully follow the manufacturer’s instructions and seek professional help if needed. Regular maintenance and inspections can help prolong the lifespan of your new roof. By addressing any issues promptly and using proper sealing techniques, you can prevent leaks and protect your RV from damage.
Consider the value of investing in a high-quality roof, as it can save you money in the long run by preventing costly repairs. Remember to always prioritize safety by using proper safety gear and taking necessary precautions.
With the right steps and care, replacing an RV roof can be a worthwhile project that ensures your vehicle is protected from the elements for many years to come. So, roll up your sleeves and get ready to embark on this fulfilling journey of renewing and preserving your beloved RV.

Certified Roofing Specialist
Jonathan Parker, a certified roofing specialist, is known for his problem-solving skills and proactive approach to roof maintenance. His goal is to provide sustainable roofing solutions that withstand Fresno’s diverse weather conditions.