Imagine stepping out into your backyard, ready to retrieve your gardening tools from your trusty shed, only to be greeted by the sight of a leaky, damaged roof. The purpose of a shed is to protect your valuable equipment and belongings, but a compromised roof can put all of that at risk. Don’t fret just yet, because in this article, we will guide you through the process of repairing shed roof felt, so you can restore the security and functionality of your outdoor storage space. Whether you’re a seasoned handyman or a novice DIY enthusiast, our step-by-step instructions and expert tips will assist you in tackling this project with confidence. So let’s roll up our sleeves and get ready to give your beloved shed the roof rejuvenation it deserves!
1. Understanding Shed Roof Felt: Composition, Types, and Common Issues
Shed roof felt is a roofing material commonly used to protect sheds and outbuildings from the elements. It is a lightweight and economical option that provides a basic level of waterproofing for the structure. In this section, we will delve into the composition of shed roof felt, the different types available, and some common issues that can arise with its use.
Shed roof felt is typically made up of multiple layers of felt or bituminous material that are saturated with asphalt. This combination creates a flexible and durable material that can withstand exposure to sunlight, rain, and snow. The top layer of the felt is often coated with mineral granules, which not only provide added protection but also give the roof a more aesthetically pleasing appearance.
When it comes to the types of shed roof felt, there are two main options to consider: traditional felt and modern synthetic options. Traditional felt, also known as organic felt, is made from a combination of cellulose fibers and bitumen. While it is a tried and tested material, it can be prone to drying out, cracking, and deteriorating over time.
On the other hand, synthetic shed roof felt is made from fiberglass or polyester, which makes it more resistant to the elements. It offers improved durability and longevity compared to traditional felt. Additionally, synthetic options often come with a longer warranty period, making them a popular choice among those seeking a low-maintenance roofing solution.
Despite their advantages, shed roof felt can experience common issues that require repair or replacement. One of the most common issues is leaks, which typically occur due to damage from heavy rainfall or aging. Tears can also form in the felt, often due to accidental punctures or the buildup of debris. Over time, UV rays can cause the felt to deteriorate and become brittle, leading to cracking and peeling. It is important to address these issues promptly to prevent further damage to the shed structure.
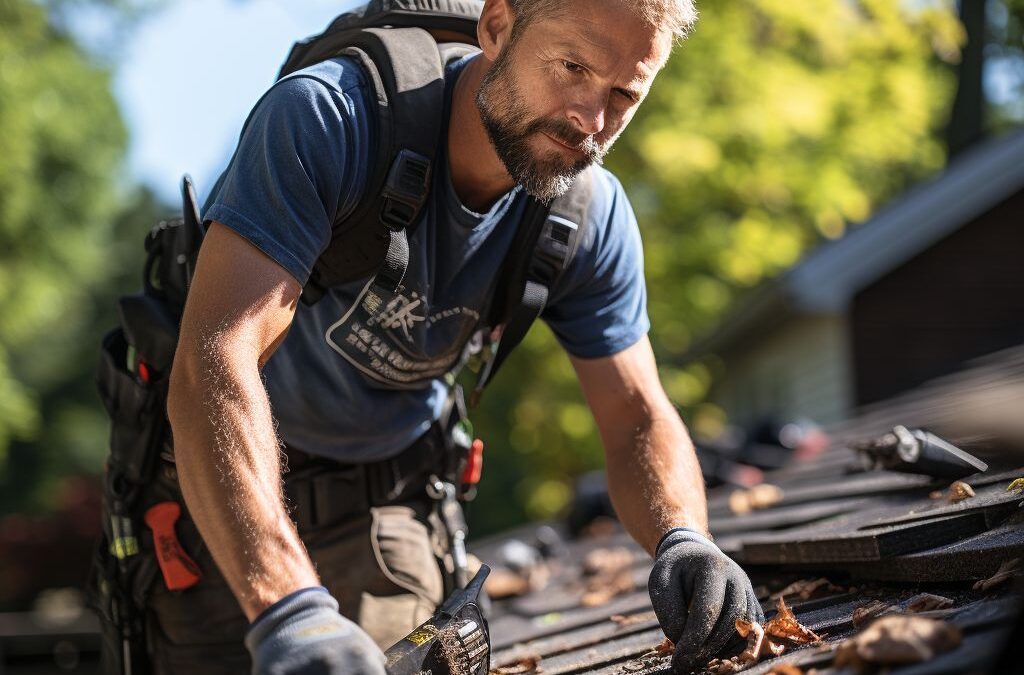
2. Assessing the Damage: How to Identify and Locate Leaks or Tears in Shed Roof Felt
In order to effectively repair shed roof felt, it is crucial to assess the damage and accurately identify any leaks or tears. This will help you determine the best course of action, whether it’s a simple patch job or a more extensive repair. Here are some steps you can follow to assess the damage on your shed roof felt:
1. Inspect the interior: Begin by examining the interior of your shed, paying close attention to any signs of moisture or water stains on the walls or ceiling. Leaks in the roof felt often lead to water penetration, which can cause discoloration or mold growth inside the shed. Make sure to carefully inspect all corners and edges for any visible signs of leaks.
2. Examine the exterior: Once you have checked the interior, it’s time to move outside and examine the shed roof. Look for any signs of sagging, blistering, or discoloration on the felt surface. These may indicate areas where leaks or tears have occurred. Pay close attention to the seams, edges, and any protrusions such as vents or chimneys, as these are often vulnerable spots.
3. Use a hose test: If you’re having difficulty identifying the exact location of the leak or tear, you can perform a hose test. With the help of a friend, start by spraying water on one section of the roof felt while the other person stays inside the shed to look for any signs of water penetration. Slowly move the hose around systematically, allowing enough time for the water to penetrate the roof and show any leaks or tears. This method can help pinpoint the exact location of the damage.
4. Look for daylight: Another helpful method for locating leaks or tears is to examine the shed roof during daylight hours. Enter the shed and turn off all the lights, allowing natural light to filter through. Look for any areas where light seeps through the roof felt. These are clear indicators of damage and should be marked for repair.
By following these steps, you can effectively assess the damage on your shed roof felt and determine the extent of the repairs needed. Remember to take note of all the areas that require attention so you can plan your repairing process accordingly.
3. Step-by-Step Guide: Repairing Small Holes or Tears in Shed Roof Felt
When it comes to repairing small holes or tears in shed roof felt, it is important to act quickly to prevent further damage and potential leaks. With a few basic tools and materials, you can easily fix these minor issues and extend the lifespan of your shed roof felt.
1. Gather the necessary materials: Before starting the repair process, gather the following materials: a pair of gloves, a utility knife or scissors, roofing cement or adhesive, a putty knife, and a patch of roof felt that matches the existing material.
2. Clean the damaged area: Begin by cleaning the area around the hole or tear using a brush or broom to remove any debris or loose material. This will ensure that the adhesive or roofing cement can adhere properly to the surface.
3. Trim any loose edges: Using a utility knife or scissors, carefully trim any loose or frayed edges around the hole or tear. This will create a clean and even surface for the patch to be applied.
4. Apply the adhesive or roofing cement: Using a putty knife, apply a thin layer of roofing cement or adhesive to the cleaned and trimmed area. Spread it evenly, ensuring that it covers an area slightly larger than the patch that will be applied.
5. Place the patch: Carefully place the patch of roof felt over the adhesive or roofing cement, ensuring that it completely covers the hole or tear. Press down firmly to ensure good adhesion.
6. Smooth and seal the patch: Using a putty knife or your gloved hand, gently smooth out any air bubbles or wrinkles in the patch. Additionally, apply a thin layer of roofing cement or adhesive around the edges of the patch to create a secure and weatherproof seal.
7. Allow time to cure: Give the adhesive or roofing cement ample time to cure according to the manufacturer’s instructions. This will ensure that the repair is fully set and durable.
By following these step-by-step instructions, you can easily repair small holes or tears in shed roof felt and maintain the integrity of your shed’s roof. Remember, regular maintenance and prompt repairs are key to extending the lifespan of shed roof felt and protecting your valuable belongings stored within.
4. Tackling Larger Damages: Patching or Replacing Sections of Shed Roof Felt
When it comes to larger damages on your shed roof felt, such as extensive tears or worn-out sections, it may be necessary to patch or replace the affected areas. This step-by-step guide will walk you through the process, ensuring that your shed roof remains durable and protected.
To begin, gather the necessary tools for the job, including a utility knife, measuring tape, roofing nails, a hammer, roofing cement, and a patching material such as a self-adhesive roofing membrane or a piece of shed roof felt.
1. Assess the extent of the damage: Start by identifying the areas that require patching or replacement. Carefully examine the shed roof felt to determine the size and location of the damaged section.
2. Remove the damaged material: Use a utility knife to cut along the edges of the damaged section, removing it completely. Be cautious not to damage the underlying structure of the shed roof.
3. Prepare the patching material: Measure the size of the area you removed and cut a piece of patching material to fit. If you are using a self-adhesive roofing membrane, simply peel off the backing, and if using a shed roof felt piece, apply roofing cement along the edges.
4. Apply the patching material: Carefully place the patching material over the hole or removed section, ensuring a tight fit. Press down firmly to adhere the material to the shed roof felt.
5. Secure the patching material: If you are using a self-adhesive roofing membrane, press down with a hand roller to ensure proper adhesion. For shed roof felt patches, apply roofing cement around the edges and use roofing nails to secure it in place.
6. Smooth and seal the patch: Once the patch is in place, use a hand roller or a flat board to press down and smooth out any wrinkles. Apply an additional layer of roofing cement over the edges of the patch to create a watertight seal.
Remember, if the damage to your shed roof felt extends beyond repair or if large sections are compromised, it may be necessary to replace the entire roof felt. In such cases, consult a professional for guidance and ensure that you follow local building codes and regulations.
By following these steps and using the proper materials and tools, you can effectively tackle larger damages on your shed roof felt, prolonging the lifespan of your shed and keeping it protected from the elements. Regular maintenance and timely repairs will ensure that your shed roof remains in optimal condition for years to come.
5. Ensuring Proper Adhesion: Expert Tips for Applying Adhesive or Roofing Cement
Applying adhesive or roofing cement is a crucial step when repairing shed roof felt. It helps to create a strong bond between the new patch or repaired area and the existing felt, ensuring a watertight seal. Here are some expert tips to help you ensure proper adhesion for a successful repair job.
1. Prepare the Surface: Before applying adhesive or roofing cement, it is important to prepare the surface properly. Clean the area thoroughly and remove any debris, dirt, or loose material. Use a soft brush or broom to sweep away loose particles, and if necessary, use a damp cloth to wipe down the area.
2. Choose the Right Adhesive or Roofing Cement: There are various types of adhesives and roofing cements available, so it is essential to select the right one for your shed roof felt. Read the manufacturer’s instructions and choose a product that is suitable for the specific type of felt you are working with. Some adhesives may require heating before application, while others may be ready to use straight from the container.
3. Apply the Adhesive or Roofing Cement: To ensure proper adhesion, it is important to apply the adhesive or roofing cement evenly and smoothly. Use a trowel, putty knife, or brush to spread a thin layer of the product onto the surface, focusing on the area where the patch or repair will be applied. Apply enough adhesive or cement to create a strong bond, but avoid applying it too thickly, as it can create bulges or uneven surfaces.
4. Press and Smooth the Patch: After applying the adhesive or roofing cement, carefully place the patch or repaired section onto the surface. Press down firmly to ensure good contact and adhesion. Use a roller or your hands to smooth out any wrinkles, bubbles, or uneven areas. This will help to create a seamless and secure bond between the new patch and the existing felt.
5. Allow Sufficient Drying Time: Once the adhesive or roofing cement is applied and the patch is in place, it is crucial to allow sufficient drying time. This will ensure that the bond is strong and effective. Refer to the manufacturer’s instructions for recommended drying times, as it can vary depending on the product used and the temperature conditions. Avoid exposing the repaired area to excessive moisture or heavy rain before it has fully dried.
By following these expert tips for applying adhesive or roofing cement, you can ensure proper adhesion during the shed roof felt repair process. Remember to choose the right product, prepare the surface diligently, apply the adhesive evenly, press and smooth the patch, and allow sufficient drying time for a successful and long-lasting repair.
6. Extending the Lifespan: Essential Maintenance Practices for Shed Roof Felt
Proper maintenance is crucial for extending the lifespan of shed roof felt. Regular inspections and care can help prevent small issues from turning into significant problems and ensure that your shed remains protected from the elements. By following these essential maintenance practices, you can maximize the durability of your shed roof felt and save on potential repair costs in the long run.
1. Keep the Roof Clean: Regularly remove any debris such as leaves, twigs, or moss that may accumulate on the roof. These can trap moisture and accelerate the deterioration of the felt.
2. Check for Damage: Perform regular inspections of your shed roof felt, particularly after severe weather events. Look for signs of wear, tear, or areas where the felt may have lifted or become loose. Addressing these issues promptly can prevent further damage and leaks.
3. Repair Small Damage Quickly: If you notice any small holes or tears in the shed roof felt, it is important to repair them promptly to prevent water penetration. Use a suitable repair adhesive or roofing cement to patch up these minor damages. Clean the area thoroughly before applying the adhesive to ensure a secure bond.
4. Address Leaks Immediately: If you discover any leaks, no matter how small, address them immediately. Water damage can quickly escalate and compromise the structural integrity of your shed. Identify the source of the leak and apply a patch or sealant to stop the water infiltration.
5. Trim Overhanging Branches: If there are any trees or branches leaning over your shed, trim them back regularly. Falling branches or excessive rubbing against the roof can damage the shed roof felt and lead to leaks or tears.
6. Monitor the Gutters: Ensure that your shed’s gutters and downspouts are clear of debris and functioning properly. Clogged gutters can cause water to back up onto the roof, leading to pooling and eventual damage to the felt.
7. Schedule Professional Inspections: Consider having your shed roof felt inspected by a professional at least once a year, especially if you live in an area prone to harsh weather conditions. A trained eye can catch any potential problems early on and recommend necessary repairs or maintenance actions.
By implementing these essential maintenance practices, you can significantly extend the lifespan of your shed roof felt. Regular care and attention will help ensure that your shed remains watertight and protected for years to come.
7. Exploring Alternatives: Pros and Cons of Replacing Shed Roof Felt with Different Materials
While shed roof felt is a common and affordable choice for protecting sheds from the elements, there may be instances where replacing it with a different material could offer better durability or aesthetic appeal. In this section, we will explore some alternative materials to shed roof felt and discuss the pros and cons of each option.
One popular alternative to shed roof felt is metal roofing. Metal roofs are known for their longevity and ability to withstand harsh weather conditions. They are resistant to fire, rot, and insect damage, making them a low-maintenance option. Additionally, metal roofs provide excellent insulation, which can help regulate the temperature inside the shed. However, metal roofing can be more expensive than shed roof felt and may require professional installation due to its specialized nature.
Another alternative to shed roof felt is asphalt shingles. These shingles offer a more traditional look and come in a variety of colors and styles to suit different aesthetic preferences. They are durable, waterproof, and typically have a longer lifespan than shed roof felt. However, asphalt shingles can be more expensive and may require additional structural support due to their weight.
If you are looking for a more eco-friendly option, consider using rubber roofing. Made from recycled materials, rubber roofs are resistant to UV rays, weathering, and cracking. They are lightweight, easy to install, and provide excellent insulation. Additionally, rubber roofs have a long lifespan, reducing the need for frequent replacements. However, rubber roofing can be more expensive upfront compared to shed roof felt, and it may not be as aesthetically pleasing to some individuals.
Ultimately, the decision to replace shed roof felt with a different material will depend on your specific needs and preferences. Consider factors such as budget, durability, maintenance requirements, and desired aesthetics when making your decision. Consulting with a roofing professional can also provide valuable insights and guidance to help you choose the best material for your shed.
People Also Ask
1. Can I repair shed roof felt without replacing it?
Yes, you can repair shed roof felt without replacing it. To repair it, clean the damaged area, apply roofing adhesive to the underside of the felt, and press it firmly onto the roof. Secure the edges with nails or staples and use roofing felt adhesive to seal any gaps.
2. What materials do I need to repair shed roof felt?
To repair shed roof felt, you will need a utility knife or scissors, a stiff brush, roofing adhesive, a measuring tape, nails or staples, and roofing felt adhesive. Additionally, you may need a ladder, safety gloves, and safety glasses.
3. How do I locate and patch a leak in shed roof felt?
To locate and patch a leak in shed roof felt, check for damp spots or water stains on the ceiling or walls inside the shed. On the roof, look for visible damage or lifted edges of the felt. Once located, clean the area, apply roofing adhesive to the underside of the felt, and press it back into place. Seal any gaps with roofing felt adhesive.
4. Can I repair shed roof felt in wet weather?
It is not recommended to repair shed roof felt in wet weather as the adhesive may not bond properly. Wait for a dry and mild day to ensure the best results. In the meantime, you can place a temporary tarp or waterproof covering over the damaged area to prevent further water ingress.
5. How long does a repair to shed roof felt last?
The longevity of a repair to shed roof felt depends on factors like the quality of the repair, exposure to weather conditions, and regular maintenance. With proper repair and maintenance, a well-done repair can last for several years before any further attention is needed.
Closing Remarks
In conclusion, if your shed roof felt is damaged or in need of repair, there are steps you can take to address the issue. First, assess the extent of the damage and determine if a patch or full replacement is necessary. If it is a minor tear or hole, you can use a self-adhesive patch or bitumen roof repair compound to seal the area. For larger or more extensive damage, it may be necessary to remove the old felt and replace it with a new layer.
Remember to thoroughly clean the area before making any repairs to ensure proper adhesion. It is also important to follow safety precautions, such as using proper tools and working on a stable surface or with a partner. Regular maintenance and inspections can help prevent future damage and prolong the lifespan of the shed roof felt.
If you are unsure about making the repairs yourself or if the damage is significant, it is recommended to consult a professional roofer for assistance. They have the expertise and experience to handle the repairs safely and effectively. Taking immediate action to repair shed roof felt will not only protect your shed and its contents but also save you money in the long run. Keep your shed in good condition by addressing any roof felt issues promptly.
Consider reaching out to a professional roofer if you are unsure about the extent of the damage or if you lack the necessary tools and expertise to repair shed roof felt yourself. Take action now to fix any issues and ensure the longevity of your shed’s roof.

Certified Roofing Specialist
Jonathan Parker, a certified roofing specialist, is known for his problem-solving skills and proactive approach to roof maintenance. His goal is to provide sustainable roofing solutions that withstand Fresno’s diverse weather conditions.