The importance of maintaining a sturdy and well-functioning roof cannot be overstated. After all, a roof is the first line of defense against the elements, shielding our homes from rain, snow, and hot sun. However, flat roofs?”>flat roofs?”>flat roofs often require special attention due to their unique materials, such as felt. To keep your flat roof leak?”>flat roof leak?”>flat roof in top condition, understanding how to roof felt?”>roof felt?”>roof felt?”>repair flat roof felt is crucial. From diagnosing common issues to choosing the right tools and techniques, this informative article will guide you through the process step by step, ensuring your flat roof remains watertight and durable for years to come. So, let’s dive right in and explore the valuable insights that will help you master the art of repairing flat roof felt.
Identifying the source of damage to the flat roof felt
When it comes to repairing flat roof felt, the first step is to identify the source of the damage. This will allow you to properly assess the extent of the problem and determine the best course of action for repair.
One common sign of damage to flat roof felt is water leakage or stains on the ceiling below. This can indicate a tear or crack in the felt that is allowing water to seep through. It’s important to locate the exact area where the water is infiltrating to ensure a targeted repair.
It’s also worth inspecting the flat roof felt for any visible signs of damage, such as blistering, cracking, or peeling. These issues may be caused by age, weather conditions, or improper installation. By thoroughly examining the surface, you can pinpoint the areas that require attention.
Additionally, check for any signs of damage or deterioration around roof fixtures, such as vents and chimneys. These areas are prone to leaks and can often be the source of flat roof felt damage. Take note of any gaps, loose flashing, or damaged sealant that may be contributing to the problem.
By taking the time to identify the source of damage to the flat roof felt, you will be better equipped to implement effective repairs. Whether it’s a small crack or a larger tear, addressing the underlying issue will help ensure a long-lasting and reliable flat roof.
Checking for leaks and water damage before repairing the flat roof felt
Before repairing the flat roof felt, it is crucial to thoroughly inspect the area for any leaks or water damage. This step is essential as it helps identify the extent of the damage and ensures that the repairs are effective in addressing the underlying issues.
To start, carefully examine the flat roof’s surface for any signs of water stains or discoloration. These can indicate areas where water has penetrated through the roof’s protective layer of felt. Additionally, check for any areas where the felt may appear swollen or bubbled, as this can point to areas of water damage.
Next, it is important to assess the interior of the building for any signs of water leakage. Look for water stains on ceilings or walls, dampness, or Musty odors, as these can all be indicators of a roof leak. Use a flashlight to check for water seepage around vents, chimneys, and skylights. It’s important to address any interior water damage as it can lead to further issues such as mold growth or structural damage over time.
Another crucial step in checking for leaks and water damage is to inspect the attic or crawl space directly beneath the flat roof. Look for any signs of water staining, damp insulation, or rotting wood. Pay attention to any areas where light may be entering, as this can indicate gaps or openings where water is seeping through.
During this inspection, it’s also important to note any potential causes of the leak or water damage, such as damaged flashing around vents or chimneys, clogged drains or gutters, or poorly installed roof penetrations. Identifying these underlying issues will help ensure that the repairs are not only effective but also address the root cause of the damage.
By thoroughly , you can accurately assess the extent of the damage and take the necessary steps to fix the underlying issues. This proactive approach will help ensure that the repairs are effective and will help prolong the lifespan of the flat roof.
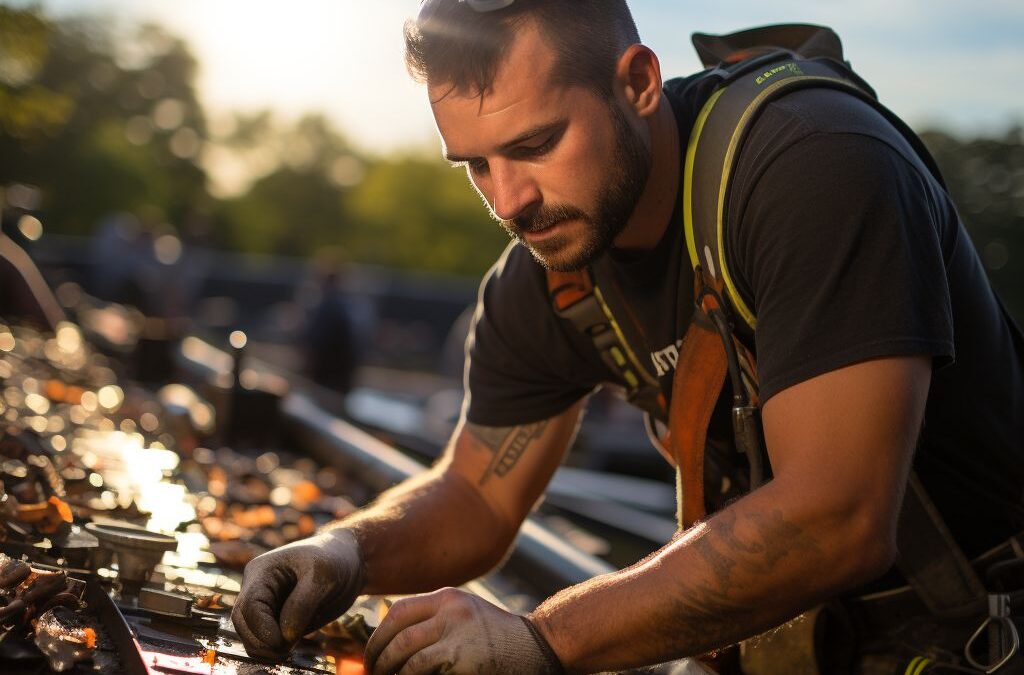
Preparation and safety measures for repairing flat roof felt
When it comes to repairing flat roof felt, taking the necessary preparation and safety measures is crucial for a successful and safe repair process. Before you start any repair work, it’s important to gather the right tools and equipment. This ensures that you have everything you need within reach and can avoid unnecessary trips up and down the ladder. Some of the essential tools you’ll need include a utility knife, roofing nails, a hammer, a brush or broom, and roofing adhesive.
Additionally, it is important to prioritize safety when working on your roof. Start by inspecting the ladder you will be using to ensure it is in good condition and stable. Make sure to set it on a flat and solid surface, and use ladder stabilizers or tie-downs if necessary to provide further stability. Always wear appropriate safety gear, such as a hard hat, work gloves, and non-slip shoes, to protect yourself from potential accidents or injuries.
Before you begin repairing the flat roof felt, clear off any debris or dirt from the surface. Use a brush or broom to remove loose materials, ensuring a clean and smooth surface to work on. This will help the new patch or layer of felt adhere more effectively. It’s also important to inspect the area thoroughly to identify any potential hazards or underlying issues that may need to be addressed before proceeding with the repair.
As you prepare to make the necessary repairs, ensure that the weather conditions are suitable for the task. Avoid working on a rainy or windy day, as these conditions can make the process more challenging and increase the risk of accidents. If possible, choose a calm and dry day with moderate temperatures.
By following these preparation and safety measures, you can ensure that your flat roof felt repair is done effectively and without any unnecessary risks or complications. Taking the time to gather the right tools, prioritize safety, and properly prepare the surface will help to ensure a successful repair that prolongs the lifespan of your flat roof felt.
Repairing small cracks and minor damage in the flat roof felt
When it comes to , it’s important to address these issues as soon as possible to prevent further damage and potential leaks. Here’s a step-by-step guide to help you effectively repair small cracks and minor damage in your flat roof felt.
1. Clean the Area: Before beginning any repairs, make sure to thoroughly clean the damaged area. Remove any debris, dirt, or loose materials using a broom or a brush. This will ensure that the repair materials adhere properly to the roof felt.
2. Assess the Damage: Carefully examine the cracks and minor damage to determine the extent of the repair required. If the cracks are small and shallow, they can be repaired using a liquid roof sealant. However, if the damage is more extensive, a patch repair may be necessary.
3. Liquid Roof Sealant: For small cracks and minor damage, a liquid roof sealant can be an effective solution. Begin by using a paintbrush or a roller to apply a generous amount of the sealant over the damaged area. Ensure that the sealant covers the crack entirely, extending beyond the damaged section to create a strong seal. Allow the sealant to dry completely according to the manufacturer’s instructions.
4. Patch Repair: If the cracks and damage are larger, a patch repair is the best option. Cut a piece of roof felt slightly larger than the damaged area. Apply a layer of roof cement or adhesive around the edges of the damaged section, creating a firm base for the patch. Position the patch over the damaged area and press it firmly into the adhesive. Smooth out any wrinkles or air bubbles using a roller or a brush. Allow the patch to dry completely before moving on to the next step.
5. Apply Roofing Cement: To ensure a watertight seal, apply a layer of roofing cement over the edges of the patch and along the seams. Use a trowel or a putty knife to spread the cement evenly, making sure it covers the edges of the patch completely. This will provide added protection against leaks and reinforce the repair.
Remember, it’s important to monitor your flat roof regularly for any signs of damage or wear. Small cracks and minor damage should be repaired promptly to prevent them from becoming major issues. By following these steps and addressing the repairs as soon as possible, you can extend the lifespan of your flat roof felt and maintain a sturdy and secure roof over your head.
Patch repair for larger tears and holes in the flat roof felt
When it comes to larger tears and holes in the flat roof felt, patch repair is necessary to effectively seal and reinforce the damaged area. This method involves applying a patch over the damaged section to provide a durable and long-lasting solution.
Before starting the patch repair process, it is crucial to clean the area around the tear or hole. Remove any loose debris and dirt using a brush or broom. This will ensure proper adhesion of the patching material and create a smooth surface for the repair.
To begin the patching process, you will need a patching material that is compatible with the flat roof felt, such as a self-adhesive patch or a bituminous roofing compound. These materials are designed to provide a watertight seal and withstand the harsh elements.
1. Measure and cut the patching material: Start by measuring the size and shape of the damaged area. Cut the patching material to fit the dimensions of the tear or hole, ensuring that it extends beyond the damaged area by a few inches on all sides. This will provide sufficient coverage and prevent further damage.
2. Apply the patching material: Peel off any protective backing from the patching material and carefully place it over the damaged area. Press down firmly to ensure proper adhesion. Use a roller or a heavy object to apply even pressure, ensuring that the patch bonds securely with the flat roof felt.
3. Seal the edges: It is important to seal the edges of the patch to prevent any water infiltration. Apply a layer of bituminous roofing compound around the perimeter of the patch, extending a few inches beyond the edges. Use a trowel or a putty knife to spread the compound evenly.
4. Smooth and blend the patch: After applying the bituminous roofing compound, use a trowel to smooth and blend the patch with the surrounding area. This will create a seamless finish and enhance the overall appearance of the repaired flat roof felt.
Remember, patch repair for larger tears and holes should only be used as a temporary fix. It is recommended to periodically inspect and maintain the flat roof felt to prevent future damage. Regularly check for any signs of wear and tear, such as cracks, blistering, or loose patches, and address them promptly to avoid costly repairs down the line.
Applying a new layer of felt to reseal and reinforce the flat roof
:
To effectively repair and reinforce a flat roof, applying a new layer of felt is an essential step. This process involves adding a fresh layer of felt on top of the existing one to create a strong and watertight seal. It helps in reinforcing the integrity of the roof and preventing further damage.
Before starting this process, it is important to ensure that the surface is clean and free from any debris or loose materials. Use a broom or a brush to sweep away dirt, leaves, and other contaminants. If there are any moss or algae growths, it’s recommended to clean them off using a suitable solution or by power washing the roof.
Once the roof surface is clean, it’s time to apply the new layer of felt. Start by measuring and cutting the felt according to the size of the roof area to be covered. Make sure to leave some extra material on the edges for overlapping and securing it properly.
Before laying the new felt, it’s advisable to apply a layer of bitumen adhesive or roofing felt?”>roofing felt?”>roofing felt adhesive on the roof surface. This adhesive helps the new felt to adhere securely to the roof and prevents any water penetration. Apply the adhesive evenly using a brush or a roller, ensuring full coverage of the roof surface.
Next, carefully place the new layer of felt onto the adhesive. Start from one edge and unroll the felt, smoothing it out as you go along. Make sure the felt is properly aligned and flat, without any wrinkles or folds. Use a roller or a broom to press down the felt and remove any air bubbles or pockets.
To secure the new layer of felt, overlap it with the existing felt. Apply another layer of adhesive on top of the overlap to create a strong bond. Make sure the adhesive is spread evenly and covers the entire overlap area.
After applying the adhesive, use a roofing torch or a heat gun to heat and activate the adhesive. This helps to ensure a more secure and watertight seal. Pay extra attention to corners, edges, and any seams to ensure they are properly sealed.
Once the new layer of felt is in place and properly sealed, allow it to dry and cure for the recommended time. This will ensure that it fully bonds with the existing felt and provides the necessary strength and protection for your flat roof.
Remember, proper maintenance and regular inspections are crucial for prolonging the lifespan of flat roof felt. Keep an eye out for any signs of damage, such as cracks or tears, and address them promptly before they worsen. Taking preventative measures and repairing any issues as soon as they arise will help keep your flat roof in good condition for years to come.
Tips for maintaining and prolonging the lifespan of flat roof felt
Proper maintenance is key to ensuring the longevity and effectiveness of your flat roof felt. To help you in this endeavor, we have compiled a list of useful tips and guidelines. By following these, you can minimize the risk of damage and extend the lifespan of your roof felt.
Regular inspections are essential for catching any potential issues before they worsen. Make it a habit to examine your flat roof felt at least twice a year, ideally in the spring and fall. Look for signs of wear and tear, such as cracks, tears, or bubbling. Any damaged areas should be promptly repaired to prevent further deterioration.
Ensure that your gutters and drains are clean and free from debris. Clogged gutters can lead to water backing up on the roof, which can cause damage to the felt. Regularly clear any leaves, twigs, or other debris from the gutter system to maintain proper drainage.
In addition to inspections, it is crucial to keep your roof clean. Remove any leaves, branches, or dirt that may accumulate on the surface. A broom or soft brush can be used for this purpose, but be gentle to avoid causing any damage.
Consider applying a roof coating to provide extra protection for your flat roof felt. Roof coatings are specifically designed to enhance durability and weather resistance. They can help prevent cracking and deterioration caused by exposure to UV rays, extreme temperatures, and moisture.
Finally, proper attic ventilation is vital for maintaining the health of your flat roof felt. Adequate airflow helps regulate temperature and humidity levels, preventing the buildup of moisture that can contribute to mold growth and deterioration. Make sure vents are clear of obstructions and functioning correctly.
By implementing these maintenance tips, you can preserve the integrity of your flat roof felt and prolong its lifespan. Regular inspections, proper cleaning, gutter maintenance, roof coatings, and ensuring sufficient ventilation will all contribute to a healthier and more durable roof. Keep in mind that professional assistance may be required for larger repairs or if you are unsure about addressing certain issues yourself.
People Also Ask
What are the steps to repair a flat roof felt?
To repair a flat roof felt, start by cleaning the area around the damaged section and removing any debris. Apply a thin layer of roofing adhesive to the damaged area and press down firmly. Finally, place a patch of roofing felt over the repaired area and secure it with more adhesive.
Can I repair a flat roof felt myself?
Yes, it is possible to repair a flat roof felt yourself. However, it is important to have the right materials and follow the proper steps to ensure a successful repair. If you are not confident in your abilities, it is recommended to hire a professional to avoid further damage.
What materials do I need to repair a flat roof felt?
To repair a flat roof felt, you will need roofing adhesive, roofing felt, a utility knife, a brush for applying adhesive, and a ladder to access the roof. It may also be helpful to have a broom or brush to clean the area before making the repair.
How long does a flat roof felt repair last?
The lifespan of a flat roof felt repair can vary depending on various factors such as the quality of the materials used, the severity of the damage, and the weather conditions in the area. With proper installation and maintenance, a flat roof felt repair can last several years.
When should I consider replacing a flat roof felt instead of repairing it?
If the flat roof felt has extensive damage, is experiencing recurring issues, or is nearing the end of its expected lifespan, it may be more cost-effective to replace it instead of repeatedly repairing it. Consulting with a professional can help determine the best course of action based on the specific condition of the roof.
In Conclusion
In conclusion, repairing a flat roof felt can be a manageable task with the right tools, materials, and knowledge. By identifying the damaged areas, cleaning and preparing the surface properly, applying the patching material correctly, and ensuring proper adhesion, you can effectively repair your flat roof felt.
It is important to regularly inspect and maintain your flat roof felt to prevent any major damages or leaks. By addressing any issues promptly, you can avoid more extensive repairs in the future. Additionally, seeking professional assistance may be necessary for more complex or extensive damage.
Remember to prioritize safety throughout the repair process, wearing protective gear and utilizing caution when accessing the roof. Following proper techniques and guidelines will help ensure a successful repair and prolong the lifespan of your flat roof felt.
With the right approach and thorough attention to detail, you can effectively repair your flat roof felt and maintain a durable and weather-resistant roofing system. Take the necessary steps today to resolve any issues and enjoy a leak-free, efficient roof for years to come.

Emergency Services Manager
Andrew Foster, a seasoned roofing professional, specializes in storm damage repairs and emergency services. His swift response and effective solutions help clients safeguard their properties during challenging times.