A sturdy shed roof serves as the guardian protecting your valuable tools, equipment, and treasured belongings from the elements. However, over time, even the most durable of shed roofs can succumb to wear and tear, leaving you with leaks, damage, and the need for repair. Rest assured, with a little guidance and some handy tools, you can restore your shed’s roof to its former glory. In this article, we’ll delve into the step-by-step process of repairing a shed roof, covering everything from identifying common problems to executing the necessary fixes. So, roll up your sleeves, grab your ladder, and let’s get started on revitalizing your trusty backyard structure!
Inspecting the Shed Roof for Damage
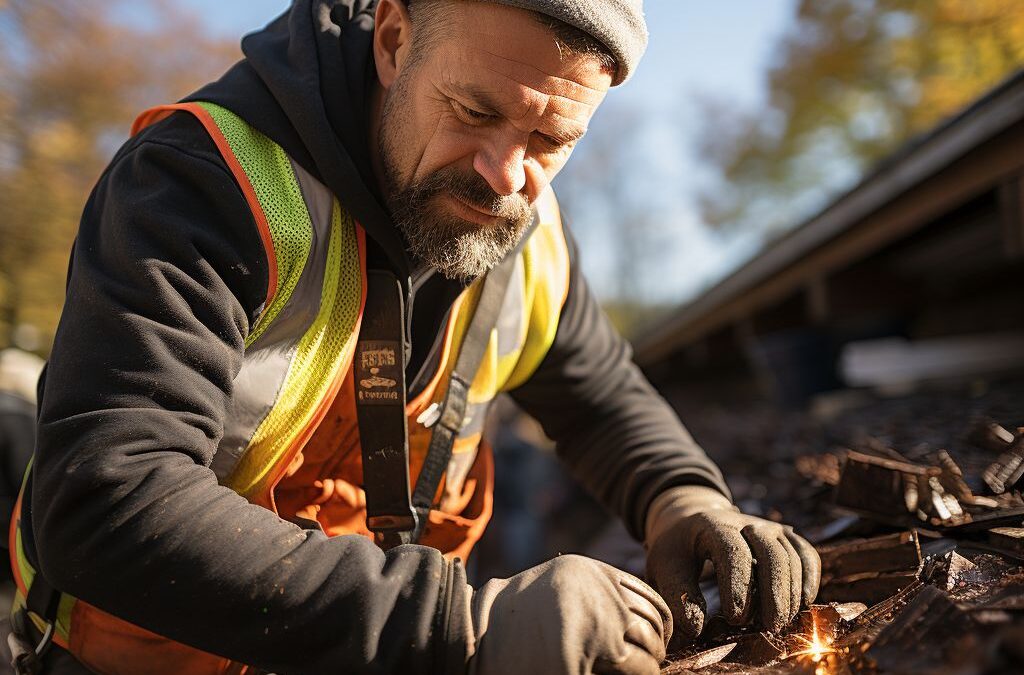
When it comes to repairing a shed roof, the first crucial step is to thoroughly inspect the roof for any signs of damage. This step is essential in order to identify the issues that need to be addressed and to determine the most appropriate repair methods. involves a careful examination of the entire roof surface and its components, including shingles, flashing, and gutters.
Begin by visually assessing the overall condition of the roof. Look for any visible signs of damage, such as missing or broken shingles, cracked flashing, or sagging areas. Pay close attention to potential problem areas, such as areas near chimneys or vents, where leaks are more likely to occur.
Next, carefully examine the shingles. Look for any signs of deterioration, such as curled or cupped edges, granule loss, or blistering. These are clear signs that the shingles are nearing the end of their lifespan and may need to be replaced.
Inspecting the flashing is another important step in the inspection process. Flashing is the metal material used to seal the joints between the roof and other structures, such as chimneys and vents. Look for any signs of rust, deterioration, or loose flashing. Damaged flashing can lead to water penetration and cause significant damage to the interior of the shed.
Don’t forget to check the gutters for any debris or blockages that could impede proper drainage and cause water to back up onto the roof. Clogged gutters can lead to water pooling on the roof, which can eventually lead to leaks and water damage.
During the inspection, it’s important to document any damage or issues that you find. Taking photographs can be particularly helpful, as you can refer back to them later when planning the repairs. It’s also a good idea to make a note of any potential safety hazards, such as loose or unstable roofing materials, that may need to be addressed before beginning the repair process.
By thoroughly , you can accurately assess the condition of the roof and determine the necessary repairs. This step is crucial in ensuring that your shed roof is properly repaired and can withstand the elements for years to come.
Identifying Common Issues with Shed Roofs
:
One of the first steps in repairing a shed roof is to identify the common issues that can occur. By understanding these issues, you can effectively troubleshoot and tackle any problems that may arise. Here are a few common issues to look out for when inspecting a shed roof:
1. Leaks: Leaks are one of the most common problems with shed roofs. They can occur due to damaged or missing shingles, a worn-out roofing material, or faulty flashing. If you notice water stains or dampness inside your shed, it’s a clear sign of a leak. It’s crucial to identify the source of the leak as soon as possible to prevent further damage.
2. Sagging or Bowing: Over time, shed roofs may develop a sagging or bowing appearance. This can be caused by structural issues, such as inadequate support or weakened rafters. Additionally, heavy snow or excessive weight on the roof can lead to this problem. If you notice any signs of sagging or bowing, it’s crucial to address it promptly to prevent roof collapse.
3. Shingle Damage: Damaged or missing shingles can compromise the integrity of your shed roof. Shingles may crack, curl, or lift due to age, weather exposure, or improper installation. These damaged shingles can allow water to seep through, leading to leaks and other problems. Regularly inspect the shingles on your shed roof for any signs of damage and replace them as needed.
4. Pest Infestation: Shed roofs are often susceptible to pest infestations, especially if there are gaps or openings that allow rodents or insects to enter. These pests can cause significant damage to the roof’s structure and insulation. Look out for signs of nesting materials, droppings, or chewed wires, as they indicate a pest infestation that needs to be addressed promptly.
5. Mold and Mildew: Moisture accumulation in the shed can lead to the growth of mold and mildew on the roof. This can deteriorate the roofing material and pose health risks. Keep an eye out for any dark spots, musty odors, or visible mold growth on the roof’s surface. Proper ventilation and regular cleaning can help prevent mold and mildew growth.
Identifying these common issues with shed roofs is the first step towards a successful repair. By knowing what to look for, you can address these problems promptly and ensure the longevity and durability of your shed roof.
Preparing for Shed Roof Repair
Before starting any repair work on your shed roof, it is essential to properly prepare yourself and the area. By taking the time to assess the damage, gather the necessary tools and materials, and create a safe working environment, you can ensure that your roof repair project goes smoothly and effectively.
Assessing the Damage:
Begin by thoroughly inspecting your shed roof for any signs of damage. Look for cracked or missing shingles, curled edges, loose fasteners, or sagging sections. Pay close attention to areas around vents, chimneys, and gutters, as these are common trouble spots. Take note of any leaks, water stains, or areas of weakened or rotten wood.
Gathering Tools and Materials:
Once you have identified the areas in need of repair, gather the necessary tools and materials for the job. You will likely need a ladder, safety equipment such as gloves and goggles, a utility knife, a pry bar, a hammer, roofing nails or screws, roofing adhesive or sealant, replacement shingles or roofing material, and a protective coating suitable for your specific shed roof.
Creating a Safe Working Environment:
Before starting any repair work, it is crucial to ensure the safety of yourself and others. Set up a sturdy ladder and make sure it is securely positioned on a level surface. Wear appropriate safety gear, such as gloves to protect your hands and goggles to shield your eyes from debris. If your shed roof is steep or particularly unstable, consider using additional safety measures, such as harnesses or scaffolding.
By properly preparing yourself and the area before repairing your shed roof, you can minimize the risk of accidents and ensure a successful outcome. Taking the time to assess the damage, gather the necessary tools and materials, and create a safe working environment will set the stage for a smooth and efficient repair process. Remember, if you are unsure about any aspect of the repair, it is always best to consult a professional to ensure the job is done correctly and safely.
Repairing Small Holes and Leaks in the Shed Roof
Small holes and leaks in the shed roof can manifest as minor problems, but if left unaddressed, they can lead to more significant damage. It is crucial to repair these issues promptly to prevent water damage and maintain the structural integrity of your shed. In this section, we’ll discuss the steps involved in fixing small holes and leaks in the shed roof.
To begin, gather the necessary materials for the repair. You’ll need roofing cement or sealant, a putty knife, a wire brush, and roofing fabric or patch material. Once you have everything ready, follow these steps to repair the small holes and leaks:
1. Clean the affected area: Use a wire brush to remove any debris or loose material around the hole or leak. Make sure the surface is clean and dry before proceeding.
2. Apply roofing cement: Using a putty knife, generously apply roofing cement over the hole or leak. Spread it out to create a smooth, even layer. The roofing cement will act as a sealant, preventing any water from entering the shed through the damaged area.
3. Reinforce with roofing fabric or patch material: If the hole or leak is more significant, you may need to reinforce it with roofing fabric or patch material. Cut the fabric or patch material to size, making sure it extends beyond the damaged area. Apply a layer of roofing cement over the hole or leak, then place the fabric or patch material on top. Smooth it out and apply another layer of roofing cement over it, ensuring a secure and watertight seal.
4. Allow it to dry: Give the repaired area ample time to dry and set. This may take a few hours or even overnight, depending on the weather conditions and the type of roofing cement used. Avoid any contact or disturbance during the drying process to ensure a proper bond.
Remember, these steps are suitable for small holes and leaks. If you encounter more extensive damage or persistent leaks, it is advisable to consult a professional roofer. They will have the expertise and tools to effectively repair your shed roof and prevent further issues.
By addressing small holes and leaks promptly and properly, you can maintain the integrity of your shed roof, prolong its lifespan, and protect the contents stored inside. Regular inspections and maintenance are essential to catch any potential issues early on and avoid costly repairs down the line.
Replacing Damaged Shingles or Roofing Material
When it comes to shed roof repair, one of the most common issues you may encounter is damaged shingles or roofing material. Over time, shingles can become cracked, curled, or even missing altogether, leaving your shed vulnerable to leaks and further damage. Fortunately, is a relatively straightforward task that can be accomplished with just a few basic tools and materials.
To begin the process, you’ll first need to gather the necessary supplies. This typically includes replacement shingles or roofing material, roofing nails, a hammer or nail gun, a pry bar or shingle ripper, and roofing cement. It’s important to choose shingles or roofing material that closely match the existing ones on your shed in terms of color, style, and size. This will help ensure a seamless repair that blends in with the rest of your shed’s roof.
Once you have your supplies ready, you can start the process of replacing the damaged shingles or roofing material. Begin by using the pry bar or shingle ripper to carefully remove the damaged shingles. Take care not to damage the surrounding shingles in the process. As you remove each damaged shingle, be sure to also remove any remaining nails or roofing material to provide a clean and even surface for the new shingles.
Next, it’s time to install the new shingles or roofing material. Start by positioning the replacement shingle in place, ensuring that it aligns properly with the existing shingles. Use the hammer or nail gun to secure the shingle in place with roofing nails, making sure to drive the nails into the designated areas on the shingle. Repeat this process for each replacement shingle until all damaged areas have been repaired.
To provide added protection and ensure a secure fit, it’s recommended to apply a small amount of roofing cement beneath each new shingle. This will help create a watertight seal and further reinforce the shingles, preventing future damage and leaks. Gently press down on each shingle to ensure proper adhesion and allow the roofing cement to fully set according to the manufacturer’s instructions.
By following these steps, you can effectively replace damaged shingles or roofing material on your shed roof. Remember, proper installation and attention to detail are key to ensuring a durable and long-lasting repair. Taking the time to address any issues promptly will help maintain the integrity of your shed roof and protect your belongings from the elements.
Applying a Protective Coating for Long-term Durability
To ensure the longevity of your shed roof and protect it from further damage, it is essential to apply a protective coating. This protective coating acts as a barrier against harsh weather conditions such as rain, snow, UV rays, and extreme temperatures. It also helps to prevent leaks, rust, and corrosion, extending the lifespan of your shed roof.
Before applying the protective coating, it is essential to clean the surface of the roof thoroughly. Remove any debris, dirt, or loose shingles using a broom or a pressure washer. This step ensures that the coating adheres properly and provides optimum protection.
Once the roof is clean and dry, you can begin applying the protective coating. There are various types of coatings available in the market, such as asphalt-based coatings, elastomeric coatings, and acrylic coatings. Choose a coating that is specifically designed for shed roofs and compatible with the material of your roof.
First, start by applying the coating around the edges and seams of the roof using a brush or a roller. These areas are prone to water seepage and require extra protection. Make sure to apply a thick layer of coating, ensuring complete coverage.
Next, move on to the main surface of the roof. If the coating requires dilution, follow the manufacturer’s instructions and mix it accordingly. Use a roller or a sprayer to evenly distribute the coating across the entire roof. Apply multiple coats if necessary, allowing each coat to dry completely before applying the next one.
To ensure uniform coverage, it is advisable to work in small sections and overlap each stroke. Check for any missed spots or thin areas and apply an additional coat if needed. Pay special attention to areas where water pools or tends to accumulate, as these are more susceptible to damage.
Once you have completed the coating process, allow it to dry completely before subjecting the roof to any foot traffic or weather conditions. This drying period may vary based on the type of coating used and the climate in your area, so be sure to refer to the manufacturer’s instructions.
In conclusion, applying a protective coating is a vital step in maintaining the long-term durability of your shed roof. It provides an extra layer of protection against various elements and extends the lifespan of your roof. By following the proper application techniques and using a high-quality coating product, you can ensure that your shed roof remains in excellent condition for years to come.
People Also Ask
How much does it cost to repair a shed roof?
The cost to repair a shed roof can vary depending on the size of the shed, the extent of the damage, and the materials needed. On average, you can expect to pay between $200 and $500 for a basic repair.
Can I repair a shed roof myself?
Repairing a shed roof can be a DIY project if you have the necessary skills and tools. However, if you are not experienced in roofing repairs, it may be best to hire a professional to ensure the job is done correctly and to avoid any potential safety hazards.
What materials do I need to repair a shed roof?
The materials you will need to repair a shed roof will depend on the type of roof and the extent of the damage. Common materials include roofing shingles, roofing nails, roofing cement or sealant, plywood or sheathing, and a pry bar or hammer.
How long does it take to repair a shed roof?
The time it takes to repair a shed roof will depend on the size of the shed, the extent of the damage, and your level of experience. On average, a basic repair can take a few hours to a full day to complete.
Can I use a tarp to temporarily repair a shed roof?
Yes, using a tarp to temporarily repair a shed roof can be a quick and effective solution to prevent further damage from leaks. Secure the tarp tightly over the affected area and ensure it is adequately fastened to prevent it from being blown away by strong winds.
Insights and Conclusions
In conclusion, repairing a shed roof can be a manageable task if approached with the right knowledge and skills. By thoroughly inspecting for any damage, sourcing the necessary materials and tools, carefully removing and replacing damaged or worn-out components, and ensuring proper installation and maintenance, you can restore the functionality and extend the lifespan of your shed roof.
Remember to prioritize safety during the repair process, and if you feel unsure or unequipped to handle the task yourself, it is advisable to seek professional help. Regularly inspecting and maintaining your shed roof can also help prevent major issues in the future, saving you time and money in the long run.
So, whether you need to fix a leaking roof, replace shingles, or reseal seams, following these steps and tips can help you successfully repair your shed roof and keep it in good condition for years to come. Your shed will continue to provide protection and storage space for your belongings, ensuring its longevity and functionality.

Alexander Johnson is a seasoned roofing professional with over 25 years in the industry and CEO at Fresno Roof Repair. His expertise blends traditional craftsmanship with cutting-edge technology, focusing on resilient roofing solutions tailored to Fresno’s diverse climate. As a leader at Fresno Roof Repair, Alexander emphasizes open communication, teamwork, and continual education, ensuring every client receives exceptional service. Beyond his role, Alexander is deeply committed to the Fresno community, supporting local initiatives. His dedication, technical proficiency, and customer-centric approach make him an invaluable asset to Fresno Roof Repair, embodying the company’s commitment to excellence and quality roofing solutions.