Shake shingle roofs exude a timeless charm, adding character and elegance to any home. However, over time, these beautiful roofs can succumb to wear and tear, resulting in cracked or damaged shingles. If left unattended, these minor issues can escalate into major problems, leaving your home vulnerable to leaks and other costly damages. But fear not, for within this article lies a treasure trove of knowledge on how to repair and restore your shake shingle roof to its former glory. From identifying problem areas to replacing individual shingles, we’ll guide you through every step, empowering you to conquer any roofing challenge that comes your way. So, let’s delve into the fascinating world of shake shingle roof repair and unlock the secrets to preserving the beauty and integrity of your beloved abode.
Identifying Damaged Shake Shingles: Signs to Look Out For
Damaged shake shingles can compromise the integrity of your roof and lead to leaks and further structural issues if left unchecked. It is essential to be able to identify signs of damage early on to prevent further deterioration. Here are some key indicators to look out for when identifying damaged shake shingles.
1. Cracked or Split Shingles: Inspect your roof for any shingles that have visible cracks or splits. These are often caused by age, weathering, or significant impacts and can compromise the shingle’s ability to protect your roof from the elements.
2. Curling or Cupping Shingles: Another common sign of damaged shake shingles is when the edges begin to curl upward or the corners cup downward. This can occur due to excessive moisture absorption and can lead to water infiltration if not addressed promptly.
3. Missing Shingles: Strong winds or improper installation can cause shake shingles to become dislodged or completely fall off. Missing shingles leave your roof vulnerable to water damage and should be attended to as soon as possible.
4. Moss or Algae Growth: A buildup of moss or algae on your shake shingles not only affects the aesthetic appeal of your roof but also suggests underlying moisture retention issues. These growths trap moisture and can accelerate the deterioration of the shingles if not treated promptly.
5. Granule Loss: Inspect your gutters and downspouts for excessive granule accumulation. Granules protect the shingles from UV rays and provide fire resistance. If you notice a significant amount of granules in the gutters, it may indicate that your shake shingles are reaching the end of their lifespan.
To ensure the longevity and structural integrity of your shake shingle roof, regular inspections are vital. By staying vigilant and identifying these signs of damage, you can address roof repair needs promptly and prevent further issues down the line.
Assessing the Extent of the Damage: Steps for Thorough Inspection
Before diving into the repair process, it is essential to assess the extent of the damage on your shake shingle roof. This step helps determine the appropriate repair approach and the level of urgency required. By thoroughly inspecting your roof, you can identify and address any underlying issues that may compromise the structural integrity of your roof.
To begin the inspection, start by carefully examining the exterior of your roof from ground level. Look for any visible signs of damage, such as missing, cracked, or curled shake shingles. Pay close attention to areas where the shingles meet flashing or other roof components, as they are prone to damage and can lead to leaks.
Next, it’s time to get up close and personal with your roof. Using a ladder and taking all necessary safety precautions, climb up to your roof to conduct a more detailed assessment. Inspect each individual shake shingle and look for signs of deterioration, such as split or rotted shingles, granule loss, or moss and algae growth. Additionally, check for any structural damage, such as sagging or water stains, which may indicate a more significant issue.
To ensure a thorough inspection, divide your roof into sections and carefully examine each area. Use a pair of binoculars to get a closer look at hard-to-reach spots or areas where you suspect damage might be present. Take note of any findings, and if possible, take photographs to have a visual record.
Once the inspection is complete, evaluate the overall condition of your roof. Determine whether the damage is localized to specific areas or if it is spread out across the entire roof. Assessing the extent of the damage will help you decide whether the repair can be limited to individual shake shingle replacement or if a more widespread restoration is required.
Remember, if you do not feel comfortable or confident conducting a roof inspection, it is always wise to consult a professional roofing contractor who can provide an expert assessment. Taking the time to assess the extent of the damage will ensure that you approach the repair process with the necessary knowledge and understanding, ultimately leading to a successful and long-lasting repair.
Preparing the Roof for Repair: Safety Precautions and Necessary Tools
Before embarking on any roof repair project, it is important to prioritize safety and gather the necessary tools to ensure a smooth and successful repair process. Taking the time to prepare the roof adequately can help prevent accidents and ensure that the repairs are done effectively.
To begin with, it is crucial to wear appropriate safety gear when working on a shake shingle roof. This includes a sturdy pair of work boots with good traction, safety glasses, and gloves to protect your hands from any sharp edges or debris. Additionally, consider wearing a safety harness or using roof brackets for added stability and fall protection.
Next, it is essential to clear the roof of any debris or loose shingles before starting the repair work. Use a broom or a roofing brush to carefully sweep away leaves, dirt, and other debris that may have accumulated over time. This will not only give you a clean surface to work on but also help you identify any additional areas of damage that may have been hidden beneath the debris.
When it comes to tools, having the right ones at hand can make a significant difference in the quality of your repair job. Some of the necessary tools for repairing a shake shingle roof include a pry bar or a shingle ripper to remove damaged shingles, a hammer for securing new shingles in place, a roofing nailer for faster and more accurate installation, and a utility knife for cutting shingles to the required size.
In addition to these tools, having a ladder that is in good condition and securely positioned is essential for accessing the roof safely. Ensure that the ladder is steady and positioned at an appropriate angle, preferably one foot out from the base for every four feet of height.
Remember, safety should always be the top priority when preparing your roof for repair. By following these precautions and gathering the necessary tools, you can approach your shake shingle roof repair project with confidence and ensure a successful outcome.
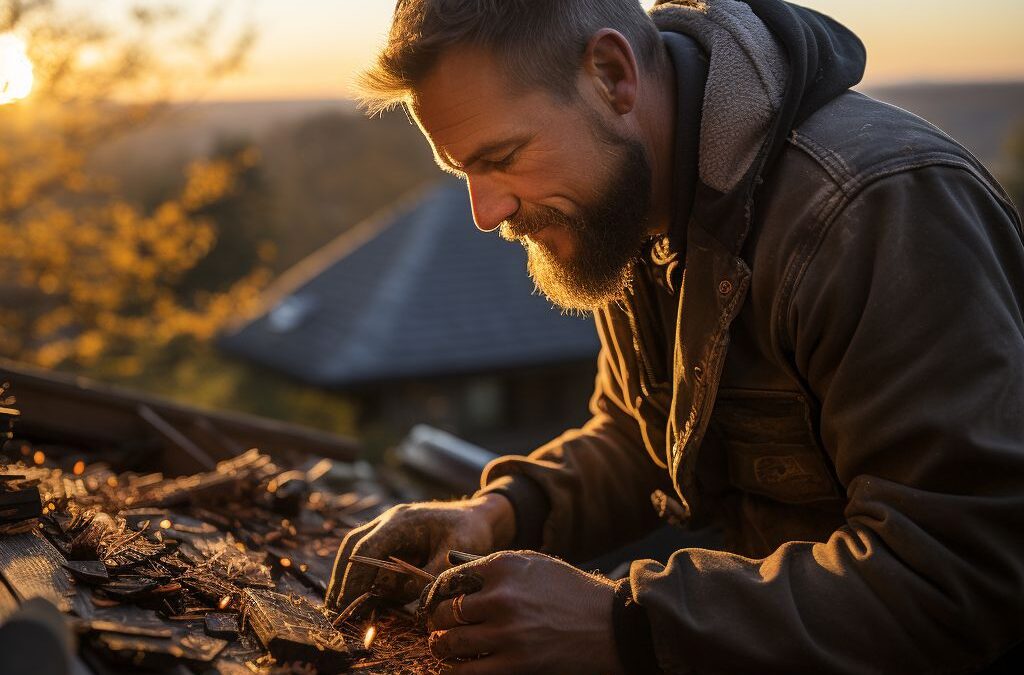
Replacing Individual Shake Shingles: Step-by-Step Guide
If you’ve noticed that a few of your shake shingles have become damaged or are missing, it’s crucial to replace them promptly to prevent further damage to your roof. Follow this step-by-step guide to properly replace individual shake shingles and restore the integrity of your roof.
1. Safety First: Before attempting any repairs, ensure your safety by wearing appropriate protective gear such as gloves, goggles, and a hard hat. Also, make sure to use a sturdy ladder and have a spotter available to assist you if needed.
2. Remove the Damaged Shingle: Start by carefully prying up the damaged shake shingle using a pry bar or claw hammer. Take extra caution not to damage the surrounding shingles while doing so.
3. Clean the Area: Thoroughly clean any debris, nails, or old adhesive from the space where the damaged shingle was located. Use a broom or a brush to ensure the area is free from any loose materials that could affect the adhesion of the new shingle.
4. Cut the Replacement Shingle: Using a saw or utility knife, cut the replacement shake shingle to the correct size. Make sure it matches the dimensions of the other intact shingles on your roof. This will ensure a seamless and aesthetically pleasing repair.
5. Apply Roofing Cement: Apply a layer of roofing cement to the backside of the replacement shingle. This adhesive will help secure the new shingle in place and create a watertight seal.
6. Install the Replacement Shingle: Carefully place the replacement shake shingle into the vacant space, ensuring that it aligns with the existing shingles. Gently press it down to bond it with the roofing cement and surrounding shingles.
7. Secure the Shingle: To provide extra stability, drive two galvanized roofing nails into the replacement shingle, one on each side. Make sure the nails are driven flush with the surface of the shingle to avoid any tripping hazards or damage.
8. Inspect and Clean Up: Once the replacement shingle is securely in place, give it a visual inspection to ensure it blends in seamlessly with the surrounding shingles. Clean up any leftover debris or materials from your repair process.
Replacing individual shake shingles can be a relatively straightforward task if done carefully and correctly. However, if you are not confident in your abilities or the damage is extensive, it is always recommended to seek professional help. Properly replacing damaged shingles will help maintain the overall structural integrity of your shake shingle roof, ensuring its longevity and protecting your home from potential leaks or further damage.
Repairing Widespread Damage: Techniques for Partial or Full Roof Restoration
When your shake shingle roof has experienced widespread damage, it may be necessary to take on partial or full roof restoration. This involves more than just replacing a few individual shingles – it requires a comprehensive approach to ensure the integrity and longevity of your roof. Here are some techniques to consider for this type of roof repair.
1. Start by thoroughly inspecting the entire roof to identify all areas of damage. Look for missing or cracked shingles, as well as signs of rot or decay. Pay close attention to the valleys and edges where water can collect and cause additional damage over time.
2. Once you have identified the areas that require repair, begin by removing the damaged shingles. This may involve removing several layers of shingles to reach the underlying decking. Use caution and appropriate safety measures when working at heights.
3. After removing the damaged shingles, inspect the underlying decking for any signs of rot or decay. Replace any damaged decking to ensure a solid foundation for the new shingles. This step is crucial for preventing future leaks and maintaining the overall stability of your roof.
4. Install new underlayment to provide an additional layer of protection against moisture. This acts as a barrier between the shingles and the decking, helping to prevent water infiltration and damage.
5. Begin installing new shingles, starting from the bottom and working your way up to the top of the roof. Ensure that the shingles are properly aligned and nailed down securely. Use a roofing nail gun or hammer, depending on your preference and skill level.
6. As you work your way up the roof, make sure to properly overlap the shingles to prevent water from seeping in between. Use roofing cement or adhesive tabs to secure any loose edges or corners.
7. Finally, inspect the restored areas for any loose or protruding nails. Hammer them down to ensure a smooth and seamless finish. Consider applying a protective sealant or coating to further enhance the durability and longevity of your roof.
By following these techniques for partial or full roof restoration, you can effectively repair widespread damage to your shake shingle roof and restore its functionality and aesthetic appeal. Remember to take necessary safety precautions throughout the process and consult with a professional if you encounter any difficulties. Regular maintenance, such as inspecting and cleaning your roof, will also help prolong its lifespan and prevent future damage.
Maintenance Tips to Prolong the Lifespan of Your Shake Shingle Roof
Regular maintenance is crucial in ensuring the longevity and durability of your shake shingle roof. By following these maintenance tips, you can keep your roof in excellent condition and avoid costly repairs or replacements in the future.
1. Clean the Gutters and Roof
One of the essential tasks in maintaining a shake shingle roof is to keep the gutters and roof clean from debris. Fallen leaves, twigs, and dirt can accumulate on your roof, causing water to pool and potentially damage the shingles. Regularly remove any debris and clean out the gutters to prevent clogs and ensure proper drainage.
2. Inspect for Moss and Algae Growth
Moss and algae may appear as green or black streaks on your shake shingles. While they may not seem like a significant issue at first, allowing moss and algae to grow can lead to water retention and accelerated deterioration of the shingles. To prevent this, periodically inspect your roof for any signs of growth and remove it promptly. Use a mild detergent solution and a soft brush to gently scrub away the moss and algae.
3. Trim Overhanging Branches
Overhanging tree branches can pose a risk to your shake shingle roof. Strong winds can cause these branches to scrape against the shingles, leading to damage or even punctures. Regularly trim back any branches that are in close proximity to your roof to prevent potential harm. This will also help to reduce the amount of falling debris that can accumulate on your roof.
4. Check for Loose or Damaged Shingles
Periodically inspect your shake shingle roof for any loose or damaged shingles. Shingles that are cracked, broken, or missing can allow water to penetrate, leading to leaks and further damage. Replace any damaged shingles promptly to ensure the integrity of your roof.
5. Schedule Professional Inspections
While regular maintenance is essential, it is also recommended to have a professional roofing contractor inspect your shake shingle roof periodically. Professional inspections can identify any hidden issues or early signs of damage that may not be easily noticeable. They can also provide guidance on the overall condition of your roof and recommend any necessary repairs or maintenance.
By following these maintenance tips, you can prolong the lifespan of your shake shingle roof and ensure its continued protection for years to come. Investing a little time and effort in regular upkeep will go a long way in preserving the beauty and functionality of your roof.
People Also Ask
1. How long does a shake shingle roof typically last?
A shake shingle roof can last anywhere from 20 to 50 years, depending on various factors such as the quality of the materials used, installation techniques, and proper maintenance.
2. What are the common causes of damage to shake shingle roofs?
The most common causes of damage to shake shingle roofs include weather elements like heavy rain, strong winds, snow, and hail, as well as aging materials, poor ventilation, and lack of regular maintenance.
3. Can I repair a shake shingle roof myself?
While minor repairs can be done by homeowners with some DIY experience, it is generally recommended to hire a professional roofing contractor with expertise in shake shingle roofs to ensure proper repairs and avoid further damage.
4. What are the steps involved in repairing a shake shingle roof?
The steps involved in repairing a shake shingle roof typically include identifying the damaged shingles, removing them carefully, replacing with new ones, securing them properly, and ensuring the surrounding shingles are in good condition and properly sealed.
5. How much does it cost to repair a shake shingle roof?
The cost of repairing a shake shingle roof can vary depending on the extent of the damage, the size of the roof, the type of materials used, and the labor costs. It is best to obtain estimates from a few reputable roofing contractors to get an accurate idea of the cost.
Concluding Remarks
In conclusion, repairing a shake shingle roof requires careful attention to detail and the use of proper techniques. By following the step-by-step process outlined above, homeowners can effectively address issues such as cracked or missing shingles, leaks, and mold growth. Regular maintenance and timely repairs will ensure the longevity and durability of the roof, preventing further damage and costly replacements.
Remember, it is essential to prioritize safety when working on the roof. If the repair seems too complex or dangerous, it is recommended to seek professional assistance. Additionally, regularly inspecting the roof and addressing any minor issues promptly can help avoid more significant problems down the line. By being proactive and maintaining the shake shingle roof, homeowners can protect their investment and ensure a secure and comfortable living environment.
Take the necessary steps today to repair your shake shingle roof and safeguard your home from potential damage. Keep your roof in optimal condition and enjoy the peace of mind that comes with a well-maintained and sturdy roof overhead.

Climate Resilience Specialist
Christopher Clark’s extensive knowledge of Fresno’s unique climate challenges drives him to provide resilient roofing solutions. His commitment to community values and fair pricing makes him a trusted partner in roofing projects.