If you’re a homeowner, the sound of raindrops falling on your roof can be comforting. But what happens when that comforting sound turns into a dreaded drip, indicating a problem with your rubber roof? Whether you’ve noticed a leak or simply want to maintain and extend the lifespan of your rubber roofing, knowing how to repair it can save you time and money in the long run. In this article, we’ll walk you through the step-by-step process of repairing and maintaining rubber roofing, ensuring that your roof remains durable, watertight, and ready to withstand the elements for years to come. So, grab your tools and let’s dive into the world of rubber roof repair!
Materials needed for repairing rubber roofing
Repairing rubber roofing requires specific materials to ensure a proper and effective fix. These materials are essential in addressing common issues and preventing future problems with your roof. By having these materials on hand, you’ll be well-prepared to tackle any rubber roofing repair project.
When it comes to repairing rubber roofing, a few key materials are essential. Firstly, you’ll need a high-quality rubber membrane patch or a rubber roofing sealant. This will effectively seal any cracks, punctures, or tears in the rubber roofing material. Look for a patch or sealant specifically designed for rubber roofs to ensure compatibility and long-lasting repairs.
In addition to the patch or sealant, you’ll need a sharp utility knife to trim any excess rubber and neatly shape the patch to fit the damaged area. A sturdy ladder or scaffolding is also necessary to safely access your roof. Rubber roofing repairs often require some degree of climbing and working at heights, so it’s vital to prioritize safety throughout the process.
Furthermore, a cleaning solution or rubber roof cleaner will help prep the damaged area before applying the patch or sealant. This cleaner will remove any debris, dirt, or algae that may hinder adhesion and compromise the effectiveness of the repair. Additionally, a soft brush or scrubber can be used to gently clean the damaged section and ensure optimal surface preparation.
Lastly, having a roll of rubber roof repair tape or a seam repair kit is beneficial, particularly for addressing loose or detached seams. This adhesive-backed tape or seam repair kit provides an extra layer of strength and stability to the seams, preventing water penetration and potential leaks.
By gathering these necessary materials before starting your rubber roofing repair project, you’ll be able to work efficiently and effectively towards a reliable and long-lasting solution. Remember, using high-quality materials specifically designed for rubber roofing is crucial in achieving successful repairs and preventing future issues.
Common issues with rubber roofing
can arise due to a variety of factors, including age, weather exposure, and poor installation. One common issue is the formation of cracks or tears in the rubber membrane, which can lead to leaks and water damage. Additionally, rubber roofing can experience shrinkage over time, causing gaps and openings that allow water to penetrate the structure. Another issue is the accumulation of debris, such as leaves and branches, which can block the drains and cause water to pool on the roof.
Cracks and tears in the rubber membrane can occur as a result of extreme temperature fluctuations or physical damage. These openings compromise the integrity of the roof and make it susceptible to leaks. It is important to promptly address any visible cracks or tears by using a rubber roof repair kit or by applying a patch made specifically for rubber roofing. The affected area should be thoroughly cleaned and dried before applying the patch, ensuring a secure and watertight seal.
Shrinkage is a common problem with rubber roofing, especially as it ages. As the rubber material contracts, it can pull away from the edges and seams, creating gaps through which water can enter. To prevent shrinkage-related issues, regular inspections should be carried out to identify any signs of pulling or lifting. If shrinkage is detected, it is essential to re-secure the rubber membrane and reinforce the edges and seams. This can be achieved by applying a specially formulated adhesive or sealant designed for rubber roofing.
The accumulation of debris on the roof is another issue that can affect the performance of rubber roofing. Leaves, branches, and other debris can clog the drains and hinder proper water drainage, leading to water pooling and potential leakage. Regular maintenance, such as clearing the roof of debris and ensuring the drains are clear, is crucial in preventing this problem. Additionally, installing gutter guards can help minimize the amount of debris that accumulates on the roof, reducing the risk of damage and prolonging the lifespan of the rubber roofing.
By addressing these common issues promptly and effectively, it is possible to extend the lifespan of rubber roofing and prevent costly repairs. Regular maintenance and inspections, along with prompt repair of cracks, tears, and shrinkage, are essential in preserving the integrity and performance of rubber roofing. Additionally, implementing preventive measures such as debris clearance and gutter guards can significantly reduce the likelihood of encountering these issues.
Step-by-step guide to repairing rubber roofing
Repairing rubber roofing can help extend the lifespan of your roof and prevent further damage. Follow these steps to effectively repair your rubber roofing:
1. Assess the damage: Before starting any repairs, thoroughly inspect your rubber roof for any signs of damage or leaks. Look for cracks, tears, or loose seams. It’s important to identify the extent of the damage to determine the best approach for the repair.
2. Gather materials: To repair rubber roofing, you will need the following materials:
– Rubber roof repair kit: These kits usually contain a rubber membrane, adhesive, and a seam roller. Ensure that the kit you select matches the type and color of your existing rubber roofing.
– Cleaner and primer: Use a rubber roof cleaner to remove any dirt, debris, or algae from the damaged area. Apply a primer afterwards to promote better adhesion.
– Scissors or utility knife: You’ll need a sharp pair of scissors or a utility knife to cut the rubber membrane to the desired size.
– Brush or roller: A brush or roller will help apply the adhesive evenly and smoothly.
3. Prepare the damaged area: Clean the damaged area with a rubber roof cleaner to remove any dirt or debris. This step is crucial as it helps the adhesive bond properly. After cleaning, apply a primer to the damaged area and let it dry.
4. Cut and apply the rubber membrane: Measure the damaged area and cut a piece of rubber membrane slightly larger than the area to ensure proper coverage. Carefully place the rubber membrane over the damaged area and press it down firmly.
5. Apply adhesive: Use a brush or roller to apply a thin layer of adhesive around the edges of the rubber membrane. Make sure to cover the entire perimeter of the patch. Press down firmly to ensure a secure bond.
6. Seal the repair: Once the adhesive has dried, use a seam roller to firmly press down on the repair. This will help create a tight seal and eliminate any air bubbles.
7. Inspect the repair: After completing the repair, inspect the area to ensure a proper bond and seal. Check for any signs of lifting or loose edges. If necessary, apply additional adhesive to secure any loose areas.
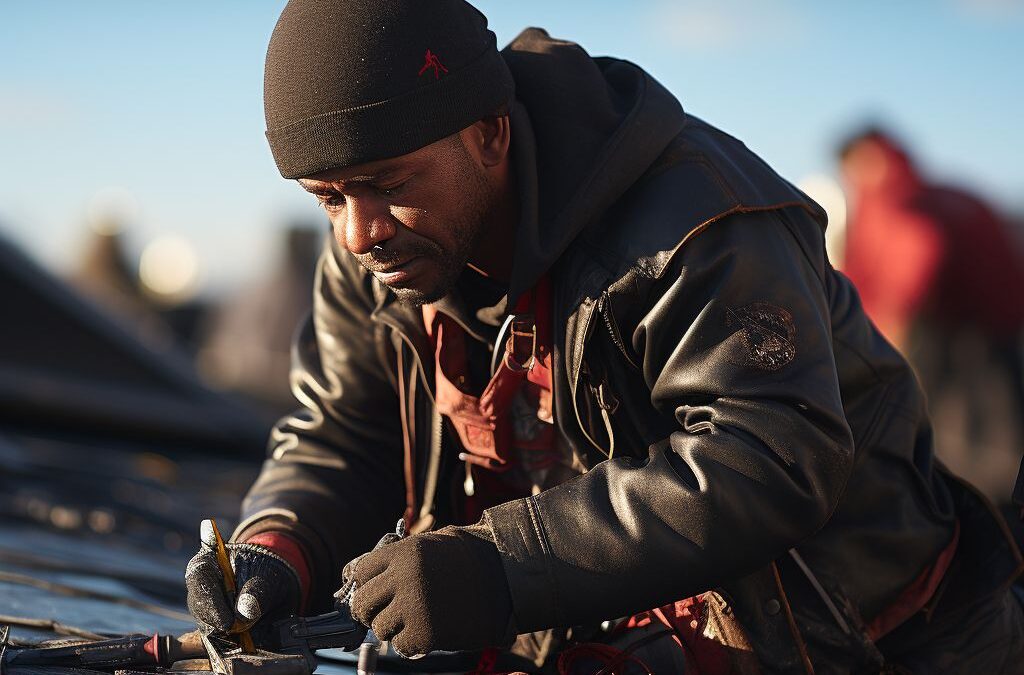
Remember, safety should always be a priority when working on a roof. Use caution and take necessary precautions such as wearing protective gear, especially if you need to work at heights or in adverse weather conditions.
Tips for preventing future rubber roofing problems
Preventing future rubber roofing problems is essential to prolong the lifespan of your roof and avoid costly repairs down the line. By following a few simple tips, you can ensure that your rubber roof remains in peak condition for years to come.
Firstly, regular inspection is key to identifying and addressing any potential issues before they escalate. Inspect your rubber roof at least twice a year, ideally in spring and fall, and after any major weather events. Look out for signs of damage such as cracks, tears, or loose seams, as well as any areas of pooling or ponding water.
To maintain the integrity of your rubber roofing, it’s important to keep it clean and clear of debris. Remove any fallen leaves, branches, or other debris that may accumulate on the roof’s surface and in gutters. Additionally, trimming overhanging tree branches can prevent them from rubbing against and damaging the rubber membrane.
Proper drainage is crucial for rubber roofs, as standing water can cause significant damage over time. Ensure that gutters, downspouts, and drains are clear and functioning effectively. Regularly clean and maintain these components to prevent any blockages that could lead to water buildup on your roof.
UV rays from the sun can accelerate the deterioration of rubber roofing material. Applying a UV protectant coating can help shield your rubber roof from harmful rays and extend its lifespan. Consult with a professional roofing contractor to determine the most suitable coating for your roof.
Lastly, avoid walking on your rubber roof whenever possible, as foot traffic can cause unnecessary wear and tear. If it is necessary to access the roof, use walkway pads or boards to distribute your weight evenly and minimize the risk of damaging the membrane.
By implementing these , you can maintain the durability and integrity of your roof for years to come. Regular inspections, proper cleaning, ensuring proper drainage, protecting against UV rays, and minimizing foot traffic are all essential steps in preserving the longevity of your rubber roof. Remember, prevention is always better than costly repairs in the long run.
When to hire a professional for rubber roofing repairs
When it comes to repairing rubber roofing, knowing when to hire a professional can be crucial. While some minor repairs can be done by homeowners themselves, certain issues may require the expertise and experience of a professional roofer. Here are some situations where it is advisable to seek professional help for your rubber roofing repairs.
One instance when it is recommended to hire a professional for rubber roofing repairs is when dealing with extensive damage. If your rubber roof has large areas that are torn, severely cracked, or have multiple leaks, it is best to leave the job to a professional. These types of repairs often require specialized tools, materials, and techniques that professionals are trained in. Attempting to fix such significant damage on your own may lead to further problems and potential safety risks.
Another scenario where it is wise to hire a professional is if you are unsure about the root cause of the rubber roofing issues. Sometimes, what may seem like a small problem can be a symptom of a larger underlying issue. A professional roofer will have the knowledge and experience to conduct a thorough inspection and identify any hidden problems that may be affecting the durability and lifespan of your rubber roof. By addressing these underlying issues, you can avoid future costly repairs.
Additionally, hiring a professional for rubber roofing repairs is crucial if you are not comfortable working at heights or if you have physical limitations. Repairing a rubber roof often requires working on a ladder or on top of the roof itself, which can be dangerous for individuals who are not experienced or equipped for such tasks. Professionals have the necessary safety equipment and training to perform repairs safely and efficiently.
Overall, hiring a professional for rubber roofing repairs is advisable in cases of extensive damage, uncertainty about the root cause of the issues, or when safety is a concern. Remember, attempting complex repairs without the proper knowledge and tools can lead to further damage and may void any existing warranties. By investing in professional expertise, you can ensure that your rubber roof is repaired effectively and that it will provide long-lasting protection for your home.
Common mistakes to avoid when repairing rubber roofing
Common mistakes can lead to costly and avoidable issues when it comes to repairing rubber roofing. By being aware of these mistakes and taking steps to avoid them, you can ensure your repair efforts are successful and long-lasting. Here are some :
Using the wrong materials: One of the most important aspects of rubber roofing repair is using the right materials. Using the wrong type of adhesive, sealant, or patch can result in ineffective repairs that may even worsen the problem. Always make sure to research and purchase materials specifically designed for rubber roofing repair. This will ensure that they adhere properly and provide a durable and watertight seal.
Not properly cleaning and preparing the surface: Before attempting any repair, it is crucial to thoroughly clean and prepare the surface of the rubber roofing. Neglecting this step can lead to poor adhesion and an ineffective repair. Use a mild cleaning solution and a stiff-bristle brush to remove any dirt, debris, or loose materials from the area needing repair. Additionally, make sure to allow the surface to dry completely before applying any adhesive or patching material.
Applying too much or too little adhesive: Achieving the right amount of adhesive is essential for a successful rubber roofing repair. Applying too much adhesive can create an uneven surface and may cause the repair to fail. On the other hand, not using enough adhesive can result in poor adhesion and may not fully seal the damaged area. Follow the manufacturer’s instructions carefully to ensure you use the correct amount of adhesive for the size and type of repair needed.
Neglecting to address underlying issues: When repairing rubber roofing, it is important to identify and address any underlying issues that may have caused the damage in the first place. Simply patching the area without addressing the root cause can lead to recurrent issues. Inspect the surrounding area for any signs of damage, deterioration, or improper installation. By addressing these issues concurrently with the repair, you can prevent future problems and ensure the longevity of your rubber roofing.
Working in unfavorable weather conditions: The weather can greatly impact the success of rubber roofing repairs. Avoid making repairs during rainy or extremely cold conditions, as this can affect the adhesion and curing process of the materials used. Additionally, working in extreme heat can cause the materials to dry too quickly, resulting in a less durable repair. Choose a day with moderate temperatures and no precipitation to ensure optimal conditions for your rubber roofing repair.
Remember, while DIY repairs can be cost-effective, it’s important to assess your skills and the complexity of the repair before attempting it yourself. If you are uncertain or uncomfortable with any aspect of the repair, it may be best to consult a professional. They have the expertise and experience to handle any rubber roofing repairs with precision, ensuring a successful outcome and peace of mind.
People Also Ask
1. Can you repair a rubber roof yourself?
Yes, you can repair a rubber roof yourself by using specially formulated rubber roof sealants or adhesives. However, it is important to assess the extent of the damage and consider your own skills and expertise before attempting a DIY repair.
2. What are the common causes of rubber roof damage?
Common causes of rubber roof damage include age, weather exposure, poor installation, foot traffic, and punctures from falling debris or sharp objects. It is important to identify the cause of the damage before attempting the repair.
3. How do you clean a rubber roof before making repairs?
To clean a rubber roof before making repairs, use a gentle cleaner specifically designed for rubber roofs and a soft-bristle brush or sponge. Avoid using abrasive cleaners or tools that can damage the rubber surface. Rinse thoroughly and allow the roof to dry before proceeding with the repair.
4. What tools and materials are needed for rubber roof repair?
Tools needed for rubber roof repair include a utility knife or roofing scissors, a brush or roller for applying sealant or adhesive, and a ladder or scaffolding for safe access to the roof. Materials required may include rubber roof sealant, adhesive, repair patches, and a cleaner specifically designed for rubber roofs.
5. What are the steps to repair a rubber roof?
The steps to repair a rubber roof typically involve cleaning the damaged area, applying a primer if necessary, applying the sealant or adhesive, and affixing a repair patch over the damaged section. The repair should be allowed to dry and cure fully before introducing any moisture or foot traffic.
In Conclusion
In conclusion, repairing rubber roofing is a relatively simple process that can be done by following some basic steps. First, identify the source of the damage or leak. This can be done by thoroughly inspecting the roof for any visible signs of damage or by using a hose to simulate rainfall and observing any areas where water may be seeping through.
Once the damaged area or leak is identified, clean the area thoroughly and allow it to dry completely. This will ensure that any repair materials adhere properly. Next, apply a rubber roof patch or sealant specifically designed for rubber roofs. This can be done using a brush or roller, making sure to cover the damaged area completely.
After applying the patch or sealant, allow it to dry according to the manufacturer’s instructions. Once dry, check for any additional leaks or areas that may require further repair. If necessary, repeat the patching process until all damage is adequately addressed.
Incorporating regular roof inspections and maintenance can greatly extend the lifespan of a rubber roof. Simple preventative measures such as keeping the roof clean and clear of debris, and addressing any minor damage promptly, can prevent larger issues from occurring in the future.
By following these steps and maintaining regular upkeep, homeowners can effectively repair rubber roofing and ensure its longevity for many years to come. Protecting the roof from damage and promptly addressing any issues is crucial in maintaining the structural integrity of the building.
Remember, it is always recommended to consult with a professional roofing contractor if you are unsure or uncomfortable with repairing the rubber roofing yourself. They can provide expert advice, guidance, and ensure that the repairs are done correctly and efficiently. Protect your investment and keep your rubber roof in optimal condition for years to come.

Climate Resilience Specialist
Christopher Clark’s extensive knowledge of Fresno’s unique climate challenges drives him to provide resilient roofing solutions. His commitment to community values and fair pricing makes him a trusted partner in roofing projects.