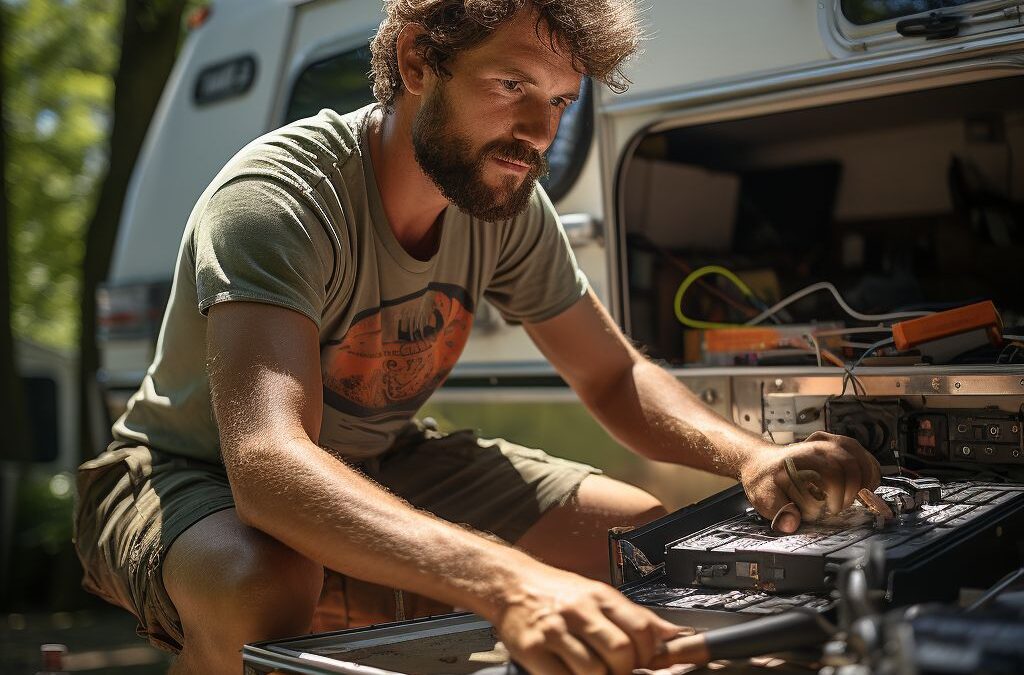
So you’ve decided to hit the road in your trusty pop up camper, only to discover a pesky leak in the roof. Don’t worry, you’re not alone! Whether it’s from age, wear and tear, or an unforeseen accident, a damaged roof on your pop up camper can put a damper on your outdoor adventures. But fear not, because we’ve got your back. In this article, we’ll guide you through the step-by-step process of repairing your pop up camper roof, so you can get back to enjoying the great outdoors in no time. From identifying the problem to choosing the right materials and applying a watertight seal, we’ll cover everything you need to know to restore your camper’s roof to its former glory. So grab your toolkit and let’s dive in!
Choosing the Right Materials for Pop Up Camper Roof Repair
When it comes to repairing a pop up camper roof, selecting the right materials is crucial in ensuring a successful and long-lasting fix. The type of material chosen will depend on the extent of the damage and the overall condition of the roof. Here are some factors to consider when choosing the materials for your pop up camper roof repair.
1. Roofing Membrane: One of the most popular choices for pop up camper roof repairs is a roofing membrane. These membranes are specifically designed to resist water and UV damage, making them an excellent choice for a watertight and durable repair. Look for a high-quality roofing membrane that is specifically designed for RVs or campers.
2. Adhesive: The adhesive you choose should be compatible with the roofing membrane and the material of your camper roof. It is essential to use a strong adhesive that can withstand the elements and provide a secure bond. Make sure to follow the manufacturer’s instructions for proper application and curing time.
3. Patching Materials: Depending on the extent of the damage, you may need additional materials such as patching fabric or fiberglass tape. These materials can reinforce weak areas or cover larger holes or cracks in the roof. Ensure that the patching materials you use are specifically designed for camper roofs and can withstand the movement and flexing of the pop up camper.
4. Cleaning and Prep Products: Before applying any repair materials, it is crucial to thoroughly clean and prepare the roof surface. Use a mild detergent and a brush to remove dirt, debris, and any loose or flaking materials. In some cases, a primer may be necessary to promote better adhesion of the repair materials.
Remember, when choosing materials for pop up camper roof repair, prioritize quality and compatibility. Investing in high-quality materials and following proper repair techniques will help ensure the longevity and effectiveness of your repair job. Whether you opt for a roofing membrane, adhesive, patching materials, or cleaning products, always refer to the manufacturer’s instructions for best results.
Assessing the Damage: Identifying Roof Leaks and Weaknesses
When it comes to repairing a pop up camper roof, the first step is determining the extent of the damage. This involves assessing any roof leaks and weaknesses. It’s important to identify these issues early on to prevent further damage and expensive repairs down the line.
To begin, visually inspect the entire roof surface for any signs of water damage or leaks. Look for discoloration or staining, which may indicate moisture infiltration. Pay close attention to the corners and edges where water is more likely to enter. Additionally, check for any punctures or holes in the roof membrane that may have been caused by tree branches, debris, or wear and tear.
Next, it’s crucial to inspect the roof seams and seals. Over time, these areas can deteriorate, leading to leaks. Run your hand along the seams and feel for any raised or loose edges. This is a common area for leaks to occur. Additionally, check the caulking around vents, skylights, and any other roof penetrations. Ensure that the caulking is intact and in good condition. If you notice any cracks or gaps, these should be repaired promptly to prevent water from entering.
For a more thorough assessment, you can perform a water test. Using a hose, spray water onto different sections of the roof while someone inside the camper inspects for any signs of leakage. This can help pinpoint areas that may need additional attention.
Remember, a small leak can quickly escalate into a major problem if left unaddressed. By thoroughly assessing the damage and identifying roof leaks and weaknesses, you can take appropriate steps towards a successful repair.
Step-by-Step Guide: Repairing a Pop Up Camper Roof
Repairing a pop up camper roof may seem like a daunting task, but with the right tools, materials, and a little patience, it can be a manageable DIY project. Here is a step-by-step guide to help you through the process:
1. Clean and inspect the roof: Begin by thoroughly cleaning the roof of any dirt, debris, or loose materials. This will allow you to get a clear view of the damage and assess the extent of repairs needed. Look out for any cracks, tears, or punctures that may be causing leaks or weakening the structure of the roof.
2. Patching the damaged areas: For minor cracks or tears, you can use a reliable roof repair tape to seal the area. Follow the manufacturer’s instructions when applying the tape, making sure to smooth out any air bubbles or wrinkles. For larger or more severe damage, you may need to cut out the damaged section and replace it with a patch made of the same material as your camper’s roof. Ensure the new patch is securely fastened and sealed to prevent any future issues.
3. Reinforce weak spots: As you repair the damaged areas, it’s important to reinforce any weak spots on the roof. This can be done by applying a layer of roof coating over the entire surface of the roof. Roof coatings are designed to provide an extra layer of protection against UV rays, water damage, and general wear and tear. Use a roller or brush to apply the coating evenly, following the manufacturer’s instructions.
4. Check and reseal seams: The seams of a pop up camper roof are particularly vulnerable to leaks and water damage. Inspect the seams carefully and use a high-quality RV roof sealant to fill any gaps or cracks. Apply the sealant generously, ensuring complete coverage along the seams. This will provide an extra layer of protection against water infiltration and extend the lifespan of the repairs.
By following these step-by-step instructions, you can effectively repair your pop up camper roof and enjoy worry-free camping adventures. Remember to take your time, be thorough in your assessments, and use the appropriate materials for the job. Happy camping!
Sealing Techniques: Ensuring a Watertight Roof
When it comes to pop up camper roof repair, one of the most crucial aspects is ensuring that the roof is completely watertight. This is vital to prevent leaks and further damage to the camper’s interior. In this section, we will discuss some effective sealing techniques that will help you achieve a watertight roof for your pop up camper.
1. Assess the condition of the roof: Before sealing any leaks or weak spots, it is essential to thoroughly assess the condition of the roof. Look for any cracks, gaps, or areas where the roof membrane might be lifting or coming apart. This will help you identify the areas that require immediate attention.
2. Clean the roof surface: Before applying any sealant, make sure to clean the roof surface thoroughly. Remove any dirt, debris, or loose material that may hinder the effectiveness of the sealant. Use a mild detergent, water, and a soft brush to clean the roof gently. Avoid using harsh chemicals or abrasive cleaners that could damage the roof.
3. Select the right sealant: Choosing the right sealant is crucial for ensuring a watertight roof. There are various types of sealants available in the market, such as silicone-based or rubber-based sealants. It’s essential to choose a sealant specifically designed for RV roofs and compatible with the material of your pop up camper’s roof.
4. Apply the sealant properly: Start by applying the sealant on the identified leaks or weak spots, ensuring a generous and even coat. Use a caulking gun or a putty knife for precise application. Work in small sections, allowing the sealant to fully dry before moving on to the next area. It’s important to follow the manufacturer’s instructions for application and drying times.
5. Pay attention to seams and joints: Seams and joints are common areas for leaks in pop up camper roofs. Make sure to pay extra attention to these areas when applying the sealant. Apply a sufficient amount of sealant along the seams and joints, ensuring full coverage. Additionally, consider using reinforcing tapes specifically designed for sealing seams for added protection.
6. Regular maintenance and inspections: Once your pop up camper roof is sealed, it’s essential to conduct regular inspections and maintenance to ensure its longevity. Routinely check for any signs of damage or new leaks, especially after severe weather conditions. Promptly address any issues that arise to prevent further damage and maintain the watertightness of your camper’s roof.
By following these sealing techniques, you can ensure a watertight roof for your pop up camper, providing you with peace of mind during your camping adventures. Remember, if you are uncertain or uncomfortable performing the repairs yourself, it is always best to seek professional assistance to ensure the job is done correctly.
Best Practices for Preventing Future Roof Damage
Preventing future roof damage is essential to keeping your pop up camper in top shape and avoiding costly repairs. By following these best practices, you can maintain a sturdy and watertight roof for years to come.
First and foremost, regular inspections are crucial in identifying any potential issues before they become major problems. It’s recommended to inspect your pop up camper roof at least twice a year, preferably in the spring and fall. Look for signs of wear and tear, such as cracks, punctures, or loose seams. Additionally, check for any signs of water damage, such as stains or soft spots on the ceiling or walls, as these might indicate a leak in the roof.
To prevent roof damage caused by heavy snow or rain, it’s important to keep the roof clear of any debris. Leaves, branches, and other objects can accumulate and clog the gutters or drains, leading to water pooling on the roof and potentially causing leaks. Regularly removing debris and ensuring proper drainage will go a long way in preventing roof damage.
Another effective measure to protect your pop up camper roof is to invest in a quality cover. A durable and weather-resistant cover can shield your camper from the elements, including harsh UV rays, rain, hail, and snow. When selecting a cover, make sure it fits snugly and has reinforced corners and tie-downs to withstand strong winds.
In addition to regular inspections and debris removal, proactive maintenance is key to preventing future roof damage. This includes resealing seams and edges as needed, as well as applying a protective coating to the roof surface. By using specialized sealants and coatings designed for pop up camper roofs, you can enhance their durability and extend their lifespan.
By following these best practices and taking proactive measures to maintain your pop up camper roof, you can prevent future damage and ensure a lasting, leak-free camping experience. Remember, a little effort and regular maintenance can save you from costly repairs down the road.
Professional Assistance: When to Seek Help for Pop Up Camper Roof Repairs
When it comes to repairing a pop up camper roof, it’s essential to know your limitations. While some repairs can be done by DIY enthusiasts, there are certain situations where seeking professional assistance is the best course of action. Here are a few scenarios where it’s advisable to call in the experts.
1. Extensive Damage: If you notice significant damage to your pop up camper roof such as severe leaks, extensive rot or sagging, it’s time to seek professional help. These issues require extensive repairs that may involve structural adjustments or even replacing the entire roof. A professional repair service will have the knowledge and expertise to tackle these complex repairs effectively.
2. Lack of Experience: If you’re new to pop up camper roof repairs or don’t feel confident in your abilities, it’s better to leave it to the professionals. Working on a roof requires specialized skills and equipment to ensure a safe and successful outcome. Hiring a professional will provide peace of mind knowing that the repair is done correctly and to industry standards.
3. Time Constraints: Repairing a pop up camper roof can be time-consuming, especially if you’re not familiar with the process. If you’re on a tight schedule or have other commitments, it might be more convenient to hire a professional. They have the necessary tools, experience, and resources to complete the repair efficiently, saving you valuable time and effort.
4. Warranty Considerations: If your pop up camper is still under warranty, attempting DIY repairs could potentially void that warranty. It’s crucial to check the terms and conditions of your warranty before making any repairs yourself. Hiring a professional ensures that the repairs are covered by the warranty, giving you added financial protection.
Remember, when it comes to your pop up camper roof, safety should be a top priority. If you’re uncertain about your abilities or the extent of the damage, it’s best to consult with a professional. They can assess the situation accurately, provide expert advice, and complete the necessary repairs to ensure your pop up camper is in optimal condition for your next adventure.
People Also Ask
1. Can a pop up camper roof be repaired by DIY methods?
Yes, it is possible to repair a pop up camper roof using DIY methods. This may include patching up small cracks or tears, applying sealant, or replacing damaged sections of the roof. However, more extensive repairs or structural issues may require professional assistance.
2. What materials are typically used for repairing a pop up camper roof?
Common materials used to repair a pop up camper roof include roof sealant, adhesive tape, patching kits, and replacement roof panels if necessary. It is important to choose materials that are specifically designed for use on camper roofs to ensure proper sealing and durability.
3. How do I locate and fix leaks in a pop up camper roof?
To locate and fix leaks in a pop up camper roof, start by inspecting the roof for any visible damage, such as cracks or soft spots. Then, use water and a hose to simulate rain and check for leaks. Once you identify the source of the leakage, use appropriate sealants or patches to fix the problem.
4. Is it necessary to remove the entire roof to repair a pop up camper?
No, it is not always necessary to remove the entire roof to repair a pop up camper. Depending on the extent and nature of the damage, you may be able to fix the issue by repairing localized areas or replacing smaller sections of the roof. However, in some cases, a complete roof replacement may be required.
5. What are common causes of roof damage in pop up campers?
Common causes of roof damage in pop up campers include aging and deterioration, impact from tree branches or other debris, water leaks, and improper maintenance. Regular inspections, maintenance, and proactive measures, such as covering the camper during periods of non-use, can help prevent roof damage.
Conclusion
In conclusion, repairing a pop-up camper roof is a manageable task that can help prolong the life of your camper. By following the steps mentioned earlier, you can successfully fix any leaks or damages on your roof. Remember to inspect your roof regularly and address any issues promptly to prevent further damage.
Additionally, it is crucial to use the right materials and techniques for repair, ensuring a strong and durable fix. Taking the time to properly repair your pop-up camper roof will not only save you money on potential future repairs but also provide you with a safe and comfortable camping experience.
So, if you own a pop-up camper with roof issues, don’t hesitate to take action and repair it. With the knowledge and steps outlined in this guide, you will be able to effectively tackle any roof repair, ensuring your camper is in top shape for your next adventure.

Lead Roofing Specialist
Michael Thompson brings over two decades of roofing expertise to Fresno Roof Repair. His dedication to quality craftsmanship and customer satisfaction has earned him a reputation as a reliable authority in the roofing industry.