A sagging roof ridge board can be a homeowner’s worst nightmare. Not only does it compromise the structural integrity of your roof, but it also poses a serious risk to the safety of your entire house. But fear not, because in this article, we will guide you through the process of repairing a sagging roof ridge board, saving you from potential disasters and hefty repair bills.
Whether you’re a seasoned DIY enthusiast or a complete novice, we’ve got you covered with step-by-step instructions and expert tips to get your roof back in tip-top shape. So, grab your tools, put on your safety gear, and let’s dive into the fascinating world of roof repair!
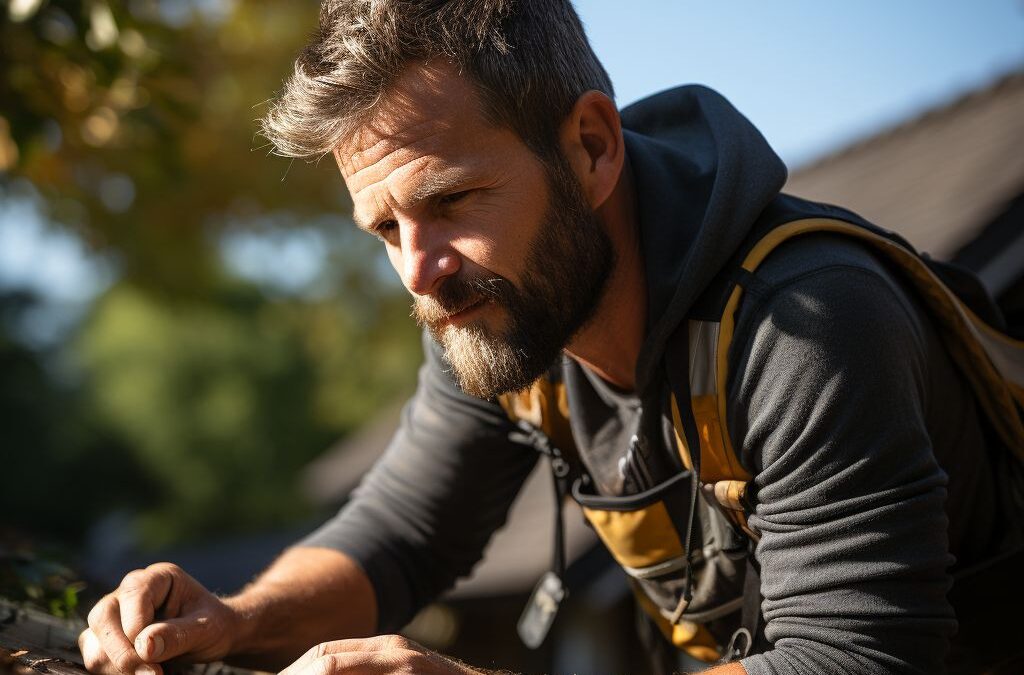
Preparation and Safety Measures
When it comes to repairing a sagging roof ridge board, it’s essential to prioritize safety and take the necessary precautions. Before embarking on this task, it is crucial to gather the required tools and materials, as well as to assess the extent of the damage. By following proper , you can ensure a successful and accident-free repair.
To begin, ensure that you have a sturdy ladder that can reach the height of your roof safely. Inspect the ladder for any defects or damage before using it to access your roof. It is also essential to wear appropriate safety gear, including a hard hat, goggles, and sturdy work boots. Additionally, consider using a harness and safety line to prevent falls.
Before climbing onto the roof, take a moment to assess the external conditions. It is best to avoid working during extreme weather conditions, such as rain, strong winds, or icy surfaces. These conditions can make the roof slippery and increase the risk of accidents. If the weather is unfavorable, it is recommended to postpone the repair until conditions improve.
Once you have ensured your safety, it is time to inspect and assess the damage to the roof ridge board. Look for signs of sagging or bowing in the ridge line, as well as any visible cracks or breaks. Assess the overall stability of the ridge board and evaluate whether a replacement is necessary.
Remember, proper are paramount when it comes to repairing a sagging roof ridge board. By following these guidelines and taking the necessary precautions, you can ensure a successful and accident-free repair.
Assessing the Damage to the Roof Ridge Board
When it comes to repairing a sagging roof ridge board, the first step is to assess the extent of the damage. This will help determine the best course of action and ensure a successful repair.
One of the most common signs of a damaged roof ridge board is a sagging or drooping appearance. This can often be seen from the ground level or when inspecting the attic. However, it’s important to get a closer look to accurately assess the damage.
To thoroughly examine the roof ridge board, it’s recommended to use a ladder and safely access the area. Once there, carefully inspect the board for any visible signs of damage such as cracks, splits, or rot. Pay close attention to any areas where the board may be sagging or bowing, as this indicates a potential problem.
Additionally, check for any gaps or separation between the roof ridge board and the rafters. This can occur due to structural issues or improper installation. If the ridge board is not securely fastened to the rafters, it can lead to further damage and compromise the overall stability of the roof.
To ensure a comprehensive assessment, it may be necessary to inspect the surrounding area as well. Look for any signs of water damage, leaks, or weakened support structures. These issues can contribute to the damage of the roof ridge board and should be addressed during the repair process.
By carefully , you can determine the necessary steps for repair. Whether it requires minor adjustments or a full replacement, understanding the extent of the damage is crucial for a successful repair.
Gathering the Necessary Tools and Materials
To successfully repair a sagging roof ridge board, you’ll need to gather a few essential tools and materials. These items will help you remove the damaged ridge board and replace it with a new one, ensuring a strong and secure roof structure.
First and foremost, you’ll need a sturdy ladder or scaffolding to safely access the roof. Make sure it is tall enough to reach the ridge line comfortably. Safety should always be your top priority, so consider using a safety harness or having a helper to assist you during the repair process.
Next, gather a range of hand tools, including a pry bar for removing nails and shingles, a hammer for installing new nails, and a utility knife for cutting any necessary materials. Additionally, have a tape measure, a straight edge or level, and a pencil on hand to help with accurate measurements and marking of materials.
In terms of materials, you’ll need a new roof ridge board that matches the dimensions of the original one. Measure the length and width of the existing ridge board before purchasing a replacement. It’s crucial to choose a high-quality, sturdy material that can withstand the weight and stress of the roof.
Other materials you may need include roofing nails or screws for installation, roofing felt or underlayment for added protection, and any sealants or adhesives required to secure the new ridge board in place. It’s always a good idea to check with a roofing expert or your local hardware store to ensure you have all the necessary supplies for the job.
By gathering the right tools and materials beforehand, you’ll be well-prepared to tackle the repair of a sagging roof ridge board. This will save you time and effort in the long run, ensuring a successful and long-lasting repair.
Removing the Damaged Roof Ridge Board
When it comes to repairing a sagging roof ridge board, the first step is to carefully remove the damaged board. This is a crucial part of the process as it sets the foundation for the rest of the repair. By following the steps outlined below, you can effectively remove the damaged roof ridge board and prepare for the replacement.
1. Assess the damage: Before proceeding with the removal, carefully inspect the roof ridge board to determine the extent of the damage. Look for any signs of rot, decay, or structural weaknesses that may require additional repairs. It’s important to address any underlying issues to ensure the long-term stability of the roof.
2. Gather the necessary tools and materials: To remove the damaged roof ridge board, you’ll need a few essential tools and materials. Make sure you have a pry bar, hammer, reciprocating saw, safety goggles, gloves, and a stable ladder. Additionally, have a tarp or drop cloth available to catch any debris that falls during the removal process.
3. Secure the area and work safely: Before starting the removal, it’s crucial to prioritize safety. Clear the area around the roof ridge board of any obstacles and ensure a safe working environment. Wear protective gear such as safety goggles and gloves to prevent any potential injuries. Additionally, make sure the ladder is securely placed and stable before climbing up to the roof.
4. Remove the shingles and nails: Begin the removal process by carefully removing the shingles and nails surrounding the damaged roof ridge board. Use a pry bar and hammer to gently lift the shingles, being cautious not to cause any further damage. Dispose of the removed shingles in a designated waste bag or container.
5. Cut the damaged board: Once the shingles and nails are removed, use a reciprocating saw to cut through the damaged roof ridge board. Make precise cuts along the length of the board, ensuring a clean removal. Take extra care to avoid cutting into any neighboring rafters or trusses.
6. Safely remove the damaged board: With the board cut, gently pry it away from the surrounding rafters or trusses. Use the pry bar and hammer to carefully lift and remove the damaged sections. Be mindful of the weight and any potential hazards as you work.
By following these steps, you can safely and effectively remove the damaged roof ridge board. Once the old board is removed, you can proceed with the next steps of the repair process, which involve installing a new board and reinforcing it for added stability.
Replacing the Roof Ridge Board with a New One
When it comes to repairing a sagging roof ridge board, replacing the damaged board with a new one is often the most effective solution. This section will guide you through the steps involved in removing the old board and installing a new one to restore the structural integrity of your roof.
First, make sure to secure the area by wearing safety gear such as gloves, goggles, and a hard hat. Additionally, it is recommended to have someone assist you during this process for added safety. Once you have taken the necessary safety precautions, follow these steps to replace the roof ridge board:
1. Start by carefully removing any shingles or roofing materials that may be covering the damaged area. Use a pry bar or a hammer and chisel to carefully pry away the nails or screws holding the roofing materials in place. Take care not to damage any surrounding shingles during this process.
2. Once the roofing materials are removed, you will be able to clearly see the damaged ridge board. Assess the extent of the damage to determine if only a section of the board needs to be replaced or if the entire board should be removed. In some cases, you may need to remove adjacent boards for easier access.
3. Use a circular saw or a reciprocating saw to carefully cut through the damaged ridge board. Make sure to follow any markings or measurements to ensure a clean and precise cut. Take your time during this step to avoid any accidental damage to the roof trusses or rafters.
4. With the damaged roof ridge board removed, it’s time to install the new one. Measure and cut the replacement board to the appropriate length. It should fit snugly between the roof trusses or rafters, ensuring a secure and sturdy fit.
5. Carefully slide the new ridge board in place, ensuring that it aligns correctly with the existing roof structure. Use galvanized nails or screws to secure the board to the trusses or rafters. Make sure to space the fasteners evenly and drive them flush with the surface of the board.
6. Once the new ridge board is securely in place, you can begin reattaching the roofing materials. Replace any adjacent boards that were removed and secure them with nails or screws. Then, carefully reinstall the shingles or roofing materials, making sure they overlap properly and are securely fastened.
By following these steps, you will be able to replace a sagging roof ridge board and restore the structural integrity of your roof. Taking the time and effort to properly replace the damaged board will ensure a long-lasting repair that will protect your home from further damage.
Reinforcing and Securing the New Roof Ridge Board
Once the damaged roof ridge board has been removed, it’s important to reinforce and secure the new one properly to ensure the structural integrity and longevity of your roof. Failing to do so could result in further sagging or even collapse of the roof in the future.
One key step in reinforcing the new roof ridge board is to install support braces or jack rafters. These will help bear the weight of the roof and distribute it evenly throughout the structure. Measure and cut the braces to the appropriate length, ensuring they are long enough to extend from the ridge down to the wall plates. It’s recommended to use pressure-treated lumber for added durability and resistance against rot and decay.
Position the braces at regular intervals along the length of the roof ridge board, ensuring they are aligned with the rafters or trusses for maximum support. Secure the braces by nailing them in place on both the ridge board and the wall plates. Additionally, you may choose to toenail them at an angle for added stability.
Sealing and Finishing the Repair for Longevity
Once the new roof ridge board has been securely installed, it is important to seal and finish the repair to ensure its longevity. This step is crucial in preventing water damage and maintaining the structural integrity of the roof. By taking the time to properly seal and finish the repair, you can protect your home from future issues and costly repairs.
To begin, it is essential to inspect the surrounding area of the repaired roof ridge board for any additional damage or gaps that could compromise the repair. Use a flashlight to thoroughly examine the area and make any necessary repairs before proceeding with the sealing process.
Next, gather the appropriate materials for sealing the repair. This may include a silicone-based roof sealant, a caulking gun, a putty knife, and a sturdy ladder. Apply the roof sealant generously along the edges of the new roof ridge board, ensuring that all seams and joints are properly sealed. This will create a watertight barrier, preventing any moisture from seeping into the repaired area.
In addition to sealing, it is important to finish the repair by giving it a protective coating. This can be achieved by applying a layer of roof coating over the sealed area. Roof coatings are available in various types, including acrylic, silicone, and asphalt-based options. Choose a coating that is suitable for your specific roofing material and climate conditions.
Using a brush or roller, evenly apply the roof coating over the repaired section, extending it slightly beyond the sealed area to ensure complete coverage. This will provide an extra layer of protection against UV rays, water damage, and general wear and tear.
Allow the sealant and roof coating to dry completely before subjecting the repaired roof ridge board to any external stresses, such as heavy rain or wind. Once dry, inspect the area one final time to ensure that the repair is secure and properly sealed.
By , you can rest assured that your roof ridge board will remain sturdy and protected for years to come. Regular inspections and maintenance can also help prevent further damage and extend the lifespan of your roof. Remember to consult a professional if you have any doubts or concerns about your DIY repair skills or the extent of the damage.
People Also Ask
How do you fix a sagging roof ridge board?
To repair a sagging roof ridge board, you can reinforce it by installing braces or support beams. You may also need to replace any damaged or weakened sections of the ridge board to ensure proper structural integrity. Consult a professional roofer for proper guidance and assistance.
Can I repair a sagging roof ridge board myself?
Repairing a sagging roof ridge board can be a complex and potentially dangerous task. It is recommended to hire a professional roofer who has the knowledge, experience, and appropriate tools to carry out the repairs safely and effectively.
What causes a roof ridge board to sag?
A sagging roof ridge board can be due to various factors such as excessive weight from accumulated snow or ice, water damage, termite or pest infestation, or simply wear and tear over time. Identifying the cause is crucial to determine the appropriate repair method.
How much does it cost to repair a sagging roof ridge board?
The cost of repairing a sagging roof ridge board can vary depending on several factors, such as the extent of the damage, the materials needed for the repair, and the location of the property. It is best to consult with a few professional roofers to get accurate quotes for the specific repair job.
How long does it take to repair a sagging roof ridge board?
The time required to repair a sagging roof ridge board can vary depending on the severity of the damage and the complexity of the repair. It could range from a few hours to several days, depending on the extent of the work required and any additional complications that may arise during the process.
To Conclude
In conclusion, repairing a sagging roof ridge board is an important task that should not be ignored. It requires a careful assessment of the structure, identifying the root cause of the sag, and implementing the appropriate repairs or reinforcements.
When dealing with a sagging roof ridge board, timely action is crucial to prevent further damage to the roof’s overall integrity. Whether you choose to handle the repair yourself or hire a professional, it is essential to prioritize safety and follow proper procedures.
Remember to consult a structural engineer or a qualified roofing contractor for expert advice and guidance if you are unsure about the repair process. They can provide further insight into the specific details of your roof’s condition and offer effective solutions for repairing the sagging ridge board.
By taking proactive steps to repair a sagging roof ridge board, you can ensure the stability and longevity of your roof while protecting your home from potential water damage or further structural issues. Don’t hesitate to address the problem and maintain the integrity of your roof for years to come.

Customer Relations Manager
Benjamin Turner is a customer-centric professional, placing emphasis on open communication and transparency throughout the roofing process. His dedication to client satisfaction ensures a smooth and collaborative experience.