Whether your roof has been damaged by a storm or the wear and tear of time, the sight of missing shingles on a roof?”>missing shingles on a roof?”>missing shingles can be cause for concern. Not only do they compromise the integrity of your roof, but they also leave your home vulnerable to leaks and water damage. But fear not! With the right tools and a little know-how, replacing missing roof shingles can be a straightforward and cost-effective DIY project. In this guide, we will walk you through the step-by-step process of replacing those errant shingles, ensuring your roof remains in top condition and your home protected from the elements. So grab your safety gear and let’s get started on restoring your roof to its former glory!
Identifying the missing roof shingles
One of the first steps in replacing missing roof shingles is to identify which ones are actually missing. This may seem like an obvious task, but it can be more challenging than you might think. Identifying missing roof shingles requires a close inspection of your roof to spot any areas where shingles are broken, damaged, or completely absent.
Start by examining your roof from the ground level using binoculars or a zoom lens camera. Look for any noticeable gaps or discoloration that could indicate missing shingles. Pay attention to areas where other materials, such as flashing or vents, meet the shingles, as these areas are more prone to shingle loss.
If you’re comfortable doing so, safely access your roof using a sturdy ladder and inspect it up close. Look for any obvious signs of missing or damaged shingles, such as exposed underlayment or nails sticking out. Keep in mind that missing shingles may not always be visible, as they can sometimes be blown off the roof but remain in the surrounding gutters or yard.
To confirm whether any shingles are missing, gently run your hand over the surface of the roof. Be careful not to apply too much pressure or step on the roof, as this could cause further damage. If you feel a noticeable gap or an area that feels different from the rest of the roof, it’s likely that shingles are missing in that spot.
Remember, identifying missing roof shingles is an important first step in the repair process. Taking the time to properly assess your roof’s condition will ensure that you address any damage promptly and effectively, ultimately helping to maintain the integrity and longevity of your roof.
Preparing the necessary materials and tools
is an essential step before replacing missing roof shingles. This ensures that you have everything you need at hand and prevents delays during the repair process.
Gather the required materials:
- New shingles: Purchase replacement shingles that match the style and color of your existing shingles. Take note of the shingle type, size, and design to ensure a seamless repair.
- Roofing nails: Choose galvanized or stainless steel nails that are recommended for roofing projects. These types of nails are resistant to rust and corrosion, ensuring the longevity of your roof.
- Roofing adhesive or sealant: Have a reliable adhesive or sealant ready to secure the new shingles in place. Opt for a high-quality product formulated specifically for roof repair.
- Roofing hammer or nail gun: Use a roofing hammer or nail gun for fast and effective installation. The tools you choose should be appropriate for your skill level and the size of the repair task.
- Roofing knife or scissors: These tools will come in handy for cutting and shaping the new shingles to fit the required size and shape.
- Ladder or scaffolding: Ensure you have a stable and secure means of accessing the roof. A ladder with a stabilizer bar or scaffolding will provide a safe platform for you to work on.
- Safety equipment: Don’t forget to prioritize your safety. Wear non-slip shoes, gloves, and eye protection to minimize the risk of accidents while working on the roof.
Once you have gathered all the necessary materials and tools, double-check that everything is in good condition and readily available before proceeding with the repair. This will save you time and effort as you work towards a successful roof shingle replacement.
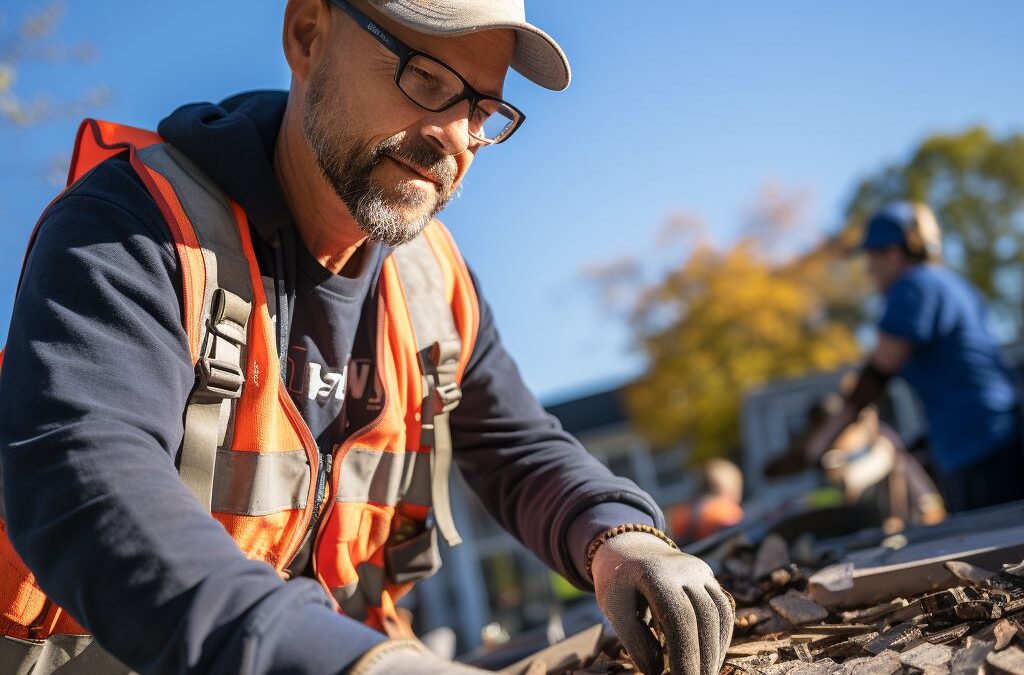
Safely accessing the roof for shingle replacement
When it comes to replacing missing roof shingles, safety should always be the top priority. Before attempting any work on the roof, it is essential to ensure that you have the right tools and take necessary precautions. Here are a few important steps to safely access your roof for shingle replacement.
Firstly, it is crucial to choose the appropriate time and weather conditions for your roof repair. Avoid working on the roof during rain, strong winds, or extreme temperatures as it can increase the risk of accidents. Ideally, choose a calm and dry day to carry out the shingle replacement.
Before heading up to the roof, gather all the necessary materials and tools. This includes replacement shingles, roofing nails, a hammer, a utility knife, a ladder, and safety equipment such as non-slip shoes, gloves, eye protection, and a safety harness if needed. Double-check that everything is in good condition before starting.
To access the roof safely, position your ladder on a flat and stable surface. Make sure the ladder is tall enough to reach the desired height, and always follow the ladder’s safety guidelines. When climbing up or down the ladder, maintain three points of contact. Do not lean too far over the sides of the ladder, as it can lead to instability and accidents.
Once on the roof, take precautionary measures to avoid slipping or falling. Wear slip-resistant shoes and stay mindful of your footing. Avoid stepping directly on the damaged or missing shingles, as they may not provide the necessary support. Instead, walk on the intact portions of the roof or use roof brackets and planks to distribute your weight evenly.
It is advisable to have someone nearby when working on the roof, acting as a spotter in case of emergencies. Additionally, if you feel uncomfortable or unsafe at any point, do not hesitate to call a professional roofing contractor to ensure the job is done correctly and securely.
Remember, safety is paramount when accessing the roof for shingle replacement. By following these guidelines and taking necessary precautions, you can ensure a successful and injury-free roof repair project.
Removing the damaged or missing shingles
When it comes to roof repair, one of the crucial steps is . This process requires careful attention and precision to ensure smooth replacement and a strong, durable roof.
First, make sure you have all the necessary tools and materials ready before starting the removal process. These may include a roofing hammer, pry bar, utility knife, roofing nails, replacement shingles, and roofing cement. Check your local home improvement store or contact a professional roofer to obtain the correct materials for your specific roof type.
Once you are prepared, access the roof safely using a sturdy ladder or scaffolding. It’s important to prioritize your safety and use proper protective gear such as gloves and non-slip footwear. Ensure the surrounding area is clear and secure, and consider having a spotter or someone nearby in case of an emergency.
To begin , use the pry bar or roofing hammer to gently lift and loosen the surrounding shingles. Take care not to damage them in the process. Once loose, carefully remove the nails securing the damaged shingles. Keep track of the location and number of nails removed for accurate replacement later on.
As you remove the damaged shingles, inspect the underlying roof deck for any signs of damage or deterioration. This is also an opportunity to check for potential leaks or other issues that may need attention. If you notice any problems, it’s advisable to consult a professional roofer for further assessment and repairs.
Remember to work methodically and systematically, starting from the bottom and working your way up. Carefully stack the removed shingles in a secure area to avoid any accidents or damage. Once all the damaged shingles are removed, it’s time to move on to the next step - installing new shingles.
Note: If you are not confident in your ability to safely remove the damaged or missing shingles, it is highly recommended to hire a professional roofer to carry out this task. Roof repair can be hazardous and should only be attempted by those with the necessary skills and knowledge.
Installing new shingles and ensuring proper alignment
When replacing missing roof shingles, it is crucial to install the new ones correctly and ensure proper alignment to maintain the integrity and functionality of your roof. Incorrect installation or misaligned shingles can lead to leaks, water damage, and even further shingle displacement during severe weather conditions. To ensure a successful replacement, follow these steps:
First, gather all the necessary materials and tools mentioned earlier, such as replacement shingles, roofing nails, a hammer, a pry bar, a utility knife, and a ladder. It’s important to have everything within reach to avoid unnecessary trips up and down the ladder, ensuring your safety and efficiency.
Once you have accessed the roof safely, it’s time to remove the damaged or missing shingles. Use the pry bar to carefully lift the surrounding shingles above the damaged one. Be cautious not to damage any adjacent shingles during this process. Once lifted, use the pry bar or your hands to remove any remaining nails or adhesive that may be holding the damaged shingle in place.
Before installing the new shingle, take a moment to inspect the surrounding area for any underlying damage or wear. If you notice any issues, such as rot or deteriorated underlayment, consider repairing them before proceeding with the replacement. Ensuring a solid foundation is essential for the longevity of your new shingles.
Now, it’s time to install the new shingles and ensure proper alignment. Start by placing the replacement shingle on top of the area where the old one was removed. Make sure it aligns with the neighboring intact shingles. Gently press it down to secure it in place. Using roofing nails, attach the new shingle by driving the nails through the designated nail line, typically located near the top of the shingle. Be sure to follow the manufacturer’s guidelines for proper nail placement and spacing.
To achieve a neat and uniform appearance, pay attention to the alignment of the newly installed shingles with the existing ones. Check that the bottom edge of the replacement shingle aligns with the bottom edges of the neighboring shingles. Use a level or straight edge if necessary to ensure a straight and orderly pattern.
By installing the new shingles correctly and ensuring proper alignment, you are taking a significant step towards a well-repaired roof. Proper alignment not only enhances the aesthetics of your roof but also ensures that water is effectively drained and no weak spots are left vulnerable. Following these guidelines will result in a durable and visually appealing outcome for your roof repair project.
Securing the shingles in place for durability
After successfully removing the damaged or missing shingles and preparing the area for replacements, it is crucial to secure the new shingles properly to ensure their durability and longevity. The process of securing the shingles in place requires attention to detail and proper technique.
To begin, align the new shingle with the existing ones, making sure it fits snugly and matches the pattern of the surrounding shingles. Using roofing nails, gently hammer them into the designated nail line of the shingle. Be careful not to hammer too forcefully, as this can damage the shingle or the underlying structure.
To ensure the shingle is secure, it’s recommended to use four nails per shingle, one at each corner. This will help distribute the weight evenly and prevent the shingle from lifting or being dislodged during extreme weather conditions. Remember to position the nails slightly above the shingle’s nail line to prevent any leakage.
In addition to nailing the shingles, it is also essential to apply roofing cement or adhesive underneath each shingle tab. This will provide an extra layer of protection against wind and water damage and improve the overall integrity of the roof. Apply a small dab of roofing cement or adhesive on the underside of each shingle tab before pressing it firmly onto the roof surface.
By securing the shingles with nails and adhesive, you are ensuring that they remain in place, even in the face of strong winds, heavy rainfall, or other environmental factors. Regularly inspect your roof for any loose or lifted shingles and promptly address any issues to prevent further damage.
Remember, securing the shingles properly is not only crucial for the durability of your roof but also for the overall protection of your home. Taking the time and care to ensure they are firmly in place will help maintain the integrity of your roof and prevent potential leaks or structural damage in the future.
Regular maintenance and inspection for a healthy roof
Regular maintenance and inspection are essential for ensuring the longevity and health of your roof. By making a habit of inspecting your roof regularly, you can catch any potential issues early on and address them before they become major problems. This will ultimately save you time, money, and headaches down the line.
To begin with, it’s important to schedule roof inspections at least once or twice a year, ideally in the spring and fall seasons. During these inspections, thoroughly examine the entire roof surface for any signs of damage, such as missing or damaged shingles, cracks, or leaks. Pay close attention to areas where shingles meet flashing, as these are common trouble spots.
In addition to visual inspections, it’s crucial to clean your roof on a regular basis. Leaves, debris, moss, and algae can accumulate over time and cause damage to the shingles. Clearing these off not only improves the appearance of your roof, but also prevents moisture buildup and potential rot.
Some key points to consider during your roof maintenance routine:
- Trim tree branches that hang over the roof to prevent damage from falling limbs or leaves.
- Check the condition of flashing around chimneys, vents, skylights, and other roof protrusions.
- Seal any gaps or cracks in the flashing to prevent water intrusion.
- Inspect the attic for signs of water stains, mold, or mildew, as this can indicate a roof leak.
- If you notice any loose or damaged shingles, promptly replace them to maintain the integrity of the roof.
- Ensure that gutters and downspouts are clear of debris and functioning properly to prevent water from pooling on the roof.
By incorporating regular maintenance and inspection into your routine, you can catch minor issues before they escalate and avoid costly repairs or premature roof replacement. Remember, a well-maintained roof not only protects your home from the elements but also maintains its overall value.
People Also Ask
1. How do you know if you have missing shingles on your roof?
To determine if you have missing shingles, visually inspect your roof for any gaps or areas where the shingles have been completely blown off. You might also notice loose or displaced shingles that are no longer aligned with the rest of the roof.
2. Can I replace just a few missing shingles?
Yes, you can replace individual missing shingles without having to replace the entire roof. However, it is essential to match the replacement shingles with the existing ones in terms of color, style, and material to maintain a cohesive appearance.
3. What tools do I need to replace missing roof shingles?
The tools you may need include a ladder, pry bar, roofing nails, hammer, shingles, roofing adhesive, and a utility knife. Ensure proper safety precautions while using a ladder and working on the roof.
4. Can I repair missing roof shingles by myself?
If you’re comfortable working on a roof and have some basic DIY skills, you can typically replace missing shingles on your own. However, it’s crucial to evaluate your abilities, as working on a roof can be dangerous. If you’re unsure, it’s best to hire a professional to do the job.
5. How much does it cost to replace missing roof shingles?”>replace missing roof shingles?
The cost of replacing missing roof shingles can vary depending on factors such as the size of the area to be repaired, the type of shingles used, and the contractor’s rates. On average, it can cost between $100 to $300 per shingle, including labor and materials.
Final Thoughts
In conclusion, replacing missing roof shingles is an essential maintenance task for homeowners to ensure the protection and longevity of their roofs. By following these steps, homeowners can effectively replace missing shingles on their own without the need for professional help. It is important to address missing shingles promptly to prevent further damage, leaks, and potential mold growth.
Regular inspection and maintenance of the roof is crucial to identify and replace any missing shingles. By being proactive in these efforts, homeowners can save themselves from costly repairs down the line. Additionally, consulting with a roofing professional may provide further guidance and expertise in replacing missing shingles, especially in complex roof designs or areas that are difficult to access.
Remember, safety should be a top priority when performing any roof repair. Ensure you have the necessary tools and equipment, exercise caution when working on a roof, and consider getting professional assistance if you are unsure about your abilities. By following these recommendations and taking appropriate action, homeowners can maintain a well-functioning roof and protect their homes from potential damage.

Emergency Services Manager
Andrew Foster, a seasoned roofing professional, specializes in storm damage repairs and emergency services. His swift response and effective solutions help clients safeguard their properties during challenging times.