A leaky roof can be a homeowner’s worst nightmare. The sight of missing shingles can evoke feelings of panic and stress, envisioning the damage that water could potentially wreak on your home. But fear not! Restoring missing shingles is not as daunting a task as it may seem. With a little bit of knowledge and the right tools, you can mend those gaps in your roof and protect your home from the elements. In this article, we will guide you through the step-by-step process of repairing missing shingles, so you can gain the confidence to tackle this project with ease and efficiency. Keep reading to uncover the secrets to a snug and secure roof that will endure for years to come.
Locating the Missing Shingles: A Step-by-Step Guide
When it comes to repairing missing shingles on your roof, the first step is to locate the exact area where the shingles are missing. This can be done by thoroughly inspecting your roof from the ground or by climbing up a ladder for a closer look. Look for any noticeable gaps or areas where the shingles are visibly missing.
Once you have identified the missing shingles, it’s important to take note of the surrounding shingles to assess the extent of the damage. Check if any of the surrounding shingles are loose, damaged, or showing signs of wear and tear. It’s crucial to address any underlying issues to prevent future problems.
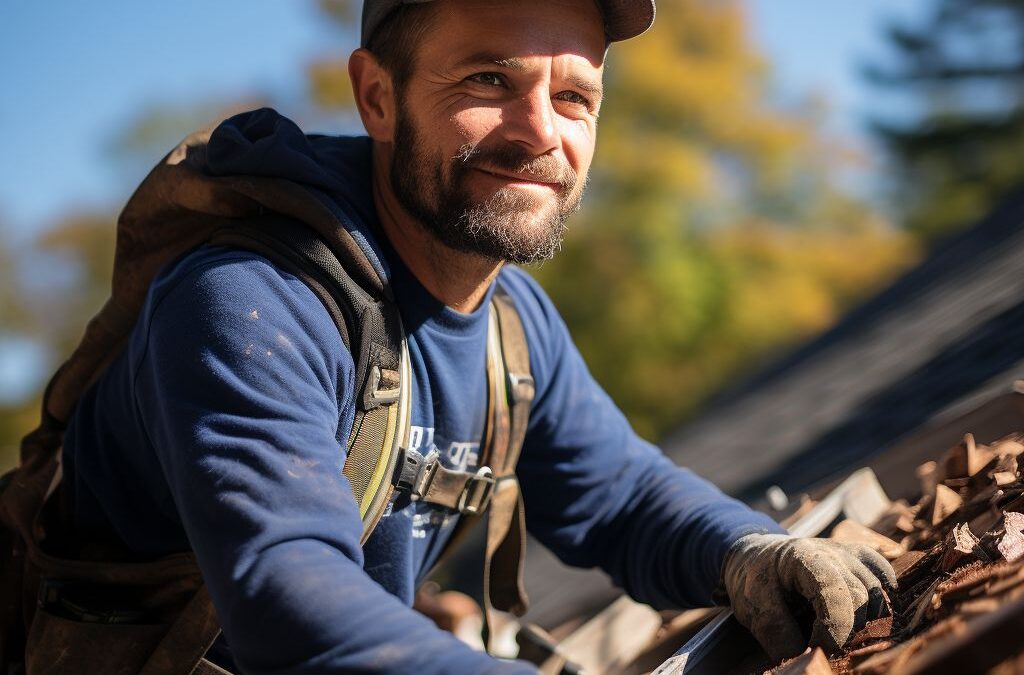
To safely access the missing shingles, it’s recommended to use a sturdy ladder and take necessary precautions. If the area is too high or inaccessible, it may be best to contact a professional roofer for assistance. Remember, safety should always be the top priority when working on your roof.
After locating the missing shingles and ensuring a safe working environment, it’s time to gather the necessary tools for the repair. These may include a pry bar, roofing nails, a hammer, a utility knife, and replacement shingles. Having these tools on hand will help streamline the repair process and ensure that you have everything you need to complete the job successfully.
By following this step-by-step guide and taking the necessary precautions, you can confidently tackle the task of repairing missing shingles on your roof. It’s crucial to address any issues promptly to prevent further damage to your roof and protect the overall integrity of your home. Remember, if you’re unsure or uncomfortable with performing the repair yourself, it’s always best to seek professional help from a qualified roofing contractor.
Tools You’ll Need for Shingle Repair
For repairing missing shingles on your roof, you’ll need a few essential tools to ensure a successful repair. These tools will help you remove and replace the damaged shingles effectively, allowing you to restore the integrity of your roof. Here are the key tools you’ll need:
1. **Safety Gear**: Before you start any roof repair, it’s essential to prioritize safety. Ensure you have a sturdy ladder, work gloves, and non-slip footwear to protect yourself from potential falls or accidents.
2. **Roofing Hammer**: A roofing hammer, also known as a roofing hatchet, is a specialized tool designed for shingle repairs. It features a flat striking surface and a notched edge, allowing you to remove and install shingles with ease.
3. **Pry Bar or Shingle Remover**: To remove the damaged shingles, you’ll need a pry bar or a shingle remover tool. This tool helps you lift the surrounding shingles without causing additional damage, making it easier to access and replace the missing shingles.
4. **Utility Knife**: A utility knife with a sharp blade is indispensable for cutting and trimming shingles. It enables you to make precise cuts, ensuring the replacement shingles fit seamlessly into the existing roof.
5. **Roofing Nails**: To secure the new shingles properly, you’ll need galvanized roofing nails. These nails are designed to withstand the elements, preventing rust and providing long-lasting durability.
6. **Roofing Adhesive or Caulk**: In some cases, you may need roofing adhesive or caulk to reinforce the bond between the new shingles and the surrounding ones. This will help prevent future issues, such as leaks or wind damage.
Having these tools readily available will make the shingle repair process more efficient and effective. Remember to always follow proper safety procedures and consult a professional if you’re unsure about any step of the repair process. By using the right tools and techniques, you can successfully repair missing shingles and protect your roof from further damage.
Assessing the Extent of Damage to Surrounding Shingles
When repairing missing shingles on your roof, it is crucial to evaluate the overall condition of the surrounding shingles. This step is important because it allows you to determine the extent of the damage and identify any additional shingles that may need replacement. By identifying and addressing all potential issues, you can ensure the longevity and effectiveness of your shingle repair.
To assess the extent of damage to surrounding shingles, start by carefully examining each adjacent shingle. Look for signs of wear, cracking, or curling, as these are indicators of potential damage. Pay close attention to the seams and edges of the shingles, where they are most susceptible to damage from wind and weather exposure.
Additionally, check the integrity of the roof’s underlayment beneath the damaged shingles. The underlayment acts as a secondary layer of protection and can be a good indicator of potential water damage. Look for any signs of moisture, such as discoloration or dampness, as these could signal a leak or an underlying problem that needs to be addressed.
Creating a checklist or taking photos of the damaged shingles can help you keep track of the areas that require repair. This will be helpful when sourcing the correct replacement materials and ensuring that all damaged shingles are properly addressed.
Evaluating the Severity of the Damage
Once you have identified the damaged shingles and potential underlying issues, it’s time to evaluate the severity of the damage. While some shingles may only show minor signs of wear or damage, others may require immediate replacement due to significant deterioration.
Use a ladder or safely climb onto your roof to get a closer look at the damaged shingles. Check for any loose or missing pieces, and assess whether the shingles are still providing adequate protection against the elements. If multiple shingles are missing or severely damaged, it may be necessary to engage a professional roofing contractor, as extensive repairs may be required.
Remember, addressing damaged shingles promptly is crucial to prevent further issues, such as water damage or the spread of deterioration to surrounding areas. By methodically assessing the extent of damage to the surrounding shingles, you can plan your repair process accordingly and ensure a thorough and effective repair job.
Replacing Damaged Shingles with the Correct Materials
When it comes to repairing missing shingles on your roof, it is crucial to use the correct materials to ensure a proper and long-lasting fix. Using the wrong materials can lead to potential leaks, damage, and an overall ineffective repair. In this section, we will guide you through the process of , ensuring your roof stays strong and reliable.
First and foremost, before purchasing replacement shingles, it is important to determine the type and style of your existing shingles. This will help you find a suitable match and ensure a cohesive look once the repair is complete. The best way to determine the exact type of shingles you have is to refer to the original installation paperwork or consult with a professional roofer.
Once you have identified the specific shingle type, it’s time to head to your local home improvement store or roofing supplier to purchase the necessary materials. Bring a sample of your existing shingle, if possible, to help with color and texture matching. It is recommended to buy slightly more shingles than what you actually need to have replacements readily available in case of future damage.
During the replacement process, it is essential to remove the damaged shingle carefully. Start by loosening any adhesive or roofing tar using a heat gun or hair dryer, making sure not to damage surrounding shingles. Once loosened, carefully lift the damaged shingle up and remove any remaining nails or fasteners. Use caution not to damage the surrounding shingles in the process.
Next, position the new shingle in place, ensuring it aligns with the adjacent shingles on all sides. Use roofing nails or roofing adhesive to secure the shingle in place, following the manufacturer’s instructions for the specific type of shingle you are using. It is important to use the appropriate number of nails and place them in the designated areas to ensure a secure attachment.
Pro Tip: To prevent the new shingle from lifting or curling, use a dab of roofing adhesive on the underside of the overlapping edges.
Repeat these steps for each damaged shingle, taking care to install them correctly and securely. Once all the replacements are complete, double-check that the new shingles are firmly in place and blend seamlessly with the surrounding undamaged shingles.
By , you can ensure the integrity and longevity of your roof. Proper installation is key to preventing leaks, maintaining insulation, and protecting your home from the elements. If you are unsure about any step of the process or encounter major damage, it is always recommended to consult with a professional roofer for assistance.
Proper Techniques for Securing Shingles to Prevent Future Issues
When repairing missing shingles on your roof, it is essential to not only replace the damaged shingles but also ensure they are secured properly to prevent future issues. Failure to secure shingles correctly can result in additional damage, leaks, and even the loss of more shingles in the future. Follow these time-tested techniques to ensure a long-lasting and secure roof.
To begin, carefully remove any debris or old nails from the area where the new shingles will be placed. This ensures a clean and flat surface for the replacement shingles. It is crucial to use the correct materials when securing shingles. Galvanized nails or roofing screws are recommended to withstand the elements and provide maximum durability.
Before installing the new shingle, apply a small amount of roofing cement to the backside. This helps create a watertight seal and prevents any potential leaks. Place the shingle in the correct position, aligning it with the existing shingles and making sure the edges are properly aligned.
To ensure a secure fit, use the appropriate technique for securing the shingle. Using a hammer or roofing nail gun, drive the nails just below the surface of the shingle. Be careful not to hit the shingle too hard, as it can cause damage. It is best to position the nails in the designated nail strip area of the shingle to ensure optimal strength.
Additionally, consider using roofing sealant or cement to further secure the shingle and prevent any potential leaks. Apply a thin line of sealant along the edges and over the nailheads. This provides an extra layer of protection against moisture and helps keep the shingles in place.
Regularly inspecting your roof for any signs of damage or loose shingles is essential in preventing future issues. Having maintenance checks at least once a year and after severe weather events allows you to address any concerns promptly. Timely repairs and replacements prevent further damage to the roof structure and minimize the risk of water leaks or further shingle loss.
By following these proper techniques for securing shingles, you can ensure a long-lasting and dependable roof. Taking the time to securely install replacement shingles will save you from potential issues down the road and provide peace of mind knowing your roof is protected.
Maintaining and Inspecting Your Roof for Longevity
Regular maintenance and inspections are essential for ensuring the longevity and durability of your roof. By taking the time to care for your roof, you can prevent future issues and potentially save yourself from costly repairs down the line. Here are a few key tips for maintaining and inspecting your roof:
1. Schedule Regular Inspections: It’s important to have your roof inspected at least once a year by a professional to identify any potential issues and address them before they escalate. Additionally, you should inspect your roof after any severe weather conditions, such as storms or heavy winds, to catch any damage early on.
2. Clear Debris and Clean Gutters: Keep your roof clear of debris, such as leaves, branches, and dirt, as they can hold moisture and cause damage over time. Additionally, regularly clean your gutters to ensure proper drainage and prevent water backups that can lead to roof leaks.
3. Check for Signs of Damage: During your inspections, look for signs of damage, such as cracked or curling shingles, loose or missing flashing, and sagging areas. These can indicate that repairs or replacements are needed.
4. Trim Surrounding Trees:
Trees that are in close proximity to your roof can pose a risk of branches falling and damaging the shingles. Trim back any branches that hang over your roof to prevent potential damage during storms or high winds.
5. Monitor Attic Conditions: A well-ventilated attic is crucial for maintaining the integrity of your roof. Check the attic regularly for signs of moisture or leaks, as these can indicate that there is a problem with the roof. Proper insulation and ventilation will help prevent condensation and ice dams from forming, which can cause significant damage.
6. Address Issues Promptly: If you notice any issues during your inspection, it’s essential to address them promptly. Delaying repairs can lead to further damage and more extensive repairs in the future. Whether it’s a small repair or a complete shingle replacement, taking action quickly will help maintain the overall health of your roof.
By following these maintenance and inspection tips, you can extend the lifespan of your roof and ensure its structural integrity. Remember, prevention is key when it comes to roof maintenance, so regular attention and care are critical for avoiding costly repairs and preserving the beauty and functionality of your home.
People Also Ask
How do I know if I have missing shingles on my roof?
You can visually inspect your roof for any signs of missing or damaged shingles. Look for sections with exposed or bare roof surface, curled or cracked shingles, or any noticeable gaps where shingles should be.
Can I repair missing shingles on my own?
Yes, if you feel comfortable working on your roof, repairing missing shingles can be a DIY project. Ensure you have the necessary tools, replacement shingles, and follow proper safety precautions. If you’re unsure, it’s best to consult a professional roofer.
What should I do with the damaged or missing shingles?
It’s important to properly dispose of damaged or missing shingles. Ensure they are safely collected and put in a proper waste disposal container or taken to a local recycling center that accepts asphalt shingles. Following environmentally-friendly methods is recommended.
Can I replace just one missing shingle?
If only one shingle is missing, it’s possible to replace just that shingle. However, it’s important to consider the age and overall condition of your roof. If multiple shingles are damaged or missing, it may be better to address those together to ensure a more uniform and effective repair.
Should I hire a professional for missing shingle repairs?
If you’re not comfortable working on your roof or if the repair involves multiple missing shingles or complex damage, it is recommended to hire a professional roofer. They have the knowledge, skills, and experience to properly assess and repair the roof, ensuring long-term durability and safety.
Concluding Remarks
In conclusion, repairing missing shingles on a roof can be a straightforward task if approached with caution and the right materials. By following the steps outlined above, homeowners can successfully replace missing shingles and prevent further damage to their roofs.
It is essential to prioritize safety and use appropriate protective equipment when working on the roof. Additionally, regular roof inspections can help identify missing or damaged shingles early on, minimizing the risk of more significant problems in the future.
Overall, with a little knowledge and the right tools, repairing missing shingles can be a manageable DIY project for homeowners. However, for those who are uncomfortable or unable to perform this task themselves, it is always recommended to seek professional help from a reputable roofing contractor to ensure the job is done correctly.
Remember, a well-maintained roof plays a vital role in protecting your home from the elements, so don’t delay in addressing any missing shingles promptly. Start by assessing the extent of the damage, gather the necessary materials, and take the necessary steps to repair and replace the missing shingles. By taking action now, you can maintain and extend the life of your roof while safeguarding your home and loved ones.

Alexander Johnson is a seasoned roofing professional with over 25 years in the industry and CEO at Fresno Roof Repair. His expertise blends traditional craftsmanship with cutting-edge technology, focusing on resilient roofing solutions tailored to Fresno’s diverse climate. As a leader at Fresno Roof Repair, Alexander emphasizes open communication, teamwork, and continual education, ensuring every client receives exceptional service. Beyond his role, Alexander is deeply committed to the Fresno community, supporting local initiatives. His dedication, technical proficiency, and customer-centric approach make him an invaluable asset to Fresno Roof Repair, embodying the company’s commitment to excellence and quality roofing solutions.