When it comes to durable and low-maintenance roofing options, a rubber roof comes out on top. With its exceptional ability to withstand the harshest weather conditions, this material offers unparalleled protection for residential and commercial structures alike. However, even the sturdiest rubber roofs are not immune to the occasional flat or damaged areas. Whether it’s due to wear and tear or severe weather, addressing a flat rubber roof repair promptly is crucial to prevent further damage and potentially costly repairs. In this article, we will guide you through the step-by-step process of repairing a flat rubber roof, ensuring that your investment remains intact and your property stays safe and leak-free. So, grab your tools and let’s get started on restoring your rubber roof’s resilience!
Identifying the Cause of Damage to a Flat Rubber Roof
It is essential to identify the cause of damage to a flat rubber roof before proceeding with any repairs. This will help address the root problem and prevent future damage from occurring. There are several common causes of damage to a flat rubber roof, including weather conditions, poor installation, and age-related wear and tear.
One of the primary culprits for damage to a flat rubber roof is harsh weather conditions. Over time, exposure to extreme temperatures, heavy rains, and constant sunlight can cause the rubber to deteriorate and develop cracks. Additionally, strong winds can lift and displace sections of the rubber, leaving the underlying layers vulnerable to leaks and further damage.
Poor installation is another potential cause of damage to a flat rubber roof. If the rubber membrane was not properly installed or if there were errors during the installation process, it can lead to issues such as loose or improperly sealed seams. These areas can become weak points that are prone to leakage and damage.
Age-related wear and tear is also a factor to consider when assessing the cause of damage to a flat rubber roof. As the rubber membrane ages, it naturally becomes less resistant to the elements. It may lose its elasticity, become brittle, and develop small punctures or tears. This gradual degradation can lead to water infiltration and structural damage if not addressed in a timely manner.
By thoroughly investigating the cause of damage to a flat rubber roof, you can determine the appropriate steps to take in the repair process. Whether it involves repairing small cracks and tears, resealing seams, or addressing issues with the installation, understanding the root cause will help ensure a successful repair and prevent future damage.
Weather Conditions
Extreme temperatures, heavy rain, and constant exposure to sunlight can damage the rubber membrane of a flat roof. It may deteriorate and develop cracks over time. Strong winds can also lift and displace sections of the rubber, leading to leaks and further damage.
Poor Installation
Improper installation or errors during the installation process can result in loose or improperly sealed seams on a flat rubber roof. These areas become weak points that are prone to leakage and further damage.
Age-Related Wear and Tear
As a flat rubber roof ages, it naturally becomes less resistant to the elements. It may lose its elasticity, become brittle, and develop small punctures or tears. This gradual degradation can lead to water infiltration and structural damage if not addressed promptly.
Assessing the Extent of Damage to Your Flat Rubber Roof
Determining the extent of damage to your flat rubber roof is crucial before you begin the repair process. This step allows you to understand the scope of work required and plan accordingly. By properly assessing the damage, you can ensure that the necessary repairs are carried out effectively, preventing further issues down the line.
To begin the assessment, start by inspecting the entire surface of your flat rubber roof. Look out for visible signs of damage such as cracks, punctures, blistering, or areas where the membrane has peeled away. Pay close attention to areas around seams, corners, and edges, as these are commonly prone to damage.
Use a ladder or other means to get a closer look at the roof. Take note of any soft spots or sagging areas, as these could indicate water damage or structural issues. It is important to assess the interior of your building as well, as water stains or mold growth on ceilings could be an indication of a leak originating from the roof.
During the assessment process, it may be helpful to create a checklist or take photographs of the damage to refer to later. This can serve as a visual reference and help you accurately communicate the extent of the damage to professional repair technicians if needed.
Remember, if the damage to your flat rubber roof is extensive or beyond your expertise, it is recommended to seek professional help. They can provide a more detailed assessment and recommend the best course of action for repairing your flat rubber roof.
Preparing the Roof Surface for Repairing a Flat Rubber Roof
Before you begin repairing a flat rubber roof, it is essential to properly prepare the surface to ensure the best results and longevity of the repair. Preparing the roof surface includes cleaning and removing debris, identifying any additional damage, and ensuring a smooth and stable surface for the repair materials to adhere to.
To start, thoroughly clean the roof surface by removing any dirt, leaves, or other debris that may have accumulated over time. This can be done using a broom, leaf blower, or a soft-bristle brush. Be sure to pay extra attention to areas around drains and seams where debris can often accumulate.
Once the surface is clean, carefully inspect the roof for any additional damage. Look for cuts, tears, or any signs of loose or damaged rubber membrane. This step is crucial as it allows you to address all damage collectively during the repair process. Make a note of any areas that require additional attention or materials.
Next, ensure that the roof surface is dry and free from moisture. Any moisture trapped beneath the repair materials can lead to future problems, such as mold or deterioration. If the roof is not completely dry, consider using a squeegee or mop to remove any standing water. Allow the roof surface sufficient time to dry completely before proceeding with repairs.
Lastly, it is important to ensure that the roof surface is flat and smooth. Any unevenness or bumps can affect the effectiveness of the repair and compromise the overall integrity of the roof. If necessary, use a scraper or sandpaper to smooth out any rough areas or high spots. Take the time to pay attention to the details, as these small steps can greatly contribute to the overall success of the repair.
By properly preparing the roof surface, you are laying the foundation for a successful rubber roof repair. Remember to clean the surface, identify additional damage, ensure a dry environment, and create a flat and smooth surface. Taking these steps will significantly increase the longevity and durability of your repair, saving you time and money in the long run.
Choosing the Right Materials and Tools for Flat Rubber Roof Repair
is crucial in ensuring a successful and long-lasting fix. With the right equipment and products, you can effectively mend any damage and restore the integrity of your rubber roof. Here are some factors to consider when selecting materials and tools for flat rubber roof repair.
One of the most important materials to have on hand is a reliable rubber roof repair kit. These kits usually include a patching material specifically designed for rubber roofs, as well as adhesive or primer. It’s essential to choose a repair kit that is compatible with your specific type of rubber roof, as different materials may require different adhesive or patching solutions. Additionally, ensure that the repair kit comes with detailed instructions or a step-by-step guide to assist you in the repair process.
In addition to the repair kit, you will also need a few essential tools. A utility knife with a sharp blade is crucial for cutting and shaping the patching material to fit the damaged area of your rubber roof. A roller or brush can be used to apply adhesive or primer and ensure proper adhesion between the patch and the roof surface. It’s important to use a roller or brush that is recommended by the manufacturer of the adhesive or primer you are using to guarantee optimal results. Finally, a ladder or scaffolding may be necessary for accessing the damaged area safely.
When choosing materials and tools for flat rubber roof repair, it’s advisable to consult with a professional or a specialist at your local hardware store. They can provide guidance on the best products for your specific roof type and the extent of damage you need to address. Additionally, consider the climate and weather conditions in your area, as some materials may perform better than others in extreme temperatures or regions prone to heavy rainfall or intense sunshine.
By carefully selecting the right materials and tools for flat rubber roof repair, you can significantly increase the chances of a successful and long-lasting fix. Taking the time to choose quality products and following manufacturer instructions will help ensure the durability and effectiveness of your repair job. Remember, it’s always better to invest in the right materials and tools upfront to avoid further damage and costly repairs down the line.
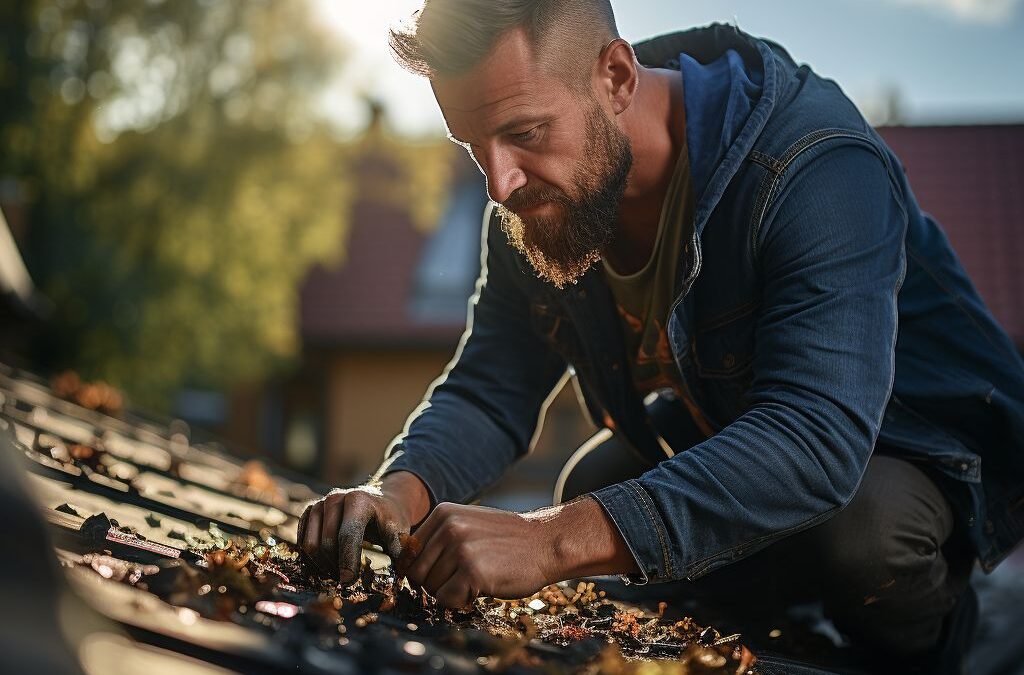
Step-by-Step Guide to Repairing a Flat Rubber Roof
Repairing a flat rubber roof can be a daunting task, but with the right knowledge and tools, it can be a manageable project. This step-by-step guide will walk you through the process of repairing your flat rubber roof, ensuring that you can tackle the task with confidence.
First, start by cleaning the damaged area of your rubber roof. Remove any debris or loose materials, using a broom or a gentle pressure wash if necessary. It’s important to have a clean and smooth surface to work with when repairing the roof.
Once the area is clean, assess the extent of the damage. Look for any cracks, punctures, or areas where the rubber has lifted or separated from the roof. This will help you determine the best course of action for repairing the roof.
Next, gather the necessary materials and tools for the repair. This may include rubber roofing adhesive, a utility knife, a heat gun, a roller, and patching material. It’s important to use materials that are specifically designed for flat rubber roofs to ensure a proper and long-lasting repair.
After you have prepared the materials, it’s time to begin the repair process. Start by applying the rubber roofing adhesive to the damaged area, ensuring that you cover the entire surface for a secure bond. If there are any lifted edges, use a heat gun to warm up the rubber and press it back into place before applying the adhesive.
Once the adhesive is applied, carefully place the patching material over the damaged area, ensuring that it covers the entire surface. Use a roller to firmly press down on the patch, ensuring a strong and seamless bond. Allow the adhesive to dry according to the manufacturer’s instructions.
After the patch is dry, inspect the area to ensure a proper repair. Look for any remaining gaps or loose edges, and apply additional adhesive as needed. It’s important to make sure the repair is secure and watertight to prevent further damage to your flat rubber roof.
In conclusion, repairing a flat rubber roof requires proper preparation, materials, and step-by-step execution. By following this guide, you can successfully repair your roof and prevent any further damage. Remember to inspects and maintain your flat rubber roof regularly to prolong its lifespan.
Maintaining and Preventing Further Damage to Your Flat Rubber Roof
Proper maintenance is essential for ensuring the longevity and functionality of your flat rubber roof. By taking proactive measures to prevent further damage, you can extend the lifespan of your roof and avoid costly repairs. Here are some tips to help you maintain your flat rubber roof and prevent future issues.
Regular inspections are crucial in identifying any potential issues before they escalate into major problems. Inspect your roof at least twice a year and after any severe weather events. Look for signs of damage such as cracks, tears, or bubbling in the rubber membrane. Check the roof edges, flashing, and joints for any loose or damaged areas. If you notice any issues, it’s important to address them promptly to prevent further damage.
Cleaning your flat rubber roof is another essential aspect of maintenance. Remove any debris that has accumulated, such as leaves, branches, or dirt. These debris can hold moisture and cause the rubber membrane to deteriorate over time. Use a broom or leaf blower to sweep away the debris gently. Avoid using harsh chemicals or abrasive cleaning tools, as they can damage the rubber surface.
Proper drainage is crucial for preventing water buildup and potential damage to your flat rubber roof. Make sure that the gutters and downspouts are clear of debris and functioning properly. Regularly inspect the roof’s drainage system, ensuring that water is flowing freely away from the roof. If you notice any blockages or issues, address them promptly to prevent water from pooling on the roof surface.
Additionally, consider applying a rubber roof coating to provide an extra layer of protection. Roof coatings help to seal any small cracks or leaks and extend the lifespan of your flat rubber roof. Choose a high-quality coating specifically formulated for rubber roofs and follow the manufacturer’s instructions for application.
By following these maintenance tips and taking a proactive approach, you can prevent further damage and ensure the longevity of your flat rubber roof. Regular inspections, proper cleaning, maintaining drainage, and considering a roof coating are all important steps in protecting your investment and avoiding costly repairs down the line. Remember, when in doubt, it’s always best to consult with a professional roofing contractor to address any concerns or issues with your flat rubber roof.
People Also Ask
1. Can a rubber roof be repaired?
Yes, a flat rubber roof can be repaired. Small tears or punctures can be patched using a rubber repair kit, while larger damages may require professional help to ensure proper and lasting repairs.
2. How do you find a leak in a rubber roof?
To locate a leak in a rubber roof, you can start by inspecting the roof’s surface for any visible damages or punctures. You can also use a water hose to simulate rain and systematically assess different areas to identify the source of the leak.
3. Can I repair a rubber roof myself?
While minor repairs can be done by homeowners, it’s recommended to hire a professional for major repairs. Rubber roofs require specific techniques and materials to ensure a successful and long-lasting repair, which can be more effectively handled by professionals.
4. How much does it cost to repair a rubber roof?
The cost of repairing a rubber roof depends on the extent of the damage and the complexity of the repair. Minor repairs can cost anywhere from $200 to $500, while major repairs or roof replacement can range from $1,000 to $3,000 or more.
5. How long does a rubber roof repair last?
The longevity of a rubber roof repair depends on various factors, including the quality of the repair, the age and condition of the roof, and proper maintenance. A professionally repaired rubber roof can typically last for several years, but it’s advisable to regularly inspect and maintain the roof to prolong its lifespan.
In Conclusion
In conclusion, repairing a flat rubber roof is a relatively straightforward process that can be done by following a few key steps. Begin by cleaning the roof thoroughly to ensure proper adhesion of the repair materials. Next, locate the source of the leak and mark it for repair. Apply a patching compound or rubber adhesive to seal the damaged area, making sure to press it firmly into place. Finally, allow the repair to cure and inspect it for any further leaks or issues.
Remember to exercise caution and properly prepare the area before attempting any repairs. It is also important to regularly inspect and maintain your rubber roof to prevent future damage and prolong its lifespan. If you are unsure about the repair process or are dealing with a larger issue, it may be wise to consult a professional roofer for assistance.
By following these steps and taking necessary precautions, you can effectively repair your flat rubber roof and ensure its durability for years to come. Take the time to address any issues promptly, as neglecting roof repairs can lead to more significant damage and costly repairs down the line. Protect your investment and maintain the integrity of your rubber roof with proper maintenance and timely repairs.

Roof Replacement Supervisor
Daniel Mitchell’s expertise lies in comprehensive roof replacements, utilizing top-quality materials to ensure durability and longevity. His meticulous approach and commitment to excellence make him a trusted professional.