When it comes to maintaining the integrity of your roof, there are few issues as concerning as exposed nail heads. Not only can these unsightly metal protrusions lead to water damage and compromising your roof’s protective barrier, but if left unaddressed, they can escalate into more costly repairs down the line. Thankfully, fixing exposed nail heads is a relatively straightforward process that can be handled with a few basic tools and some expert knowledge. In this article, we’ll guide you through the steps to repair exposed nail heads on your roof, ensuring your home stays secure and protected from the elements. So, grab your tools and let’s get started on giving your roof the care it deserves.
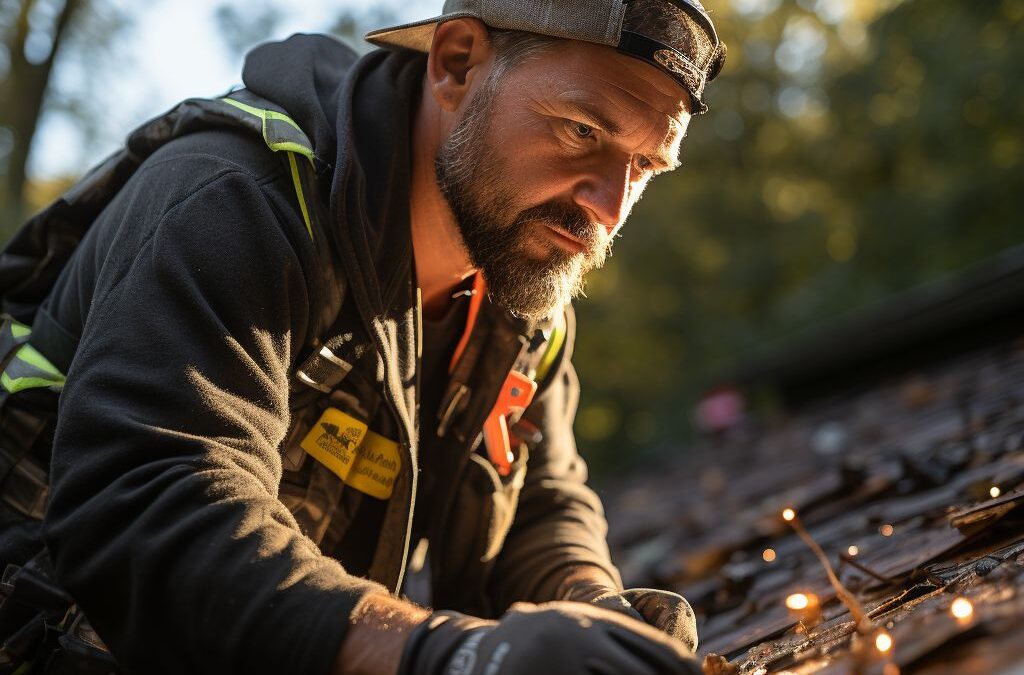
Identifying exposed nail heads on the roof
Exposed nail heads on a roof can be a cause for concern as they can lead to water leakage and further damage if not addressed promptly. It is essential to identify these nail heads on your roof to ensure the integrity of your roofing system.
One of the first signs of exposed nail heads is the presence of rust stains or discoloration on your roof. The exposed metal can rust over time, leaving behind unsightly marks that are easy to spot. Additionally, if you notice any loose or broken shingles in a specific area, there is a high chance that the nail heads holding them in place have become exposed.
To identify exposed nail heads more accurately, it is recommended to perform a visual inspection of your roof. Use caution and safety measures when conducting this inspection. Binoculars can be a helpful tool if your roof is difficult to access. Look for any nails or metal protrusions that are visible on the surface of the roof. Pay closer attention to areas where shingles may have been displaced or damaged, such as around chimneys, vents, or skylights.
If you are unsure whether a certain spot is an exposed nail head or not, lightly tap on it with a small mallet or a similar tool. If it makes a hollow sound or feels loose, it is likely an exposed nail head that needs repair. Remember, always prioritize safety when inspecting your roof, and if you’re uncomfortable doing it yourself, it’s best to hire a professional to assess the situation.
Now that you know how to identify exposed nail heads on your roof, let’s move on to the tools and materials you will need to repair them.
Tools and materials needed for repairing exposed nail heads
When it comes to repairing exposed nail heads on your roof, having the right tools and materials is essential to ensure a successful repair. These items will help you effectively address the issue and prevent further damage to your roof. Here are some of the tools and materials you will need for repairing exposed nail heads:
– Hammer: A sturdy hammer with a claw is necessary for removing and resetting the nails securely. Choose a hammer that is comfortable to grip and has good leverage.
– Pry bar: A pry bar will come in handy for gently prying up any loose shingles or tiles around the exposed nail head. This will allow you to access the nail without causing additional damage.
- Roofing nails: You will need replacement roofing nails to secure the loosened nail or to replace any damaged ones. Ensure that the nails are appropriate for your roof’s material and gauge their length correctly to penetrate the roofing material fully.
– Roofing cement: Roofing cement, also known as roof sealant, is essential for sealing the repaired nail heads. It provides an additional layer of protection against water infiltration and helps secure the nails in place.
– Caulk gun: A caulk gun is necessary for applying the roofing cement evenly and with precision. It helps control the flow of the sealant, ensuring a neat and effective application.
– Roofing adhesive: In some cases, you may need roofing adhesive to secure loose shingles or tiles. Check the manufacturer’s instructions and select an adhesive that is suitable for your roofing material.
– Safety equipment: When working on your roof, it is crucial to prioritize safety. Make sure to have a sturdy ladder, safety harness, nonslip shoes, and proper protective gear, including gloves and goggles.
Remember, each roof repair job may have specific requirements depending on the roofing material used, so it is important to consult a professional or refer to the manufacturer’s guidelines for any additional tools or materials necessary for your specific situation. By gathering these tools and materials beforehand, you’ll be fully prepared to tackle the task of repairing exposed nail heads on your roof effectively.
Step-by-step guide for repairing exposed nail heads on the roof
Repairing exposed nail heads on the roof is a crucial step in maintaining a sturdy and waterproof roof. If left unattended, these exposed nail heads can lead to leaks and significant damage to your home. Here is a step-by-step guide to help you repair these nail heads and prevent any further issues.
First, gather the necessary tools and materials for the repair. You will need a hammer, roofing nails, roofing cement, a nail punch, a putty knife, a ladder, and safety gear such as gloves and goggles. It’s essential to have everything on hand before starting the repair process.
Once you have your tools ready, begin by inspecting the roof for any exposed nail heads. These nail heads can often be found along the edges of shingles or in areas where shingles have become loose or damaged. Carefully mark each nail head that needs attention.
Next, use the nail punch and hammer to drive any loose nails further into the roof surface. This will prevent them from causing further damage and create a flat surface for the repair. Be careful not to damage the surrounding shingles while doing this.
After securing the loose nails, apply a small amount of roofing cement to each exposed nail head. This will help seal and protect the area. Use a putty knife to spread the roofing cement evenly over the nail head, ensuring it covers the entire area and adheres to the surrounding shingles.
Once the roofing cement has been applied, gently press down on the shingles around the repaired nail head to ensure a secure bond. This will help prevent any future movement or loosening.
Finally, inspect the rest of the roof for any additional exposed nail heads and repeat the repair process as necessary. It’s important to address all the nail heads to ensure the roof remains in good condition.
Remember to prioritize safety throughout the repair process. Use a sturdy ladder and secure it properly to avoid any accidents. Wear gloves to protect your hands and goggles to shield your eyes from any debris.
By following this step-by-guide, you can effectively repair exposed nail heads on your roof and prevent further damage. Regularly inspecting your roof for any signs of wear or damage and addressing them promptly will help maintain the integrity of your roof and prolong its lifespan.
Ensuring proper safety measures while repairing exposed nail heads
When it comes to repairing exposed nail heads on a roof, safety should always be the number one priority. Working on a roof can be dangerous, especially if proper precautions are not taken. Before attempting any repairs, it is important to take the necessary steps to ensure a safe work environment.
First and foremost, it is crucial to wear the appropriate safety gear. This includes a hard hat to protect your head from falling debris, safety glasses to shield your eyes from any flying objects, and sturdy work boots with slip-resistant soles to prevent accidents on slippery surfaces. Additionally, wearing gloves will not only protect your hands from sharp objects but also provide better grip while working.
Another important safety measure is using a sturdy ladder or scaffolding when accessing the roof. It is critical to properly set up and secure the ladder or scaffolding before climbing up. Always ensure a stable base and consider having someone spot you while accessing the roof for added safety.
Furthermore, it is essential to be mindful of the weather conditions. Avoid working on the roof during rainy or windy days, as they can increase the risk of accidents. Wet surfaces can be slippery, making it easy to lose balance, and strong winds can destabilize ladders or scaffolding.
Once you are on the roof, take extra precautions to avoid tripping hazards. Clear any debris or obstacles from your work area and use caution when moving around. It is advisable to use a safety harness or fall arrest system if working near the roof’s edge or in steep areas.
Lastly, always be aware of your surroundings and exercise caution when using tools. Ensure that tools and materials are properly secured to prevent them from falling and potentially causing damage or injury.
By following these safety measures, you can ensure a safer work environment while repairing exposed nail heads on your roof. Remember, taking the time to prioritize safety will not only protect you but also allow for a more efficient and successful repair process.
Preventing further damage by sealing and securing the repaired nail heads
To ensure the longevity and durability of your roof, it is crucial to take preventive measures after repairing exposed nail heads. Sealing and securing the repaired nail heads not only prevents future damage but also helps maintain the overall integrity of your roof. Here are a few steps you can follow to effectively seal and secure the repaired nail heads:
1. Choose the right sealant:
Selecting the appropriate sealant is essential for achieving a long-lasting and watertight seal. Look for a sealant specifically designed for roofing applications and ensure it is compatible with the type of roofing material you have. Common sealant options include roofing cement, silicone-based sealant, or polyurethane sealant.
2. Apply the sealant:
Thoroughly clean the area around the repaired nail heads, removing any debris or loose materials. Use a brush to sweep away dirt or dust. Next, apply the chosen sealant directly onto the repair area, ensuring complete coverage over the nail heads. Use a putty knife or a caulking gun for precise and controlled application. Make sure to fill any gaps or cracks around the nail heads to prevent water penetration.
3. Secure with roofing nails:
To reinforce the seal and provide additional security, consider using roofing nails to further secure the repaired nail heads. Carefully insert roofing nails into the surrounding roofing material, placing them just above the repaired nail heads. This will help hold the sealant in place and prevent any movement or shifting that could compromise the repair.
4. Inspect and maintain:
Regularly inspect your roof to check for any signs of damage or potential issues. Pay close attention to the areas where the nail heads were repaired and ensure the sealant remains intact. If you notice any cracks or deterioration, promptly reapply the sealant to maintain its effectiveness. Additionally, be proactive in maintaining your roof by addressing any loose or damaged shingles, as they can lead to future exposed nail heads.
By diligently sealing and securing the repaired nail heads, you can minimize the risk of further damage and maintain the structural integrity of your roof. Remember to regularly inspect and maintain your roof, as proactive maintenance will help prevent future issues and extend the lifespan of your roof.
Maintaining the integrity of the roof to avoid future exposed nail heads
To ensure the longevity and durability of your roof, it is crucial to take proactive measures to maintain its integrity and prevent the occurrence of exposed nail heads. By following these steps, you can minimize the chances of having to deal with this issue in the future.
First and foremost, regular roof inspections are essential. Make it a habit to inspect your roof at least once every six months, particularly after severe weather events or storms. Look out for signs of wear and tear, loose or damaged shingles, and any exposed nail heads. Catching these issues early on will allow you to address them promptly and prevent further damage.
Another crucial aspect of maintaining your roof’s integrity is proper ventilation. Inadequate ventilation can lead to heat buildup in the attic, which can accelerate the deterioration of roofing materials, including the nails. Ensure that your roof has sufficient attic ventilation to regulate temperature and prevent excessive moisture buildup. This will help keep the nails and other components of your roof in good condition.
Regularly cleaning your gutters and ensuring they are free from debris is also vital. Clogged gutters can lead to water overflow, which can seep into the roof’s structure and cause damage to the nails. This can weaken their hold and ultimately result in exposed nail heads. By keeping your gutters clean and ensuring they are functioning properly, you can minimize the risk of this occurring.
Additionally, it is crucial to address any issues with your roof promptly. Whether it’s a missing shingle or a damaged section, any gaps or openings can leave the nails exposed to the elements. Have a professional roofer inspect and fix any issues as soon as they arise to prevent further damage and potential nail exposure.
Lastly, investing in high-quality roofing materials and proper installation can go a long way in preventing exposed nail heads. Ensure that the nails used during installation are of the appropriate size and material for your roof type. This will ensure a secure fit and reduce the likelihood of them protruding over time.
By following these maintenance practices and taking proactive measures, you can maintain the integrity of your roof and minimize the chances of encountering exposed nail heads in the future. Regular inspections, proper ventilation, gutter maintenance, prompt repairs, and the use of high-quality materials will all contribute to a strong and durable roof that will withstand the test of time.
People Also Ask
1. How do you fix exposed nail heads on a roof?
To repair exposed nail heads on a roof, you will need to apply roofing cement or a sealant to cover the nail heads. Make sure to clean the area around the nail head, apply the cement or sealant, and then smooth it out with a putty knife or a similar tool.
2. Can I just hammer down the exposed nail heads on my roof?
Hammering down exposed nail heads on a roof may temporarily fix the issue, but it is not a recommended long-term solution. The nails will likely pop back up, and the problem could worsen over time. It is best to cover the exposed nail heads with roofing cement or a sealant.
3. What can happen if I don’t repair exposed nail heads on my roof?
If exposed nail heads on your roof are not repaired, it can lead to potential leaks and water damage. The nail heads can create small openings for water to enter, which can gradually deteriorate the roof structure and cause further issues such as mold or rot.
4. How long does it take to repair exposed nail heads on a roof?
The duration to repair exposed nail heads on a roof can vary depending on the extent of the damage. Generally, it can take anywhere from a few minutes to an hour or more to cover the nail heads with roofing cement or a sealant. However, it is essential to allow the repair to properly dry and cure before considering the job complete.
5. Can I repair exposed nail heads on a roof myself, or should I hire a professional?
Repairing exposed nail heads on a roof can be done as a DIY project if you feel comfortable working at heights and have the necessary tools and materials. However, if you are unsure or feel unsafe, it is best to hire a professional roofer who can ensure the repair is done correctly and safely.
To Wrap It Up
In conclusion, repairing exposed nail heads on a roof is a crucial task that should not be overlooked. By following the steps outlined earlier, one can effectively address this issue and prevent further damage to the roof. Regular inspection and maintenance are key to keeping a roof in optimal condition.
Remember, safety should be the top priority when working on a roof, so always take necessary precautions and use proper equipment. If the task seems challenging or you are unsure of how to proceed, it is advised to seek professional help.
Protecting your roof from damage not only ensures the safety and integrity of your home but also extends its lifespan. By promptly addressing exposed nail heads and other roofing issues, you can maintain a secure and weatherproof shelter for you and your loved ones.
Consider scheduling routine inspections and taking proactive measures to prevent future nail head exposure. By staying proactive and addressing any roofing concerns promptly, you can avoid significant repair costs and potential hazards down the line.

Certified Roofing Specialist
Jonathan Parker, a certified roofing specialist, is known for his problem-solving skills and proactive approach to roof maintenance. His goal is to provide sustainable roofing solutions that withstand Fresno’s diverse weather conditions.