Is your tar and gravel roof starting to show signs of wear and tear? Perhaps you’ve noticed some cracks or leaks that are causing concern. Don’t worry – repairing a tar and gravel roof is a task that you can handle with a little knowledge and guidance. In this article, we will walk you through the step-by-step process of repairing a tar and gravel roof, from identifying the problem areas to applying the appropriate repair solutions. By following our expert advice, you’ll be able to extend the lifespan of your roof and ensure the protection of your home for years to come. So, let’s dive in and discover how you can tackle the task of repairing your tar and gravel roof!
Identifying and Locating Damage on a Tar and Gravel Roof
When it comes to repairing a tar and gravel roof, it is crucial to first identify and locate any damage that needs to be addressed. This step is essential in order to assess the extent of the problem and determine the best course of action for repairs. Damage to a tar and gravel roof can occur due to a variety of factors such as age, weather conditions, improper installation, or lack of maintenance.
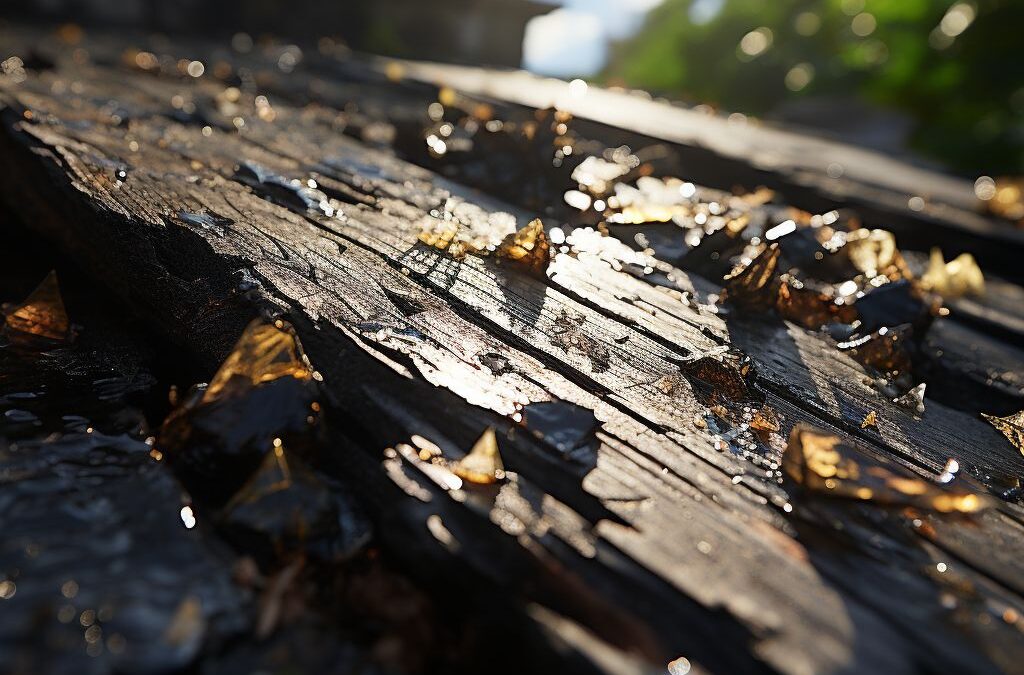
One of the most common signs of damage on a tar and gravel roof is the presence of leaks. These leaks can manifest as water stains on the interior ceilings or walls, damp insulation, or even water pooling on the roof surface. Another indication of damage is blistering or bubbling of the tar and gravel surface, which can be caused by trapped moisture or poor adhesive application during installation. Additionally, cracks or splits in the gravel surface or the underlying layers can also be indicative of damage. These cracks may be small and difficult to spot, but they can eventually lead to more significant issues if left unaddressed.
To locate the areas that require repair, a thorough inspection of the roof should be conducted. This can be done by visually inspecting the surface for any signs of damage or irregularities. It is important to pay close attention to areas where the gravel may have shifted or thinned out, as these areas are more prone to damage. Additionally, checking the seams and edges of the roof can help identify any potential weaknesses.
Using a ladder and exercising caution, homeowners or professionals can also physically inspect the roof by walking on it. This allows for a closer examination of the surface and the ability to feel for any soft or spongy areas that could indicate underlying damage. By inspecting the roof from various angles and paying attention to the condition of the tar and gravel, any problem areas can be identified for prompt repair.
In summary, accurately is an important first step in the repair process. Regular inspections and vigilance can help catch issues early on and prevent them from worsening. By addressing damage promptly, homeowners can ensure the longevity and functionality of their tar and gravel roofs.
Common Issues and Causes for Damage on Tar and Gravel Roofs
Tar and gravel roofs can provide durable protection for many years, but like any roofing system, they are susceptible to damage over time. Understanding the can help homeowners identify and address problems early on, preventing more extensive and costly repairs.
One of the most common issues with tar and gravel roofs is blistering. Blistering occurs when air or moisture becomes trapped between layers of the roofing material, causing bubbles or blisters to form on the surface. This can be caused by improper installation, inadequate ventilation, or excessive heat, and it can weaken the integrity of the roof.
Another common issue is cracking, which can occur due to the natural aging of the roof or exposure to extreme weather conditions. Cracks can allow water to seep into the underlying layers, leading to leaks and further damage. Additionally, the gravel that covers the roof can erode over time, leaving the tar layer exposed and vulnerable to damage from UV rays and other environmental factors.
Ponding water is another concern for tar and gravel roofs. The heavy weight of standing water can put significant stress on the roof structure, leading to sagging or even collapse. Ponding water can also cause the roofing material to deteriorate more quickly, increasing the risk of leaks and other issues.
Other causes of damage on tar and gravel roofs include improper maintenance, foot traffic, and damage from falling debris such as tree branches or hail. It is important for homeowners to regularly inspect their roofs for signs of damage and address any issues promptly.
Preventing Damage on Tar and Gravel Roofs
To prevent damage on tar and gravel roofs, homeowners should consider taking the following steps:
- Regular inspection and maintenance: Schedule regular inspections of your tar and gravel roof to identify and address any potential issues before they worsen. This can include removing debris, repairing any cracks or blisters, and ensuring proper drainage.
- Proper installation: Ensure that your tar and gravel roof is installed by a professional with experience in this type of roofing system. Proper installation is crucial for preventing issues such as blistering and cracking.
- Ventilation and insulation: Adequate ventilation and insulation can help regulate the temperature and moisture levels in your attic, reducing the risk of blistering and other roof damage.
- Trimming trees and branches: Regularly trim any overhanging trees or branches near your roof to prevent damage from falling debris during storms or strong winds.
- Limit foot traffic: Avoid unnecessary foot traffic on your tar and gravel roof, as excessive weight and movement can cause damage to the surface and the underlying layers.
- Regular cleaning: Remove any debris, leaves, or other materials that accumulate on your roof to prevent drainage issues and reduce the risk of water damage.
By understanding the , homeowners can take proactive steps to prevent and address these problems. Regular maintenance, proper installation, and timely repairs can help extend the lifespan of a tar and gravel roof and ensure it provides reliable protection for years to come.
Preparing the Surface for Repair on a Tar and Gravel Roof
Before performing any repairs on a tar and gravel roof, it is important to properly prepare the surface to ensure a successful and long-lasting fix. This involves cleaning the roof, removing any loose and damaged materials, and addressing any underlying issues that may have contributed to the damage.
To begin, the roof should be thoroughly cleaned to remove any debris, dirt, or loose gravel. This can be done using a broom or leaf blower to sweep away loose materials, followed by a gentle power washing to remove stubborn dirt and grime. It is important to note that excessive pressure can damage the roof, so a low-pressure setting should be used when power washing.
Once the roof is clean, it is important to inspect the surface for any signs of damage or deterioration. This could include cracks, blisters, or areas where the gravel has worn away. These damaged areas should be carefully marked so that they can be properly repaired.
Next, any loose or damaged materials should be removed from the surface of the roof. This may involve scraping away loose gravel or removing any sections of blistered or cracked tar. A putty knife or flat-tipped shovel can be useful for this task. It is important to be gentle when removing materials to avoid causing further damage to the roof.
After removing the damaged materials, the surface should be thoroughly dried before proceeding with repairs. This can be done by allowing the roof to air dry for a day or two, or by using a heat gun or torch to carefully dry the surface. It is crucial to ensure that the roof is completely dry to prevent any moisture from getting trapped underneath the new repairs.
Once the surface is clean and dry, it is ready for repair. This may involve patching cracks or holes with roofing cement or applying a new layer of tar and gravel. It is important to follow the manufacturer’s instructions when applying any repair materials and to ensure that the repairs are properly sealed to prevent further damage.
By properly preparing the surface before repairing a tar and gravel roof, you can increase the longevity and effectiveness of your repairs. Taking the time to clean, inspect, and remove any damaged materials will help to create a solid foundation for the repairs, ensuring a durable and reliable rooftop for years to come.
Step-by-Step Guide to Repairing a Tar and Gravel Roof
Repairing a tar and gravel roof may seem like a daunting task, but with the right tools and techniques, it can be done effectively. Here is a step-by-step guide to help you through the process:
1. Clean the surface: Start by cleaning the damaged area of the roof using a broom or a pressure washer. Remove any debris, dirt, or loose gravel that may interfere with the repair. Clean the surrounding area as well to ensure proper adhesion of the repair material.
2. Locate the damage: Carefully inspect the roof to identify the extent and location of the damage. Common issues on tar and gravel roofs include cracks, blisters, and gravel loss. Use a roofing knife or scraper to gently lift the layers and examine the underlying material for any signs of damage.
3. Patch the cracks: If you find any cracks on the surface, fill them with a suitable roofing cement or mastic using a trowel. Ensure that the crack is completely filled and evenly smoothed out. For larger cracks or areas of damage, consider adding a layer of reinforcement fabric before applying the patching material.
4. Fix blisters and bubbles: To repair blisters or bubbles on the roof, cut an ‘X’ shape on the blister using a razor knife. Lift the edges of the blister and apply roofing cement underneath. Press down firmly to flatten the blister and ensure proper adhesion. Smooth out any excess cement with a trowel.
5. Replace gravel: If your roof has lost significant amounts of gravel, it’s important to replace it to protect the underlying layers. Spread a layer of roofing cement on the repaired area and sprinkle gravel over it while it’s still wet. Use a broom to evenly distribute the gravel and press it down gently to secure it in place.
6. Consider additional reinforcement: For more extensive damage, you may need to reinforce the repaired area using a nylon or fiberglass membrane. Apply a layer of roofing cement, lay the membrane over it, and then add another layer of cement on top. Make sure to taper the edges to create a smooth transition with the surrounding roof surface.
Remember, before attempting any roof repairs, it’s crucial to prioritize safety. Consider using a secure ladder, wearing appropriate protective gear, and seeking professional help if you’re unsure about any step. By following this step-by-step guide, you’ll be able to repair your tar and gravel roof and extend its lifespan.
Choosing the Right Materials and Tools for Tar and Gravel Roof Repair
When it comes to repairing a tar and gravel roof, selecting the appropriate materials and tools is crucial for a successful outcome. The right materials and tools will ensure that the repair is durable, long-lasting, and capable of withstanding various weather conditions.
First and foremost, it is important to choose a high-quality roofing membrane that is specifically designed for tar and gravel roofs. Look for a membrane that is resistant to UV rays, punctures, and cracking. Opting for a thicker membrane can provide added protection and durability. Additionally, make sure to select a membrane that is compatible with the type of tar and gravel roof you have.
In addition to the roofing membrane, you will also need to gather the necessary tools for the repair. Some essential tools for tar and gravel roof repair include a roofing shovel or pry bar for removing damaged gravel and tar, a utility knife for cutting the roofing membrane, a wire brush for cleaning the surface, a trowel or putty knife for applying the new tar and gravel, and a roofing brush for spreading the gravel evenly. It is important to have the right tools on hand to ensure a smooth and efficient repair process.
Materials Checklist:
- High-quality roofing membrane
- Roofing shovel or pry bar
- Utility knife
- Wire brush
- Trowel or putty knife
- Roofing brush
Remember, it is crucial to select roofing materials and tools that match the unique characteristics of your tar and gravel roof. Consult with a roofing professional or refer to the manufacturer’s guidelines to ensure you are using the correct materials for your specific repair needs. With the right materials and tools, you can confidently proceed with repairing your tar and gravel roof, knowing that you are setting it up for long-term success.
Proper Maintenance Techniques to Extend the Lifespan of a Tar and Gravel Roof
To ensure the longevity and durability of your tar and gravel roof, regular maintenance is essential. By implementing proper maintenance techniques, you can extend the lifespan of your roof and minimize the need for costly repairs. Here are some tips to help you maintain your tar and gravel roof:
Inspect Regularly: Regular inspections are crucial to identify any potential issues or signs of damage early on. Take the time to inspect your roof at least twice a year, preferably in spring and fall, when the weather is favorable. Look for signs of cracks, blisters, bubbles, or loose gravel. Additionally, check for areas with ponding water, as this can lead to roof deterioration over time.
Clean debris: Clearing away debris from your tar and gravel roof is important to prevent water pooling and clogging of drains. Remove any leaves, branches, or other debris that have accumulated on the surface. This will help maintain proper water flow and prevent damage to the roof membrane.
Address repairs promptly: If you notice any signs of damage during your inspections, it’s crucial to address them promptly. Small cracks or blisters can worsen over time, leading to more extensive damage and potential leaks. Consult a professional roofer to assess the extent of the damage and perform the necessary repairs.
Perform regular maintenance tasks: In addition to inspections and repairs, performing regular maintenance tasks will help extend the lifespan of your tar and gravel roof. These tasks can include re-sealing seams and joints, reapplying gravel to bare spots, and reinforcing weak areas. It is recommended to hire a professional roofing contractor for these maintenance tasks to ensure they are done correctly.
Apply a protective coating: Consider applying a protective coating to your tar and gravel roof to provide an extra layer of protection against UV rays, weather elements, and general wear and tear. A reflective coating can also help reduce cooling costs by reflecting the sunlight and preventing excessive heat absorption.
By following these proper maintenance techniques, you can enhance the durability and lifespan of your tar and gravel roof. Regular inspections, cleaning debris, prompt repairs, regular maintenance tasks, and protective coatings are all essential steps in ensuring your roof remains in optimal condition for years to come. Remember, it’s always best to consult a professional roofer for any major repairs or maintenance tasks for optimal results.
People Also Ask
1. How do you know if your tar and gravel roof needs repair?
Signs that your tar and gravel roof may need repair include leaks, ponding water, cracks in the surface, blistering, or loose gravel. Conduct regular inspections and look for these signs to determine if repair is necessary.
2. Can I repair a tar and gravel roof myself?
While it is possible to make minor repairs on your own, it is often recommended to hire a professional roofing contractor for tar and gravel roof repairs. They have the necessary experience, tools, and materials to ensure a proper and lasting repair.
3. How much does it cost to repair a tar and gravel roof?
The cost of repairing a tar and gravel roof can vary depending on the extent of the damage, the size of the roof, the materials needed, and the location. On average, homeowners can expect to spend between $500 and $2,000 for repairs.
4. What is the best method to repair a tar and gravel roof?
The best method to repair a tar and gravel roof usually involves cleaning the damaged area, applying a roofing patch or cement, reinforcing it with a mesh or fabric, and then adding a new layer of tar and gravel to match the existing roof. Consult with a roofing professional to determine the best approach for your specific situation.
5. How long do tar and gravel roof repairs typically last?
The longevity of tar and gravel roof repairs depends on various factors such as the quality of materials used, the expertise of the contractor, and the level of ongoing maintenance. With proper repairs and regular maintenance, these repairs can last for several years.
Wrapping Up
To conclude, repairing a tar and gravel roof can be a straightforward process if approached correctly. By following the steps outlined above, including identifying the damaged areas, cleaning the roof surface, applying the tar adhesive, and sealing the repaired spots, homeowners can effectively extend the lifespan of their tar and gravel roofs.
However, it is important to remember that repairing a tar and gravel roof requires safety precautions and experience with roofing materials. If you don’t feel comfortable or confident in your abilities, it is always recommended to hire a professional roofing contractor who can efficiently and effectively repair your tar and gravel roof.
Remember, regular maintenance and inspections can go a long way in preventing major damage to your roof. By routinely inspecting for signs of wear and tear, such as cracks or blistering, and fixing them promptly, you can prolong the life of your tar and gravel roof and avoid costly repairs down the line.
In conclusion, maintaining a tar and gravel roof involves periodic inspections, timely repairs, and professional expertise when necessary. By taking these steps, homeowners can ensure that their tar and gravel roofs remain in optimal condition, providing years of protection for their homes.
Ensure the longevity of your tar and gravel roof by addressing any damages promptly and consulting professional help as needed.

Innovation and Technology Director
William Simmons is dedicated to bridging the gap between innovative roofing technologies and traditional craftsmanship. His focus on blending modern techniques with reliable practices ensures optimal results for our clients.