If you own a building with a flat roof, then you’re likely aware of the importance of keeping it well-maintained. After all, a sturdy roof is the first line of defense against weather elements that can wreak havoc on your property. Unfortunately, even well-built flat roofs can develop leaks or wear down over time, leading to potential damage and costly repairs. That’s where understanding how to repair flat roof membranes becomes essential. In this article, we’ll explore the ins and outs of flat roof membrane repairs, from identifying the issue to executing the necessary fixes. Whether you’re a DIY enthusiast or simply looking to educate yourself, read on to discover valuable tips and techniques to ensure optimal functionality and longevity for your flat roof.
Identifying the Source of Damage to the Flat Roof Membrane
Damage to a flat roof membrane can occur for various reasons, ranging from natural wear and tear to extreme weather conditions. Before attempting to repair a damaged flat roof membrane, it is crucial to identify the source of the damage accurately. This will help ensure that the repair process is targeted and effective.
One common source of damage to a flat roof membrane is ponding water. This occurs when water becomes trapped on the surface of the roof, causing the membrane to deteriorate over time. To identify ponding water as the source of damage, look for areas where water consistently collects or appears discolored.
Another possible source of damage is mechanical stress. This can be caused by heavy foot traffic, falling debris, or equipment being placed on the roof. Look for signs of punctures, tears, or dents in the membrane as indicators of mechanical stress.
Leaks are another common issue with flat roof membranes. The source of a leak may not always be located directly above the visible damage on the membrane. It is essential to thoroughly inspect the entire roof to determine the exact location of the leak.
To identify leaks, look for discoloration or water stains on the ceiling or walls inside the building. Additionally, inspect the roof for any cracks, gaps, or areas where the membrane has become loose or damaged.
By carefully examining the roof and identifying the source of the damage, you can proceed with the appropriate repair method. Whether it involves repairing a puncture, reinforcing weak areas, or addressing ponding water, understanding the cause of the damage will help you make informed decisions and ensure a successful repair.
Choosing the Right Repair Method for the Flat Roof Membrane
When it comes to repairing a flat roof membrane, it is crucial to choose the right repair method to ensure its longevity and effectiveness. Each type of damage may require a different approach and technique for repair. Understanding the various repair methods available will help you determine the most suitable solution for your flat roof membrane.
One common repair method for flat roof membranes is the use of patching materials. These materials are designed to adhere to the damaged area, creating a watertight seal. Patching materials can be applied directly over small punctures or tears in the membrane, providing a quick and cost-effective solution. When using patching materials, it is essential to clean the damaged area thoroughly and ensure proper adhesion to achieve a successful repair.
Another repair method for flat roof membranes is the application of liquid waterproofing coatings. These coatings are typically applied as a liquid and dry to form a protective barrier over the damaged section. Liquid waterproofing coatings are best suited for larger areas of damage, such as cracks or extensive blistering. Before applying the coating, it is crucial to clean the damaged area and ensure it is free from debris and moisture to achieve optimal adhesion and effectiveness.
In some cases, particularly for more severe damage, a complete roof membrane replacement may be necessary. This involves removing the damaged membrane and installing a new one in its place. While this may be a more costly and time-consuming repair method, it ensures that all underlying issues are addressed, providing long-term protection and durability for your flat roof.
Remember, the right repair method will depend on the extent and type of damage to your flat roof membrane. Consulting with a professional roofing contractor is advised to assess the damage accurately and recommend the most appropriate repair method for your specific situation. Taking the time to choose the right repair method will not only save you time and money but also ensure the longevity and effectiveness of your flat roof membrane.
Preparing the Surface for Membrane Repair
Before proceeding with repairing a flat roof membrane, it is crucial to properly prepare the surface to ensure the best possible results. This step is essential for creating a strong and secure bond between the existing membrane and the repair material. By following the right preparation techniques, you can significantly enhance the longevity of the repaired flat roof membrane.
Firstly, start by thoroughly cleaning the damaged area of the membrane. Remove any loose debris, dirt, or other foreign objects using a broom or a brush. You may also consider using a pressure washer to remove stubborn dirt or moss, but be cautious not to apply excessive pressure that can damage the membrane.
Once the surface is clean, it is important to ensure proper adhesion of the repair material. Use a suitable solvent or cleaner to wipe down the damaged area and remove any residues or contaminants. This will allow the repair material to adhere more effectively and create a strong bond with the existing membrane.
After cleaning, check for any signs of moisture or water infiltration. Ensure that the damaged area is completely dry before proceeding with repairs. Moisture can prevent proper adhesion and compromise the repair’s effectiveness. Use a moisture meter to accurately assess the moisture levels of the membrane.
Additionally, it is important to inspect the surrounding membrane for any signs of damage or deterioration. Cracks, blistering, or other defects nearby may also require repair to prevent future issues. Addressing these problems during the preparation stage will help maintain the structural integrity of the entire flat roof membrane.
By taking the time to properly prepare the surface before applying the repair material, you can boost the chances of a successful repair. The key is to create a clean, dry, and sound substrate on which the repair material can adhere securely. This will ensure that the repaired flat roof membrane can withstand the elements and provide long-lasting protection for your property.
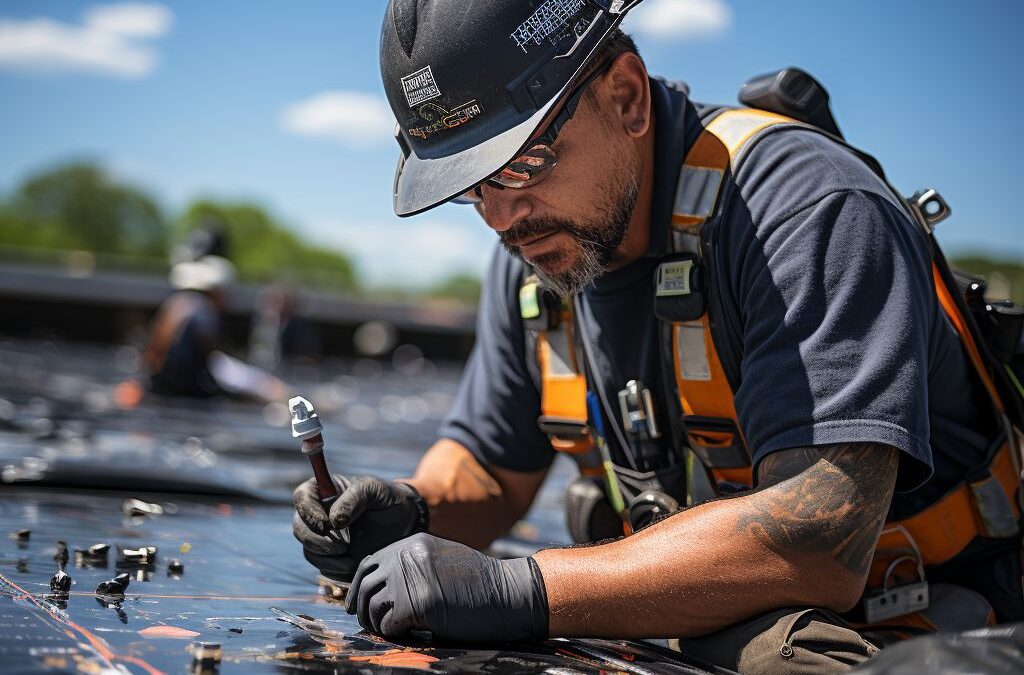
Step-by-Step Guide to Repairing a Flat Roof Membrane
Repairing a flat roof membrane can be a daunting task, but with the right tools and knowledge, it can be done effectively. Follow this step-by-step guide to ensure a successful repair and extend the lifespan of your flat roof membrane.
Step 1: Clean the Roof Surface
Before beginning the repair process, it is crucial to clean the roof surface thoroughly. Use a broom or brush to remove any debris, dirt, or loose materials from the damaged area. Ensure that the surface is dry and free of any contaminants that may hinder the repair process.
Step 2: Cut Out the Damaged Section
Using a utility knife or roofing scissors, carefully cut out the damaged section of the flat roof membrane. Make sure to remove any loose edges or protruding pieces to create a clean and smooth surface for the repair.
Step 3: Prepare the Replacement Material
Measure the dimensions of the removed section and cut a replacement patch from the same type of roofing membrane. Ensure that the patch is slightly larger than the damaged area to provide adequate coverage.
Step 4: Apply Adhesive
Apply a layer of roof membrane adhesive to both the repaired area and the replacement patch. Ensure that the adhesive is evenly spread and covers the entire surface.
Step 5: Install the Replacement Patch
Carefully place the replacement patch onto the adhesive, aligning it with the edges of the repaired area. Press firmly to ensure proper adhesion and remove any air bubbles using a roller or hand pressure.
Step 6: Seal the Edges
To provide extra protection and prevent water infiltration, apply a layer of roof membrane adhesive along the edges of the replacement patch. Smooth out the edges to create a seamless finish.
Step 7: Allow for Proper Curing
Allow the repaired area to cure according to the manufacturer’s instructions. This may involve a certain amount of time for the adhesive to dry and bond the patch securely to the roof surface.
By following these step-by-step instructions, you can effectively repair a flat roof membrane and extend its lifespan. Remember to prioritize safety, wear appropriate protective gear, and consult with professionals if you are unsure about any aspect of the repair process. With patience and attention to detail, your flat roof membrane will be restored to its optimal condition, providing long-lasting protection for your property.
Tips for Applying the Membrane Repair Material Properly
:
When it comes to repairing a flat roof membrane, applying the repair material properly is crucial to ensure a long-lasting and effective fix. Here are some tips to help you achieve the best results:
1. Clean and Prepare the Surface: Before applying the repair material, it’s essential to clean and prepare the surface of the flat roof membrane. Remove any debris, dirt, or loose material from the damaged area. Use a brush or broom to sweep away any loose particles and ensure the surface is clean and dry. This will help the repair material adhere properly and create a strong bond.
2. Follow the Manufacturer’s Instructions: Different types of membrane repair materials may have specific instructions for application. It’s important to carefully read and follow the manufacturer’s guidelines to ensure proper application. Pay attention to factors such as temperature requirements, application thickness, and curing time. Following these instructions will help you achieve the best results and ensure the repair material performs as intended.
3. Use Proper Tools and Techniques: Utilizing the right tools and techniques is essential for applying the repair material properly. Depending on the type of repair material, you may need a brush, roller, trowel, or specialized application equipment. Ensure that you use the recommended tools and techniques specified by the manufacturer. This will help you distribute the repair material evenly and ensure it covers the damaged area effectively.
4. Apply in Multiple Layers: Applying the repair material in multiple layers can help enhance its effectiveness and longevity. This technique helps create a stronger and more durable repair. Start by applying a thin layer of the repair material evenly over the damaged area. Allow it to dry before applying subsequent layers. For best results, follow the recommended layer thickness and drying time as specified by the manufacturer.
5. Pay Attention to Overlapping and Sealing: If you are using patching materials or sealants to repair the flat roof membrane, ensure proper overlapping and sealing. Overlapping the repair material beyond the damaged area will help prevent water penetration and ensure a watertight seal. Utilize the recommended sealing techniques, such as applying adhesive or heat to create a secure bond between the repair material and the existing membrane.
By following these tips, you can ensure that the membrane repair material is applied properly and increase the chances of a successful and long-lasting repair. Remember to always prioritize safety and consult a professional if you are unsure about any step of the repair process.
Ensuring Longevity of Repaired Flat Roof Membrane
After investing time and effort into repairing your flat roof membrane, it is crucial to take steps to ensure its longevity. By following a few simple maintenance practices, you can extend the lifespan of your repaired roof membrane and prevent potential future damage.
Regular Inspections: Schedule frequent inspections of your roof to identify any issues before they escalate. Check for signs of pooling water, cracks, or areas where the membrane may have become loose or damaged. Promptly addressing these problems can prevent water infiltration and further deterioration.
Maintain Cleanliness: Keeping your roof clean and free from debris is essential. Accumulated leaves, dirt, and other debris can trap moisture, leading to premature aging of the membrane. Regularly sweep or use a leaf blower to remove any debris, paying extra attention to areas where water may collect.
Proper Drainage: Ensure your roof has proper drainage systems in place to prevent water from pooling. Standing water can cause the membrane to deteriorate and compromise its integrity. Regularly check and clean gutters, downspouts, and drains to ensure they are clear of debris and functioning adequately.
Protective Coatings: Applying a protective coating to your repaired roof membrane can help prolong its lifespan. These coatings act as an extra layer of defense against UV rays, extreme weather conditions, and general wear and tear. Consult with a professional roofer to determine the most suitable coating for your specific roof membrane type.
Regular Maintenance: Implement a regular maintenance schedule to address any small repairs promptly. Fixing minor issues, such as small punctures or loose seams, can prevent them from developing into more significant problems that require extensive repairs. Regular inspections and maintenance will help keep your roof in optimum condition.
With these preventative measures, you can ensure the longevity of your repaired flat roof membrane. By taking a proactive approach to maintenance and implementing regular inspections, cleaning, and protective measures, you can protect your investment and enjoy a durable, leak-free roof for years to come. Remember, when in doubt, consult with a professional roofer for expert guidance and assistance.
People Also Ask
1. How do I locate a leak in my flat roof membrane?
To locate a leak in a flat roof membrane, inspect the roof for any visible signs of damage such as cracks, blisters, or punctures. You can also use a hose to simulate rain and observe for any water intrusion points.
2. Can I repair a flat roof membrane myself?
Yes, you can repair a flat roof membrane yourself if you have some basic DIY skills. However, it is recommended to consult with a roofing professional to ensure proper repair techniques and materials are used.
3. What are the common flat roof membrane repair methods?
Common repair methods for flat roof membranes include patching with adhesive or sealant, using roofing cement or coating, installing a new patch or membrane layer, or applying a liquid membrane system.
4. Can I repair a flat roof membrane without replacing it?
In some cases, a flat roof membrane can be repaired without replacing it. This depends on the extent of the damage and the overall condition of the membrane. A professional roof inspection can help determine if a repair is sufficient or if replacement is necessary.
5. How long does a flat roof membrane repair last?
The longevity of a flat roof membrane repair can vary depending on factors such as the quality of materials used, the expertise of the installer, and the maintenance performed thereafter. With proper repair and maintenance, a flat roof membrane repair can last several years.
Conclusion
In conclusion, repairing a flat roof membrane can be a straightforward process with the right knowledge and tools. The first step is to identify the areas of damage or leaks, which may require a thorough inspection. From there, it’s important to clean and dry the affected area before applying a suitable repair material, such as a liquid coating or patching compound.
It’s crucial to ensure that the repair material is compatible with the roof membrane and follows manufacturer guidelines. Regular maintenance and inspections can also help prevent future damage and extend the lifespan of the membrane. Remember to consult a professional if you are uncertain about any aspect of the repair process.
By following these steps and taking the necessary precautions, you can effectively repair a flat roof membrane and maintain the integrity of your roof. Protecting your investment in your property and avoiding potential water damage are important considerations for any homeowner or building owner. Take the time to assess and address any issues promptly to ensure the long-term functionality of your flat roof.

Innovation and Technology Director
William Simmons is dedicated to bridging the gap between innovative roofing technologies and traditional craftsmanship. His focus on blending modern techniques with reliable practices ensures optimal results for our clients.