Roll roofing is a fantastic option for shed owners looking to safeguard their outdoor structures against the elements. Easy to install and cost-effective, it provides reliable protection for years to come. Whether you’re a seasoned DIY enthusiast or a beginner with little experience, this step-by-step guide will walk you through the process of installing roll roofing on low-pitch roof?”>install roll roofing?”>roll roofing on low-pitch roof?”>install roll roofing?”>roll roofing on your shed. From gathering the necessary tools to preparing the surface and completing the final touches, we’ve got you covered. So grab your safety gear and let’s dive into the world of roll roofing installation!
Materials needed for installing roll roofing on a shed
Installing roll roofing on a shed requires a few essential materials to ensure a successful installation. These materials are specifically designed to provide durability and protection against the elements. Here are the key materials you will need:
1. Roll roofing: This is the main component that will cover the shed roof. Roll roofing is made of layers of asphalt and felt, providing a waterproof and weather-resistant barrier. It comes in rolls, typically measuring 36 inches wide and various lengths. Choose a roll roofing material that is suitable for your shed’s roof pitch and climate conditions.
2. Roofing adhesive: To secure the roll roofing to the shed’s surface, you will need roofing adhesive. This adhesive is typically made of asphalt and is applied using a roofing brush or roller. Ensure you choose a high-quality adhesive that is compatible with the type of roll roofing you are installing.
3. Underlayment: Underlayment is an additional layer of protection that is placed between the existing shed roof and the roll roofing. It acts as a moisture barrier and enhances the durability of the roofing system. Common underlayment materials include felt or synthetic membranes.
4. Roofing nails: These nails are used to secure the roll roofing and underlayment to the shed’s roof deck. Roofing nails are specifically designed to withstand harsh weather conditions and provide a tight grip. It is recommended to use galvanized roofing nails?”>roofing nails?”>roofing nails to prevent rusting and corrosion.
5. Roofing cement: Roofing cement is a thick, asphalt-based product used to seal and patch any gaps, seams, or joints in the roll roofing. Apply a generous amount of roofing cement using a trowel or putty knife to ensure a watertight seal.
6. Roofing nails and cement combinations: Another option to secure the roll roofing is using roofing nails and cement combinations. These specialized nails have an attached cement head that, when heated, melts and seals the roofing material. This method provides additional strength and durability to the installation.
Remember that the required quantity of materials will depend on the size of your shed roof and the specific installation instructions provided by the manufacturer. Having all the necessary materials on hand before starting the installation process will make the entire process smoother and more efficient.
Preparation steps before installing roll roofing on a shed
:
Before you dive into the process of installing roll roofing on your shed, it is crucial to adequately prepare the surface and gather all the necessary tools and materials. Taking the time to properly prepare will ensure a smooth and successful installation process.
First and foremost, you need to ensure that the shed roof is clean and free from any debris or loose particles. Start by sweeping or blowing off any dirt, leaves, or twigs that may have accumulated over time. Additionally, remove any existing roofing material, such as old shingles or felt, from the surface.
Once the roof is clean, carefully inspect it for any signs of damage or deterioration. Look out for loose or damaged boards, rotted areas, or any structural issues that may need to be addressed before proceeding with the installation. It is essential to have a sturdy and stable surface to ensure the longevity of your new roll roofing.
Next, you’ll need to measure the entire roof area to determine the amount of roll roofing material required. Measure the length and width of the roof, and remember to account for any overhangs or edges. It is always a good idea to purchase some extra material to have on hand for any potential misalignments or mistakes during installation.
After measuring, calculate the appropriate slope for your shed roof. The slope, also known as the pitch, determines how water will flow off the roof. This is important because it helps prevent water accumulation and potential leaks. A slope of at least 2 inches for every 12 inches of horizontal run is generally recommended.
Once you have gathered all the necessary measurements and assessed the condition of your shed roof, it is time to gather the materials needed for the installation process. This typically includes roll roofing material, roofing nails, a nail gun or hammer, roofing cement, a chalk line, a utility knife, and a roofing brush.
Properly preparing the surface and gathering all the required materials are crucial steps in ensuring a successful roll roofing installation on your shed. Skipping or overlooking these steps could result in an inefficient and ineffective installation, potentially leading to costly repairs in the future. Take the time to prepare adequately, and you’ll be on your way to a sturdy and durable roofing solution for your shed.
Step-by-step guide to installing roll roofing on a shed
Installing roll roofing on a shed is a relatively simple process that can be completed by most DIY enthusiasts. With the right materials and a little bit of patience, you can have a durable and weather-resistant roof for your shed in no time. Here is a step-by-step guide to help you through the installation process.
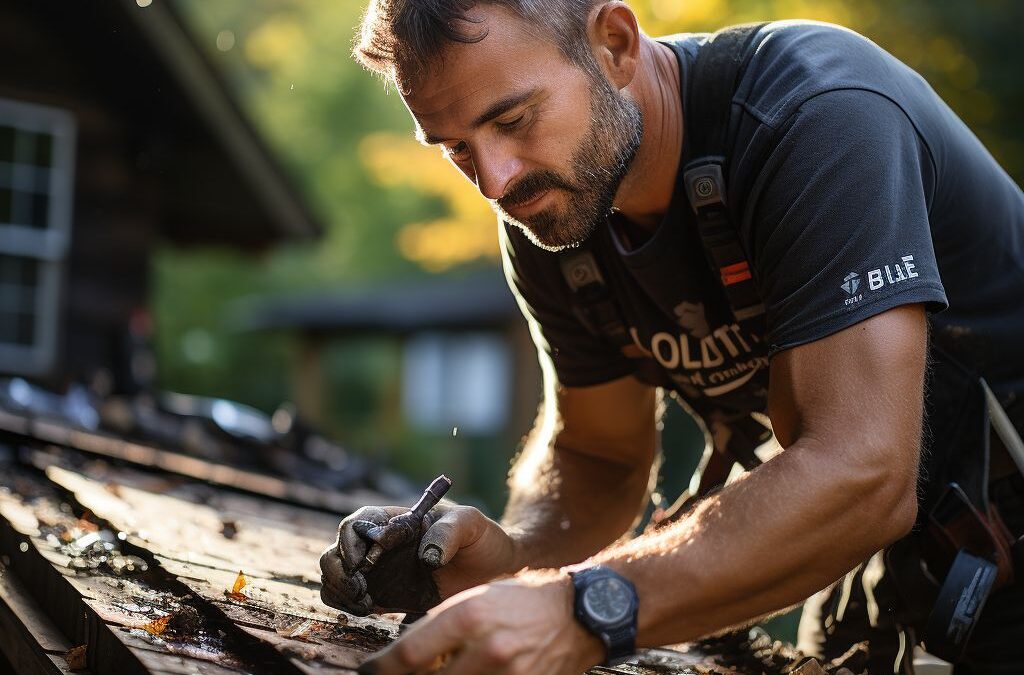
1. Clean and prepare the shed roof: Before you begin the installation, it is crucial to ensure that the surface of your shed roof is clean and free of any debris or loose shingles. Use a broom or a leaf blower to remove any dirt, leaves, or branches. Inspect the roof for any signs of damage and make any necessary repairs before moving forward.
2. Measure and cut the roll roofing: Carefully measure the dimensions of your shed roof and add a few extra inches to allow for overlapping. Mark the measurements on the roll roofing and use a utility knife or roofing shears to cut it accordingly. This will ensure a proper fit and minimize waste.
3. Apply adhesive and secure the first row: Start at one edge of the shed roof and apply roofing adhesive along the bottom edge. Place the first row of roll roofing over the adhesive and firmly press it down, smoothing out any wrinkles or bubbles as you go. Use a roller or a roofer’s membrane roller to ensure a tight seal.
4. Continue with additional rows: Apply adhesive to the top edge of the first row and overlap the second row of roll roofing by a few inches. Repeat this process, ensuring each row is securely adhered and overlaps the previous one. Trim any excess roofing material as needed.
5. Install the ridge cap: After completing the main section of the roof, it’s time to install the ridge cap. Cut a piece of roll roofing that is wide enough to cover the ridge line of the shed roof. Apply roofing adhesive to the underside of the ridge cap and press it firmly into place. Secure it further with roofing nails or screws, spaced evenly along the ridge.
6. Seal all edges and seams: Once the roll roofing is in place, inspect the edges and seams for any gaps or areas that need additional sealing. Use roofing cement or roofing adhesive to seal these areas, ensuring a watertight barrier that will protect your shed from leaks.
By following these step-by-step instructions, you can successfully install roll roofing on your shed and provide it with long-lasting protection against the elements. Remember to always prioritize safety and consult with a professional if you have any doubts or concerns throughout the process.
Tips and tricks for a successful roll roofing installation on a shed
To ensure a successful roll roofing installation on your shed, there are a few tips and tricks that can make the process smoother and help you achieve long-lasting results. Follow these guidelines to ensure a professional and durable finish for your shed’s roof.
First and foremost, it’s essential to prepare the surface properly before installing the roll roofing. This includes cleaning the shed roof thoroughly and making any necessary repairs. Remove any debris, dirt, or loose shingles, and ensure the surface is dry before proceeding. Additionally, it’s recommended to consider using a primer to improve the adhesion of the roll roofing material.
When it comes to actually installing the roll roofing, it’s essential to pay attention to the overlap and fastening technique. Ensure that each layer of roll roofing overlaps the previous one by a sufficient amount, typically about 3-4 inches. This overlap is crucial to prevent water from seeping through the seams and causing damage. Using roofing cement or adhesive to secure the overlaps will provide an extra layer of protection against leaks.
Proper fastening techniques are vital to the integrity of the roll roofing installation. Ensure that you use nails or staples designed specifically for roofing materials. These fasteners should be placed at regular intervals, typically every 6-12 inches, along the edges and overlaps of the roll roofing. Avoid overdriving the nails or staples, as this can damage the material and compromise its effectiveness.
It’s also important to consider the weather conditions when installing roll roofing on a shed. Ideally, choose a calm and dry day to work on the project. High winds or rain can make the installation process more challenging and potentially affect the quality of the finished roof. If the weather conditions are unfavorable, it’s best to postpone the installation to a more suitable time.
Remember that regular maintenance is essential for extending the lifespan of roll roofing on a shed. Conduct regular inspections and remove any debris or leaves that may accumulate on the roof. Additionally, check for any signs of damage, such as cracks or loose seams, and address them promptly to prevent further issues.
Following these tips and tricks will help you achieve a successful roll roofing installation on your shed. By paying attention to preparation, proper installation techniques, and regular maintenance, you can ensure a durable and long-lasting roof that will protect your shed for years to come.
Expert advice on maintaining and extending the lifespan of roll roofing on a shed
Proper maintenance and care are essential to ensure the longevity of your roll roofing on a shed. By following some expert advice, you can keep your roof in excellent condition and extend its lifespan. Here are a few tips to help you maintain and protect your roll roofing investment.
Regular Inspections: It is crucial to inspect your roll roofing periodically for any signs of damage, such as cracks, tears, or loose edges. Performing inspections at least twice a year, preferably in spring and fall, will allow you to identify and address potential issues before they become major problems.
Cleaning: Keep your roll roofing clean to prevent debris buildup, which can lead to moisture retention and accelerate deterioration. Regularly remove leaves, branches, and other debris from the roof’s surface using a soft-bristle broom or leaf blower. Avoid using sharp tools that can damage the roofing material.
Proper Ventilation: Adequate ventilation is essential to prevent heat and moisture buildup in the shed. Poor ventilation can cause the roofing material to warp, blister, or age prematurely. Ensure that your shed has proper vents or exhaust systems installed, allowing for proper airflow.
Sealing and Repairs: Address any small damages or leaks promptly to prevent them from expanding and causing more significant issues. Use an appropriate roofing sealant to patch up any cracks or tears, and replace damaged sections if necessary. Regularly check the sealing around vents, chimneys, and other roof penetrations to ensure they are intact.
Protective Coatings: Applying a protective coating can enhance the durability of your roll roofing. There are various options available, such as elastomeric coatings, which provide additional resistance against UV rays, weathering, and water damage. Consult with a professional to determine the best coating for your specific roll roofing type.
Gutter Maintenance: Keep your gutters clean and free from debris to prevent water backups and overflow. Clogged gutters can lead to water pooling on the roof, which can damage the roofing material over time. Regularly remove leaves, twigs, and other debris from your gutters to ensure proper water drainage.
By following these expert tips and incorporating them into your regular maintenance routine, you can significantly extend the lifespan of your roll roofing on a shed. Remember that proper care and attention are necessary to protect your investment and ensure the long-term integrity of your roofing system.
People Also Ask
1. Can roll roofing be installed on a shed?
Yes, roll roofing can be installed on a shed. It is a cost-effective and relatively easy-to-install option for shed roofs.
2. What tools are needed to install roll roofing on a shed?
You will need a few basic tools, such as a utility knife, a hammer, a paintbrush or roller, roofing nails, and a measuring tape, to install roll roofing on a shed.
3. What type of underlayment is required for roll roofing installation?
Typically, a layer of roofing felt or an underlayment specifically designed for roll roofing is required before installation. This provides added protection against moisture and improves the longevity of the roofing material.
4. How do I prepare the shed roof for roll roofing installation?
Before installing roll roofing, it is important to ensure the shed roof is clean and dry. Remove any debris or previous roofing materials, repair any damaged areas, and make sure the surface is smooth.
5. Can roll roofing be installed over an existing layer of roll roofing on a shed?
In some cases, it is possible to install roll roofing over an existing layer. However, it is essential to thoroughly assess the condition of the previous layer and ensure it is free from damage or moisture. Removal of the old material is recommended for better results and durability.
Closing Remarks
In conclusion, installing roll roofing on a shed is a relatively straightforward process that can provide long-lasting protection for your structure. By carefully preparing the surface, laying down the roofing material correctly, and ensuring proper adhesion, you can achieve a durable roof that will withstand the elements.
Remember to always consult the manufacturer’s instructions for the specific roll roofing product you are using. Take your time during the installation process to ensure accuracy and minimize any potential mistakes. Additionally, it is recommended to have a helping hand and to use proper safety equipment, such as gloves and eye protection.
By following these steps and taking necessary precautions, you can successfully install roll roofing on your shed and enjoy the benefits of a weather-resistant and aesthetically pleasing roof. So, go ahead and give your shed the protection it deserves!

Customer Relations Manager
Benjamin Turner is a customer-centric professional, placing emphasis on open communication and transparency throughout the roofing process. His dedication to client satisfaction ensures a smooth and collaborative experience.