Are you a proud shed owner looking to protect your investment from the elements? One crucial aspect of maintaining a sturdy and leak-free shed roof is the installation of a drip edge. A drip edge is a small but mighty component that helps channel water away from the shed’s edges, preventing costly water damage. Whether you’re a seasoned DIY-er or a newbie to roofing projects, this informative article will guide you step-by-step on how to install drip edge on your shed roof like a pro. So grab your tools and let’s get started on enhancing the longevity and durability of your shed roof!
Choosing the Right Drip Edge for Your Shed Roof
When it comes to installing drip edge on your shed roof, choosing the right type can make a significant difference in its effectiveness and longevity. Drip edge is a crucial component of any roof, as it helps protect the shed from water damage by directing water away from the edges and into the gutters or downspouts.
There are different types of drip edges available in the market, but it’s important to select one that suits the specific needs of your shed roof. One popular option is the L-shaped drip edge, which provides excellent protection against water infiltration. It is typically made of galvanized steel or aluminum, ensuring durability and resistance to rust or corrosion. Another option is the T-shaped drip edge, which is often used for low-slope roofs or roofs with no gutters. It helps to prevent water from getting under the roofing material and into the shed.
When choosing a drip edge for your shed roof, consider the material it is made of, the overall design of your shed, and the weather conditions in your area. If you live in a region that experiences heavy rainfall or strong winds, you may want to opt for a more robust drip edge that can withstand such conditions. Additionally, ensure that the size of the drip edge matches the dimensions of your shed roof for a proper fit.
By carefully selecting the right drip edge for your shed roof, you can ensure the optimal protection and longevity of your shed. Take time to research the different options available, consult with professionals if needed, and make an informed decision based on the unique requirements of your shed roof. Remember, investing in a high-quality drip edge will not only prevent water damage but also potentially save you from costly repairs in the future.
Understanding the Purpose and Benefits of Drip Edge on Shed Roofs
Drip edge is an important component in shed roof construction that often goes unnoticed. Its purpose is to protect the edges of the roof from water damage and to redirect water away from vulnerable areas. This can help prevent leaks, rot, and other moisture-related issues that can compromise the integrity of your shed’s roof. Understanding the purpose and benefits of drip edge will ensure that you make an informed decision when installing it on your shed roof.
One of the primary benefits of drip edge is its ability to direct water away from the edge of the roof. By extending slightly over the edge, the drip edge prevents water from seeping underneath the roofing materials and causing damage. This is especially important in areas prone to heavy rainfall or snow, where water runoff can be significant. Additionally, the drip edge acts as a barrier between the roof deck and fascia board, protecting the wooden components from water intrusion and potential rot.
Another benefit of installing drip edge on your shed roof is its ability to prolong the lifespan of your roofing system. By redirecting water away from the edge, this component helps to prevent water-related issues such as mold growth, wood rot, and structural damage. By investing in drip edge installation, you are essentially investing in the long-term stability and protection of your shed roof.
In summary, is crucial for any shed owner. This underrated component plays a crucial role in protecting the integrity of the roof by redirecting water away from vulnerable areas. By preventing water damage and promoting longevity, drip edge installation ensures that your shed roof remains durable and free from moisture-related issues for years to come.
Gathering the Tools and Materials Needed for Drip Edge Installation
:
Before you begin installing drip edge on your shed roof, it’s important to gather all the necessary tools and materials. Having everything ready will help ensure a smooth installation process and save you time and frustration. Here are the items you’ll need:
1. Drip Edge: Start by choosing the right drip edge for your shed roof. Consider the size and material options available, such as aluminum or galvanized steel, to find the best fit for your project.
2. Tape Measure: Accurate measurements are crucial for an effective drip edge installation. Use a tape measure to measure the length of your shed roof and determine the amount of drip edge needed.
3. Tin Snips: Tin snips are essential for cutting the drip edge to fit the dimensions of your shed roof. Make sure you have a pair of quality tin snips that can easily cut through the chosen material.
4. Safety Gloves: Protect your hands from sharp edges and potential injuries by wearing safety gloves throughout the installation process. Look for a pair that provides both dexterity and protection.
5. Safety Glasses: Your safety should always come first, so don’t forget to wear safety glasses to protect your eyes from any flying debris or sharp edges while working with the drip edge.
6. Roofing Nails: To secure the drip edge to your shed roof, you’ll need roofing nails. Choose nails that are long enough to penetrate through the drip edge and into the roof’s framing.
7. Hammer: A hammer will be needed to drive the roofing nails into place. Ensure you have a sturdy hammer that is comfortable to use and provides enough force to secure the drip edge.
8. Ladder: Depending on the size and height of your shed, you may need a ladder to access the roof safely. Select a ladder that is stable, sturdy, and appropriate for the height requirements.
9. Caulk or Sealant: To provide added protection against water intrusion, consider using caulk or sealant along the edges of the drip edge. This will create a watertight seal and enhance the longevity of your shed roof.
Having all of these tools and materials in place before you start the drip edge installation will make the process more efficient and ensure a successful outcome. Take the time to gather everything you need, and don’t hesitate to consult a professional for guidance if you’re unsure about any aspect of the installation.
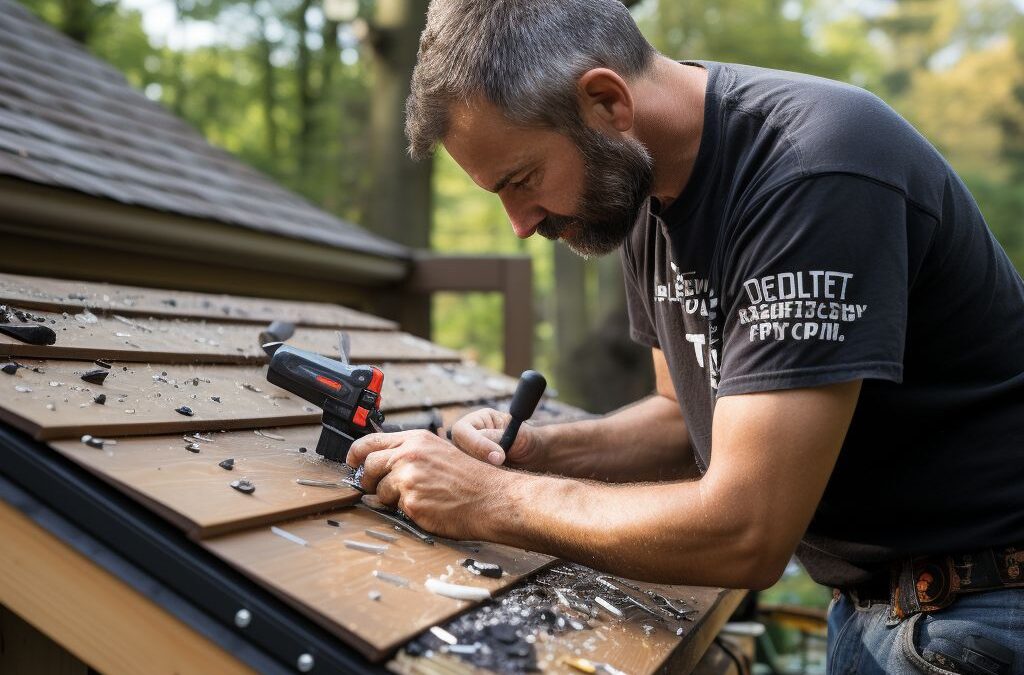
Step-by-Step Guide to Installing Drip Edge on Your Shed Roof
Installing drip edge on your shed roof is an essential step in ensuring its longevity and protection against water damage. Drip edge acts as a barrier between your shed’s roof and the edge, preventing water from seeping underneath the shingles and causing rot or leaks. This step-by-step guide will walk you through the process of installing drip edge on your shed roof, ensuring a secure and waterproof installation.
Step 1: Measure and cut the drip edge: Start by measuring the length of each side of your shed roof where the drip edge will be installed. Using these measurements, cut the drip edge to the appropriate length using tin snips or a metal cutting blade.
Step 2: Install the underlayment: Before installing the drip edge, it’s important to have a layer of underlayment in place. This helps to provide an extra layer of protection against water and helps to create a smooth surface for the drip edge to rest on. Secure the underlayment using roofing nails or staples.
Step 3: Position and secure the drip edge: Starting at one corner of the shed roof, position the drip edge along the edge of the roof, making sure that the extended flange faces outward. Nail the drip edge in place, ensuring that the nails are driven through the flange and into the roof deck or sheathing. Repeat this process for each side of the shed roof.
- Tip: When positioning the drip edge, make sure that it overhangs the edge of the roof by about 1 inch. This allows any water that runs off the roof to be directed away from the fascia and eaves.
Step 4: Joining the drip edge: If your shed roof has corners or valleys, you’ll need to join two pieces of drip edge together. Overlap the two pieces by a few inches and secure them using metal screws or roofing nails. Make sure there are no gaps between the two pieces, as this will prevent water from seeping through.
Step 5: Install the shingles: With the drip edge securely in place, you can now install the shingles on your shed roof. Start at the bottom edge, working your way up, and make sure to follow the manufacturer’s instructions for installation. The drip edge will help to guide the water runoff and protect the edges of the shingles.
Step 6: Inspect and maintain: Once you have completed the installation of the drip edge and shingles, take the time to inspect the entire roof for any gaps or loose nails. Replace any damaged or missing shingles and ensure that the drip edge is securely fastened.
By following these step-by-step instructions, you can install drip edge on your shed roof, providing an extra layer of protection against water damage. Taking the time to properly install and maintain your drip edge will help to extend the lifespan of your shed roof and ensure that it remains in great condition for years to come.
Common Mistakes to Avoid When Installing Drip Edge on a Shed Roof
When it comes to installing drip edge on your shed roof, there are a few common mistakes that you should avoid to ensure a successful installation. These mistakes can compromise the effectiveness of the drip edge and even lead to costly repairs down the line. To help you avoid these pitfalls, we’ve outlined some of the most important things to keep in mind during the installation process.
1. Incorrect Measurements: One of the most common mistakes when installing drip edge on a shed roof is inaccurate measurements. It is crucial to measure the length and angle of each section accurately to ensure a proper fit. Even a small miscalculation can result in gaps or overlapping, which could allow water to seep underneath the drip edge and cause damage to your shed.
2. Wrong Orientation: Another mistake that is often made is installing the drip edge upside down or in the wrong orientation. The drip edge should be positioned with the angled edge facing outward, overhanging the edge of the roof. This allows the water to flow away from the shed and prevents it from seeping into the roof or fascia.
3. Inadequate Fastening: Properly securing the drip edge is crucial for its effectiveness. Using insufficient or incorrect fasteners can lead to the detachment or loosening of the drip edge over time. Make sure to use roofing nails or screws that are appropriate for the type of material used for your shed roof. Additionally, ensure that the fasteners are spaced correctly according to the manufacturer’s guidelines to provide adequate support.
4. Neglecting Sealant: Failing to apply sealant properly is a common mistake that can compromise the waterproofing capabilities of the drip edge. Once the drip edge is installed, it is essential to apply a layer of roofing sealant along the top edge to create a watertight seal. This will prevent water from seeping underneath the drip edge and causing damage to the roof or shed structure.
By avoiding these common mistakes during the installation process, you can ensure that your drip edge functions effectively and prolongs the lifespan of your shed roof. Take the time to measure accurately, orient the drip edge correctly, use appropriate fasteners, and apply sealant diligently. Following these guidelines will help protect your shed from water damage and ultimately save you time and money in the long run.
Maintaining and Repairing Drip Edge on Your Shed Roof for Longevity
Proper maintenance and occasional repairs are crucial to ensure the longevity of your shed roof’s drip edge. By taking the necessary steps to keep it in good condition, you can effectively prevent water damage and maintain the structural integrity of your shed. Here are some helpful tips for maintaining and repairing the drip edge on your shed roof.
Regular Inspection: It is important to inspect your drip edge at least once a year, preferably during the spring or fall. Look for any signs of damage, such as cracks, rust, or loose nails. Additionally, check for gaps between the drip edge and the roofing materials. If you notice any issues, address them promptly to prevent further damage.
Cleaning: Over time, debris like leaves, twigs, and dirt may accumulate on the drip edge. Regular cleaning will ensure that water can flow freely and prevent clogs that can lead to water pooling or moisture infiltration. Use a broom or brush to remove the debris gently. Avoid using harsh chemicals or pressure washers, as they can cause damage to the drip edge.
Repairs: If you identify any cracks or loose nails, it is essential to promptly repair them. Start by removing any rust or old caulk, using a wire brush or sandpaper. Then, clean the area with a mild detergent and water solution. Apply a layer of primer onto the damaged areas and let it dry. Finally, use a quality silicone caulk or roofing cement to seal the cracks or secure loose nails.
Replacing: In some cases, the drip edge may be beyond repair or severely damaged. If this is the case, it is best to replace it entirely. When replacing the drip edge, ensure that you choose a product that matches the dimensions and style of the existing drip edge. Remove the old drip edge carefully and clean the area before installing the new one.
Tips for Longevity:
– Regularly clean your gutters to prevent debris from accumulating and causing clogs, which can affect the performance of the drip edge.
– Check for any damage after severe weather events, such as hailstorms or high winds, and promptly repair or replace any affected sections of the drip edge.
– Trim overhanging tree branches that could potentially cause damage to the drip edge or shed roof.
By following these maintenance and repair guidelines, you can ensure that your shed roof’s drip edge remains in optimal condition for years to come. Regular inspections, cleaning, and timely repairs will contribute to the longevity and effectiveness of your shed roof’s drip edge system, protecting your shed from potential water damage.
People Also Ask
What is drip edge and why is it important?
Drip edge is a metal flashing that is installed along the edges of a roof to prevent water from seeping under the roofing material. It is important because it helps protect the underlying structure of the shed, preventing water damage and rot.
What materials do I need to install drip edge?
To install drip edge on a shed roof, you will need the following materials: drip edge flashing, roofing nails, a hammer, tin snips (for cutting the drip edge), a tape measure, and a ladder or scaffolding (if needed).
How do I measure and cut drip edge for installation?
To measure and cut drip edge for installation, start by measuring the length of the shed’s roof edges. Use tin snips to cut the drip edge to the appropriate lengths, allowing for mitered corners where necessary.
What is the proper way to install drip edge on a shed roof?
Start by installing the drip edge along the eaves of the shed roof, overlapping it with the roofing felt or underlayment. Secure it in place with roofing nails every 8-12 inches. Then, install the drip edge along the rake edges, overlapping the eave drip edge and securing it with nails. Miter the corners for a clean and professional finish.
Can I install drip edge on an existing shed roof?
Yes, you can install drip edge on an existing shed roof. Start by removing any old or damaged flashing. Then, follow the same steps as for a new installation, making sure to properly secure the new drip edge in place with roofing nails.
Concluding Remarks
In conclusion, installing drip edge on a shed roof is a simple and beneficial step to protect the building from water damage. By following the proper steps and using the right tools, anyone can successfully install drip edge on their shed roof.
Remember to gather all the necessary materials before beginning the installation process, such as drip edge, roofing nails, and a roofing hammer. Measure the length of the roof and cut the drip edge accordingly, ensuring a proper fit. Start by nailing down the drip edge along the eaves, making sure it overlaps the fascia board and extends beyond the roof edge.
Next, secure the drip edge along the gable ends, overlapping it over the eave drip edge. Make sure to properly align and overlap the sections of drip edge to create a continuous barrier against water infiltration.
Finally, double-check all the installed drip edge to ensure it is securely fastened and properly aligned. Taking the time to install drip edge correctly will provide added protection against water damage, ultimately prolonging the lifespan of your shed.
Don’t wait any longer – go ahead and install drip edge on your shed roof today to safeguard your shed against potential water damage and enjoy the peace of mind that comes with it. Your shed will thank you for it!

Alexander Johnson is a seasoned roofing professional with over 25 years in the industry and CEO at Fresno Roof Repair. His expertise blends traditional craftsmanship with cutting-edge technology, focusing on resilient roofing solutions tailored to Fresno’s diverse climate. As a leader at Fresno Roof Repair, Alexander emphasizes open communication, teamwork, and continual education, ensuring every client receives exceptional service. Beyond his role, Alexander is deeply committed to the Fresno community, supporting local initiatives. His dedication, technical proficiency, and customer-centric approach make him an invaluable asset to Fresno Roof Repair, embodying the company’s commitment to excellence and quality roofing solutions.