Roll roofing is a convenient and cost-effective solution for fixing or replacing damaged rooftops. Whether you’re a seasoned DIY enthusiast or a novice homeowner eager to take on your first roofing project, installing rolled roofing can be a relatively simple task. By following a few key steps and using the right materials, you can ensure a sturdy, long-lasting roof that will protect your home for years to come. In this article, we will guide you through the essential steps to successfully install rolled roofing, providing you with the necessary knowledge and confidence to tackle this project head-on. So, grab your tools and let’s get started on transforming your roof into a weather-resistant shield!
Preparing the Roof for Rolled Roofing Installation
Before installing rolled roofing on your roof, it is essential to properly prepare the surface to ensure a smooth and long-lasting installation. This step is crucial as it lays the foundation for a successful roofing project. Here are some key steps to follow when preparing your roof for rolled roofing installation.
1. Inspect the Roof: Begin by thoroughly inspecting your roof for any existing damage, such as leaks, cracks, or loose shingles. It is crucial to address these issues before installing rolled roofing to prevent further damage and ensure a watertight seal.
2. Clean the Roof: Remove any debris, leaves, or loose materials from the roof surface. Use a broom or a leaf blower to sweep away the dirt and ensure a clean and smooth surface for the rolled roofing installation. If you notice any moss or algae growth, it is advisable to treat the roof with a moss and algae cleaner to prevent future growth and potential damage.
3. Repair and Replace: Take the time to repair any damaged or missing shingles, as well as any areas with rot or decay. Replace any loose or missing nails and make sure all roof components are securely attached. This will ensure a solid base for the rolled roofing material and prevent any future issues.
4. Check for Proper Ventilation: Adequate roof ventilation is important for maintaining the integrity of the roof and preventing moisture buildup. Check that all vents are clear and functioning properly. If necessary, install or repair ventilation systems to ensure proper airflow in your attic.
5. Apply a Base Layer: Depending on the condition of your roof, you may need to apply a base layer before installing the rolled roofing material. This base layer can help provide additional protection and extend the lifespan of your roof. It also acts as a barrier between the old roof and the new rolled roofing, enhancing its durability.
6. Conduct a Roof Moisture Test: Before proceeding with rolled roofing installation, it is essential to check for moisture issues on your roof. This can be done by conducting a moisture test using specialized tools. Identifying and addressing any moisture problems will help prevent future damage and ensure a successful rolled roofing installation.
By following these steps and properly preparing your roof, you can ensure a smooth and successful rolled roofing installation. Preparation is key to achieving a long-lasting and watertight seal, so don’t rush this crucial step. Take the time to inspect, clean, repair, and apply any necessary base layers before proceeding with the installation.
Choosing the Right Rolled Roofing Material
When it comes to installing rolled roofing, one of the most crucial decisions you’ll need to make is choosing the right material. This decision will impact the longevity, durability, and overall performance of your roof, so it’s important to consider several factors before making a final choice.
First and foremost, you’ll need to evaluate the climate in which you live. Different regions have different weather conditions, and your roofing material should be able to withstand the elements in your area. For instance, if you reside in an area with heavy rainfall or snowfall, you’ll want to opt for a rolled roofing material that has excellent waterproofing properties. On the other hand, if you live in a region with high temperatures and intense sunlight, look for a material that offers UV resistance to prevent heat damage.
Another factor to consider is the slope of your roof. Rolled roofing materials come in different thicknesses, and the slope of your roof will determine the appropriate thickness to choose. For low-slope roofs, a thicker material is often recommended to ensure optimal durability and protection against water penetration. Conversely, for roofs with a steeper slope, you may be able to opt for a thinner material.
Additionally, consider the aesthetic appeal of the material. Rolled roofing is available in various colors and textures, allowing you to choose an option that complements the overall look of your home. Whether you prefer a sleek and modern appearance or a more traditional and rustic style, there’s a rolled roofing material out there to suit your preferences.
Lastly, budget plays a significant role in . Different materials come with different price tags, so it’s important to select one that fits within your budget while still meeting your performance requirements. Remember that investing in high-quality materials from reputable manufacturers can often save you money in the long run by reducing the need for frequent repairs or replacements.
In conclusion, requires careful consideration of factors such as climate, roof slope, aesthetics, and budget. Take the time to research and evaluate various options to ensure you make the best choice for your specific roofing needs.
Measuring and Cutting Rolled Roofing Material
When installing rolled roofing, it is crucial to measure and cut the material accurately to ensure a proper fit and seamless installation. This step is essential in achieving a weather-resistant and durable roof.
To begin, gather all the necessary tools for . You will need a measuring tape, straight edge or roofing square, utility knife with extra blades, and a chalk line for marking the material.
First, measure the length of the roof and use the measuring tape to determine the total amount of rolled roofing material required. It is recommended to add a few extra inches to account for wastage and potential errors. Next, measure the width of the roof and roll out the roofing material accordingly.
After measuring the material, use a straight edge or roofing square to mark the cut lines. Place the straight edge along the marked lines and use a utility knife to make precise cuts. It is important to use sharp blades to avoid jagged edges or tears.
Pro Tip: To make cutting easier, score the surface of the rolled roofing material first, and then go over the scored line again with a little more pressure to complete the cut. This technique helps prevent bending or folding of the material during the cutting process.
- Be sure to lay the roofing material flat on a clean surface when measuring and cutting to avoid any unwanted wrinkles or distortion in the material.
- Double-check your measurements and ensure the roofing material aligns properly with the edges and corners of the roof before proceeding with installation.
- Remember, accuracy is key when to ensure a seamless and professional-looking installation.
Once the rolled roofing material is accurately measured and cut, you are now ready to move on to the next step, applying adhesive and securing it to the roof.
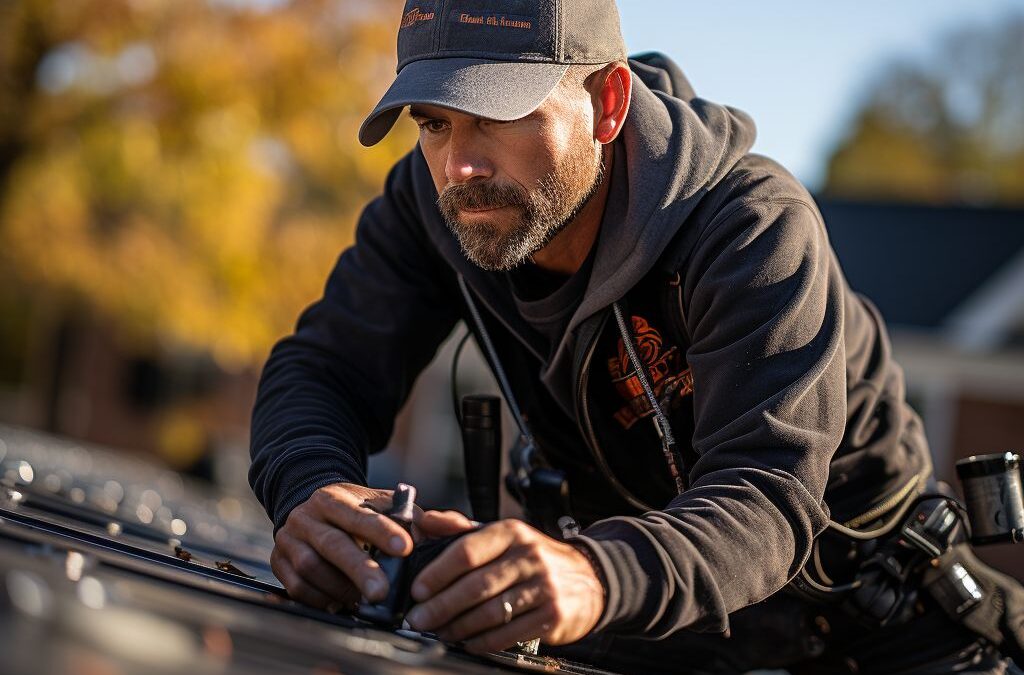
Applying Adhesive and Securing Rolled Roofing to the Roof
Once you have prepared the surface of your roof and chosen the appropriate rolled roofing material, it is time to move on to the next crucial step of the installation process - applying adhesive and securing the rolled roofing to the roof. This step ensures that the roofing material is firmly attached and protected against harsh weather conditions.
Begin by carefully unrolling the roofing material across the surface of the roof, making sure it overlaps any previously installed layers by at least 2 inches. This overlap will help prevent water leakage and create a more seamless appearance. Prior to applying adhesive, ensure that the roofing material is aligned correctly and looks smooth.
Next, apply an approved roofing adhesive to the underside of the rolled roofing material. This adhesive is specifically designed to bond the material to the roof’s surface, creating a durable and watertight seal. A notched trowel or brush can be used to spread the adhesive evenly, ensuring every area is covered.
As you apply the adhesive, work in small sections to prevent it from drying out before the roofing material is secured. Remember to follow the manufacturer’s instructions on the recommended drying time for the adhesive.
After applying the adhesive, carefully fold back half of the rolled roofing material, exposing the roof surface. Begin securing the material by pressing it down firmly onto the adhesive. Use a roller or a broom to apply even pressure, ensuring proper adhesion. Continue this process with the other half of the roofing material, pressing it down and smoothing out any wrinkles or bubbles along the way.
As you secure the rolled roofing, make sure to pay attention to the edges and corners. These areas are particularly prone to wind uplift and water penetration, so it is essential to properly seal them. Apply adhesive to the edges and use roofing nails or staples to secure the material in place.
To further reinforce the installation, consider placing an additional layer of roof cement or adhesive along the edges and seams of the rolled roofing. This will provide added protection against water infiltration and structural integrity.
By applying adhesive and securely fastening the rolled roofing to the surface of your roof, you are taking an important step towards ensuring its longevity and effectiveness. Proper installation techniques and attention to detail will help create a seamless and professionally finished result, providing you with a sturdy and waterproof roof for years to come. Remember to always refer to the manufacturer’s guidelines and safety precautions during the installation process.
Sealing and Finishing Touches for Rolled Roofing Installation
Once you have successfully applied the rolled roofing material and secured it to your roof, it’s time to focus on the sealing and finishing touches to ensure a long-lasting and effective installation. Proper sealing is essential for protecting your roof from moisture and preventing any potential leaks or damage. Here are some important steps to follow in the sealing and finishing process:
1. Inspect and Clean: Before sealing the rolled roofing, thoroughly inspect the entire surface for any debris, dirt, or loose materials. Use a broom or pressure washer to clean the roof and ensure a smooth and clean surface for the sealant.
2. Apply Roof Cement: Use a trowel to apply roof cement along the edges and seams of the rolled roofing. Roof cement helps to seal any gaps and create a watertight barrier. Work in small sections and make sure to apply an even layer of cement.
3. Use Seam Tape: For added reinforcement, apply seam tape to the seams of the rolled roofing. Seam tape provides extra strength and durability, preventing any potential water penetration. Make sure to firmly press the tape onto the roofing material, ensuring a tight seal.
4. Install Flashing: Depending on the design and structure of your roof, you may need to install flashing around chimneys, vents, or other penetrations. Flashing helps to divert water away from these vulnerable areas, preventing any water damage. Follow the manufacturer’s instructions to properly install the flashing.
5. Inspect and Repair: Once the sealing and finishing touches are complete, take the time to inspect the entire roof to ensure everything is in place and properly sealed. Look for any signs of damage or areas that may need additional attention. Address any repairs promptly to avoid future issues.
By following these steps and paying attention to the sealing and finishing touches, you can ensure a durable and effective installation of rolled roofing. Proper sealing and finishing are crucial for maintaining the integrity of your roof and protecting it from the elements.
People Also Ask
1. Can rolled roofing be installed over shingles?
Yes, rolled roofing can be installed over shingles as long as the existing roof is in good condition and has no issues like leaks or rotting. However, it’s important to note that adding rolled roofing over shingles may affect the overall roof thickness and may require additional flashing or adjustments during installation.
2. What tools are needed to install rolled roofing?
The tools required for installing rolled roofing include a utility knife, roofing nails, a roofing hammer, a measuring tape, a chalk line, a utility brush, and a ladder if necessary. It’s also recommended to have safety equipment like gloves and goggles to protect yourself during the installation process.
3. Can rolled roofing be installed on a flat roof?
Yes, rolled roofing can be installed on a flat roof. However, it’s crucial to ensure that the flat roof has proper drainage and slope to prevent water pooling. Additionally, it’s recommended to use a modified bitumen rolled roofing material specifically designed for flat roofs for better durability and performance.
4. How long does rolled roofing last?
The lifespan of rolled roofing may vary depending on the quality of the material and the installation method. On average, rolled roofing can last between 5 to 10 years. However, proper maintenance, regular inspections, and prompt repairs can help prolong its lifespan.
5. Can I install rolled roofing myself?
Yes, rolled roofing can be installed as a do-it-yourself project for those with basic roofing skills and experience. However, it’s essential to follow the manufacturer’s instructions carefully, use proper safety precautions, and ensure the surface is clean and adequately prepared before installation. If uncertain, it’s recommended to consult a professional roofer for assistance.
Wrapping Up
In conclusion, installing rolled roofing can be a manageable task if you follow the proper steps and take necessary precautions. Begin by preparing the roof surface, making sure it is clean and free of any debris or old roofing material. Measure and cut the rolled roofing to fit the dimensions of your roof, ensuring there is an overlap of at least 6 inches between each strip. Secure the rolled roofing in place using nails or roofing cement. Lastly, make sure to inspect the installation for any potential leaks or issues, and address them promptly.
Installing rolled roofing on your own can be a cost-effective way to protect your roof and prolong its lifespan. However, if you are unsure about your ability to safely complete the installation or if you have a complex roof structure, it is always recommended to consult a professional roofing contractor. They have the expertise and experience to ensure a proper and long-lasting installation.
Remember, a well-installed rolled roofing can provide reliable protection against the elements and extend the life of your roof. By following the correct installation techniques, you can have peace of mind knowing that your roof is well-maintained.
When it comes to installing rolled roofing, a little knowledge and care can go a long way in ensuring a successful and durable installation. Take the time to understand the process, gather the necessary materials, and execute the steps with precision. With patience and attention to detail, you can have a well-protected roof that will withstand the test of time.

Maintenance Programs Coordinator
Nathan Edwards is passionate about proactive roof maintenance programs designed to extend the lifespan of your roof. His commitment to preventing costly issues through regular upkeep sets him apart in the industry.