As winter settles in and the holiday season approaches, there’s nothing quite as delightful as the twinkle of Christmas lights adorning rooftops. Whether you’re looking to create a dazzling display or simply spread some merry cheer, installing Christmas lights on your roof line can truly transform your home into a festive wonderland.
But with wires to untangle, hooks to secure, and bulbs to replace, the task may seem daunting. Fear not! In this informative guide, we will walk you through the step-by-step process of effortlessly installing Christmas lights on your roof line. So, gather your holiday spirit and let’s dive into the enchanting world of rooftop illumination!
Choosing the Right Christmas Lights for Your Roof Line
is an important decision that can make or break the overall look of your holiday display. The type of lights you choose will depend on several factors including your personal style, the type of roof you have, and the desired effect you want to achieve.
One of the first things to consider is the size and wattage of the lights. Mini lights are a popular choice for roof line installations because they are small and versatile. They come in a variety of colors and are available in both incandescent and LED options. LED lights are more energy-efficient and tend to last longer, making them a great choice for those who want to save on their energy bill and reduce their environmental impact.
Another important factor to consider is the length of the lights. Measure the distance of your roof line and take into account any corners, peaks, or dormers that you want to decorate. It’s always better to have a little extra length than to come up short, so be sure to err on the side of caution when determining the quantity of lights needed.
When it comes to style, the options are endless. Some homeowners prefer a classic look with white or multicolored lights, while others may opt for more unique options such as icicle lights or net lights. The key is to choose lights that complement your home’s architecture and personal style.
Pro Tip: Consider purchasing lights that are rated for outdoor use, as they will be more durable and able to withstand the elements. Additionally, make sure to check the packaging for any safety certifications or guidelines to ensure you are purchasing a quality product.
Overall, involves considering factors such as size, wattage, length, style, and safety. By taking the time to carefully choose lights that are suitable for your specific needs, you can create a stunning and festive display that will bring joy to your home and neighborhood throughout the holiday season.
Determining the Length and Quantity of Lights Needed
When it comes to installing Christmas lights on your roof line, one of the first steps is determining the length and quantity of lights you will need. This will ensure that you have enough lights to cover your desired areas and create a captivating display. Before heading to the store, there are a few factors to consider in order to make an accurate estimate.
First, measure the length of your roof line where you plan to install the lights. It’s important to measure all sides of your roof, including any peaks or angles, to get an accurate total. Use a sturdy tape measure and take note of the measurements in feet or meters. Once you have the total length, you can use this measurement to determine the quantity of lights needed.
Next, consider the spacing between each light. Some prefer to have lights tightly packed together for a more vibrant look, while others prefer a more spaced-out appearance. On average, a spacing of 6-8 inches (15-20 cm) between each light is recommended. Keep in mind that this spacing may vary based on personal preference and the size of your roof.
To calculate the quantity of lights needed, divide the total length of your roof line by the spacing between each light. For example, if your roof line measures 40 feet (12 meters) and you prefer a spacing of 6 inches (15 cm), you would divide 40 by 0.5 (6 inches converted to feet). This would give you a total of 80 lights needed.
It’s always a good idea to purchase extra lights to account for any breakages or to fill in any gaps for a more uniform appearance. Additionally, consider the power source available and choose lights that are suitable for the electrical capacity of your home.
By taking the time to measure your roof line and calculate the quantity of lights needed, you can ensure a successful and visually appealing installation. Remember to keep safety in mind and refer to manufacturer’s guidelines for any specific recommendations.
Preparing and Measuring Your Roof Line for Installation
Before you begin the process of installing Christmas lights on your roof line, it’s important to properly prepare and measure your roof line to ensure a smooth and successful installation. This step is crucial for achieving a professional and neat display of lights that will bring joy and holiday cheer to your home.
First, it’s essential to gather all the necessary tools and materials for the task at hand. You will need a measuring tape, a ladder or scaffolding, clips or hooks for securing the lights, zip ties or twist ties, and an extension cord if needed. Having all these items readily available will save you time and effort during the installation process.
Once you have gathered your tools, it’s time to measure your roof line. Start by measuring the length of the roof line where you plan to install the lights. This will help you determine the quantity of lights needed, which we will discuss in the next section. Measure from corner to corner, taking into account any turns or bends in the roof line. It’s important to be as accurate as possible to ensure you have enough lights and to avoid any unnecessary gaps or overlaps.
Next, take note of any obstacles or features on your roof line that may affect the installation process. This could include chimneys, vents, or other protrusions. Measure the distance from these obstacles to the end of the roof line, as this will help you determine where to start and end your light installation.
In addition to measuring the roof line, it’s also important to consider the power source for your lights. Locate an outdoor electrical outlet near your roof line, or plan to use an extension cord from an indoor outlet, ensuring it is rated for outdoor use. This will save you the hassle of running cables across walkways or driveways, and it will ensure your lights are connected to a safe and reliable power source.
By properly preparing and measuring your roof line before installation, you will be setting yourself up for success and avoiding any unnecessary challenges. Taking the time to gather your tools, measure accurately, and plan for obstacles will make the installation process much smoother and more efficient. Now that you have prepared your roof line, let’s move on to the next step – securing the Christmas lights safely on your roof line.
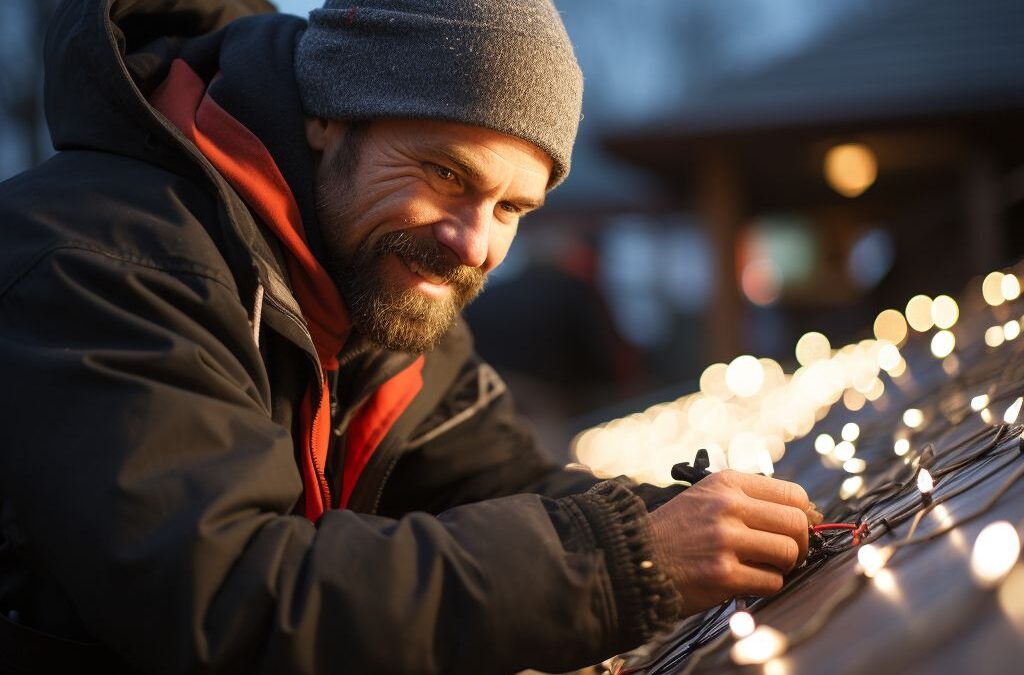
Securing Christmas Lights Safely on Your Roof Line
One of the most important aspects of installing Christmas lights on your roof line is ensuring that they are safely secured. This not only prevents any potential damage to your roof, but also ensures the safety of those around your home. Here are a few steps to help you securely attach your Christmas lights to your roof line.
Firstly, it is crucial to use proper clips or hooks specifically designed for outdoor Christmas light installations. These clips or hooks are designed to securely hold the lights in place without causing any damage to your roof. It is recommended to choose clips or hooks that are weather-resistant and can withstand harsh winter conditions.
Before attaching the clips or hooks, make sure to clean the surface of your roof line. This will help the clips adhere better and provide a more secure hold. Use a mild cleaning solution and a soft brush or cloth to gently remove any dirt or debris.
Once the surface is clean, start attaching the clips or hooks along the roof line, ensuring that they are evenly spaced. For a professional and neat display, it is important to maintain consistent spacing between the lights. You can use a measuring tape to ensure equal distances between each clip or hook.
Pro Tip: When attaching the clips or hooks, make sure they are placed in a manner that allows the lights to hang down slightly. This prevents any potential water entry into the sockets and minimizes the risk of damage.
It is also important to properly secure the wiring of the lights. Use electrical tape or zip ties to secure the wires to the clips or hooks, keeping them neat and organized. This not only creates a tidy appearance but also prevents any tripping hazards.
Remember to avoid using nails or staples to attach the lights, as these can pierce through the wires and damage your roof. Additionally, using adhesive material may cause damage when removing the lights after the holiday season.
By following these steps, you can securely attach your Christmas lights to your roof line and enjoy a beautiful and festive display without worrying about any potential damage or safety hazards.
Creating a Professional and Neat Display of Christmas Lights
Having a professional and neat display of Christmas lights on your roof line can make all the difference in creating a magical atmosphere for the holiday season. Here are some tips to help you achieve a polished look:
Firstly, consider the color scheme of your lights. Choose a color combination that complements the overall aesthetics of your home. Whether you prefer classic warm white lights for a traditional feel, or if you want to add a splash of color with multi-colored lights, selecting the right color scheme will contribute to a cohesive and visually appealing display.
Next, pay attention to spacing and symmetry. Start by planning where you want to place your lights and measuring the distance between each section. It’s essential to ensure an even spacing between the lights to maintain a seamless look. Using a measuring tape and marking the spots with tape or removable hooks can help you achieve precise spacing.
Furthermore, utilize extension cords and timers to hide any visible wiring and ensure your lights turn on and off automatically. This will not only add convenience but also enhance the overall appearance of your display. Concealing wires in channels or along gutters will give your installation a clean and professional finish.
Consider adding elements such as garlands, bows, or other decorative accents to complement your lights. This can add depth and dimension to your display, making it more visually appealing. Place them strategically along the roof line or at the corners to create focal points and enhance the overall festive vibe.
Lastly, step back and assess your display from a distance to ensure it looks balanced and appealing. Make any necessary adjustments to straighten lights or reposition decorations to achieve that polished, professional look.
By following these tips, you can create a professional and neat display of Christmas lights on your roof line that will impress your neighbors and add joy and cheer to your home throughout the holiday season.
Troubleshooting and Maintenance Tips for Roof Line Christmas Lights
When it comes to installing Christmas lights on your roof line, it’s important to ensure they not only create a festive display but also function properly throughout the holiday season. To help you troubleshoot any issues you may encounter and maintain your roof line Christmas lights, here are some helpful tips:
1. Check for loose connections: One common issue with roof line Christmas lights is loose connections. Over time, the weather and repeated use can cause the connections between strands to loosen, resulting in flickering lights or complete outage. To troubleshoot this, carefully inspect the connections and tighten them if necessary. Additionally, consider using waterproof connectors or electrical tape to provide extra protection against moisture.
2. Replace any burnt-out bulbs promptly: Burnt-out bulbs can diminish the overall appeal of your roof line Christmas lights. To maintain a well-lit and vibrant display, make it a habit to regularly inspect the lights and promptly replace any bulbs that are no longer working. This will not only ensure a beautiful display but also prevent the remaining bulbs from experiencing increased voltage and potentially burning out.
3. Handle with care during harsh weather conditions: While it’s important to secure your roof line Christmas lights properly, extreme weather conditions can still cause damage. Strong winds, heavy snow, or ice buildup can put stress on the lights and their connectors. To prevent any mishaps, consider using clips or hooks specifically designed for outdoor use, as they provide more stability and durability. Moreover, ensure that the cords are not pulled or twisted excessively during installation, as this can weaken the wires and lead to malfunctions.
4. Clean and store your lights properly: After the holiday season, it’s crucial to clean and store your roof line Christmas lights properly to ensure their longevity. Remove any dirt or debris by gently wiping the bulbs and cords with a soft cloth. Then, carefully coil the lights and store them in a dry, climate-controlled place to prevent moisture, which can lead to rust or electrical hazards.
By following these troubleshooting and maintenance tips, you can ensure that your roof line Christmas lights remain dazzling and functional throughout the holiday season. Remember to prioritize safety and take the necessary precautions when working with electricity and outdoor installations. With a little upkeep and attention to detail, your roof line Christmas lights will continue to spread holiday cheer for years to come.
People Also Ask
What tools do I need to install Christmas lights on a roof line?
To install Christmas lights on a roof line, you will need several tools including a ladder, clips or hooks to hold the lights in place, extension cords, and a power source. Additionally, it may be helpful to have a helper to hold the ladder or assist in hanging the lights.
What type of lights should I use for the roof line?
For installing Christmas lights on a roof line, it is recommended to use outdoor-rated LED lights as they are energy-efficient, long-lasting, and safe to use. Choose lights with the appropriate length and color to suit your preference.
How do I measure the roof line for Christmas lights?
To measure your roof line for Christmas lights, start by determining the length of the area you want to cover. Use a tape measure to measure the distance along the roof line from one corner to the other, and add a few extra feet to account for any curves or dips. This will help you determine how many strands of lights you will need.
How do I secure Christmas lights to the roof line?
To secure Christmas lights to the roof line, use clips or hooks designed for outdoor lights. Attach the clips or hooks to the eaves or gutters, ensuring they are spaced evenly and securely. Carefully fasten the lights onto the clips or hooks, making sure they are not too tight to avoid damaging the lights.
Should I hire a professional to install Christmas lights on the roof line?
While installing Christmas lights on a roof line can be a DIY project, if you are unsure of your abilities or have safety concerns, it may be wise to hire a professional. They have the knowledge, experience, and equipment to install the lights safely and efficiently, giving you peace of mind during the holiday season.
In Summary
In conclusion, installing Christmas lights on a roofline can be a fun and festive way to decorate your home for the holiday season. By following a few simple steps, you can ensure a safe and visually appealing display.
Remember to inspect your lights and extension cords for any damage before starting. Use clips or gutter hooks to secure the lights along the roofline, ensuring they are evenly spaced and straight. Take caution when climbing ladders and work with a partner if possible.
Once installed, plug in the lights and adjust any positioning if needed. Enjoy the warm and joyful glow of your beautifully decorated roofline throughout the holiday season.
Spread holiday cheer by sharing your illuminated home with friends and neighbors. Encourage them to join in the festive spirit by installing their own Christmas lights. Don’t forget to turn off the lights before going to bed or leaving the house to both conserve energy and prevent any potential accidents.
Happy decorating and have a wonderful holiday season!

Alexander Johnson is a seasoned roofing professional with over 25 years in the industry and CEO at Fresno Roof Repair. His expertise blends traditional craftsmanship with cutting-edge technology, focusing on resilient roofing solutions tailored to Fresno’s diverse climate. As a leader at Fresno Roof Repair, Alexander emphasizes open communication, teamwork, and continual education, ensuring every client receives exceptional service. Beyond his role, Alexander is deeply committed to the Fresno community, supporting local initiatives. His dedication, technical proficiency, and customer-centric approach make him an invaluable asset to Fresno Roof Repair, embodying the company’s commitment to excellence and quality roofing solutions.