Whether you’re a seasoned camper or new to the world of travel trailers, one thing is certain: a sturdy and reliable roof is essential for a comfortable and leak-free journey. Over time, exposure to harsh weather elements can cause wear and tear on the rubber roof of your beloved travel trailer. But fear not, as we bring you a comprehensive guide on how to repair your rubber roof like a pro. From identifying the problem areas to selecting the right materials and employing proper techniques, we’ve got you covered. So, grab your toolkit and let’s embark on a roof-repair adventure that will ensure your precious travel companion remains in top-notch condition for all your future exploration endeavors.
Identifying the Damage: Assessing the Condition of Your Rubber Roof
Assessing the condition of your rubber roof is an important first step in the process of repairing it. This is crucial to determine the extent of the damage and decide on the appropriate repair method. Below are some key points to consider when identifying the damage on your travel trailer’s rubber roof.
Firstly, visually inspect the entire surface of the roof for any signs of wear and tear. Look for visible cracks, punctures, or tears in the rubber membrane. Check for any areas that are lifting or bubbling, as this could indicate water damage underneath.
Next, examine the roof edges and seams carefully. These areas are prone to damage and are common entry points for water. Look for any loose or separated seams, as well as any damage or deterioration around the edges.
Pay close attention to any fixtures or accessories on the roof, such as vents, skylights, or air conditioners. Ensure that the seals around these areas are intact and in good condition. Any signs of cracking or gaps could indicate potential leaks.
Another important aspect to assess is the overall cleanliness of the roof. Accumulated dirt, debris, or plant growth can cause damage over time. Make sure to thoroughly clean the roof surface before proceeding with repairs.
In summary, a thorough visual inspection of your travel trailer’s rubber roof is crucial for assessing its condition. Look for visible damage, inspect the edges and seams, check the condition of fixtures and accessories, and ensure the roof is clean. This will provide you with a clear idea of the extent of the damage and help you choose the appropriate repair method.
Choosing the Right Repair Method: Factors to Consider for Your Travel Trailer
Choosing the right repair method for your travel trailer’s rubber roof is crucial in ensuring that it is effectively repaired and maintains its durability. When determining the repair method, there are several factors to consider that will help you make an informed decision.
Firstly, you need to assess the extent of the damage to your rubber roof. Is it a minor tear or puncture, or does it require a more extensive repair? This will help you determine whether a simple patching solution will suffice, or if a complete roof replacement is necessary.
Another important factor to consider is the type of rubber roof material used on your travel trailer. There are different types of rubber roofs, such as EPDM, TPO, and PVC. Each material has its own unique repair requirements and compatibility with certain repair products. It is essential to identify the specific type of rubber roof on your travel trailer before proceeding with any repair method.
Additionally, you should consider the accessibility and location of the damage. Is the damage in an easily reachable area, or will you need to remove components or make special arrangements to access it? Some repair methods may require extra effort and time, so it’s important to factor in these considerations when choosing the right repair method.
Lastly, you need to consider your own skills and comfort level with DIY repairs. Some repair methods may be more complex and require professional assistance, while others can be done by individuals with basic handyman skills. If you are unsure about the repair process or lack the necessary experience, it is advisable to seek professional help to ensure the job is done correctly.
Taking into account these factors will help you determine the most suitable repair method for your travel trailer’s rubber roof. Always remember to prioritize the longevity and integrity of your roof when making your decision, and don’t hesitate to seek guidance from experts if needed.
Preparing for the Repair: Gathering the Necessary Tools and Materials
Before beginning the repair process for your rubber roof on a travel trailer, it is essential to gather all the necessary tools and materials. This will ensure that you have everything you need at your disposal, making the repair process smoother and more efficient.
To start, you will need a few basic tools such as a utility knife or a pair of scissors for trimming and cutting purposes. Additionally, having a ladder or step stool on hand is crucial to easily access the roof of your travel trailer. Safety should always be a priority, so also make sure to wear appropriate protective gear like gloves and safety goggles.
In terms of materials, the key component for repairing a rubber roof is a high-quality rubber roof sealant. Look for sealants specifically designed for RV or travel trailer roofs, as they are formulated to withstand the specific conditions these vehicles are exposed to. You may also need adhesive or caulk to secure loose edges or fix any cracks or gaps in the rubber material.
If you notice any damages or punctures, it is advisable to have a rubber roof patch kit available. These kits typically include patching material, adhesive, and instructions on how to apply them correctly. Having a few spare pieces of rubber roof material can also come in handy, as they can be used for larger repairs or replacements if needed.
It is important to remember that every repair project may have unique requirements, so do some research to ensure you have all the necessary tools and materials for your specific situation. Taking the time to gather the right supplies beforehand will save you the hassle of making multiple trips to the store and allow you to complete the repair more efficiently.
Recommended Tools and Materials:
- Utility knife or scissors
- Ladder or step stool
- Gloves and safety goggles
- Rubber roof sealant
- Adhesive or caulk
- Rubber roof patch kit
- Spare pieces of rubber roof material (optional)
Having these tools and materials ready will enable you to confidently move forward with the repair process and restore your travel trailer’s rubber roof to its former glory.
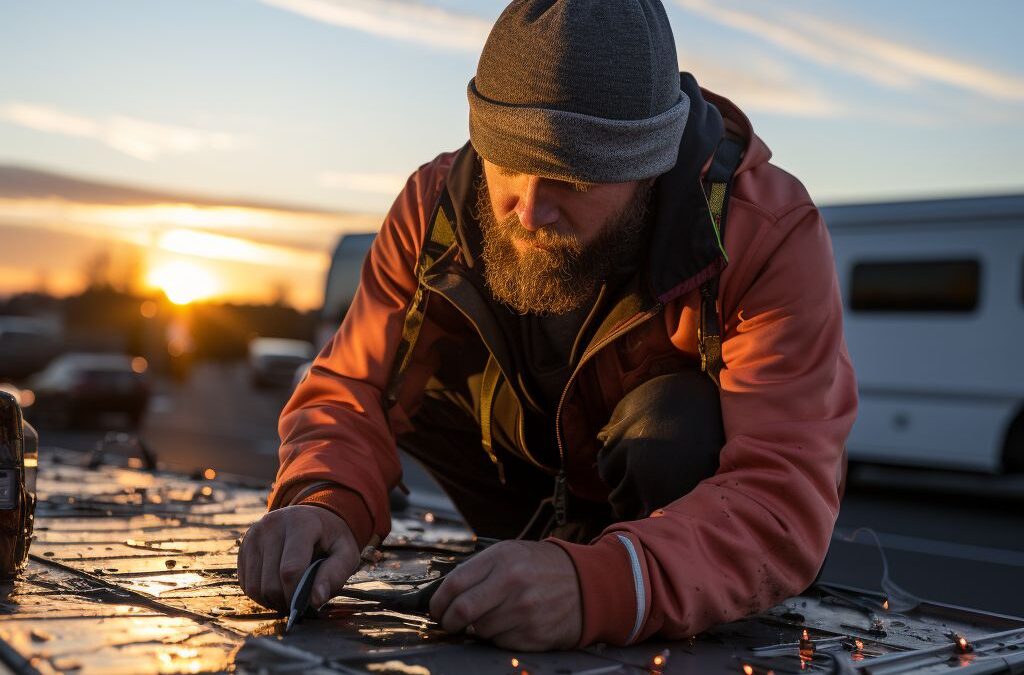
Step-by-Step Repair Process: A Comprehensive Guide for Fixing Your Rubber Roof
Repairing a rubber roof on your travel trailer can seem like a daunting task, but with the right tools and materials, it can be a manageable project. Follow these step-by-step instructions to fix your rubber roof and restore its functionality and appearance.
First, gather all the necessary tools and materials before starting the repair process. You will need a rubber roof repair kit, which typically includes a patch or membrane, adhesive, and a scrub brush. Additionally, gather a utility knife, a roller or hand press, a putty knife, and a ladder or scaffolding to safely reach the damaged areas.
Once you have all the tools and materials ready, the first step is to clean and prepare the damaged area. Use a scrub brush and mild soap to remove any dirt, debris, or existing coatings from the roof’s surface. Rinse thoroughly and allow the area to dry completely before proceeding.
Next, assess the extent of the damage and identify any underlying issues. Look for cracks, tears, or punctures in the rubber membrane, as well as any signs of water damage or rot in the underlying structure. Ensure that the roof is structurally sound before proceeding with the repair.
Now, it’s time to apply the rubber roof patch or membrane to the damaged area. Follow the manufacturer’s instructions for the specific repair kit you are using. Generally, this involves applying a layer of adhesive to both the underside of the patch and the damaged area on the roof. Use a roller or hand press to firmly bond the patch to the roof, ensuring a secure and watertight seal.
After the patch has been applied, use a putty knife to smooth out any air bubbles or wrinkles. This will help ensure a flat and seamless finish. Allow the adhesive to cure according to the manufacturer’s instructions before subjecting the roof to any moisture or heavy use.
Finally, take preventive measures to extend the lifespan of your travel trailer’s rubber roof. Regularly inspect the roof for signs of damage and address any issues promptly. Clean the roof regularly, removing any dirt, debris, or standing water. Avoid harsh chemicals or abrasive materials that could damage the rubber membrane. Consider applying a protective coating or sealant to further enhance the roof’s durability and water resistance.
By following this step-by-step repair process and taking preventive measures, you can effectively fix your rubber roof and ensure its longevity. Remember to prioritize safety and consult professional help if needed, especially for extensive damage or if you are not comfortable with DIY repairs.
Preventive Measures: Tips to Extend the Lifespan of Your Travel Trailer’s Rubber Roof
Looking to prolong the life of your travel trailer’s rubber roof? Implementing preventive measures can help keep your roof in good condition, preventing future damage and the need for costly repairs. Here are some tips to help you extend the lifespan of your rubber roof:
Regular Cleaning: Regularly cleaning your rubber roof is crucial for preventing the buildup of dirt, debris, and other contaminants that can damage the material over time. Use a soft-bristle brush or sponge along with a mild detergent or a specialized rubber roof cleaner to gently scrub the surface. Rinse thoroughly with water to remove any residue.
Inspect and Address Issues Promptly: Perform routine inspections of your rubber roof to identify any signs of damage, such as cracks, tears, or loose seams. Promptly address these issues to prevent them from worsening. Small tears can be patched using a rubber roof patch kit, while larger or more extensive damage may require professional intervention.
Protective Coating: Applying a protective coating to your rubber roof can provide an extra layer of protection against UV rays, harsh weather conditions, and other potential sources of damage. Look for a coating specifically designed for rubber roofs and follow the manufacturer’s instructions for application.
UV Protection: The sun’s UV rays can cause significant damage to your rubber roof, leading to deterioration and cracking. To protect your roof, consider installing a UV-resistant cover or adding a shade structure to your travel trailer. Additionally, parking your trailer in shaded areas whenever possible can also help limit exposure to direct sunlight.
Avoid Harsh Chemicals: When cleaning or performing any maintenance on your rubber roof, it’s important to avoid using harsh chemicals or abrasive cleaners. These can damage the rubber material and decrease its lifespan. Stick to mild soaps or cleaners specifically formulated for rubber roofs.
Regular Inspections: Make it a habit to conduct regular inspections of your rubber roof at least once or twice a year. Look for any signs of wear and tear, and address them promptly to prevent further damage. Pay special attention to areas around vents, seams, and edges, as these are common areas for leaks.
By following these preventive measures, you can significantly extend the lifespan of your travel trailer’s rubber roof. Regular cleaning, prompt repairs, and the use of protective measures will help maintain the integrity of the rubber material and keep your roof in optimal condition for years to come.
People Also Ask
1. Can a rubber roof on a travel trailer be repaired?
Yes, a rubber roof on a travel trailer can be repaired. Depending on the extent of the damage, it can be patched or recoated using specialized rubber roof repair products.
2. How long does it take to repair a rubber roof on a travel trailer?
The time taken to repair a rubber roof on a travel trailer can vary depending on the extent of the damage and the repair method used. Generally, it can take a few hours to a couple of days to complete the repair.
3. What materials are needed to repair a rubber roof on a travel trailer?
To repair a rubber roof on a travel trailer, you will typically need a rubber roof repair kit, which includes adhesive, patching material, and a sealant. Additionally, you may require a utility knife, a paintbrush, and a clean cloth for the repair process.
4. Can I repair a rubber roof on a travel trailer myself?
Yes, it is possible to repair a rubber roof on a travel trailer yourself. However, it is important to have proper knowledge and follow the manufacturer’s instructions while doing so to ensure a successful and long-lasting repair.
5. How much does it cost to repair a rubber roof on a travel trailer?
The cost of repairing a rubber roof on a travel trailer can vary depending on the extent of the damage, the repair method used, and the materials required. On average, it can cost between $100 to $500 for the repair, including all necessary materials.
Conclusion
In conclusion, repairing a rubber roof on a travel trailer is a manageable task that can help extend the lifespan of your vehicle. By following the necessary steps, such as identifying the damage, cleaning the area, applying patching materials, and ensuring proper adhesion, you can successfully repair your rubber roof. It is important to regularly inspect and maintain your roof to prevent any potential leaks or further damage. Remember, taking care of your rubber roof will not only protect your travel trailer investment but also provide a safe and comfortable journey for your future adventures.

Maintenance Programs Coordinator
Nathan Edwards is passionate about proactive roof maintenance programs designed to extend the lifespan of your roof. His commitment to preventing costly issues through regular upkeep sets him apart in the industry.