If you’re a homeowner, you know the importance of a solid and dependable roof. It protects your family, possessions, and the overall structure of your home from the various elements that Mother Nature throws your way. However, over time, even the sturdiest of roofs can develop issues, such as rotted roof plywood. Ignoring this problem could lead to significant damage and expensive repairs down the line. But fear not, as this article will guide you through the process of repairing rotted roof plywood, ensuring that your home remains safe, secure, and leak-free. So, grab your tools and let’s get started on restoring your roof’s structural integrity.
Determining the Extent of Damage to the Plywood
One of the first steps in repairing rotted roof plywood is to determine the extent of the damage. This will help you evaluate whether you need to replace a small section or the entire plywood sheet. To assess the damage, carefully inspect the affected area for signs of water infiltration, mold growth, or visible rot.
Start by examining the surface of the plywood for any discoloration, soft spots, or areas that feel spongy to the touch. Additionally, check for water stains on the ceiling inside your home, as they can indicate a leak originating from the damaged plywood. Pay attention to any musty odors or the presence of mold, as these are clear signs of water damage.
If you find any localized areas of damage, use a screwdriver or another sharp tool to probe the affected plywood. Soft or crumbly wood indicates rot, while dampness suggests moisture penetration. It’s important to determine the underlying cause of the damage, as simply replacing the plywood without addressing the root issue may lead to further problems down the line.
In some cases, the damage may be more extensive, affecting larger sections of the roof plywood. This typically occurs when the problem has been neglected for an extended period and may require a complete replacement of the affected sheets.
Remember, safety should always be your top priority when assessing roof plywood damage. If the roof is steep or the area is difficult to access, it’s best to consult a professional to avoid potential accidents or further damage.
Removing the Damaged Plywood Safely and Effectively
When it comes to repairing rotted roof plywood, it is essential to remove the damaged sections safely and effectively to ensure a successful repair. Here are some key steps to follow:
1. Begin by carefully examining the extent of the damage to the plywood. Look for signs of rot, such as soft spots, discoloration, or mold growth. It is important to remove all the affected areas to prevent the spread of rot and ensure a strong foundation for the replacement plywood.
2. Before starting the removal process, ensure your safety by wearing protective gear, including gloves, safety goggles, and a dust mask. Rotted plywood can be weak and brittle, and debris may fall as you work.
3. Start by removing any roofing materials or shingles covering the damaged plywood. Use a pry bar or a hammer and chisel to carefully lift and remove the nails or screws holding the plywood in place. Take your time to avoid damaging the surrounding areas.
4. Once the roofing materials are cleared, carefully cut the damaged plywood into manageable sections with a circular saw or reciprocating saw. This will make it easier to handle and remove without causing unnecessary strain or damage to the roof structure.
5. With the damaged plywood cut into sections, gently pry them up and remove them from the roof. Dispose of them properly to prevent any potential health or safety hazards.
6. After removing the damaged plywood, thoroughly inspect the underlying structure for any signs of rot or damage. Address any issues before installing the new plywood to ensure a sturdy and long-lasting repair.
Remember, safety is paramount throughout the entire process of removing the damaged plywood. Take your time, use the appropriate tools, and be cautious of your surroundings to prevent accidents or further damage. By following these steps, you’ll be on your way to repairing your rotted roof plywood effectively.
Selecting Suitable Replacement Plywood Materials
When it comes to repairing rotted roof plywood, selecting the right replacement materials is crucial for a successful and long-lasting repair. Not all plywood is created equal, and choosing the right type and grade is essential to ensure strength and durability in your roof.
First and foremost, you’ll want to look for plywood that is specifically designed for roofing applications. Roofing plywood is typically made from high-quality, pressure-treated lumber that is resistant to rotting, warping, and other forms of damage caused by exposure to the elements.
In terms of thickness, the industry standard for roofing plywood is 3/8 inch, although thicker options such as 1/2 inch or 5/8 inch may be necessary depending on the specific load requirements of your roof. Thicker plywood will provide added strength and support, especially in areas where heavy snowfall or strong winds are common.
Additionally, consider the grade of the plywood you choose. Plywood is graded based on its appearance and structural integrity, with grades ranging from A to D. For roof repairs, it is recommended to select plywood with an A or B grade, as these grades indicate that the plywood is free from knots, cracks, and other defects that could compromise its strength.
When purchasing replacement plywood, be sure to calculate the amount you’ll need based on the size of the damaged area you’re repairing. It’s always a good idea to buy a little extra to account for any cutting or fitting that may be required during installation.
Remember, the quality of the replacement plywood you choose will directly impact the overall effectiveness and longevity of your roof repair. By selecting materials specifically designed for roofing applications and considering factors such as thickness and grade, you can ensure a sturdy and reliable repair that will protect your home from further damage.
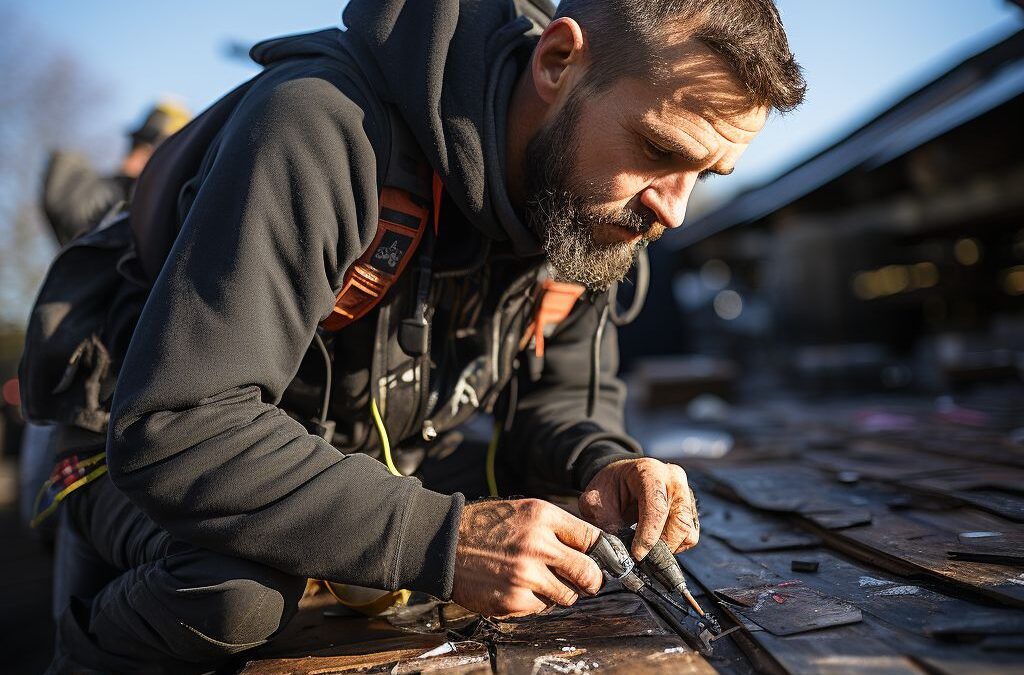
Proper Tools and Techniques for Installing New Plywood
When it comes to repairing rotted roof plywood, selecting is crucial to ensure a secure and long-lasting repair. Here are some essential considerations to make during the installation process.
Firstly, it is important to have the right tools for the job. Ensure you have a circular saw or reciprocating saw to cut the plywood accurately to size. A nail gun or screw gun will also be helpful for securing the plywood to the roof structure. Additionally, it is advisable to have a pry bar or crowbar to remove any remaining pieces of the damaged plywood.
Once you have all the necessary tools, begin by carefully removing the damaged plywood using the pry bar or crowbar. Take caution not to damage the surrounding area or adjacent plywood during this process. Next, measure the dimensions of the removed plywood and use the circular saw or reciprocating saw to cut a suitable replacement piece. It is essential to ensure that the replacement plywood fits snugly into the vacant area without any gaps.
To install the new plywood, use a nail gun or screw gun to attach it securely to the rafters or trusses. Start from the outer edges and work your way towards the center, spacing the nails or screws approximately 6 inches apart. This will provide proper support and prevent the plywood from sagging or warping over time.
Using Adhesive for Extra Stability
For added stability, consider using construction adhesive between the new plywood and the roof structure. Apply a thin layer of adhesive to the surface where the new plywood will be placed, ensuring complete coverage. This will help create a strong bond and further reinforce the integrity of the repair.
Finally, once the new plywood is securely in place, use a level to check for any unevenness. If necessary, make any adjustments by adding shims or additional plywood to ensure a smooth and level surface.
By following these , you can ensure a successful repair that will withstand weather conditions and provide long-lasting support to your roof structure.
Ensuring a Waterproof and Long-lasting Repair
When repairing rotted roof plywood, it is crucial to ensure the longevity and water resistance of the repair. This will help in preventing future damage and maintaining the structural integrity of the roof. Here are some important steps to consider for :
1. Use Waterproofing Sealants: Before installing the new plywood, apply a waterproofing sealant to the edges and surface of the existing plywood. This will create an added layer of protection against moisture infiltration. Be sure to choose a sealant that is suitable for outdoor use and compatible with the roofing materials you are working with.
2. Install a Moisture Barrier: To further protect the new plywood and prevent any potential water damage, consider installing a moisture barrier. This can be a self-adhesive membrane or a synthetic underlayment that acts as a protective barrier between the plywood and the roofing material. Make sure it is properly installed according to the manufacturer’s instructions to ensure its effectiveness.
3. Properly Flashing the Roof: Flashing plays a crucial role in preventing water from seeping into vulnerable areas of the roof, such as the joints and transitions. Check the existing flashing for any signs of damage and replace it if needed. Install new flashing around protrusions, such as chimneys or vent pipes, using appropriate techniques to ensure a watertight seal.
4. Quality Roofing Materials: When replacing the damaged plywood, choose high-quality roofing materials that are known for their durability and resistance to moisture. Opt for pressure-treated or marine-grade plywood that is specifically designed to withstand outdoor conditions. Using subpar materials can lead to future rot or water damage, resulting in the need for further repairs.
5. Pay Attention to Roof Pitch and Drainage: Ensuring proper water drainage is vital for the longevity of the roof repair. Consider the roof’s pitch or slope and ensure that it is adequate for proper water runoff. Make sure that gutters and downspouts are functioning properly and clear of any debris, as clogged gutters can cause water to pool on the roof, leading to leaks and damage.
By following these steps and taking extra precautions to ensure a waterproof and long-lasting repair, you can extend the lifespan of your roof and minimize the need for future repairs. Remember to regularly inspect your roof and address any issues promptly to prevent further damage or costly repairs down the line.
Applying Protective Finishes and Coatings to Preserve the Plywood
To ensure the long-term durability and lifespan of the newly installed plywood in your roof, it is crucial to apply protective finishes and coatings. These protective measures will not only safeguard the plywood from future decay and rot, but also provide an added layer of waterproofing to keep your roof leak-free.
Before applying any finishes or coatings, it is important to allow the new plywood to acclimate to the surrounding environment for at least 48 hours. This will help prevent any potential warping or buckling of the wood. Once the acclimation period is complete, you can proceed with the following steps to apply protective finishes and coatings:
1. Clean the surface: Begin by thoroughly cleaning the plywood surface to remove any dirt, dust, or debris. Use a mild detergent and water solution to gently scrub the plywood, ensuring that you reach every corner and groove. Rinse with clean water and allow it to dry completely before proceeding to the next step.
2. Apply a wood preservative: To further protect the plywood from future rot and decay, consider applying a wood preservative. Choose a preservative that is specifically formulated for outdoor use and has fungicidal properties. Apply the preservative evenly using a brush or roller, following the manufacturer’s instructions regarding drying time and number of coats.
3. Add a waterproofing sealant: Once the wood preservative has dried, it is time to apply a waterproofing sealant. This sealant will protect the plywood from moisture penetration, preventing any potential damage caused by rain, snow, or humidity. Ensure that the sealant is compatible with the type of plywood you are using and apply it according to the manufacturer’s instructions.
4. Consider a protective coating: Depending on your preferences and the climate in which you live, you may want to consider adding an additional protective coating. This can include paints, stains, or clear finishes that not only enhance the aesthetics of your roof but also provide an extra layer of defense against the elements. Choose a product that is specifically designed for exterior wood surfaces and follow the application instructions accordingly.
By following these steps and properly applying protective finishes and coatings, you can effectively preserve the newly installed plywood on your roof. This proactive approach will help prolong the lifespan of the plywood and ensure that your roof remains in optimum condition for years to come. Remember, regular inspections and maintenance are also key to identifying any potential issues early on and preventing further damage to your roof.
People Also Ask
1. Can you repair rotted roof plywood without replacing it?
It may be possible to repair rotted roof plywood without replacing the entire sheet. This can be done by cutting out the rotted sections and replacing them with new plywood patches.
2. What causes roof plywood to rot?
Roof plywood can rot due to prolonged exposure to moisture, such as leaks or inadequate ventilation. Fungal growth and wood-destroying insects can also contribute to the rotting process.
3. How do you know if roof plywood is rotten?
You can determine if roof plywood is rotten by inspecting it for soft spots or areas that easily crumble when touched. External signs include water stains, sagging ceiling, or visible mold growth on the underside of the roof.
4. How long does roof plywood last before it needs replacement?
The lifespan of roof plywood can vary depending on factors like climate and maintenance. On average, roof plywood can last around 20 to 30 years. However, it is essential to perform regular inspections to catch and address any signs of rot early.
5. Can you prevent roof plywood from rotting?
While it is challenging to completely prevent roof plywood from rotting, you can take several measures to minimize the risk. These include ensuring proper roof ventilation, promptly repairing any leaks, treating the wood with preservatives, and maintaining a clean and debris-free roof.
Insights and Conclusions
In conclusion, repairing rotted roof plywood is a crucial task to ensure the structural integrity of your roof. By following the steps mentioned above, you can address the issue effectively and prevent further damage. Always prioritize safety by wearing protective gear and thoroughly inspecting the area before working on it. Remember to use suitable materials and techniques based on the extent of the damage.
With proper maintenance and timely repairs, you can prolong the lifespan of your roof and avoid costly replacements. Regularly inspect your roof for signs of rot and take immediate action at the first sign of damage. Additionally, consider consulting with a professional if you are unsure of how to proceed or if the damage is extensive. Taking these proactive steps will not only protect your home but also save you from potential headaches down the line.

Roof Replacement Supervisor
Daniel Mitchell’s expertise lies in comprehensive roof replacements, utilizing top-quality materials to ensure durability and longevity. His meticulous approach and commitment to excellence make him a trusted professional.