When it comes to safeguarding your home, your roof plays a crucial role in protecting you and your loved ones from the elements. However, over time, wear and tear on your roof shingles installed?”>roof shingles installed?”>roof shingles can leave your roof vulnerable to leaks and damage. Luckily, with a bit of knowledge and some handy tools, repairing roof shingles can be a manageable task that can save you both time and money. So, whether you’re dealing with cracked, curled, or missing shingles, this article will guide you through the step-by-step process of restoring your roof to its former glory. Let’s dive in and learn how to repair roof shingles like a pro.
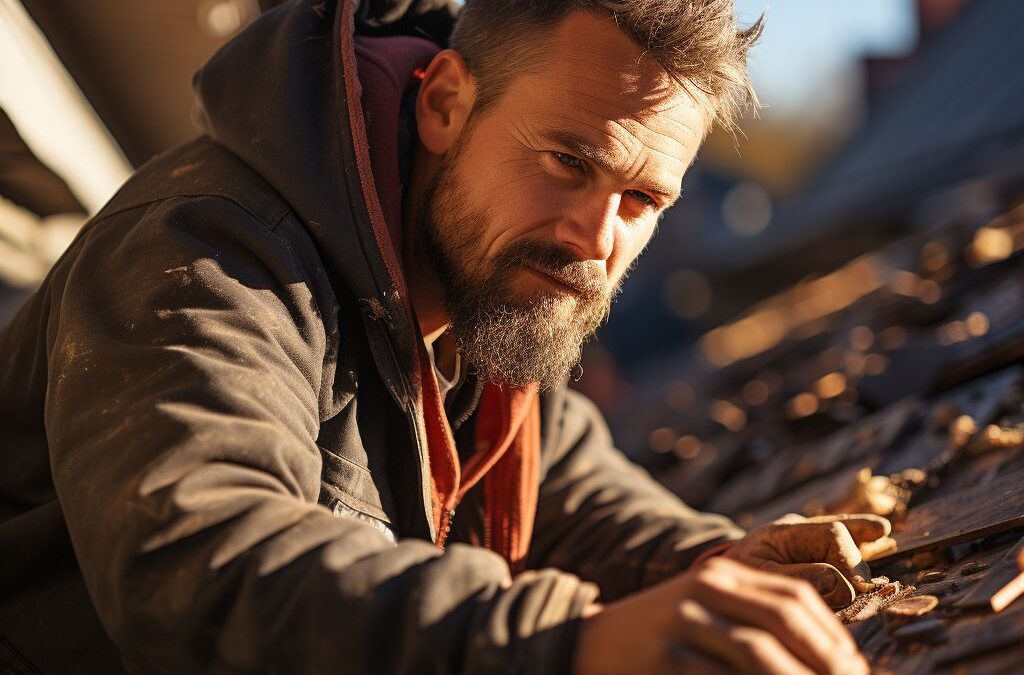
Identifying the Damaged Shingles
The Importance of Identifying Damaged Shingles
Before diving into the nitty-gritty of roof shingle repair, it’s crucial to first identify which shingles are damaged. This step will not only save you time and effort but also ensure that you are addressing the specific areas that require attention.
When examining your roof, keep an eye out for any signs of wear and tear, such as missing, cracked, or curled shingles. Look for areas where the shingles appear discolored, as this could indicate moisture damage or potential leaks. Additionally, check for any granules that may be missing from the shingles, as this can be a sign of advanced deterioration.
One effective way to identify damaged shingles is by conducting a visual inspection from the ground using binoculars. This will allow you to spot any obvious signs of damage without the need to climb up onto the roof. However, keep in mind that a comprehensive inspection may require getting up close and personal with the shingles for a more thorough assessment.
Assessing the Extent of the Damage
Before you begin repairing roof shingles, it is crucial to assess the extent of the damage. This step allows you to determine whether a single shingle needs to be replaced or if there are multiple shingles that require attention. By carefully evaluating the situation, you can ensure that you have the right tools and materials to address the problem effectively.
To assess the damage, start by thoroughly inspecting your roof. Look for any missing or cracked shingles, as well as signs of curling or buckling. Additionally, check for any loose or raised shingles that may indicate underlying issues. Take note of the size and location of the damaged area as this information will help you determine the amount of time and materials needed for the repair.
When , keep in mind that it may not be limited to visible shingle issues. Roof leaks, water stains on ceilings, or dampness in the attic can all indicate more significant problems that require professional attention. If you notice any of these signs, it is essential to contact a roofing specialist for a thorough inspection.
Remember, safety should always be a priority when working on your roof. If the damage is extensive or if you are uncomfortable climbing onto your roof, it is best to hire a professional roofer. They have the experience and equipment necessary to carry out repairs safely and efficiently. is the first step towards a successful roof repair, so make sure to take the time to evaluate the situation thoroughly.
Gathering the Necessary Tools and Materials
Before starting your roof shingle repair project, it is essential to gather all the necessary tools and materials to ensure a smooth and efficient process. By having everything on hand, you can avoid unnecessary delays and interruptions during the repair process.
For this task, you will need a few basic tools such as a pry bar, a hammer, a utility knife, and a ladder. These tools will help you in removing the damaged shingles, securing the new ones, and accessing different parts of your roof. Make sure your ladder is sturdy and secure to prevent accidents or injuries while working at heights.
In addition to the tools, it is crucial to have the right materials for replacing the damaged shingles. You will need new shingles that match the color and style of your existing roof. It is recommended to buy an extra bundle of shingles to ensure you have enough to complete the repair. Other materials you may need include roofing nails?”>roofing nails?”>roofing nails, roofing adhesive or sealant, and roofing felt or underlayment.
Proper safety equipment is also essential when working on roofs. Ensure you have a safety harness, gloves, goggles, and a dust mask to protect yourself from any potential hazards.
To keep track of your materials and tools, consider using a toolbox or a designated storage space for easy access and organization. This will save you time and effort, allowing you to focus on the repair task at hand.
Remember, having the necessary tools and materials readily available will make your roof shingle repair process much smoother and more efficient.
Replacing a Single Damaged Shingle
When it comes to roof shingle repair, one of the most common issues homeowners face is a single damaged shingle. Whether it’s due to harsh weather conditions, age, or accidental damage, replacing a single shingle can help restore the integrity of your roof and prevent further damage. Here’s a step-by-step guide on how to safely and efficiently replace a single damaged shingle.
First, you’ll need to gather the necessary tools and materials for the project. This includes a ladder, safety gear such as gloves and goggles, a pry bar or a shingle ripper, roofing nails, a hammer, and a replacement shingle. Make sure you choose a replacement shingle that matches the color and style of the existing ones on your roof.
Once you have everything ready, start by carefully inspecting the damaged shingle. Look for signs of curling, cracking, or missing pieces. If the shingle is completely damaged and cannot be salvaged, it’s best to remove it entirely and replace it with a new one.
To remove the damaged shingle, use the pry bar or shingle ripper to lift the shingle above it. Gently pry up the nails that hold the damaged shingle in place, being careful not to damage the surrounding shingles. Once the nails are removed, you can easily slide out the damaged shingle.
Next, prepare the area for the replacement shingle by removing any remaining nails or debris. Ensure the surface is clean and smooth before proceeding. Position the replacement shingle in the correct spot, aligning it with the surrounding shingles. Use roofing nails to secure the shingle in place, making sure to drive the nails into the appropriate slots or holes in the shingle.
After attaching the replacement shingle, double-check that it is securely fastened and sits flush with the surrounding shingles. Make any necessary adjustments to ensure a tight fit. Finally, inspect the area to ensure there are no visible gaps or loose nails.
By following these steps, you can easily replace a single damaged shingle and maintain the integrity of your roof. Remember to prioritize safety by using proper equipment and taking necessary precautions when working at heights. If you are unsure about the process or the extent of the damage, it’s always best to consult a professional roofer for assistance.
Repairing Multiple Damaged Shingles in a Row
When you notice multiple damaged shingles in a row on your roof, it’s important to address the issue promptly to prevent further damage and potential leaks. Here’s a step-by-step guide on how to repair multiple damaged shingles in a row.
First, gather the necessary tools and materials for the repair, including replacement shingles, roofing nails, a hammer, a pry bar, and a utility knife. Check the manufacturer’s instructions for the correct type of replacement shingle to use for your particular roof.
1. Start by removing the damaged shingles one by one. Use a pry bar to carefully lift the shingles above the damaged area, taking care not to damage the neighboring shingles. Remove any roofing nails that are holding the damaged shingles in place.
2. Once the damaged shingles are removed, assess the underlying roof deck for any signs of damage or rot. If you notice any issues, make the necessary repairs before proceeding with the installation of the new shingles.
3. Cut replacement shingles to the appropriate size using a utility knife. It’s important to ensure that the replacement shingles fit snugly into place without overlapping neighboring shingles.
4. Begin by installing the new shingle at the bottom of the row. Align it with the existing shingles and secure it in place using roofing nails. Make sure to nail the shingle in the designated areas, typically located just above the adhesive strip of the shingle below.
5. Repeat this process for each replacement shingle, working your way up the row. Take care to align the shingles properly and ensure a tight fit.
6. Once all the damaged shingles have been replaced, inspect the area to ensure that everything is secure and in proper alignment. Make any necessary adjustments or nail down any loose edges.
Remember, if you encounter any difficulties or if the damage seems extensive, it’s best to consult a professional roofer for assistance. They have the knowledge and expertise to handle more complex roofing repairs and can ensure the longevity and integrity of your roof.
By following these steps, you can successfully repair multiple damaged shingles in a row and restore the appearance and functionality of your roof. Regular maintenance and inspections are key to preventing future shingle damage, so be sure to keep an eye on your roof’s condition and address any issues promptly.
Handling Curling or Buckling Shingles
:
Curling or buckling shingles can be a common issue that homeowners face, and it’s important to address these problems promptly to prevent further damage to your roof. When shingles start to curl or buckle, it can expose your roof to potential leaks and other issues. Here are a few steps to handle curling or buckling shingles:
1. Inspect the affected shingles: Start by visually inspecting the shingles that are curling or buckling. Look for any signs of damage, such as cracks or breaks. It’s also important to check the surrounding shingles to ensure they are in good condition.
2. Assess the underlying cause: Curling or buckling shingles can be caused by various factors, including age, moisture buildup, or poor installation. Determine the root cause of the issue to prevent further damage. If it’s due to moisture buildup, for example, address any ventilation or drainage issues to alleviate the problem.
3. Repair or replace the damaged shingles: Depending on the extent of the damage, you may be able to repair the curled or buckled shingles. Use a heat gun or a hairdryer on a low heat setting to soften the shingles, then carefully flatten them with your hands. If the damage is severe or if the shingles cannot be repaired, it may be necessary to replace them.
4. Secure the replacement shingles: If you need to replace any curled or buckled shingles, start by removing the damaged ones. Carefully lift the surrounding shingles and slide the new shingle into place. Then, secure it with roofing nails or staples, making sure to align it properly with the surrounding shingles.
5. Consider professional help: If you’re unsure about on your own, or if the damage is extensive, it’s best to seek professional help. Roofing experts have the knowledge and experience to assess the situation accurately and provide effective solutions.
Remember, prevention is key when it comes to roof maintenance. Regular inspections and timely repairs can help prevent shingle damage, including curling or buckling. Additionally, proper ventilation and maintenance can prolong the lifespan of your roof and minimize the risk of future issues. Seek professional guidance if needed and don’t hesitate to address any concerns about your roof’s condition.
Preventing Future Shingle Damage
To ensure the longevity and integrity of your roof, it’s essential to take the necessary steps to prevent future shingle damage. By implementing a few preventive measures, you can avoid costly repairs and maintain the overall condition of your roof for years to come.
Regular Roof Inspections:
Regular roof inspections are crucial in identifying potential issues before they escalate into major problems. Ideally, you should inspect your roof at least twice a year, in the spring and fall. Look for signs of wear and tear, such as cracked, curled, or missing shingles, as well as any damage caused by wind or moisture. Additionally, keep an eye out for any debris, such as branches or leaves, that may accumulate and potentially cause damage to your shingles over time.
Clean Gutters and Downspouts:
Properly functioning gutters and downspouts play a significant role in preventing shingle damage. Clogged gutters can lead to water backup, which can seep under the shingles and cause rotting or leakage. Regularly clean out your gutters and downspouts to ensure the smooth flow of water away from your roof. Consider installing gutter guards to prevent debris from clogging the gutters, thus reducing the risk of water damage to your shingles.
Trim Overhanging Trees:
Trees that overhang your roof can cause various problems, including shingle damage. Overhanging branches can scrape against shingles during windstorms, leading to excessive wear and tear. Falling branches can also puncture or dislodge shingles, leaving your roof vulnerable to moisture infiltration. Trim back any overhanging branches to eliminate the risk of damage to your shingles and ensure that they are not in direct contact with your roof.
Maintain Proper Attic Ventilation:
Proper attic ventilation is essential for the health of your roof and can help prevent shingle damage. Inadequate ventilation can lead to excessive heat buildup, which can cause shingles to buckle or warp. Additionally, moisture buildup due to poor ventilation can accelerate the deterioration of shingles and contribute to the growth of mold and mildew. Ensure that your attic is adequately ventilated to promote proper air circulation and maintain a consistent temperature, which will help extend the lifespan of your shingles.
By following these preventive measures, you can significantly reduce the risk of shingle damage and prolong the life of your roof. Regular inspections, cleaning the gutters, trimming overhanging trees, and maintaining proper attic ventilation can go a long way in safeguarding your shingles from unnecessary wear and tear. Remember, a proactive approach to roof maintenance is key to avoiding costly repairs in the future.
People Also Ask
What are the most common causes of roof shingle damage?
The most common causes of roof shingle damage include strong winds, heavy rain or snow, age, and improper installation. These factors can lead to cracked, broken, or missing shingles.
Can I replace a single damaged shingle myself?
Yes, you can replace a single damaged shingle yourself if you are comfortable working on your roof. However, it is important to properly identify the type of shingle and follow proper installation techniques to ensure long-lasting repairs.
How do I remove a damaged shingle?
To remove a damaged shingle, carefully lift the tabs of the shingle above it and use a flat pry bar to loosen the adhesive. Gently lift the damaged shingle and slide it out. Be cautious not to damage surrounding shingles during the process.
What materials and tools do I need to repair roof shingles blown off?”>repair roof shingles blown off?”>repair roof shingles?
To repair roof shingles, you will need replacement shingles, roofing nails, a pry bar, a hammer, roofing adhesive, and a utility knife. It is also advisable to have proper safety equipment, such as gloves and safety goggles.
Should I hire a professional for roof shingle repairs?
If you are not comfortable working on your roof or if the damage is extensive, it is recommended to hire a professional roofer for shingle repairs. They have the experience and equipment to handle the job safely and ensure proper repairs.
In Retrospect
In conclusion, repairing roof shingles is an essential task to ensure the longevity and integrity of your roof. By following the steps outlined above, you can successfully repair damaged shingles on your own. Remember to always prioritize safety and use caution when working at heights.
Regular maintenance and inspections can help you catch any potential issues early on and prevent further damage. If you notice extensive or recurring damage to your roof shingles, it may be best to consult a professional roofing contractor for a more comprehensive repair or replacement.
Don’t overlook the importance of repairing roof shingles promptly to avoid more significant issues down the road. Take the necessary steps to protect your investment and maintain a secure and well-functioning roof for years to come.

Emergency Services Manager
Andrew Foster, a seasoned roofing professional, specializes in storm damage repairs and emergency services. His swift response and effective solutions help clients safeguard their properties during challenging times.