Cracked cracked-clay-roof-tiles/” title=”How to repair cracked clay roof tiles?”>roof tiles can be a homeowner’s worst nightmare. Not only do they compromise the structural integrity of your roof, but they also leave it vulnerable to leaks and further damage. If you’ve noticed cracks in your roof tiles, fret not – with a little bit of knowledge and some elbow grease, you can tackle this problem head-on.
In this article, we’ll guide you through the step-by-step process of repairing cracked roof tiles, so you can restore your roof’s durability and protect your home from the elements. From understanding the causes of cracked tiles to learning the right techniques for fixing them, you’ll become equipped with the necessary know-how to handle this common roofing issue. So, grab your toolbox and let’s get started on securing your roof’s longevity.
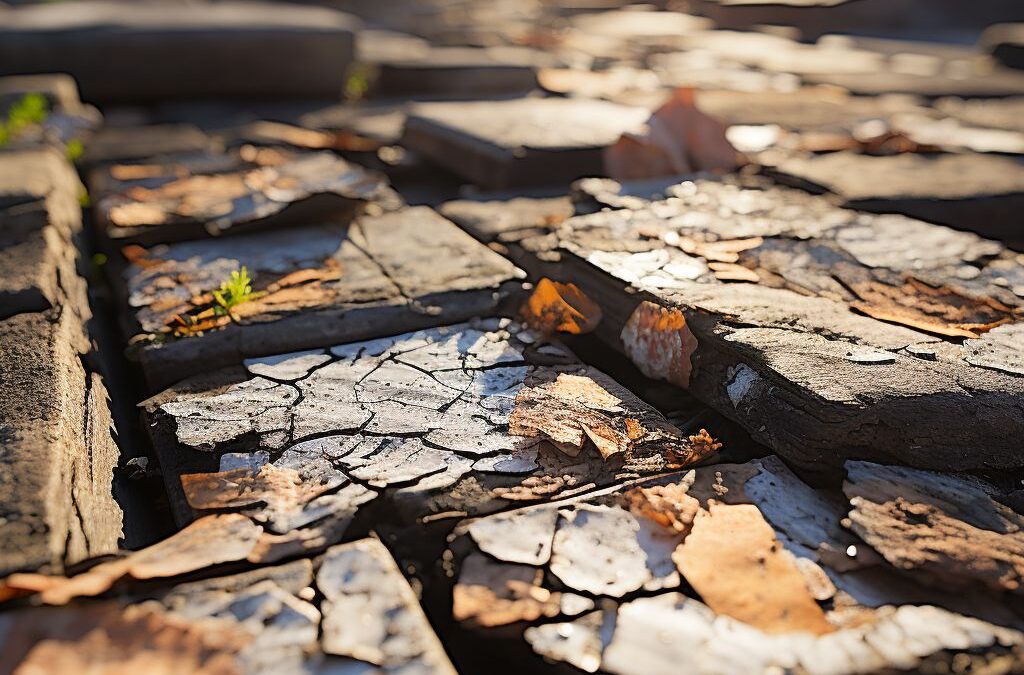
Identifying the Cracked Roof Tiles
Cracked roof tiles can be a common issue that homeowners face, and it is important to identify them accurately in order to take appropriate action. Cracks in roof tiles can occur due to various reasons such as age, weather conditions, or improper installation.
One way to identify cracked roof tiles need to be replaced?” href=”https://fresnoroofrepair.net/do-cracked-roof-tiles-need-to-be-replaced/”>cracked roof tiles is to inspect them visually. Climb up on a ladder and carefully examine each tile for any visible cracks or damage. Look for hairline cracks that may be difficult to spot initially but can expand over time. Additionally, keep an eye out for tiles that may be completely broken or missing. These damaged tiles can lead to leaks and further damage to your roof if not addressed promptly.
Another way to identify cracked roof tiles is to check for signs of water leaks or moisture inside your home. If there are water stains or dampness on your ceiling, it is likely that there are cracked or damaged tiles on your roof allowing water to seep in. Pay attention to any musty odors or mold growth, as these can be indications of water leakage from cracked tiles.
It is also worth noting that sometimes cracked roof tiles may not be visible from the ground level or have obvious signs of damage. In such cases, it is best to consult with a professional roofing contractor who can conduct a thorough inspection of your roof and identify any hidden cracks or damage. They have the expertise and tools to identify even the smallest cracks that may go unnoticed by an untrained eye.
Identifying cracked roof tiles is the first step in addressing the issue and preventing further damage to your roof and home. Take the time to visually inspect your tiles, check for signs of water leaks, and consider seeking professional assistance for a comprehensive assessment. Being proactive in identifying and addressing cracked roof tiles will help ensure the longevity and functionality of your roof.
Preparation and Safety Measures
Before attempting to repair cracked roof tiles, it is crucial to take the necessary . This will not only ensure your safety but also help in achieving a successful repair.
First and foremost, it is important to have the right tools and materials on hand. You will need a ladder, safety harness, safety goggles, work gloves, a trowel, a caulking gun, roofing sealant, replacement roof tiles (if needed), and a hammer. Make sure all tools are in good condition and suitable for the job.
Next, it is essential to assess the condition of your roof and identify any potential hazards. Keep an eye out for loose debris, such as tree branches or moss, that may pose a safety risk during the repair process. Clear away any clutter and ensure a clear path for working on the roof.
Safety should always be a top priority when working at heights. Always use a sturdy ladder and ensure that it is set on a flat and stable surface. Secure the ladder to the roof with a safety harness to prevent slips and falls. Additionally, wear safety goggles to protect your eyes from any flying debris, and work gloves to safeguard your hands from sharp edges.
While working on the roof, it is important to be aware of the potential for further damage. Avoid putting excessive weight on the roof, as this can cause more cracks or even lead to structural issues. Walk on designated areas or tiles that are in good condition.
Lastly, check the weather forecast before starting any roof repair work. Avoid working on a roof during rain, strong winds, or extreme heat, as these conditions can increase the risk of accidents.
By taking the necessary , you can ensure a safe and effective repairs process for your cracked roof tiles. Remember to always prioritize safety and consult a professional if you are unsure about any aspect of the repair.
Repairing Cracked Roof Tiles with Sealant
When it comes to fixing cracked roof tiles, using sealant can be a practical and effective solution. Sealant is designed to bond with the tile, providing a waterproof barrier that helps prevent further damage and deterioration. Whether you have a few small cracks or larger ones, repairing them with a sealant can extend the lifespan of your roof and save you from more costly repairs down the line.
To begin the process of , first, ensure that the tiles and the surrounding area are clean and free of debris. Use a broom or a blower to remove any dirt or loose particles. This will help the sealant adhere properly and create a strong bond.
Next, assess the extent of the cracks. Small, hairline cracks can often be repaired simply by applying a coat of sealant over the damaged area. However, larger cracks may require additional measures such as using a patching compound before applying the sealant.
Before applying the sealant, it’s crucial to wear proper safety equipment such as gloves and eye protection to protect yourself from any potential hazards. Additionally, ensure that the weather conditions are suitable for sealant application – it is best to carry out this repair on a dry and warm day.
To apply the sealant, use a caulking gun or a putty knife to carefully fill in the cracks. Begin at the base of the crack and work your way up, ensuring that the sealant fills the entire length of the crack. Smooth the sealant with a putty knife or your finger, ensuring that it is evenly distributed and flush with the surface of the tile.
Let the sealant dry completely according to the manufacturer’s instructions. Once dry, check the repaired area for any additional cracks that may have been missed. If there are any remaining cracks, repeat the process of applying the sealant until all cracks are properly sealed.
Remember, while using sealant can temporarily fix cracked roof tiles, it is not a permanent solution. It is essential to regularly inspect your roof for any signs of damage and perform necessary repairs or replacements to maintain its integrity. Additionally, following proper roof maintenance practices such as clearing debris and inspecting for potential issues can help prevent future cracks and prolong the lifespan of your roof.
Replacing Individual Cracked Roof Tiles
When it comes to cracked roof tiles, sometimes it is more practical to replace the damaged tiles rather than trying to repair them. This section will guide you through the process of to ensure a sturdy and long-lasting roof.
Firstly, you need to safely access the roof area where the cracked tile is located. Ensure that you have the necessary safety equipment, including a ladder, appropriate footwear, and a safety harness if needed. It is always recommended to have a partner to assist you during this process for added safety.
Once you have reached the damaged tile, carefully remove any debris or loose mortar surrounding it. Use a trowel to gently pry the cracked tile away from the surrounding tiles. Be cautious not to damage any neighboring tiles during this step. If the tile is secured with nails, use a pry bar or nail puller to remove them.
Next, take measurements of the removed tile to ensure that you select the correct replacement. It is crucial to choose a tile that matches the size, shape, and color of the existing tiles to maintain the aesthetic appeal of your roof.
After obtaining the replacement tile, apply a layer of roofing cement or adhesive to the back of the tile. This will help secure it in place and provide additional protection against water infiltration. Carefully position the new tile in the vacant space, ensuring it aligns properly with the surrounding tiles.
Secure the replacement tile by gently pressing it down and applying even pressure. Wipe off any excess cement or adhesive that may have oozed out from the edges of the tile. Allow sufficient time for the tile to set and bond with the roof before subjecting it to any external pressure or weather elements.
It is essential to note that if you are not comfortable or experienced in performing this task, it is best to seek professional assistance. Roofing work can be dangerous, and it is always better to prioritize your safety. Additionally, if you encounter any structural issues or extensive damage, it is advisable to consult a roofing professional for a thorough assessment and appropriate repairs. Remember to always prioritize safety and take the necessary precautions when working at heights.
Performing a Complete Roof Tile Replacement
When it comes to a complete roof tile replacement, sometimes the damage to the tile is beyond repair. In such cases, it is necessary to remove and replace the entire tile to ensure the integrity and stability of your roof. Here are the steps to effectively perform a complete roof tile replacement:
1. Assess the extent of the damage: Before beginning the replacement process, carefully inspect the cracked roof tiles to determine if they can be repaired individually or if a complete replacement is required. Look for signs of excessive cracking, water damage, or structural issues that may indicate the need for a full replacement.
2. Gather the necessary tools and materials: To perform a complete roof tile replacement, you will need a few essential tools and materials. These may include a ladder, safety goggles, gloves, a chisel or pry bar, a hammer, replacement tiles that match your existing ones, roofing cement, and a trowel. It is crucial to prioritize safety and ensure you have all the appropriate equipment before proceeding.
3. Remove the damaged tile: Start by carefully removing the cracked or damaged tile. Use a chisel or pry bar to gently lift the tile and then slide it out from under the surrounding tiles. Take caution not to damage any adjacent tiles during this process. Once the tile is removed, clean the area beneath it, removing any debris or excess roofing cement.
4. Install the new tile: Carefully slide the replacement tile into the empty space left by the damaged one. Ensure that it aligns properly with the surrounding tiles and sits securely in place. Use roofing cement to secure the new tile, applying it to both the underside of the tile and the surrounding area. Press the tile firmly into place and wipe away any excess cement.
5. Allow the cement to dry: It is essential to give the roofing cement enough time to dry and set properly. This will ensure a secure and long-lasting replacement. Follow the manufacturer’s instructions for drying time but, as a general rule, wait at least 24-48 hours before walking on or applying any weight to the newly replaced tile.
By following these steps, you can effectively perform a complete roof tile replacement. Remember to prioritize safety throughout the process and consult with a roofing professional if you encounter any difficulties or uncertainties. Regular maintenance and inspections will help you identify and address cracked roof tiles promptly, preventing further damage and extending the lifespan of your roof.
Maintaining and Preventing Future Cracks
To ensure the longevity and integrity of your roof tiles, it is crucial to implement regular maintenance practices and take preventive measures to minimize the occurrence of future cracks. By following these guidelines, you can help to extend the lifespan of your roof tiles and avoid the need for frequent repairs.
First and foremost, it is important to inspect your roof regularly for any signs of damage or wear. This can be done visually or by hiring a professional roofing contractor to conduct a thorough inspection. Look out for any cracked or chipped tiles, as well as any areas that may be susceptible to potential damage such as loose or missing mortar. Identifying these problem areas early on will allow you to take prompt action and prevent further damage.
In addition to regular inspections, it is recommended to schedule routine cleaning of your roof tiles. Over time, dirt, debris, and algae can accumulate, which can weaken the tiles and promote the growth of moss. Cleaning the tiles with a mild detergent and a soft-bristle brush will help to remove these unwanted elements and maintain the integrity of the tiles. Avoid using high-pressure washers or abrasive cleaning materials, as they can cause further damage to the tiles.
Furthermore, maintaining proper ventilation in your attic can prevent unnecessary heat buildup, which can cause expansion and contraction of the roof tiles, leading to cracks. Ensure that your attic is well-insulated and properly ventilated to allow for proper airflow and temperature regulation. This will help to minimize the stress on the tiles and reduce the likelihood of cracking.
Lastly, consider applying a protective sealant to your roof tiles. This will provide an additional layer of protection against the elements and help to prevent moisture penetration. Choose a high-quality sealant that is specifically designed for roof tiles and follow the manufacturer’s instructions for application. Regularly reapply the sealant as recommended to ensure its effectiveness.
By implementing these maintenance practices and taking preventive measures, you can significantly reduce the risk of future cracks in your roof tiles. Remember to conduct regular inspections, clean the tiles, maintain proper ventilation, and apply a protective sealant when necessary. These simple steps will help to preserve the condition of your roof tiles and minimize the need for costly repairs or replacements.
People Also Ask
1. Can cracked roof tiles be repaired?
Yes, cracked roof tiles can often be repaired by using a silicone or roof tile adhesive to seal the crack. However, if the damage is extensive, it may be more cost-effective to replace the tile altogether.
2. How much does it cost to repair cracked roof tiles?
The cost of repairing cracked roof tiles depends on factors such as the extent of the damage and the type of tiles being used. On average, repairs can range from $150 to $400 per tile, including labor and materials.
3. What causes roof tiles to crack?
Roof tiles can crack due to various reasons, including: extreme weather conditions, such as freezing temperatures or hailstorms; improper installation or walking on the roof; natural wear and tear over time; or the growth of underlying tree roots.
4. Can I use sealant to fix a cracked roof tile?
Yes, sealants like roof tile adhesive or silicone can be used to fix small cracks or gaps in roof tiles. Apply the sealant evenly along the crack, ensuring it fills the entire gap. However, it is important to note that this is a temporary solution, and professional repairs or tile replacement may be required for severe damage.
5. Is it necessary to repair cracked roof tiles immediately?
While it is not always necessary to repair cracked roof tiles immediately, it is recommended to fix them as soon as possible. Delaying repairs can allow water to seep into the roof, which may lead to further damage, such as leaks, mold growth, or structural issues. Timely repairs can help prevent more extensive and costly repairs in the future.
To Conclude
In conclusion, repairing cracked roof tiles is a necessary task to ensure the durability and longevity of your roof. By closely inspecting your roof for cracked tiles and addressing them promptly, you can prevent further damage and potential leaks. It is important to gather the necessary tools and materials, clean the cracked area, apply roof sealant, and finally replace the cracked tile if necessary. Remember to prioritize safety throughout the process and consider seeking professional help if the task seems too advanced or if you are dealing with a large number of damaged tiles.
Taking the time to repair cracked roof tiles will not only protect your home from potential water damage, but it will also save you money in the long run by avoiding more extensive repairs. Don’t hesitate to address even minor cracks, as they can quickly worsen and compromise the integrity of your roof. By following the steps outlined in this guide and staying proactive with roof maintenance, you can ensure a sturdy and secure roof for years to come.

Customer Relations Manager
Benjamin Turner is a customer-centric professional, placing emphasis on open communication and transparency throughout the roofing process. His dedication to client satisfaction ensures a smooth and collaborative experience.