The cozy crackling of a fireplace is often a cherished aspect of any home, bringing warmth and comfort during chilly winter nights. However, as time passes, chimney bricks can deteriorate and crack, leading to potential safety hazards and unsightly aesthetic damage. But fear not! In this article, we will guide you through the steps to repair broken chimney bricks, ensuring your fireplace remains both functional and visually appealing. Whether you are a DIY enthusiast or simply looking to learn more about roof repair, this comprehensive guide will equip you with the knowledge and confidence to restore your chimney to its former glory. So grab your tools and let’s get started on this exciting and rewarding project!
Common Causes of Broken Chimney Bricks
Broken chimney bricks can be a common problem for homeowners, and understanding the causes of this damage can help you prevent it in the future. One of the leading causes of broken chimney bricks is water damage. Over time, moisture can seep into the bricks, causing them to crack, chip, and eventually break. This can occur if the chimney flashing is not properly installed or if there are any leaks in the chimney system.
Another cause of broken chimney bricks is the freeze-thaw cycle. In colder climates, water can enter the small cracks in the bricks during the day and then freeze at night. As water freezes, it expands and puts pressure on the surrounding bricks, causing them to crack and break. This process can repeat over time, leading to extensive damage to the chimney structure.
Additionally, poor construction or settling of the chimney can also contribute to broken bricks. If the chimney was not built with proper support or if the foundation settles unevenly, it can put strain on the bricks, causing them to crack and break. It’s important to ensure that your chimney was constructed correctly and is built on a stable foundation to prevent future damage.
To prevent broken chimney bricks, regular maintenance and inspections are essential. Keep an eye out for any signs of water damage, such as leaks or discoloration, and address them promptly. Additionally, make sure to have your chimney inspected by a professional at least once a year to catch any potential issues early on.
By understanding the , you can take proactive steps to prevent this damage and ensure the longevity of your chimney. With regular maintenance, inspections, and prompt repairs, you can keep your chimney in optimal condition for years to come.
Inspecting the Damage: Identifying the Extent of the Problem
When dealing with broken chimney bricks, it is essential to thoroughly inspect the damage before proceeding with any repairs. This will allow you to accurately assess the extent of the problem and determine the best course of action.
One of the first things to look out for during the inspection is the visible signs of broken bricks. Cracked or chipped bricks are obvious indicators of damage, but there may also be loose or missing mortar between the bricks. These issues can compromise the structural integrity of the chimney and should be addressed promptly.
In addition to visual cues, it’s also important to check for any signs of water damage. Water can easily seep into cracks or gaps in the bricks and cause further deterioration. Look for discoloration or dampness on the surrounding areas of the chimney, as well as water stains on the inside of your home near the chimney. These can be indications of an underlying problem that needs immediate attention.
To further assess the extent of the damage, consider conducting a thorough chimney inspection from both the exterior and interior. This can be done by using a flashlight to examine the interior of the chimney, checking for any signs of loose or crumbling bricks. It is also recommended to climb up on the roof and carefully examine the chimney from all angles. Keep an eye out for any leaning or tilting, as this could be a sign of more significant structural issues.
By taking the time to inspect the damage thoroughly, you can gain a better understanding of the extent of the problem and make informed decisions regarding the necessary repairs. This initial examination will guide you in determining what tools and materials are needed and help you avoid any unforeseen complications during the repair process. Remember, if you are uncertain about the extent of the damage or the repair steps required, it is always best to consult with a professional chimney repair expert for guidance.
Preparing for the Repair: Essential Tools and Materials
Before diving into the process of repairing broken chimney bricks, it is crucial to gather the necessary tools and materials to ensure a smooth and efficient repair. Having the right equipment on hand will not only make the job easier but will also help achieve optimal results. Here are the essential tools and materials needed for repairing broken chimney bricks:
1. Safety Gear:
When working with bricks, safety should always be a top priority. Make sure to wear protective gear such as safety goggles, gloves, and a dust mask. These items will shield your eyes, hands, and respiratory system from any potential hazards, including flying debris and dust particles.
2. Masonry Tools:
To repair broken chimney bricks effectively, you will need a few specific masonry tools. These tools include a chisel, hammer, trowel, pointing trowel, scrub brush, wire brush, and a mixing container for mortar. The chisel and hammer will help remove damaged bricks, while the trowel, pointing trowel, and brushes are essential for applying new mortar.
3. Mortar Mix:
Mortar is used to hold the bricks together and fill in any gaps left after removing the broken bricks. It is essential to choose a mortar mix that matches the existing mortar in terms of color and composition. This will ensure a cohesive look and strong bond between the new and old bricks. Additionally, follow the manufacturer’s instructions when mixing the mortar to achieve the proper consistency.
4. Replacement Bricks:
Having an ample supply of replacement bricks is crucial for a seamless repair job. It is recommended to use bricks that closely match the original ones in terms of size, color, and texture. This will help maintain the visual integrity of the chimney and prevent any noticeable differences between the old and new bricks.
5. Water and Cleaning Solutions:
Before applying new mortar, it is important to clean the damaged area thoroughly. Water and cleaning solutions like masonry cleaner or mild detergent can help remove any dirt, debris, or loose mortar residue. A clean surface will ensure better adhesion and a more professional finish.
6. Level and Tape Measure:
To ensure the repaired bricks are properly aligned and leveled, it is essential to have a level and tape measure on hand. These tools will assist in achieving an even and structurally sound chimney repair.
By gathering these essential tools and materials, you will be well-equipped to tackle the task of repairing broken chimney bricks. Remember to prioritize safety, follow proper guidelines, and take your time to ensure the best possible outcome. With careful preparation and the right resources, you can restore your chimney’s integrity and prolong its lifespan.
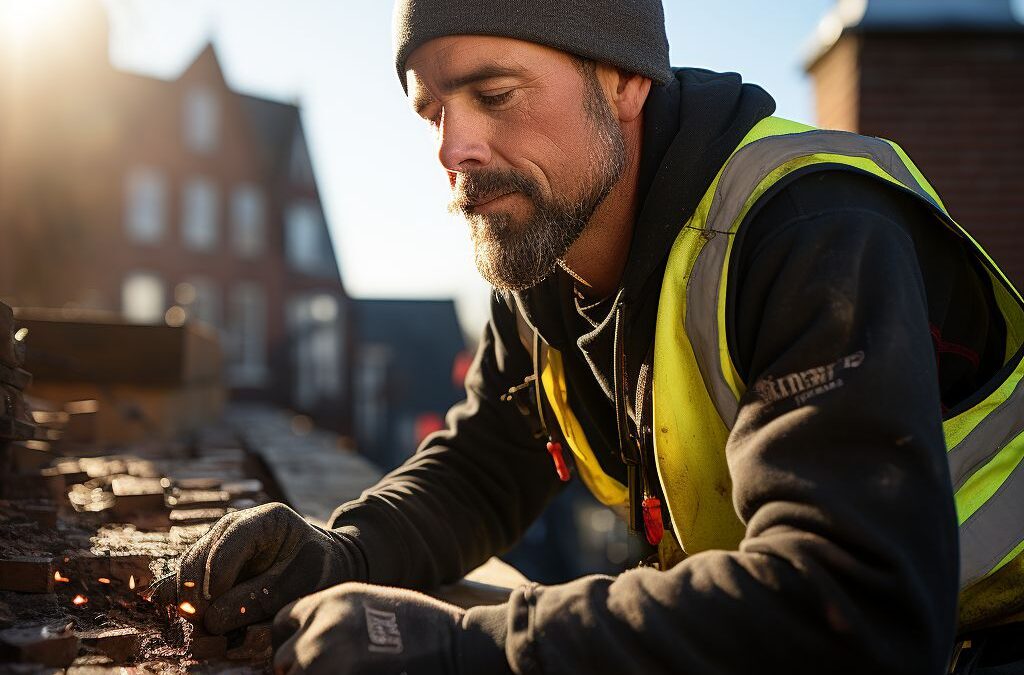
Step-by-Step Guide: Repairing Broken Chimney Bricks
Repairing broken chimney bricks can be a daunting task, but with the right tools and knowledge, it is possible to restore your chimney to its former glory. Follow this step-by-step guide to learn how to repair broken chimney bricks and ensure the safety and functionality of your chimney.
Firstly, it is important to gather all the necessary tools and materials before starting the repair process. You will need safety equipment such as goggles, gloves, and a dust mask to protect yourself from any debris. Additionally, you will need a masonry hammer, brick chisel, trowel, masonry brush, mortar mix, and water.
Once you have gathered all the required tools, the next step is to carefully examine the extent of the damage. Inspect each broken brick and surrounding area to determine the cause of the damage and whether any underlying issues need to be addressed. It is crucial to identify any loose or crumbling mortar as well, as this will need to be removed and replaced.
To begin the repair process, start by removing any loose or damaged bricks and mortar using a masonry hammer and chisel. Be careful not to further damage surrounding bricks during this step. Once the damaged bricks have been removed, clean the area thoroughly using a masonry brush to remove any debris and ensure a clean surface for the new mortar.
Mix the mortar according to the manufacturer’s instructions, making sure to achieve the desired consistency. Apply a thin layer of mortar to the backside of the replacement brick using a trowel. Carefully place the brick into the designated spot, ensuring it fits snugly with the surrounding bricks. Use a level to ensure the brick is properly aligned and adjust if necessary.
Once the replacement bricks are in place, fill in any gaps with mortar using the trowel. Smooth out the mortar with a jointing tool or the edge of the trowel to give it a finished look. Allow the mortar to cure for the recommended amount of time before using the chimney again.
It is crucial to note that chimney repairs should only be attempted by those with experience or in cases of minor damage. If the damage is extensive or there are underlying structural issues, it is recommended to seek the assistance of a professional chimney repair expert who can assess the situation and provide appropriate solutions.
By following this step-by-step guide, you can effectively repair broken chimney bricks and restore the integrity of your chimney. Remember to prioritize safety and seek professional help when necessary to ensure the longevity and functionality of your chimney.
preventing-future-brick-damage”>Proactive Measures: Preventing Future Brick Damage
Taking proactive steps to prevent damage to your chimney bricks can save you time, money, and the hassle of dealing with repairs in the future. By implementing a few simple measures, you can ensure the longevity and security of your chimney structure.
1. Regular Inspections: Regularly inspecting your chimney bricks can help you identify any signs of wear and tear before they worsen. Look out for cracks, loose or missing mortar, and any other signs of damage. Catching these issues early on will allow for prompt repairs and prevent further damage to the bricks.
2. Maintain Proper Ventilation: Adequate ventilation is crucial in preventing the deterioration of chimney bricks. Poor ventilation can lead to excess moisture accumulation, which can weaken the bricks and mortar over time. Ensure that your chimney has proper airflow by keeping the flue open when the fireplace is not in use and installing a chimney cap to prevent rainwater and debris from entering.
3. Waterproofing: Applying a waterproof sealant to your chimney bricks can be an effective measure in preventing future damage. This sealant creates a barrier against water penetration and protects the bricks from the freeze-thaw cycle, which can cause cracking and crumbling. Consult with a professional to determine the appropriate sealant for your chimney bricks and follow the manufacturer’s instructions for application.
4. Trim Overhanging Trees: Overhanging trees can pose a threat to your chimney bricks. Falling branches or leaves can cause damage upon impact. Additionally, trees and foliage can trap moisture around the chimney, leading to accelerated deterioration. Regularly trim any branches that are in close proximity to your chimney and maintain a clear distance between the tree canopy and your roofline.
By implementing these proactive measures, you can significantly reduce the risk of future brick damage. Remember that regular inspections, proper ventilation, waterproofing, and landscape maintenance are all key components in maintaining a sturdy and long-lasting chimney structure. Don’t underestimate the importance of preventive maintenance and save yourself from costly repairs in the long run.
Seeking Professional Help: When to Call a Chimney Repair Expert
While some chimney repairs can be tackled by homeowners with basic DIY skills, there are certain situations where it is best to call a professional chimney repair expert. These experts have the knowledge, experience, and specialized equipment required to handle more complex chimney repair jobs. It is important to know when it is time to seek their assistance to ensure the safety and longevity of your chimney.
If you notice extensive damage to your chimney bricks where a large portion of them are cracked, loose, or missing, it is a sign that the damage is beyond what a DIY repair can handle. This could indicate a more serious structural issue with your chimney that needs to be evaluated and addressed by a professional. Attempting to repair such extensive damage without the proper expertise could lead to further damage or compromise the stability of your chimney.
Additionally, if you have attempted to repair your chimney bricks but continue to experience recurring issues, it is a clear indication that professional help is needed. A chimney repair expert will be able to identify the underlying cause of the ongoing problems and provide a comprehensive solution to prevent further damage and costly repairs in the future.
When dealing with chimney repairs, safety should always be a top priority. If you are uncomfortable working at heights or lack the necessary tools and equipment to safely navigate your roof and chimney, it is best to leave the job to the professionals. Climbing ladders and working on rooftops can be risky, especially when dealing with chimney repairs that require expertise and precision.
Remember, calling a chimney repair expert can save you time, money, and hassle in the long run. They will not only address the immediate repair needs but also provide valuable advice on preventative maintenance to extend the lifespan of your chimney. With their professional touch, you can have peace of mind knowing that your chimney is in safe hands and will be restored to its optimal functionality.
People Also Ask
1. Can I repair broken chimney bricks myself?
Yes, you can repair broken chimney bricks yourself by following a few simple steps. However, it is recommended to consult a professional if the damage is extensive or if you are not experienced in masonry work.
2. What materials do I need to repair broken chimney bricks?
To repair broken chimney bricks, you will need a hammer, chisel, mortar mix, trowel, wire brush, and water. These tools and materials will help you remove the damaged bricks, clean the area, and replace them with new ones.
3. How do I remove broken bricks from the chimney?
To remove broken bricks from the chimney, use a chisel and hammer to carefully chip away the mortar surrounding the damaged brick. Once loose, gently pry out the broken brick. Be cautious not to damage surrounding bricks and mortar during this process.
4. How do I clean the area before repairing broken chimney bricks?
Use a wire brush to remove any loose debris and mortar from the area where the broken bricks are located. Thoroughly clean the surface to ensure proper adhesion of new mortar and bricks.
5. How do I replace broken bricks in a chimney?
To replace broken bricks in a chimney, mix mortar according to the manufacturer’s instructions and apply a layer to the cleaned area. Press the new brick firmly into the mortar, leaving a small gap for expansion. Use a trowel to smooth the mortar and match the surrounding brickwork.
Final Thoughts
In conclusion, repairing broken chimney bricks is a task that can be accomplished with some planning and the right tools. It is important to thoroughly assess the extent of the damage before starting the repair process. Taking the necessary steps, such as cleaning the area, removing loose bricks, and installing new bricks with the appropriate mortar, can help restore the functionality and visual appeal of the chimney.
Remember to prioritize safety by using appropriate protective gear and ensuring a stable working environment. If the damage seems extensive or if you lack the necessary skills or confidence, it is always advisable to consult a professional chimney repair specialist.
By following these steps and investing the time and effort required, you can successfully repair broken chimney bricks and prolong the lifespan of your chimney. Don’t neglect this important maintenance task, as it can help prevent further damage and potential hazards in the future. Keep your chimney in good condition and enjoy the warmth and comfort it provides.

Roof Replacement Supervisor
Daniel Mitchell’s expertise lies in comprehensive roof replacements, utilizing top-quality materials to ensure durability and longevity. His meticulous approach and commitment to excellence make him a trusted professional.