With every gust of wind, a shake roof can become vulnerable to damage. Whether caused by age, weather, or simple wear and tear, a damaged shake roof can lead to a host of problems, including leaks and further destruction of the underlying structure. But before you panic and call in the professionals, take a moment to breathe. In this guide, we will walk you through the step-by-step process of repairing your shake roof, empowering you to tackle the task with confidence, save money, and extend the lifespan of your roof. So grab your hammer and put on your work gloves; it’s time to restore that beautiful shake roof to its former glory.
Identifying and Assessing Shake Roof Damage
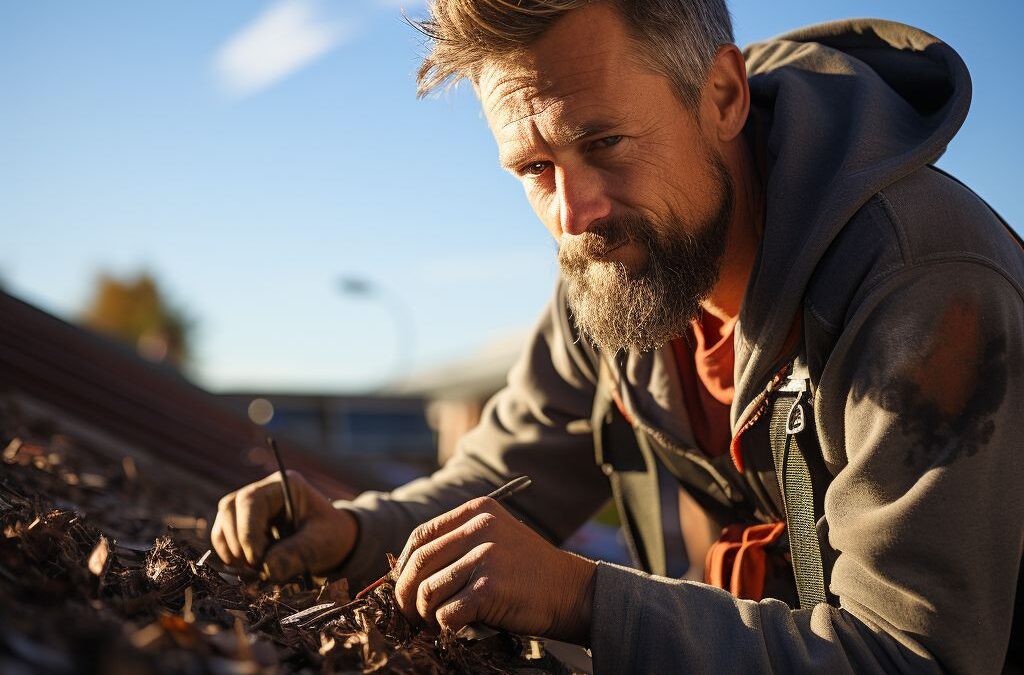
One of the first steps in repairing a shake roof is to accurately identify and assess the damage. This is essential for determining the extent of the repairs needed and ensuring that the appropriate measures are taken to fix the problem.
When inspecting a shake roof for damage, it is important to look for signs of wear and tear, such as cracked, split, or missing shakes. Shakes that are curling or have become dislodged from their original position are also indicators of significant damage. Additionally, keep an eye out for any signs of water leakage or staining on the underside of the roof or in the attic space, as this may suggest underlying issues that need to be addressed.
To assess the overall condition of the shake roof, it is necessary to conduct a thorough inspection. This can be done by visually examining the roof from the ground, using binoculars if necessary, or by actually climbing onto the roof for a closer look. It is important to exercise caution and ensure that appropriate safety measures are taken when accessing the roof.
During the inspection, pay close attention to areas that are prone to damage, such as the valleys and edges of the roof. These areas are often more susceptible to issues such as water damage and moss growth. Look for any signs of rot, decay, or decayed flashing, as these can compromise the integrity of the entire roof structure.
In addition to visual inspection, it may be beneficial to hire a professional roofing contractor to conduct a more detailed assessment of the shake roof. These professionals have the necessary expertise and experience to identify hidden damage and provide an accurate assessment of the repair needs.
By thoroughly identifying and assessing the shake roof damage, homeowners can take informed steps towards repairing and restoring the roof to its original condition. This initial step is crucial in devising a comprehensive repair plan and selecting the appropriate tools and materials for the job at hand.
Understanding the Shake Roof Repair Process
Repairing a shake roof requires a systematic approach to ensure the longevity and stability of the overall structure. This process involves several steps, from identifying the damage to executing the necessary repairs. By , homeowners and professionals alike can effectively assess and address issues before they worsen.
First, it is essential to visually inspect the shake roof for signs of damage. This can include loose or missing shakes, cracks, rot, and mold. Pay close attention to areas around chimneys, vents, and other roof protrusions, as they are prone to leaks and damage. Use a ladder to get a closer look and carefully walk across the roof surface while taking precautions to prevent accidents or further damage.
After identifying the damage, the next step is to determine the extent of repairs needed. This may involve measuring the square footage of damaged shakes, assessing the overall condition of the roof, and inspecting the underlying structure for any structural issues. It is crucial to accurately assess the scope of the repairs to ensure the proper allocation of time, resources, and materials.
Once the assessment is complete, it is time to gather the necessary tools and materials for the shake roof repair. This can include a hammer, pry bar, roofing nails, replacement shakes, roofing adhesive, and a saw for cutting shakes to size. It is important to use high-quality materials that match the existing shakes in terms of size, thickness, and color. This will help maintain the aesthetic appeal of the roof while ensuring a proper fit and durability.
To successfully execute the repairs, homeowners and professionals should follow a step-by-step approach. This may involve removing and replacing damaged shakes, securing loose shakes, addressing leaks or gaps, and sealing the entire roof to prevent future damage. It is crucial to follow industry best practices and manufacturer’s guidelines to ensure the repairs are done correctly and provide long-lasting results.
is essential for anyone responsible for maintaining or restoring this type of roofing system. By following a systematic approach and utilizing the right tools and materials, homeowners can effectively address shake roof damage and prolong the lifespan of their roofs.
Selecting the Right Tools and Materials for Shake Roof Repair
When it comes to repairing a shake roof, choosing the appropriate tools and materials is crucial for a successful restoration. Using the wrong equipment or low-quality materials can result in subpar repairs that may not withstand the test of time. Therefore, it is essential to understand the specific requirements of shake roof repair and invest in the right tools and materials for the job.
Determine the Type of Shake Roof
Before proceeding with selecting tools and materials, it is important to identify the type of shake roof you are working on. Shake roofs can be either made from cedar or asphalt, each requiring different repair techniques and materials. Cedar shakes are typically thicker and may require specialized tools for removal and replacement, while asphalt shakes are more easily handled with general roofing tools.
Essential Tools for Shake Roof Repair
To successfully repair a shake roof, certain tools are indispensable. These include:
- Roofing hammer: A roofing hammer, or a roofing hatchet, with a smooth face and a sharp claw is essential for removing damaged shakes and driving in new ones.
- Tarp or drop cloth: To protect the surrounding area and ensure a clean workspace, a tarp or drop cloth should be used to catch debris and prevent it from causing any additional damage.
- Roofing nails: Use galvanized roofing nails that are long enough to secure the shakes properly. They should penetrate both the shake and the roof deck without extending too far.
- Pry bar: A pry bar helps in gently lifting up and removing damaged shakes without causing unnecessary damage to the adjacent shakes or roof structure.
- Chisel or utility knife: A chisel or utility knife is useful for trimming or shaping shakes to fit properly during the repair process.
- Roofing adhesive or sealant: Depending on the extent of the damage, a roofing adhesive or sealant may be necessary to apply to the edges of the shakes to prevent water infiltration.
Quality Materials for Shake Roof Repair
When it comes to materials, opt for those that are designed specifically for shake roof repairs. These may include:
- Replacement shakes: Whether cedar or asphalt shakes, make sure to source high-quality replacement shakes that match the existing ones in terms of size, thickness, and texture. This will ensure a seamless repair.
- Underlayment: Installing an appropriate underlayment, such as roofing felt or synthetic underlayment, is crucial for protecting the roof structure beneath the shakes from moisture and preventing leaks.
- Flashing: Check the condition of the flashing around chimneys, vents, and other roof penetrations. Replace any damaged or deteriorated flashing to ensure proper protection against water intrusion.
- Treatment and preservatives: For cedar shake roofs, applying a treatment or preservative after repairs can help protect the wood and prolong its lifespan.
- Roofing cement or adhesive tape: In cases where tight seals are required, using roofing cement or adhesive tape can help ensure a watertight repair.
By investing in the right tools and materials for your shake roof repair, you will be equipped to effectively address any damage and restore the longevity and functionality of your roof. Remember, always prioritize quality and compatibility to achieve the best results.
Step-by-Step Guide to Repairing a Shake Roof
Repairing a shake roof requires careful attention and skill. It is essential to follow a step-by-step guide to ensure that the repair process is done correctly and effectively. Here is a breakdown of the necessary steps involved in repairing a shake roof:
1. Safety First: Before starting any repair work on your shake roof, it is vital to prioritize safety. Make sure to wear appropriate protective gear, such as gloves and goggles, to avoid any injuries or accidents. Additionally, use a sturdy ladder and be cautious of your surroundings.
2. Inspecting the Damage: Begin by thoroughly inspecting your shake roof for any signs of damage. Look for cracked, split, or missing shakes, as well as any leaks or sagging areas. Take note of the extent of the damage to determine the appropriate repair approach.
3. Remove and Replace Damaged Shakes: Once you have assessed the damage, proceed to remove the damaged shakes. Gently pry them loose using a pry bar, taking care not to damage the surrounding shakes. Replace the removed shakes with new ones of the same size and material.
4. Secure Shakes: Use galvanized nails or screws to secure the replacement shakes firmly in place. Make sure they are properly aligned with the existing shakes to maintain a uniform appearance.
5. Seal the Shakes: To enhance the durability and longevity of your shake roof, consider applying a layer of sealant to the repaired shakes. This will help protect against moisture and prevent future damage. Choose a high-quality sealant specifically designed for shake roofs and apply it evenly using a paintbrush or roller.
6. Check for Proper Ventilation: Adequate ventilation is crucial for shake roofs, as it helps prevent moisture buildup and premature decay. During the repair process, ensure that the vent openings are clear of debris and properly functioning. If necessary, clean or replace the vents to promote proper airflow.
7. Perform a Final Inspection: Once the repair work is completed, carefully inspect the entire shake roof to ensure that all damaged areas have been adequately addressed. Look for any loose nails or shakes that may need further attention. Conduct a water test to verify that leaks have been resolved.
By following these step-by-step instructions, you can effectively repair a shake roof and restore its functionality and aesthetic appeal. However, if you are unsure about any aspect of the repair process, it is always best to consult a professional roofer to avoid any potential mistakes or further damage.
Addressing Common Issues and Challenges in Shake Roof Repair
One of the most common challenges when repairing a shake roof is determining the extent of damage and identifying any underlying issues. This is especially true if the damage is not immediately visible. It is important to thoroughly inspect the entire roof, including the shakes, underlayment, flashing, and any other components, to ensure that all areas requiring repair are identified.
Another common issue in shake roof repair is matching the replacement shakes to the existing ones. Shake roofs often have a unique and distinctive look, and finding replacement shakes that closely match the original ones can be a challenge. It is important to look for shakes that are of the same material, size, and color as the existing ones to maintain the overall aesthetic appeal of the roof. It may be necessary to contact a roofing professional or supplier who specializes in shake roofing to assist with finding the right replacement shakes.
In addition, working with shakes can be more labor-intensive compared to other roofing materials. Shakes may need to be individually removed and replaced, which can be time-consuming and require specialized skills. It is important to take the necessary precautions to prevent further damage to surrounding shakes during the repair process. This may involve carefully removing damaged shakes, securing new shakes in place, and ensuring that all fasteners are properly installed.
Overall, requires careful attention to detail and a thorough understanding of shake roofing materials and techniques. By taking the time to assess the damage, selecting the right tools and materials, and following a step-by-step repair process, homeowners can effectively address and overcome these challenges to restore the functionality and beauty of their shake roof.
Maintaining and Preventing Shake Roof Damage
To ensure the longevity and durability of a shake roof, proper maintenance and proactive prevention are essential. By regularly inspecting and maintaining your shake roof, you can identify and address any potential issues before they escalate into major problems. Additionally, taking preventive measures can help minimize the risk of shake roof damage caused by environmental factors or aging.
Regular inspections should be conducted at least twice a year, preferably in the spring and fall. Inspect the entire roof for any signs of damage, such as cracked or loose shakes, mold or mildew growth, or signs of water infiltration. Pay close attention to areas that are more prone to wear and tear, such as valleys and flashing.
Clearing debris, such as leaves, branches, and dirt, from the roof and gutters is crucial in preventing shake roof damage. Accumulated debris can trap moisture and create an ideal environment for rot and decay. Utilize a sturdy ladder and appropriate safety measures to safely access the roof for thorough cleaning.
Proper ventilation is paramount for shake roof maintenance. Inadequate ventilation can lead to excessive heat buildup and moisture retention, both of which can accelerate shake roof deterioration. Ensure that your attic or crawl space has adequate ventilation to regulate temperature and moisture levels. Consult with a roofing professional to determine the right ventilation system for your specific shake roof.
Regularly applying a high-quality wood preservative or sealant to the shakes can significantly extend their lifespan and enhance their resistance to weathering. This protective coating helps shield the shakes from moisture, UV rays, and fungal growth. Refer to the manufacturer’s instructions to ensure the proper application process and frequency for the chosen product.
Trimming overhanging tree branches near your shake roof is important to prevent damage from falling branches during storms or heavy winds. Branches rubbing against the roof can also cause abrasions and wear down the surface of the shakes over time. It’s recommended to hire a professional tree service to safely trim branches near your roof.
By following these maintenance and prevention guidelines, you can effectively prolong the life of your shake roof and minimize the need for major repairs. Remember, a well-maintained shake roof not only adds value to your home but also provides reliable protection against the elements for years to come.
People Also Ask
1. How much does it cost to repair a shake roof?
The cost of repairing a shake roof can vary depending on the extent of the damage and the size of the roof. On average, homeowners can expect to pay anywhere from $500 to $1500 for minor repairs, while more significant repairs or a complete roof replacement can range from $5000 to $15,000.
2. Can I repair a shake roof myself?
While it is possible to repair a shake roof yourself, it is generally recommended to hire a professional roofer for this task. Repairing a shake roof requires specialized knowledge and techniques to ensure proper installation, weatherproofing, and longevity of the repairs.
3. How long does a shake roof repair last?
The lifespan of a shake roof repair can vary depending on various factors such as the quality of the repair, the age of the shakes, and the level of maintenance. A well-executed repair can last anywhere from 5 to 15 years, but eventually, the entire roof may need to be replaced as the shakes age and deteriorate over time.
4. What are the common issues with shake roofs?
Common issues with shake roofs include cracked or split shakes, loose or missing shakes, water damage, rotting shakes, and moss or algae growth. Regular inspections and prompt repairs can help address these issues before they worsen and lead to more extensive damage.
5. Can a shake roof be repaired or does it need to be replaced?
In many cases, a shake roof can be repaired rather than replaced entirely. Minor issues such as a few cracked or loose shakes can often be addressed with repairs. However, if the shakes are significantly damaged, decayed, or the overall roof condition is poor, a complete replacement may be necessary for lasting durability and safety.
To Conclude
In conclusion, repairing a shake roof can be a challenging but necessary task to ensure its longevity and structural integrity. By following the steps mentioned above, you can effectively repair and maintain your shake roof, extending its lifespan and protecting your home from potential damage. It is important to regularly inspect your roof for any signs of damage or wear, and address any issues promptly to prevent further problems. Additionally, seeking professional help or consulting with roofing experts can offer valuable guidance and ensure that repair work is done correctly. By taking proper care of your shake roof, you can enjoy years of reliable protection for your home.

Commercial Roofing Consultant
Matthew Carter’s forte lies in commercial roofing systems, particularly flat roofs and metal structures. His expertise and attention to detail guarantee reliable and tailored solutions for businesses in Fresno.