A cedar shake roof not only adds timeless charm and rustic elegance to your home, but it also offers excellent protection against the elements. But if you’re considering installing a cedar shake roof, you may wonder where to begin. Don’t fret! In this article, we will guide you through the process of installing a cedar shake roof, step by step. From preparing the surface to securing the shakes, we will provide you with the knowledge and tips needed to complete this project successfully. So, grab your tools, put on your safety gear, and let’s dive into the world of cedar shake roofs, unveiling the secrets to creating a beautiful and durable roof that will stand the test of time.
Components required for installing a cedar shake roof
Cedar shake roofs offer a beautiful and durable option for homeowners looking to enhance the aesthetic appeal of their homes. However, before you begin installing a cedar shake roof, it’s important to gather all the necessary components.
One of the key is the cedar shake shingles themselves. These shingles are typically made from cedar wood, which is known for its natural resistance to insects, rot, and decay. When selecting cedar shake shingles, look for high-quality shingles that have been treated to enhance their durability and longevity.
In addition to the cedar shake shingles, you will also need a few other components to ensure a successful installation. This includes underlayment, which acts as a protective barrier between the cedar shakes and the roof deck. Underlayment helps to prevent moisture from seeping through and damaging the roof structure. Additionally, you will need roofing nails, a hammer or nail gun, a measuring tape, a chalk line, and a ladder or scaffolding for accessing the roof.
Before you begin the installation process, it’s important to ensure that you have all the necessary components on hand. This will help to streamline the installation process and ensure that you have everything you need to complete the job successfully. Gathering these components before you start will also save you time and effort in the long run, allowing you to focus on the task at hand – installing your beautiful cedar shake roof.
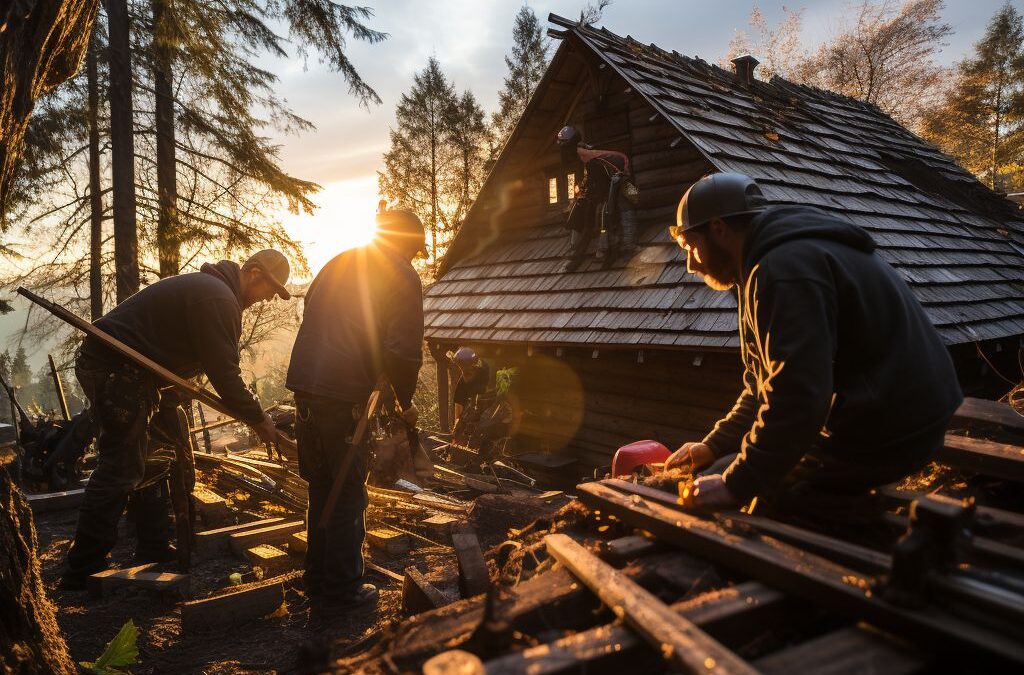
Preparing the roof for cedar shake installation
.
Before you can begin installing cedar shake shingles on your roof, it is essential to properly prepare the roof to ensure a successful installation. This step is crucial for the longevity and durability of your cedar shake roof.
Firstly, you need to remove any existing roofing materials from the roof surface. This includes stripping off old shingles, nails, and any other debris that may be present. It is recommended to hire a professional to handle this task as it requires expertise and knowledge of safety precautions.
Once the roof is cleaned and clear of any previous materials, the next step is to inspect the roof for any signs of damage. Look for any signs of rot, decay, or structural issues. If any issues are found, they must be addressed and repaired before proceeding with the cedar shake installation. It is crucial to have a structurally sound roof to ensure the longevity of the cedar shakes.
In addition to inspecting for damage, it is also essential to ensure proper ventilation on the roof. Improper ventilation can lead to issues such as mold growth, roof deck decay, and premature deterioration of the cedar shakes. Proper roof ventilation helps to regulate temperature and moisture levels, extending the lifespan of your cedar shake roof.
Finally, before proceeding with the installation, it is advisable to install an underlayment on the roof surface. This provides an additional layer of protection against moisture and acts as a barrier between the cedar shakes and the roof deck. It is important to choose an underlayment that is compatible with cedar shake roofs and follow the manufacturer’s instructions for proper installation.
By thoroughly , you can ensure a sturdy and long-lasting roof that will provide beauty and protection for years to come.
Installing cedar shake shingles on a sloped roof
requires careful attention to detail and proper installation techniques to ensure a durable and visually appealing end result. It is important to follow the correct steps to ensure that the cedar shakes are properly aligned and securely attached to the roof.
Firstly, start by measuring the length and width of each area of the roof where cedar shake shingles will be installed. This will help determine the number of shingles needed for the project. Remember to account for any overlaps and waste when calculating the quantity of shingles required.
Next, prepare the surface of the roof by removing any existing shingles or debris. It is essential to have a clean and smooth surface for optimal cedar shake installation. Repair and replace any damaged roofing materials, and address any underlying issues such as leaks or rot before proceeding further.
Once the roof is prepared, it is time to lay out the cedar shake shingles. Starting from the bottom of the roof, install a layer of building felt or an underlayment of your choice to provide additional moisture protection. This layer should be secured with roofing nails or staples, ensuring a tight fit.
After the underlayment is in place, begin installing the cedar shake shingles. Start at the bottom edge of the roof and work your way up in horizontal rows. Each row should overlap the previous row by approximately 2 inches to provide proper coverage and prevent water infiltration. Secure each cedar shake shingle with roofing nails, ensuring they are placed near the top, allowing for the next row to cover the nails.
To ensure a consistent and aesthetically pleasing appearance, make sure to maintain a uniform exposure, which is the amount of the cedar shake shingle that is visible once installed. This can be achieved by using a guide or template to align the shingles correctly.
Throughout the installation process, be mindful of any obstacles such as chimneys, vents, or skylights. Properly cutting and fitting cedar shake shingles around these areas is crucial for a watertight seal and professional finish. Take the time to carefully measure and cut the shingles to ensure a snug fit.
Finally, trim any excess cedar shake shingles and secure any loose edges or corners with approved roofing adhesives or additional nails. Inspect the entire roof installation for any gaps, loose shingles, or imperfections, and make any necessary adjustments before proceeding to the next step.
Overall, requires precision and attention to detail. By following these steps, you can achieve a beautiful and durable cedar shake roof that enhances the aesthetics of your home while providing long-lasting protection against the elements.
Applying the first row of cedar shake shingles
When it comes to installing a cedar shake roof, properly applying the first row of shingles is essential for a durable and visually appealing result. The first row serves as the foundation for the rest of the roof, so it’s important to take your time and ensure it is done correctly.
To begin, you will need to measure and mark the edge of the roof to ensure a straight and even line for the first row. This can be done using a chalk line or a straightedge. Once you have your reference line, it’s time to lay down the first row of cedar shake shingles.
Starting at one end of the roof, place the first shingle with its bottom edge aligned with the reference line. Make sure that the shingle is flush with the edge of the roof and use roofing nails to secure it in place. It is recommended to use galvanized or stainless steel nails that are corrosion-resistant and will withstand the elements over time.
Continue installing the first row of cedar shake shingles by overlapping each shingle with the one before it. This overlap should be about 1.5 to 2 inches and ensures proper water drainage. Secure each shingle with nails, making sure to place the nails in the top portion of the shingle, near the exposed area.
As you work your way across the first row, ensure that each shingle is straight and aligned with the reference line. This is crucial for maintaining a neat and uniform appearance. Use a level to check for any deviations and make adjustments as necessary.
Remember to leave a small gap between each shingle, known as the cedar shingle gap, to allow for natural expansion and contraction due to temperature changes. This gap should be around 1/8 inch.
By taking the time to properly apply the first row of cedar shake shingles, you will set the stage for a successful installation and a beautiful cedar shake roof that will last for years to come. Move on to the next step of securing the remaining rows of shingles to complete your cedar shake roof installation.
Properly securing cedar shake shingles to the roof
is a crucial step in the installation process to ensure long-lasting and durable protection for your home. By following the right techniques and using the appropriate materials, you can ensure that your cedar shake roof remains intact even in harsh weather conditions.
To begin, it is important to use the right nails when securing cedar shake shingles to the roof. Stainless steel or hot-dipped galvanized nails are recommended as they are resistant to corrosion and can withstand the expansion and contraction of the shingles caused by temperature changes. It is essential to use nails with the proper length to penetrate through the shingle and into the roof’s sheathing.
Next, make sure to position the nails correctly. They should be placed above the butt line of the shingle, where the thick part of the shingle overlaps the thin part. This will help prevent water from seeping through the nail hole and causing damage to the roof’s structure. It is generally recommended to place nails about 1-1.5 inches above the butt line, but be sure to consult your manufacturer’s guidelines for specific recommendations.
Furthermore, spacing between the nails is also important for proper shingle installation. Typically, nails should be spaced about 1-2 inches from the side edge of each shingle and 4-6 inches above the bottom edge. This will ensure that the shingles are securely fastened without causing any splitting or damage.
In addition to proper nail placement, it is crucial to maintain a consistent exposure pattern when installing cedar shake shingles. This means that each row should have the same amount of visible shingle surface. This not only enhances the visual appeal of the roof but also provides a uniform and secure installation.
Lastly, consider applying a layer of roofing cement under each shingle to further enhance its stability on the roof. This will provide extra protection against strong winds and prevent the shingles from lifting or getting dislodged.
By following these tips, you can properly secure cedar shake shingles to your roof and ensure a durable and aesthetically pleasing installation that will last for years to come. Remember to always consult your manufacturer’s guidelines for specific instructions and recommendations to ensure the best results.
Finishing touches and maintenance for a cedar shake roof
Once you have successfully installed your cedar shake roof, there are a few finishing touches and maintenance tasks to consider. These steps will help ensure the longevity and beauty of your roof for years to come.
Firstly, it is important to inspect your cedar shake roof regularly. This is especially crucial after extreme weather events such as heavy rain, strong winds, or snowstorms. Look for any signs of damage, such as cracked or loose shingles, and address them promptly. Catching and fixing small issues early on can prevent them from turning into major problems down the line.
To maintain the appearance and protect the natural oils in the cedar shakes, it is recommended to apply a high-quality cedar roof treatment every few years. This treatment helps to preserve the wood and prevent weathering, discoloration, and moss or algae growth. Follow the manufacturer’s instructions and apply the treatment evenly across the entire roof surface.
Gutters and downspouts play an essential role in the overall health of your cedar shake roof. Make sure they are clean and free from debris that could cause water to back up or overflow onto the roof. Regularly clear out leaves, twigs, and other debris from the gutters to ensure proper drainage. Additionally, consider installing gutter guards to prevent clogs and reduce the amount of maintenance required.
Additionally, it is crucial to trim any overhanging branches or trees that may pose a threat to your cedar shake roof. Falling branches or excessive shade can prevent proper air circulation, leading to moisture retention and potential decay of the wood. Trim branches that are within a 10-foot radius of the roof to minimize the risk of damage and promote a healthy roof environment.
Lastly, keeping your cedar shake roof clean can significantly extend its lifespan. Use a soft-bristle brush or a leaf blower to remove debris such as leaves, pine needles, and dirt regularly. Avoid using pressure washers or harsh chemicals as they can damage the wood. When cleaning, be careful not to lift or damage any shingles in the process.
By following these finishing touches and maintenance tips, you can ensure that your cedar shake roof remains durable, visually appealing, and protects your home for many years to come. Regular inspections, treatments, gutter maintenance, tree trimming, and gentle cleaning are all part of the essential care that will help your cedar shake roof withstand the test of time.
People Also Ask
1. Can a cedar shake roof be installed over an existing roof?
Yes, a cedar shake roof can be installed over an existing roof, provided that the existing roof is in good condition and meets certain requirements. It’s important to consult with a professional roofer to assess the suitability of your existing roof.
2. Does cedar shake roofing require any special underlayment?
Yes, cedar shake roofing requires a specific type of underlayment to ensure proper installation and protection against moisture. A self-adhering ice and water shield is commonly used, which creates a waterproof barrier beneath the cedar shakes.
3. What tools and materials are needed for installing a cedar shake roof?
Some of the tools and materials required for installing a cedar shake roof include cedar shakes, roofing felt, roofing nails, a nail gun or hammer, a chalk line, a circular saw, and a ladder. It’s crucial to have the necessary safety equipment, such as gloves and eye protection, as well.
4. What is the average lifespan of a cedar shake roof?
The average lifespan of a cedar shake roof can vary depending on various factors, such as the quality of the cedar shakes, climate conditions, and maintenance. Generally, a well-maintained cedar shake roof can last between 30 to 50 years or more.
5. Are there any special maintenance requirements for cedar shake roofing?
Cedar shake roofing requires regular maintenance to ensure its longevity and performance. This includes periodic inspections for damage or moss buildup, cleaning the roof periodically, and replacing any damaged or worn-out shakes as needed. It’s recommended to consult a professional for specific maintenance guidelines.
Insights and Conclusions
In conclusion, installing a cedar shake roof requires careful planning and attention to detail. It is important to follow the manufacturer’s instructions and local building codes to ensure a proper installation. While it can be a labor-intensive project, the end result is a beautiful and durable roof that can enhance the overall aesthetic of your home.
If you are considering installing a cedar shake roof, it may be beneficial to consult with a professional roofing contractor who has experience working with this material. They can provide guidance and ensure that the installation is done correctly.
Remember to regularly inspect and maintain your cedar shake roof to prolong its lifespan and prevent any potential issues. With proper care, your cedar shake roof can provide years of protection and beauty for your home.

Lead Roofing Specialist
Michael Thompson brings over two decades of roofing expertise to Fresno Roof Repair. His dedication to quality craftsmanship and customer satisfaction has earned him a reputation as a reliable authority in the roofing industry.