Looking to give your shed a fresh new look? One of the most effective ways to revamp its exterior is by installing shingles on the roof. Not only will this upgrade increase the shed’s durability and weather resistance, but it will also add a touch of elegance to the overall aesthetic. In this step-by-step guide, we will walk you through the process of installing shingles on a shed roof, providing you with the essential knowledge and expert tips to ensure a successful and professional-looking project. Whether you’re a seasoned DIY enthusiast or a beginner taking on your first roofing endeavor, read on to discover the ins and outs of shingle installation and transform your shed into a stunning focal point of your outdoor space.
Selecting the Right Materials for Installing Shingles on a Shed Roof
is crucial to ensuring a durable and long-lasting roof. When it comes to selecting shingles, there are a few factors to consider. Firstly, you need to choose the type of shingle material that suits your shed and its surroundings. Popular options include asphalt, wood, metal, and synthetic shingles.
Asphalt shingles are the most commonly used material due to their affordability, versatility, and ease of installation. They are available in various styles and colors to match your shed’s aesthetic. Wood shingles provide a natural and rustic look, but they require more maintenance and may not be as resistant to weather conditions. Metal shingles, such as steel or aluminum, offer excellent durability and can withstand extreme weather conditions. Finally, synthetic shingles are a modern and eco-friendly option, often made from recycled materials.
Aside from the shingle material, you should also consider factors such as the shed’s location and climate. If you live in an area with high winds or heavy snow, you may want to opt for shingles that have a higher wind or snow rating. Additionally, consider the shed’s pitch or slope and ensure that the shingles you choose are suitable for that particular angle. Different shingles have different warranties, so be sure to check the manufacturer’s warranty to ensure you have the best coverage for your shed roof.
When selecting the right materials, it’s also important to purchase the necessary accessories. These can include underlayment, drip edge, and ridge vents. Underlayment provides an additional layer of protection against moisture and helps to enhance the overall integrity of the roof. Drip edge is a metal strip that goes along the edge of the roof to help prevent water from seeping into the shed. Ridge vents are essential for proper ventilation and preventing moisture buildup in the attic space.
In summary, requires careful consideration of factors such as shingle material, shed location, climate, and necessary accessories. Take the time to research and choose materials that will provide durability, enhance the shed’s aesthetics, and withstand the elements for years to come. Remember, investing in quality materials now will save you time, money, and frustration in the future.
Preparing the Shed Roof to Ensure Proper Installation of Shingles
Before installing shingles on a shed roof, it is crucial to properly prepare the surface. This ensures a smooth and successful installation process, as well as increases the longevity of the shingles. Here are some important steps to follow when preparing your shed roof for shingle installation.
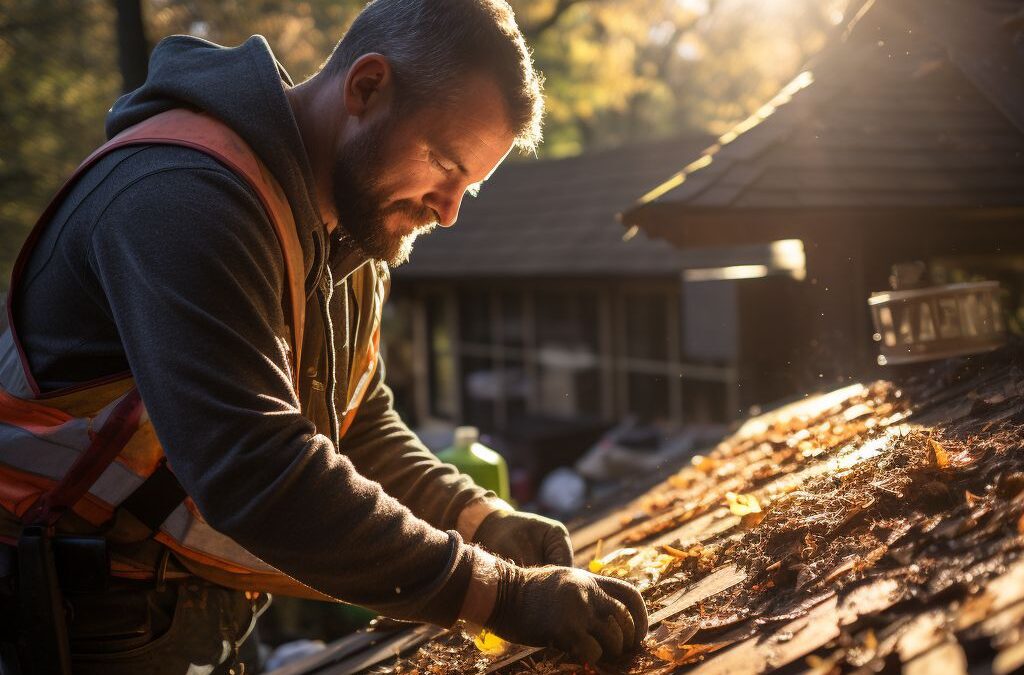
Firstly, ensure that the roof surface is clean and free of any debris. Start by sweeping or using a leaf blower to remove loose dirt, leaves, or branches. It is essential to have a clean and smooth surface for shingle installation to ensure proper adhesion and prevent any damage to the new shingles.
Next, inspect the shed roof for any existing damage or areas that may need repair. Look for signs of rot or decay, loose or damaged shingles, or any leaks. Addressing these issues before installing new shingles is crucial to maintain the structural integrity of the shed and avoid further damage.
If there are any damaged or missing shingles, replace them before installing new ones. This ensures that the roof is uniform and provides a solid base for the new shingles. Additionally, inspect and replace any damaged or worn-out underlayment to prevent moisture infiltration or leaks.
Another important step in preparing the shed roof is ensuring proper ventilation. Good ventilation is crucial for maintaining the integrity of the shingles and preventing heat and moisture buildup in the shed. Install vents or exhaust fans to facilitate proper airflow and prevent condensation, which can lead to rot and mold formation.
Lastly, make sure to trim any overhanging tree branches that may pose a risk to the shed roof. Falling branches can cause damage to the shingles and may lead to leaks or more serious structural issues. Trim the branches back to a safe distance away from the shed to prevent any potential hazards.
By taking the time to properly prepare the shed roof for shingle installation, you can ensure a successful and long-lasting outcome. Remember to clean the surface, repair any damage, replace worn-out shingles or underlayment, ensure proper ventilation, and trim overhanging branches. These steps will help guarantee a solid foundation and optimal conditions for the shingles, ensuring the overall integrity and longevity of your shed roof.
Step-by-Step Guide: Installing Shingles on a Shed Roof
Installing shingles on a shed roof may seem like a daunting task, but with the right tools and knowledge, it can be accomplished with ease. Follow this step-by-step guide to ensure a successful shingle installation on your shed roof.
First, gather all the necessary materials for the project. This includes shingles, underlayment, roofing nails?”>roofing nails?”>roofing nails, a ladder, a hammer, a utility knife, and a chalk line. Make sure to select shingles that are suitable for shed roofs and match the style and color of your shed.
Before installing the shingles, it is crucial to prepare the shed roof properly. Start by cleaning any debris or moss from the surface. Next, inspect the roof for any damage or rotting wood. Replace any damaged or rotted areas before proceeding with the installation.
Once the roof is clean and in good condition, begin by installing the underlayment. This layer provides an extra barrier against moisture and helps to extend the lifespan of the shingles. Start at the bottom of the roof and work your way up, overlapping each row of underlayment by at least four inches.
Now it’s time to install the shingles. Begin by placing a starter course at the bottom edge of the roof, ensuring that it overhangs the edge by about half an inch. Secure the starter course with roofing nails. Then, proceed to install the shingles in rows from the bottom up, using the chalk line as a guide for straight placement. Overlap each shingle row by about six inches and secure them with roofing nails, making sure to follow the manufacturer’s instructions for proper nail placement.
As you work your way up the roof, be sure to stagger the shingle placement to create a stronger and more aesthetically pleasing finish. Trim any excess shingle material as needed using a utility knife.
To ensure the longevity and effectiveness of your shingle installation, it is essential to provide proper ventilation for your shed roof. Poor ventilation can lead to moisture buildup and ultimately result in shingle damage. Install ridge vents or soffit vents?”>soffit vents?”>soffit vents, depending on the design of your shed, to allow for adequate airflow.
Throughout the installation process, it is crucial to pay attention to detail and avoid common mistakes. Avoid overdriving or underdriving the roofing nails, as this can compromise the integrity of the shingles. Additionally, ensure that the shingles are properly aligned and evenly spaced for a neat and secure result.
By following this step-by-step guide, you can successfully install shingles on your shed roof. Remember to take your time, work carefully, and refer to the manufacturer’s instructions for any specific guidelines or recommendations. With proper installation and maintenance, your shed roof will be protected for years to come.
Tips for Achieving an Effective and Long-Lasting Shingle Installation
To ensure that your shingle installation on a shed roof is effective and long-lasting, there are several key tips to keep in mind. Taking the time to follow these tips will help you achieve a sturdy and durable roof that will protect your shed for many years to come.
First, it is crucial to properly prepare the roof before installing shingles. This includes cleaning the surface of any debris or loose materials, as well as ensuring that the roof is clear of any existing nails or staples. Additionally, it is important to inspect the roof for any potential areas of damage or weakness, such as rot or leaks, and address these issues before proceeding with the shingle installation.
Next, take the time to select high-quality shingles that are suitable for the climate and conditions of your area. Opt for shingles that are designed to withstand harsh weather elements, such as wind, rain, and snow. Additionally, consider the aesthetic appeal of the shingles and choose a color and style that complements the overall design of your shed.
When installing the shingles, pay attention to proper alignment and placement. Ensure that each shingle is securely fastened and overlaps the previous one correctly. This will prevent water from seeping underneath the shingles and causing damage to the roof structure.
Proper ventilation is also key to maintaining the longevity of your shed roof. Without adequate airflow, moisture can accumulate, leading to mold growth and deterioration of the shingles. Install vents or ridge caps to promote air circulation and prevent moisture buildup.
Lastly, it is important to avoid common mistakes that can compromise the effectiveness of your shingle installation. These include overdriving nails, which can damage the shingles and reduce their durability, as well as neglecting to use starter strips or underlayment, which provide an extra layer of protection against leaks.
By following these tips, you can ensure that your shingle installation on a shed roof is effective and long-lasting. Taking the time to properly prepare the roof, select quality materials, and adhere to proper installation techniques will result in a sturdy and durable roof that will serve your shed well for years to come.
Ensuring Proper Ventilation for Your Shed Roof with Shingle Installation
Proper ventilation is crucial for the overall health and longevity of your shed roof. Without adequate airflow, the build-up of heat and moisture can lead to various issues, including mold and rot. When installing shingles on your shed roof, it is essential to take the necessary steps to ensure proper ventilation. This section will outline the importance of ventilation and provide key tips to achieve optimal airflow.
One of the primary reasons you need to ensure proper ventilation is to reduce heat buildup in your shed. During hot summer months, the temperature inside the shed can rise significantly, causing damage to the shingles and the materials underneath. With adequate ventilation, you can allow fresh air to circulate, preventing the roof from overheating and prolonging its lifespan.
Another vital reason for proper ventilation is to prevent moisture buildup. When moisture becomes trapped in the shed roof, it can lead to the growth of mold and mildew. These elements not only compromise the structure of your shed but also pose health risks. By promoting airflow, you can effectively control moisture levels and minimize the chances of mold growth.
To achieve proper ventilation for your shed roof, consider implementing a combination of intake and exhaust vents. Intake vents, usually located at the bottom of the roof, allow fresh air to enter, while exhaust vents, installed near the top, facilitate the exit of hot air. This airflow cycle creates a continuous ventilation system that effectively regulates temperature and moisture levels.
In addition to intake and exhaust vents, you can also incorporate soffit vents and ridge vents. Soffit vents are installed on the underside of the roof overhangs, allowing air to flow into the attic space. Ridge vents, on the other hand, are installed along the roof ridge, providing an outlet for hot air to escape. This combination of vents ensures proper airflow throughout the shed roof, promoting a well-ventilated and healthy environment.
Remember that the specific ventilation requirements may vary depending on the size and design of your shed. It is recommended to consult with a roofing professional or refer to the manufacturer’s guidelines to determine the optimal ventilation system for your specific shed roof.
By prioritizing proper ventilation during the installation of shingles on your shed roof, you can significantly enhance its durability and performance. Adequate airflow minimizes the risk of heat and moisture-related issues, ensuring your shed remains in excellent condition for years to come. Take the time to plan and implement an effective ventilation system, and you’ll reap the benefits of a well-ventilated shed roof.
Common Mistakes to Avoid When Installing Shingles on a Shed Roof
When it comes to installing shingles on a shed roof, there are common mistakes that can easily be made if you aren’t careful. These mistakes can not only compromise the integrity of your shed roof but also lead to costly repairs down the line. It’s important to be aware of these mistakes and take the necessary precautions to avoid them.
One common mistake is not properly preparing the surface before installing the shingles. It’s crucial to ensure that the roof is clean, free of any debris or old shingles, and properly waterproofed. Failure to do so can result in inadequate adhesion of the shingles, leading to leaks and water damage. Take the time to thoroughly clean and inspect the roof before moving forward with the installation.
Another mistake to avoid is improper nailing of the shingles. It’s crucial to use the right type and length of nails and to nail them in the correct locations. Using nails that are too short or positioning them in the wrong places can cause the shingles to lift or become loose over time. This can result in water penetration and potential damage to the underlying structure of the shed roof. Always follow the manufacturer’s guidelines for nail placement and size.
Additionally, insufficient ventilation is a mistake that can have long-term consequences. Proper ventilation is vital for regulating temperature and moisture in the shed roof. Without it, excessive heat and moisture can build up, leading to mold growth, rot, and premature deterioration of the shingles. Ensure that your shed roof has adequate ventilation through the use of ridge vents, soffit vents, or gable vents to maintain a balanced airflow.
Lastly, rushing through the installation process is a common mistake that can compromise the quality and durability of your shingle installation. Take your time and follow the step-by-step guide carefully. Don’t skip any necessary steps, such as applying an underlayment or using proper flashing around roof penetrations. Skipping these steps can lead to leaks and water damage, diminishing the effectiveness of your shed roof.
In conclusion, when installing shingles on a shed roof, it’s crucial to avoid common mistakes to ensure a long-lasting and effective installation. Take the time to properly prepare the surface, use the correct materials and techniques, and prioritize proper ventilation. By avoiding these common mistakes, you can ensure that your shed roof will provide reliable protection for years to come.
People Also Ask
1. How do I prepare a shed roof for shingle installation?
To prepare a shed roof for shingle installation, start by ensuring the roof is clean and free from debris. Install an underlayment to protect the roof deck from moisture. Next, apply a drip edge to prevent water damage and then begin laying the shingles according to the manufacturer’s instructions.
2. What tools do I need to install shingles on a shed roof?
To install shingles on a shed roof, you will need a few essential tools, including a hammer, utility knife, roofing nails, ladder or scaffolding for accessibility, chalk line for accurate alignment, and a roofing nail gun for faster installation. Additionally, having a roofing nailer and a shingle cutter can further simplify the process.
3. Can I install shingles on a shed roof myself?
Yes, with some basic knowledge and the right tools, you can install shingles on a shed roof yourself. Ensure you follow proper safety measures and carefully read the manufacturer’s instructions. If you’re uncertain or uncomfortable with the process, it’s always wise to consult a professional roofer.
4. How long does it take to install shingles on a shed roof?
The time it takes to install shingles on a shed roof depends on various factors such as the size of the shed, your level of experience, and the complexity of the roof. Generally, a small to medium-sized shed roof can be completed in a day or two by an experienced individual or a roofing team.
5. Do I need to remove the old shingles before installing new ones on a shed roof?
In most cases, it’s recommended to remove the old shingles before installing new ones on a shed roof. This allows for a clean surface and ensures proper attachment of the new shingles. However, if the existing shingles are in good condition and not layered excessively, you may be able to install new shingles directly over them.
Final Thoughts
In conclusion, installing shingles on a shed roof is a relatively straightforward process that can be accomplished with some basic tools and knowledge. By following the steps outlined above, you can ensure that your shed roof is properly protected from the elements and will have a professional, finished look.
Remember to take the necessary precautions such as wearing proper safety gear and working on a dry, stable surface. It is always helpful to have a helper to assist with the process, especially when dealing with larger and heavier shingles.
Overall, taking the time to install shingles correctly will greatly extend the lifespan of your shed roof and prevent any potential damage from occurring. So, what are you waiting for? Get started on your shed roofing project and enjoy the benefits of a well-protected and aesthetically pleasing space.
Happy shingling!

Customer Relations Manager
Benjamin Turner is a customer-centric professional, placing emphasis on open communication and transparency throughout the roofing process. His dedication to client satisfaction ensures a smooth and collaborative experience.