Are you an avid adventurer who loves exploring the great outdoors in your trusty RV? If so, you know that your home on wheels requires regular maintenance to ensure it stays in top-notch condition. One crucial aspect of RV maintenance that often gets overlooked is inspecting the roof. After all, your RV’s roof is its first line of defense against the elements, so it’s vital to keep it in tiptop shape. In this informative article, we will guide you through the step-by-step process of inspecting your RV’s roof, helping you identify any potential issues before they turn into costly repairs. So, let’s strap on our tool belts and get ready to inspect that roof like a pro!
1. Understanding the Importance of Regular RV Roof Inspections
Regular RV roof inspections are crucial for maintaining the integrity and longevity of your recreational vehicle. The roof is one of the most vulnerable areas of an RV, constantly exposed to the elements and potential damage. By conducting routine inspections, you can identify and address any issues before they become major problems, saving you time and money in the long run.
Inspecting your RV roof on a regular basis helps you catch any signs of damage, such as cracks, leaks, or loose seams, before they lead to more extensive issues. Water damage can be particularly destructive, causing rot, mold, and structural problems if not addressed promptly. A small leak left unattended can quickly escalate into a serious repair job. Regular inspections allow you to identify these problems early on and take prompt action to prevent further damage.
Regular inspections also help you maintain the validity of your RV warranty. Many manufacturers require regular inspections as part of their warranty terms, so neglecting these inspections may void your warranty. By adhering to an inspection schedule, you not only protect your investment but also ensure that any warranty claims you may need to make in the future will be valid.
The Benefits of Routine RV Roof Inspections
Performing regular inspections of your RV roof offers several benefits. First and foremost, it helps you maintain a safe and secure environment inside your recreational vehicle. You can catch issues like leaks or weak spots that may compromise the structural integrity of your roof and put you and your family at risk.
Secondly, routine inspections enable you to address small problems before they become costly repairs. By identifying and fixing minor issues promptly, you can avoid more extensive damage and save money on extensive repairs down the line.
Lastly, regular roof inspections contribute to the overall lifespan of your RV. By proactively maintaining and addressing any roofing issues, you can extend the lifespan of your unit. This not only ensures that your investment lasts longer but also enhances its resale value should you decide to sell your RV in the future.
In conclusion, regular RV roof inspections are essential for maintaining the integrity of your recreational vehicle. By conducting inspections on a routine basis, you can catch any signs of damage early on and prevent more extensive problems from developing. Additionally, adhering to an inspection schedule helps you maintain the validity of your warranty and ensures a safe and secure environment for you and your family. Stay tuned for our step-by-step guide on preparing for a thorough RV roof inspection.
2. Step-by-Step Guide: Preparing for a Thorough RV Roof Inspection
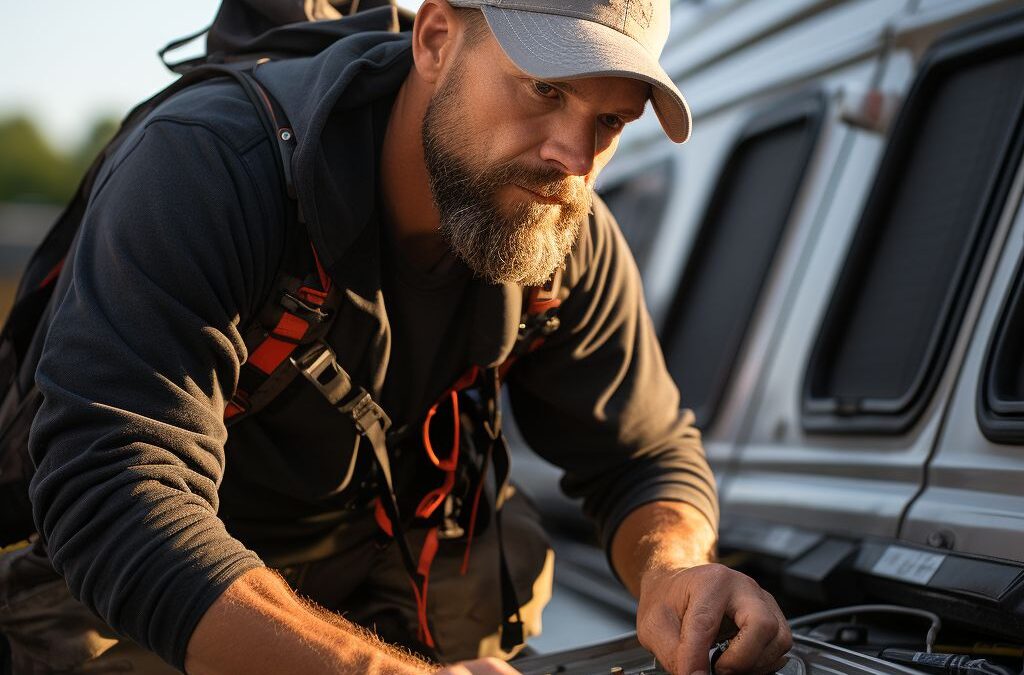
Preparing for a thorough RV roof inspection is an essential step in maintaining the integrity and longevity of your recreational vehicle. By following a step-by-step guide, you can ensure that your inspection is comprehensive and effective. Before getting started, it’s important to gather the necessary tools and equipment to perform the inspection properly.
Gather the Essential Tools:
Before starting the inspection, make sure you have the following tools and equipment on hand:
- Ladder: A stable and sturdy ladder is crucial for safely accessing the roof of your RV. Make sure the ladder is in good condition and properly set up before climbing onto the roof.
- Safety Gear: Wear appropriate safety gear, including gloves, goggles, and non-slip footwear, to protect yourself during the inspection.
- Flashlight: A reliable flashlight will help you spot any potential issues more easily if you are inspecting the roof in dimly lit areas or during the evening.
- Camera: A camera or smartphone with a good camera can be useful for documenting any damage or areas of concern on your roof. This documentation can serve as a reference or evidence if you need to contact a professional for repairs.
- Sealant and Patching Materials: Depending on the condition of your roof, you may need to have sealant or patching materials on hand to address any immediate repairs that you discover during the inspection.
Step-by-Step Inspection Process:
Once you have gathered all the necessary tools, follow this step-by-step guide for a thorough RV roof inspection:
- Clean the Roof: Before starting the inspection, ensure that the roof is free from any debris, dirt, or leaves. Use a broom or a soft brush to sweep away any loose particles.
- Visual Examination: Begin by visually inspecting the entire roof surface. Look for any signs of cracks, blistering, peeling, or separation. It’s essential to inspect all areas, including the seams, vents, skylights, and any protruding features on the roof. Pay close attention to areas where the roof membrane may have lifted or become damaged.
- Check the Sealants: Inspect the condition of the sealants around vents, skylights, and other protrusions. Look for any cracks, gaps, or signs of deterioration. Damaged or deteriorating sealants can lead to water leaks and should be addressed promptly.
- Examine the Roof Edges: Inspect the edges of the roof, paying close attention to any areas where the roof meets the sidewalls or gutter system. Look for signs of separation or damage that may compromise the roof’s integrity.
- Inspect the Roof’s Interior: Once you have completed the external inspection, move inside your RV and examine the ceiling and walls for any signs of water damage or discoloration. This can indicate a roof leak that requires immediate attention.
- Document and Address Issues: As you conduct the inspection, document any issues you encounter, either through written notes or photographs. This documentation will help you prioritize repairs and serve as a reference if needed.
By following this step-by-step guide and utilizing the necessary tools, you can ensure a thorough and effective inspection of your RV roof. Regular inspections and prompt repairs will help extend the lifespan of your roof and prevent further damage.
3. Spotting and Evaluating Common Roofing Issues: Signs of Leakage and Damage
Inspecting your RV roof for signs of leakage and damage is crucial in order to prevent further issues and costly repairs. By being proactive and identifying these common roofing issues, you can address them promptly and extend the lifespan of your RV roof. Here are some key signs to look for during your inspection:
1. Water stains: Water stains on the ceiling or walls inside your RV are a clear indication of a leak. These stains may appear as discoloration or bubbling paint. It’s important to address these stains immediately to prevent further damage to the interior of your RV.
2. Soft spots: While walking on the roof, pay attention to any soft spots or areas that feel spongy underfoot. Soft spots can indicate water damage and the potential for structural issues. Take note of the location of these areas so that you can address them during the repair process.
3. Cracks and punctures: Inspect the roof surface for any visible cracks or punctures. These can occur due to various factors such as debris impact or aging of the roof material. Even small cracks can lead to significant leakage over time, so it’s important to address them promptly.
4. Loose or missing sealant: Check the areas where different components of the roof meet, such as vents, skylights, and antennas. Look for any signs of deteriorating or missing sealant. This can create a pathway for water to enter your RV and cause damage. If you notice any issues, make sure to reseal these areas.
5. Blisters and bubbles: Blisters and bubbles on the roof surface are a common sign of water intrusion. These can occur when moisture gets trapped between the roof layers, causing separation and bulging. If left unaddressed, blisters and bubbles can worsen and lead to more extensive damage.
During your inspection, it’s important to document any signs of leakage or damage that you come across. Take photographs and notes to reference later when addressing repairs or seeking professional help. Remember to perform regular inspections to catch any issues early and prevent further damage to your RV roof.
4. Tools of the Trade: Essential Equipment for a Comprehensive RV Roof Inspection
Having the right tools for a comprehensive RV roof inspection is crucial to identify any potential issues and ensure the longevity of your roof. Here are some essential equipment items that every RV owner should have on hand:
1. Ladder: A sturdy ladder is an essential tool for safely accessing and inspecting your RV roof. Make sure the ladder is tall enough to reach your roof comfortably and securely. Look for a ladder with non-slip feet and strong, stable construction.
2. Safety Gear: Safety should always come first when inspecting your RV roof. Be sure to wear appropriate safety gear, including a helmet, gloves, and non-slip shoes. Additionally, consider using a safety harness or attaching yourself securely to the ladder to prevent accidents.
3. Flashlight: A powerful flashlight is essential for inspecting every nook and cranny of your RV roof, especially if you are conducting the inspection in low light conditions. Look for a flashlight with a long battery life and a strong beam, enabling you to clearly see any potential issues.
4. Sealant Testing Kit: To determine the condition of your RV roof sealant, invest in a sealant testing kit. This kit typically includes a solution that you can apply to the sealant, helping you identify if it is still providing an effective barrier against water intrusion.
5. Inspections Mirrors: Inspecting hard-to-reach areas of your RV roof can be challenging, but an inspection mirror can make the task easier. These mirrors are designed to extend your line of sight, allowing you to spot any hidden damages or signs of wear.
6. Moisture Meter: A moisture meter is an invaluable tool in identifying potential leaks or water damage on your RV roof. This device measures the levels of moisture in various materials, helping you identify areas that may require repair or replacement.
By having these essential tools on hand, you can thoroughly inspect your RV roof for any signs of damage, leakage, or wear. Remember to always follow proper safety procedures and to consult with a professional if you are unsure about any aspect of the inspection or require assistance with repairs.
5. Expert Tips for Cleaning and Maintaining Your RV Roof to Maximize Longevity
To ensure the longevity of your RV roof, regular cleaning and maintenance are essential. Neglecting to clean and maintain your roof can lead to damage, leaks, and costly repairs. By following these expert tips, you can keep your RV roof in excellent condition and prolong its lifespan.
Schedule Routine Cleaning
Regular cleaning is crucial to prevent dirt, debris, and grime from accumulating on your RV roof. Start by sweeping away any loose debris using a soft-bristle brush or broom. Once cleared, use a gentle cleanser that is specifically formulated for RV roofs and a soft sponge or cloth to scrub away stubborn stains. Avoid using harsh chemicals or abrasive scrubbing pads, as they can damage the roof material.
Inspect and Repair Sealants
Inspect the sealants on your roof for signs of wear and damage. Look for cracks, peeling, or separation around vents, skylights, and other protrusions. If you notice any issues, it is important to address them promptly. Use a roof sealant compatible with your RV roof material to repair any compromised areas. Apply the sealant according to the manufacturer’s instructions and ensure a thorough and even coverage.
Protective Roof Coating
Consider applying a protective roof coating to further extend the lifespan of your RV roof. Roof coatings help guard against UV rays, weather damage, and reduce the risk of leaks. Choose a coating that is suitable for your roof material and apply it according to the manufacturer’s instructions. Additionally, ensure the roof is clean and dry before application for optimal adhesion.
Check for Low-Hanging Branches
When parking your RV, be mindful of low-hanging branches that can potentially damage your roof. Regularly inspect your parking spot for any overhanging tree limbs and trim them if necessary. Avoid parking under trees during storms or high winds, as falling branches can cause significant damage to your RV roof.
Store Properly
When not in use, store your RV in a covered area or use a quality RV cover to protect it from the elements. This helps prevent damage from harsh weather, sun exposure, and debris. If you choose to use an RV cover, ensure it fits properly and is designed specifically for your RV model to avoid causing any unintended damage.
By following these expert tips for cleaning and maintaining your RV roof, you can maximize its longevity and minimize the risk of costly repairs. Regular cleaning, inspecting and repairing sealants, applying protective coatings, checking for low-hanging branches, and proper storage are all crucial steps in keeping your RV roof in optimal condition. Remember, a well-maintained roof means a comfortable and enjoyable travel experience for years to come.
6. Professional Recommendations: When to Seek Professional Help for Roof Repairs
Professional Recommendations for Roof Repairs
Seeking professional help for roof repairs can be a wise decision, especially when dealing with complex or extensive issues. While some minor repairs can be done by RV owners themselves, certain situations require the expertise and experience of professionals in the field. Here are some professional recommendations on when to seek professional help for roof repairs:
1. Extensive Damage: If your RV roof has sustained significant damage, such as large holes or extensive leaks, it is best to consult a professional. These experts have the skills and resources to properly assess the damage and perform thorough repairs. Attempting to fix major issues without the necessary knowledge and tools can lead to further damage or an incomplete repair job.
2. Manufacturer Warranty: Many RVs come with a manufacturer warranty that covers roof repairs within a certain timeframe. If your RV is still under warranty, it is advisable to contact the manufacturer or an authorized repair center. They are equipped to handle repairs that fall under the warranty, ensuring that your RV roof is fixed according to the manufacturer’s specifications.
3. Safety Concerns: Safety should always be a priority when it comes to roof repairs. Climbing on top of an RV can be challenging and potentially dangerous, especially for individuals who are not used to working at heights. If you are uncomfortable or unsure about performing repairs on your own, it is best to leave it to the professionals who are trained to work safely at elevated heights.
4. Time and Expertise: Repairing an RV roof can be time-consuming, especially if you are not familiar with the process. Assessing the damage, sourcing the right materials, and carrying out the repairs require knowledge and experience. If you don’t have the time or expertise to dedicate to the task, hiring a professional will ensure the job is completed efficiently and effectively.
Overall, while some minor repairs can be handled by RV owners, seeking professional help for roof repairs is recommended in certain situations. When facing extensive damage, utilizing a manufacturer warranty, dealing with safety concerns, or lacking the necessary time and expertise, reaching out to professionals ensures a proper and lasting repair for your RV roof.
7. DIY Repairs and Preventive Measures: Extending the Lifespan of Your RV Roof
It’s important for RV owners to take proactive measures in extending the lifespan of their RV roof. By implementing DIY repairs and preventive measures, you can save money and ensure that your roof stays in good condition for years to come. Here are some tips to help you maintain and care for your RV roof effectively.
1. Regular Cleaning: Keeping your RV roof clean is essential to prevent the buildup of dirt, debris, and damaging substances like bird droppings or tree sap. Regularly sweeping or gently scrubbing your roof with a mild soap and water solution will help to maintain its integrity and prevent potential damage. Take care not to use harsh chemicals or abrasive tools that can cause unnecessary wear and tear.
2. Inspect and Repair Seals: Inspecting and maintaining the seals on your RV roof is crucial in preventing leaks and water damage. Over time, seals can deteriorate or become loose, creating gaps for water to seep through. Check the seals around vents, skylights, and other rooftop fixtures, and replace any damaged or worn-out seals promptly. Applying a sealant, such as silicone or RV roof sealant, can also help reinforce existing seals and provide an extra layer of protection against leaks.
3. Optimize Ventilation: Adequate airflow and ventilation are essential for preventing condensation, mold, and mildew growth on your RV roof. Ensure that roof vents and exhaust fans are operating efficiently and not obstructed by debris. Additionally, consider installing vent covers to allow for continuous ventilation even during inclement weather.
4. UV Protection: The constant exposure to sunlight can lead to premature deterioration of your RV roof. To protect it against UV rays, consider applying a roof protectant or UV-resistant coating. These products help to reduce the damaging effects of the sun’s rays and prolong the lifespan of your roof.
5. Trim Overhanging Branches: Trees can provide shade and a pleasant camping atmosphere, but overhanging branches can pose a risk to your RV roof. Regularly trim any branches that may come into contact with your roof to prevent scratches, punctures, or more severe damage from falling limbs during storms.
By following these DIY repairs and preventive measures, you can ensure that your RV roof remains in excellent condition for years to come. Regular inspections, cleaning, and maintenance will help you identify and address issues promptly, saving you from costly repairs down the road. Taking the time to care for your roof now will extend its lifespan and ultimately enhance your overall RVing experience.
People Also Ask
1. How often should I inspect my RV roof?
It is recommended to inspect your RV roof at least twice a year, before and after the camping season, to ensure any damage or leaks are detected and addressed in a timely manner.
2. What should I look for when inspecting my RV roof?
During your RV roof inspection, check for any cracks, tears, or punctures in the roofing material. Look for signs of water damage, such as discoloration or soft spots. Examine the seals around vents, antennas, and air conditioners for any signs of deterioration.
3. How do I clean my RV roof before inspection?
To clean your RV roof before inspection, use a mild soap and water solution and a soft bristle brush or sponge. Avoid harsh chemicals that could damage the roof. Start from one end and work your way toward the other, rinsing thoroughly to remove any soap residue.
4. Can I walk on my RV roof while inspecting it?
It is generally safe to walk on the RV roof while inspecting it, but exercise caution and distribute your weight evenly. Use a secure and stable ladder to access the roof, and consider using roof boards or a rubber roof mat for added stability and to protect the roof from damage.
5. Should I hire a professional for RV roof inspection?
While it is possible to inspect your RV roof yourself, hiring a professional for a thorough inspection can provide peace of mind. Professionals have the experience and knowledge to identify potential issues that may go unnoticed and can make recommendations for repairs or maintenance.
To Wrap It Up
In conclusion, inspecting an RV roof is an important maintenance task to ensure the integrity of the vehicle and prevent any costly repairs in the long run. By following a few simple steps, such as cleaning, inspecting for damage, and addressing any issues promptly, owners can prolong the lifespan of their RV roof and maintain its functionality.
Regular inspections should be conducted at least twice a year, and extra attention should be given after extreme weather conditions or long periods of storage. It is crucial to thoroughly clean the roof before inspecting it, removing any debris or dirt that could hinder the inspection process. While inspecting, look for signs of damage, such as cracks, punctures, or even mold and mildew growth.
Addressing any identified issues promptly is imperative to prevent further damage and ensure a functioning RV roof. Simple repairs, like patching up minor cracks or holes, can be done by the owners themselves using appropriate roof repair materials. However, for more extensive damages or if unsure about the repair process, it is recommended to seek professional help.
By regularly inspecting and maintaining the RV roof, owners can extend the life of their vehicle, enhance its performance, and avoid costly repairs down the line. Taking proper care of the roof is not only a smart investment but also contributes to the overall safety and comfort of RV living.
Make it a habit to inspect your RV roof regularly and address any issues promptly. Your RV is an asset, and proper maintenance will help you enjoy it for years to come.

Lead Roofing Specialist
Michael Thompson brings over two decades of roofing expertise to Fresno Roof Repair. His dedication to quality craftsmanship and customer satisfaction has earned him a reputation as a reliable authority in the roofing industry.