Is that old roof turbine on your home squeaking, grinding, or just not keeping up with the demands of ventilation anymore? It might be time for a replacement. Don’t worry, you don’t need to hire expensive professionals for this task. With a little guidance and the right tools, you can replace a roof turbine yourself and save both time and money. In this article, we will walk you through the step-by-step process of replacing a roof turbine, ensuring that your home stays well-ventilated and protected from the elements. So, grab your toolbox and let’s get started!
The Importance of Properly Functioning Roof Turbines
Roof turbines play a crucial role in maintaining the overall health and functionality of your roof. These devices, also known as rooftop ventilators or whirlybirds, are designed to improve air circulation within your attic and prevent the build-up of moisture, heat, and stale air. A properly functioning roof turbine can help regulate the temperature of your home, reduce energy costs, and extend the lifespan of your roof.
One of the key benefits of a well-maintained roof turbine is its ability to improve indoor air quality. As warm air rises, it tends to get trapped in the attic, which can lead to excessive moisture and mold growth. By effectively ventilating the attic space, roof turbines allow for the escape of this hot and humid air, reducing the chances of mold and mildew formation. In turn, this helps maintain a healthier and safer living environment for you and your family.
Moreover, proper air circulation provided by roof turbines can help alleviate the strain on your HVAC system. During hotter months, when your attic is not adequately ventilated, it can trap heat and increase the temperature of your entire home. This forces your cooling system to work harder, leading to higher energy costs. With a well-functioning roof turbine, cool fresh air is drawn into the attic, exchanging hot air and balancing the temperature, resulting in a more efficient and cost-effective cooling process.
In addition to temperature regulation and energy savings, roof turbines also contribute to the longevity of your roof. Excessive heat and moisture can cause shingles to deteriorate faster and weaken the overall structure of your roof. By efficiently expelling hot air and moisture, roof turbines help prolong the life of your roofing materials. This not only saves you money on frequent roof repairs but also preserves the aesthetic appeal and value of your property.
To sum it up, a properly functioning roof turbine is crucial for maintaining a healthy and energy-efficient home. Regular inspections and timely replacements are necessary to ensure that your roof turbine is operating at its optimal level. In the following sections, we will explore common signs that indicate it’s time for a roof turbine replacement and provide a step-by-step guide to help you navigate the process smoothly.
Common Signs That Your Roof Turbine Needs Replacement
If you want to ensure your roof remains in optimal condition, it’s important to pay attention to the signs that indicate your roof turbine may need replacement. A roof turbine is an essential component of your roofing system, as it helps ventilate the attic and regulate air circulation. When a roof turbine becomes faulty or is nearing the end of its lifespan, it can lead to various issues, including poor ventilation, increased energy costs, and potential damage to your roof.
One of the most is increased noise. While it’s normal for a roof turbine to produce some noise as it spins, excessive or unusual sounds can indicate a problem. If you notice loud rattling, grinding, or squeaking noises coming from your roof turbine, it’s a clear indication that something is wrong and it may need to be replaced.
Another sign to look out for is reduced airflow or lack of ventilation. Roof turbines are designed to remove stagnant and hot air from the attic, promoting air circulation throughout the space. If you notice that your attic feels stuffy, humid, or excessively hot, it may be a sign that your roof turbine is not functioning properly. Poor ventilation can also lead to moisture buildup, which can contribute to mold and mildew growth, as well as damage to your roof structure.
Additionally, visual cues such as rust or visible damage can indicate a need for roof turbine replacement. Over time, exposure to the elements can cause wear and tear on the turbine’s components, leading to corrosion and deterioration. If you observe rust spots, cracks, or other visible damage on the roof turbine, it’s wise to consider replacing it before further issues arise.
To summarize, the include excessive noise, reduced airflow or lack of ventilation, as well as visual cues such as rust or visible damage. It’s crucial to address these signs promptly to prevent further damage and ensure the proper functioning of your roofing system. By identifying these indicators early on, you can take the necessary steps to replace your roof turbine and maintain a well-ventilated and efficient roof.
Preparing for a Roof Turbine Replacement
Before replacing a roof turbine, it is important to properly prepare to ensure a smooth and successful replacement process. Taking the time to prepare adequately will help avoid potential issues and ensure that the new roof turbine functions effectively. Here are a few steps to follow when .
Firstly, it is crucial to assess the condition of the existing roof turbine. Inspect it closely to determine if it can be repaired or if a replacement is necessary. Signs that indicate a roof turbine may need replacing include excessive wobbling, rusted or corroded parts, and noticeable damage. If any of these signs are present, it is best to proceed with a replacement rather than attempting a repair.
Once the decision to replace the roof turbine has been made, the next step is to source the necessary materials and equipment. Make sure to choose a roof turbine that is the correct size and design for your specific needs. Factors to consider when selecting a new roof turbine include the size and shape of your roof, the desired airflow capacity, and any specific climate considerations. Research different options and consult with professionals if needed to ensure you choose the right turbine for your roof.
In addition to the turbine itself, gather all the necessary tools and equipment needed for the replacement process. Common tools may include a ladder, wrenches, a hammer, pliers, and safety gear such as gloves and goggles. It is essential to have everything on hand before starting the replacement to avoid any unnecessary delays or interruptions.
Lastly, it is crucial to clear the area around the roof turbine before starting the replacement process. Remove any debris or obstructions that could hinder the installation or pose a safety risk. Additionally, ensure that the roof is clean and free from any loose shingles or damage. This will provide a stable and secure foundation for the new roof turbine installation.
By adequately , you can ensure that the process goes smoothly and the new turbine functions effectively. Remember to assess the condition of the existing turbine, select the right replacement options, gather all necessary tools and equipment, and clear the area before starting the installation. With careful preparation, your roof turbine replacement will be successful and contribute to the overall improvement of your roofing system.
Step-by-Step Guide to Replacing a Roof Turbine
Replacing a roof turbine can be a challenging task, but with the right knowledge and tools, it can be done effectively. This step-by-step guide will walk you through the process of replacing a roof turbine, ensuring that you can successfully complete the task and restore the proper functioning of your roof ventilation system.
1. Assess the condition: Before starting the replacement process, it’s important to assess the condition of your roof turbine. Look for any signs of damage such as cracks, rust, or excessive wear and tear. This will help you determine if a replacement is necessary or if simple repairs can suffice.
2. Gather the necessary tools: Before getting started, make sure you have all the tools you will need for the job. This may include a ladder, pry bar, screwdriver, roofing nails, roofing cement, and a new roof turbine. Having all the tools ready beforehand will save you time and frustration during the replacement process.
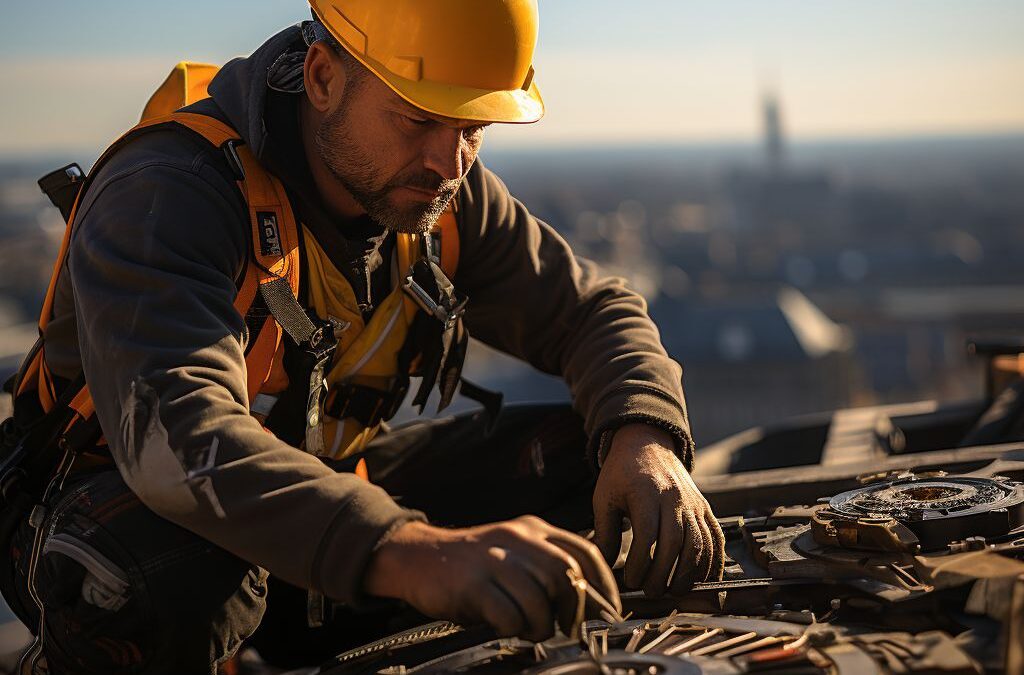
3. Safely access the roof: Use a sturdy ladder to access your roof safely. Make sure the ladder is securely placed on a level ground and have someone hold it steady as you climb up. Safety should always be a top priority when working at heights.
4. Remove the old roof turbine: Start by removing any screws or nails that are securing the old roof turbine in place. A pry bar can be helpful in loosening the turbine from its mounting. Carefully lift the old turbine off the roof, taking note of any caulking or sealant that may need to be removed.
5. Clean the area: Once the old turbine is removed, take the time to clean any debris or dirt from the area. This will ensure a proper and secure installation of the new roof turbine.
6. Install the new roof turbine: Carefully position the new roof turbine in place, aligning it with the existing hole or marking a new spot if necessary. Secure the turbine by using roofing nails or screws, making sure it is tightly fastened to the roof.
7. Seal the edges: To ensure a watertight seal, use roofing cement or caulking around the edges of the new roof turbine. This will prevent any water leakage and increase the longevity of the installation.
8. Test the functionality: Once the new roof turbine is installed and sealed, it’s important to test its functionality. Give it a gentle spin and observe if it rotates freely. This will ensure proper ventilation and airflow in your attic.
By following this step-by-step guide, you can confidently replace a roof turbine and restore proper ventilation in your home. Remember to prioritize safety throughout the process and consult a professional if you are unsure or uncomfortable with any aspect of the replacement procedure.
Choosing the Right Roof Turbine for Your Needs
When it comes to replacing your roof turbine, it’s important to choose the right one for your specific needs. The correct turbine will ensure optimal performance and efficient ventilation for your roof. Here are some factors to consider when selecting a roof turbine:
1. Size and Capacity: The size and capacity of the roof turbine should match the needs of your property. Consider the square footage of your roof, as well as the ventilation requirements. A larger roof may require a larger turbine to effectively ventilate the space.
2. Material: Roof turbines are commonly made of aluminum or steel. Both materials are durable and resistant to rust and corrosion. Consider the weather conditions in your area and choose a turbine material that can withstand harsh elements.
3. Style and Design: Roof turbines come in various styles and designs. Some models are low-profile and blend seamlessly with the roof, while others have a more prominent appearance. Choose a design that complements the overall aesthetic of your home.
4. Noise Level: While roof turbines are generally quiet, some models may produce more noise than others. If noise is a concern for you, look for turbines that are specifically designed for quiet operation. You can also consider adding additional insulation or soundproofing materials to minimize any noise.
5. Energy Efficiency: Some roof turbines are designed to be more energy-efficient than others. Look for models with features such as sealed ball bearings and efficient blade designs. These can help reduce energy consumption and lower your utility bills.
In conclusion, selecting the right roof turbine is essential for ensuring proper ventilation and maintaining the overall integrity of your roof. Consider factors such as size, material, style, noise level, and energy efficiency when making your decision. By choosing the right turbine, you can enjoy a well-ventilated and energy-efficient roof for years to come.
Ensuring a Seamless and Effective Roof Turbine Replacement
When it comes to replacing a roof turbine, it is crucial to ensure a seamless and effective process. This will not only guarantee the optimal functioning of your new turbine but also prevent any future issues or complications. By following these guidelines and tips, you can ensure a successful roof turbine replacement.
Firstly, it is important to choose the right replacement roof turbine. Consider factors such as the size, design, and material of the turbine. Additionally, ensure that the replacement turbine is compatible with your existing roof structure. Consulting with a professional or researching reputable brands can help you make an informed decision.
Before starting the replacement process, gather all the necessary tools and materials. This may include a ladder, socket wrenches, replacement turbine, sealant, and safety gear. Prepare the work area by clearing any debris or obstructions and ensuring a stable and safe environment.
Next, carefully remove the old roof turbine by loosening the bolts or screws that secure it to the roof. Take note of the placement and alignment of the turbine to ensure proper installation of the new one. Inspect the roof opening for any damage or decay, and make any necessary repairs or replacements.
Once the old turbine is removed, install the new one in its place. Follow the manufacturer’s instructions and guidelines for proper installation. Use a sealant around the base of the turbine to prevent any water leakage. Ensure that the turbine is securely fastened to the roof to prevent any future issues.
After the replacement is complete, conduct a thorough inspection to ensure everything is in proper working order. Check for any gaps, leaks, or loose fittings. Test the turbine by ensuring it spins freely and smoothly. Make any necessary adjustments or repairs as needed.
By following these steps and precautions, you can ensure a seamless and effective roof turbine replacement. Remember to prioritize safety throughout the process and consider consulting with a professional if needed. Maintaining a well-functioning roof turbine will not only contribute to the overall health of your roof but also provide efficient ventilation and airflow for your home.
People Also Ask
1. Can I replace a roof turbine myself?
Yes, you can replace a roof turbine yourself if you have the necessary knowledge and tools. However, it is recommended to hire a professional if you are not experienced in roofing or do not feel comfortable working at heights.
2. What tools do I need to replace a roof turbine?
Some essential tools you may need to replace a roof turbine include a ladder, safety harness, gloves, screwdrivers, pliers, a roofing knife, and roofing cement. The specific tools required may vary depending on the type and size of the turbine.
3. How often do roof turbines need to be replaced?
The lifespan of a roof turbine can vary, but on average, they may need to be replaced every 10-20 years. Factors such as weather conditions, maintenance, and quality of materials can also affect the longevity of the turbine.
4. How do I remove an old roof turbine?
To remove an old roof turbine, you will typically need to unscrew the mounting bolts or screws that secure it to the roof. Once the turbine is loose, gently lift it away, taking care not to damage the surrounding roof materials. Proper disposal of the old turbine is important to prevent any environmental issues.
5. What should I look for when choosing a new roof turbine?
When choosing a new roof turbine, consider factors such as the size and design of your roof, the average wind speeds in your area, and the airflow requirements of your attic. It is also important to select a high-quality turbine that is durable and has good reviews from customers.
In Summary
In conclusion, replacing a roof turbine requires a systematic approach to ensure an efficient and successful installation. By following the steps outlined above, you can confidently replace a roof turbine on your own. Remember to prioritize safety, gather the necessary tools and materials, carefully remove the old turbine, install the new one securely, and conduct a thorough inspection before completing the process.
Keep in mind that if you lack the necessary experience or don’t feel comfortable with DIY tasks, it is always best to consult a professional roofer who can assist you with the replacement. With the proper knowledge and precautions in place, replacing a roof turbine can be a manageable task that promotes the overall health and longevity of your roofing system.

Commercial Roofing Consultant
Matthew Carter’s forte lies in commercial roofing systems, particularly flat roofs and metal structures. His expertise and attention to detail guarantee reliable and tailored solutions for businesses in Fresno.