Do you own a beloved trailer that’s in need of a roof replacement? Whether you’re an avid traveler or a weekend adventurer, ensuring the integrity of your trailer’s roof is essential to protect your investment from the elements. The roof is the shield that keeps you safe from rain, snow, and harsh UV rays, so it’s vital to maintain its quality. If you’re seeking guidance on how to replace the roof on your trailer, look no further. In this comprehensive article, we’ll take you through step-by-step instructions and provide valuable tips to help you tackle this project with confidence. Let’s dive into the world of trailer roof replacements and get your favorite companion back on the road, ready to embark on countless new adventures.
Choosing the Right Roof Material for a Trailer
is crucial in ensuring the durability and longevity of your trailer’s roof. The right material should be able to withstand harsh weather conditions, provide adequate insulation, and be lightweight to prevent unnecessary strain on the trailer’s structure. Here are some factors to consider when selecting the appropriate roof material for your trailer.
1. Weather Resistance: The roof material you choose should be able to withstand various weather conditions, including rain, snow, and extreme temperatures. Materials such as metal, rubber, or a combination of the two can provide excellent resistance to the elements.
2. Weight: Since trailers are designed to be lightweight, it is important to select a roof material that adds as little weight as possible. Materials like aluminum or fiberglass can be lightweight options that won’t overload your trailer’s structure.
3. Durability: Trailer roofs are exposed to constant movement and potential impacts, so it is essential to choose a material that is durable and can withstand these factors. Metal roofs, such as aluminum or steel, are known for their strength and longevity.
4. Insulation Properties: Proper insulation is vital to maintaining a comfortable interior temperature in your trailer. Depending on your climate, you may want to consider roof materials that offer good insulation properties. Some options include foam-insulated metal panels or thermoplastic polyolefin (TPO) roofing membranes.
5. Maintenance Requirements: Consider the amount of maintenance your chosen roof material will require. Some materials, like rubber, require periodic cleaning and inspection, while others, like metal, may only require occasional maintenance.
Remember, it is essential to take into account the specific needs and requirements of your trailer when choosing a roof material. Consulting with a professional in the roofing industry can provide valuable insights and help you make an informed decision. With the right roof material, you can ensure the safety, functionality, and longevity of your trailer.
Assessing the Condition of Your Trailer’s Roof
Before embarking on a roof replacement project for your trailer, it is essential to thoroughly assess the condition of your existing roof. This will help you determine the extent of repairs needed or whether a complete replacement is necessary. Here are some key steps to follow in this process.
Firstly, visually inspect the roof for any obvious signs of damage such as water stains, cracks, or areas where the roofing material is peeling or missing. Pay close attention to any areas around vents, skylights, or protrusions, as these are common trouble spots where leaks can develop.
Next, use a ladder to physically inspect the roof up close. Be cautious when climbing onto the trailer roof and ensure it is safe to do so. While up on the roof, carefully walk around and feel for spongy or weak spots. These could indicate underlying water damage or rot and may require immediate attention.
Additionally, check the roof seams and edges for signs of wear and tear. These areas are prone to leaking, so pay close attention to any loose or deteriorated sealants. Look for cracks or gaps in the seams that may allow moisture to penetrate.
Pro Tip: If your trailer has a rubber or TPO roof, look for signs of blisters, bubbles, or areas where the material has pulled away from the substrate. These may be indicators of underlying water damage or improper installation.
Using a Moisture Meter
To get a more accurate assessment of the roof’s condition, consider using a moisture meter. This tool measures the moisture content within the roofing material, helping identify areas of hidden water damage. Simply press the pins of the moisture meter into the roof surface and note any readings that surpass the acceptable moisture levels.
After conducting a thorough inspection and moisture analysis, you will have a better understanding of the condition of your trailer’s roof. Based on your assessment, you can then proceed with the appropriate repairs or make an informed decision on whether a complete roof replacement is necessary. Remember to consult with a professional if you are unsure of any findings or require expert advice.
Preparing the Trailer for a Roof Replacement
Before replacing the roof on your trailer, it is essential to properly prepare the trailer to ensure a smooth and successful installation. This involves a series of steps to ensure the old roof is removed, the surface is clean and ready for a new roof, and any necessary repairs are addressed.
Firstly, it is important to clear the trailer of any debris or obstacles that may hinder the roof replacement process. This includes removing any loose items or equipment on top of the trailer, as well as ensuring the area surrounding the trailer is clear of any obstructions. This will allow for easy access to the roof and reduce the risk of accidents or damage during the replacement.
Next, it is crucial to thoroughly inspect the trailer’s roof for any signs of damage or weaknesses. Check for any leaks, sagging, or structural issues that may need to be addressed before installing a new roof. It is important to fix these problems before proceeding with the replacement to prevent further damage or complications down the line.
Once any necessary repairs have been made, the existing roof material can be removed. This may involve carefully prying up or removing any shingles, metal sheets, or other roofing materials that were previously installed. It is crucial to take caution during this process to avoid damaging the trailer’s structure or causing any unnecessary harm.
After the old roof has been removed, it is time to clean and prepare the surface for the new roof. This can be done by thoroughly sweeping or power washing the trailer’s roof to remove any remaining debris or dirt. This step ensures a clean and smooth surface for the new roof to adhere to, maximizing its lifespan and performance.
Furthermore, it is recommended to inspect and reinforce the trailer’s roof structure during the preparation process. This involves checking for any loose or damaged supports and reinforcing them as needed to provide a sturdy foundation for the new roof. This step is especially important if you are switching to a heavier roofing material or if the existing structure shows signs of weakness.
By properly , you can ensure a successful installation and prolong the lifespan of your new roof. Taking the time to assess the condition of the trailer’s roof, removing the old roof material, and cleaning the surface will help create a solid foundation for the new roof to be installed upon. Emphasizing these steps in the preparation process will result in a safer, more efficient, and longer-lasting roof replacement for your trailer.
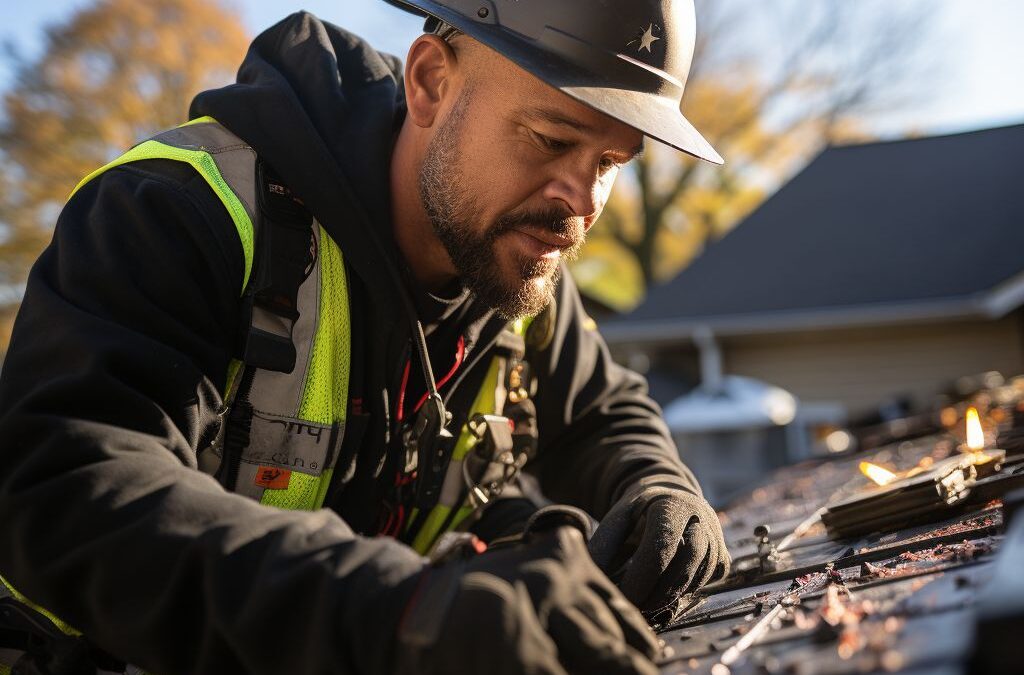
Step-by-Step Guide to Removing the Old Roof
When it comes to replacing the roof on your trailer, the first step is to remove the old roof. This process requires careful planning and attention to ensure a smooth transition to the installation of a new roof. Here is a step-by-step guide to help you through this important phase of the project.
1. Safety First: Before you begin removing the old roof, it’s crucial to prioritize safety. Prepare yourself by wearing protective gear, including gloves, safety glasses, and a dust mask. Additionally, make sure you have a sturdy ladder or scaffolding to access the roof safely.
2. Clear the Surface: Start by removing any debris, loose shingles, or other materials from the roof. Use a broom or a leaf blower to thoroughly clean the surface. By removing all the loose particles, you’ll have a clean working area and a better view of the condition of the roof structure.
3. Inspect for Damage: Once the surface is clear, carefully inspect the roof for any signs of damage, including water leaks, rot, or weakened areas. Check the edges, corners, and seams for any structural issues that may require attention. Take note of any sections that need repairs or reinforcements before installing the new roof.
4. Remove the Shingles: If your trailer has shingles, start by gently prying them up using a flat bar or a shingle shovel. Work row by row, being careful not to damage the underlying roof structure. Dispose of the old shingles in a designated debris container to keep your work area clutter-free.
5. Identify and Remove Fasteners: Look for the fasteners that are holding the old roof in place. These can include screws, nails, or staples. Using a claw hammer or a screwdriver, carefully remove all the fasteners, taking care not to damage the roof’s base. Make sure to collect and discard them safely to avoid any accidents or injuries.
6. Strip Away Layers: In some cases, there may be multiple layers of roofing material on your trailer. If this is the case, continue removing each layer one by one until you reach the base. Take extra care when removing the last layer to avoid damaging the roof structure.
7. Clean the Surface: Once the old roof is completely removed, it’s essential to clean the surface thoroughly. Use a broom or a brush to remove any remaining debris or dust. Then, use a pressure washer or a hose to rinse away any stubborn dirt or grime that may have accumulated.
Remember, removing the old roof is just the first step in the process of replacing it. Make sure to follow manufacturer instructions for the specific material you choose and consult a professional if you’re unsure about any steps or techniques. By taking your time and being thorough in removing the old roof, you’ll set the stage for a successful installation of a new, durable roof for your trailer.
Installing a New Roof on Your Trailer
Once you have properly assessed the condition of your trailer’s roof and prepared it for replacement, it’s time to install a new roof. This process requires careful attention to detail and precision to ensure a proper fit and optimum performance. Here is a step-by-step guide to help you through the installation process.
1. Measure and Cut the Roof Material: Begin by measuring the dimensions of your trailer’s roof accurately. This will help you determine the exact amount of roofing material you need. Remember to account for any vents or obstructions on the roof. Next, using a sharp utility knife or a specialized tool, carefully cut the roof material according to your measurements.
2. Prepare the Roof Surface: Before laying the new roof material, it’s essential to clean the surface thoroughly. Remove any debris, loose nails, or old adhesives. If there are any existing leaks, make sure to patch them up using appropriate sealants. A clean and smooth surface will ensure better adhesion, providing a long-lasting and leak-free roof.
3. Apply Adhesive and Lay the Roof Material: Start by applying a high-quality roofing adhesive to the trailer’s roof surface using a trowel or a roller. Follow the manufacturer’s instructions for the correct amount of adhesive to use. Afterward, carefully lay the roof material on the adhesive, ensuring proper alignment and avoiding any wrinkles or bubbles. Smooth out the material using a roller or a brush to remove any air pockets and ensure good adherence.
4. Secure the Edges and Seams: Once the roof material is in place, it’s crucial to secure the edges and seams properly. Use a roofing knife or scissors to trim any excess material, leaving a small overhang for proper water runoff. Apply adhesive along the edges and press them firmly to create a watertight seal. For the seams, use a roofing seam roller to bond them securely. This step is crucial to prevent water infiltration and potential damage to your trailer.
5. Install Flashing and Sealants: To further enhance the roof’s durability and weather resistance, install flashing around any protrusions or edges. Flashing serves as an additional barrier against water penetration. Use appropriate sealants to ensure a watertight seal between the flashing and the roof material.
Remember, proper ventilation and insulation are vital for a functional and efficient trailer roof. Consider installing roof vents or fans to improve air circulation and regulate temperature inside the trailer. This will help prevent mold growth and moisture damage. Additionally, insulation can contribute to energy efficiency and overall comfort.
By following these steps and considering the important aspects of roof ventilation and insulation, you can successfully install a new roof on your trailer. However, if you are not confident in your DIY skills or if the roof replacement requires extensive repairs, it’s always recommended to consult with a professional roofing contractor to ensure the best results.
Important Considerations for Roof Ventilation and Insulation
Proper roof ventilation and insulation are crucial factors when replacing the roof on a trailer. Ventilation helps in maintaining a comfortable temperature inside the trailer by allowing fresh air to circulate and preventing excessive heat buildup. Insulation, on the other hand, helps to regulate the temperature within the trailer and provides energy efficiency. In this section, we will explore some during the roof replacement process.
One key consideration for roof ventilation is to ensure proper airflow through the trailer’s attic space. This can be achieved by installing roof vents such as ridge vents, static vents, or vent fans. Ridge vents are installed along the peak of the roof, allowing hot air to escape and fresh air to enter through the eaves. Static vents are typically placed on the sides of the trailer and provide passive ventilation. Vent fans, on the other hand, are powered fans that actively pull air out of the trailer.
It is also important to consider the insulation material for the trailer roof. Proper insulation helps in reducing energy costs by preventing heat loss in winter and heat gain in summer. Common insulation materials for trailer roofs include fiberglass insulation, spray foam insulation, and reflective insulation. Fiberglass insulation is a popular choice as it is affordable and relatively easy to install. Spray foam insulation provides excellent insulation and can help with sealing any gaps or cracks. Reflective insulation, typically made from aluminum foil, is another option that reflects radiant heat away from the trailer.
In addition to selecting the right ventilation and insulation materials, it is important to ensure proper installation. Improper installation can lead to ventilation or insulation issues, reducing the effectiveness of both. It is recommended to consult with a professional or follow manufacturer guidelines to ensure proper installation of your chosen ventilation and insulation materials.
In summary, proper roof ventilation and insulation are crucial for a trailer’s comfort and energy efficiency. Installing roof vents and choosing the right insulation material will help maintain a comfortable temperature inside the trailer and reduce energy costs. Remember to consider factors such as airflow, insulation material, and proper installation to make the most of your roof replacement project.
People Also Ask
1. Can I replace a roof on a trailer myself?
Yes, it is possible to replace a roof on a trailer yourself. However, it is a complex task that requires advanced DIY skills, proper tools, and safety precautions. It is recommended to have some construction experience or consult with a professional for guidance.
2. How much does it cost to replace a trailer roof?
The cost to replace a trailer roof can vary depending on factors such as the size of the trailer, material used, and labor costs in your area. On average, it can cost anywhere between $1,500 to $5,000. It is advisable to get quotes from multiple contractors to get a more accurate estimate.
3. What materials are suitable for a trailer roof replacement?
There are various materials suitable for a trailer roof replacement, including metal, rubber, fiberglass, or PVC. Each material has its advantages and disadvantages in terms of durability, weight, cost, and installation complexity. You should consider the specific requirements of your trailer and consult with a professional for the best material choice.
4. How long does it take to replace a roof on a trailer?
The duration of a trailer roof replacement depends on factors such as the size of the trailer, complexity of the project, and the experience of the installer. On average, it can take anywhere from a few days to a couple of weeks. It is recommended to consult with a professional to get a more accurate timeframe based on your specific situation.
5. What are the signs that indicate the need for a trailer roof replacement?
Signs that indicate the need for a trailer roof replacement include water leaks, sagging or bulging spots, mold or mildew growth, excessive wear and tear, or visible cracks and damage. If you notice any of these signs, it is crucial to address the situation promptly to prevent further damage to the trailer’s structure.
In Conclusion
In conclusion, replacing a roof on a trailer is a significant undertaking that requires careful planning and attention to detail. By following the step-by-step process outlined in this guide, you can successfully replace your trailer roof and ensure its longevity and structural integrity.
Remember to assess the condition of your current roof, gather all the necessary tools and materials, and prepare the trailer before starting the replacement process. Take your time to remove the old roof carefully, inspect the underlying structure for any damages, and reinforce it if needed. Proceed with installing the new roof material in a methodical and precise manner, ensuring proper sealing and weatherproofing.
Throughout the process, prioritize safety and consider seeking assistance if required, especially when dealing with heavier materials or complex tasks. Regular maintenance and inspection of your trailer roof will also help prevent future damage and prolong its lifespan.
Now that you have a comprehensive understanding of how to replace a roof on a trailer, take the necessary steps to evaluate your situation and begin your project. With the right approach and careful execution, you can successfully complete this task and enjoy a durable, well-protected trailer for years to come.

Climate Resilience Specialist
Christopher Clark’s extensive knowledge of Fresno’s unique climate challenges drives him to provide resilient roofing solutions. His commitment to community values and fair pricing makes him a trusted partner in roofing projects.