Is your roof showing signs of wear and tear? Are the shingles on the edge of your roof becoming loose or damaged? If so, it’s crucial to address these issues promptly to prevent further damage and costly repairs down the line. Fortunately, replacing shingles on the edge of your roof is a task that can be accomplished with a bit of know-how and some handy tools. In this article, we will guide you through the step-by-step process of replacing shingles on the edge of your roof, ensuring that your home remains protected and your curb appeal intact. So, grab your tool belt and let’s get started!
Locating the Damaged Shingles on the Edge of Your Roof
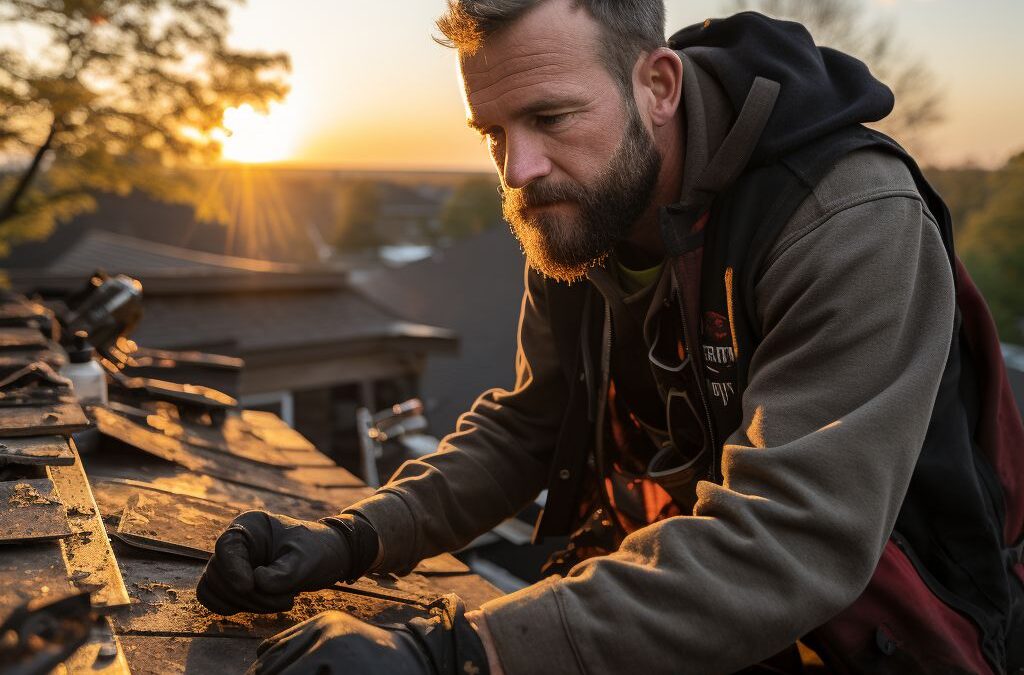
When it comes to roof repairs, a common issue homeowners face is damaged shingles along the edge of their roof. Identifying these damaged shingles is the first step in the replacement process. In this section, we will guide you on how to locate the damaged shingles on the edge of your roof.
To begin, it is essential to conduct a thorough inspection of your roof’s edge. Start by visually examining the exterior of your house from ground level, looking for any noticeable signs of damage such as missing or dislodged shingles, curling or buckling shingles, or signs of water leakage. These visual cues can help you identify the general area that requires repair.
Next, it is crucial to inspect the area more closely. Consider accessing your roof using a ladder but prioritize safety first. When climbing the ladder, ensure it is secure and stable, and use proper safety equipment such as a harness and non-slip footwear. Once on the roof, carefully walk along the edge, visually examining each shingle in detail.
Look for signs of wear and tear, such as cracks, splits, or missing granules, which can indicate that the shingle is damaged and needs replacement. Pay close attention to areas where shingles overlap, as these are often vulnerable to damage. It’s also important to inspect the flashing, which is a protective barrier that prevents water from seeping into the roof’s edge. If the flashing is loose or damaged, it may contribute to shingle deterioration.
To pinpoint the exact shingles that need to be replaced, mark them with chalk or a small piece of tape as you go along. This will make the replacement process more efficient and ensure that no damaged shingles are overlooked.
By following these steps and thoroughly inspecting your roof’s edge, you can successfully locate the damaged shingles in need of replacement. Take your time during this process to ensure accuracy, as it will lay the foundation for a proper repair job and help maintain the integrity of your roof.
Preparing Your Tools and Materials for Shingle Replacement
Having the right tools and materials on hand before starting your shingle replacement project is essential for a smooth and successful repair. Before you begin, gather the following items:
1. Safety Gear:
Ensure you have appropriate safety gear to protect yourself during the roof repair process. This should include a sturdy pair of work gloves, safety goggles, and a helmet or hard hat to shield your head from any potential falling debris.
2. Ladder:
A stable and properly positioned ladder is crucial for accessing the edge of your roof. Make sure it is in good condition, and positioned securely on a level surface. Consider using ladder stabilizers or hooking it to the edge of the roof to provide added stability.
3. Roofing Shingle Ripper:
This specialized tool is designed to simplify the process of removing damaged shingles. It features a sharp, V-shaped blade at one end that allows you to slide it underneath the shingle and lift it up, making it easier to remove without causing further damage.
4. Hammer:
A basic claw hammer is necessary for removing nails and securing the new shingles in place. Choose one that feels comfortable and provides a good grip, as you will be using it extensively throughout the project.
5. Replacement Shingles:
Purchase enough replacement shingles to cover the damaged area on the edge of your roof. Ensure they match the existing shingles in terms of both style and color to maintain a cohesive and visually appealing appearance.
6. Roofing Nails:
You’ll need a sufficient number of roofing nails to secure the new shingles to the roof. Opt for nails specifically designed for roofing, as they are corrosion-resistant and able to withstand the elements.
7. Adhesive or Roof Cement:
Depending on the specific requirements of your roof, you may need adhesive or roof cement to secure the edges of the shingles and prevent them from lifting or curling. Consult the manufacturer’s instructions or seek advice from a roofing professional for the appropriate adhesive or cement for your shingle replacement project.
By gathering these tools and materials in advance, you’ll be well-prepared to tackle the task of replacing the shingles on the edge of your roof. Remember to prioritize safety throughout the process and follow proper ladder safety procedures. With the right tools in hand, you’ll be ready to move on to the next step – removing the old shingles safely and effectively.
Removing the Old Shingles Safely and Effectively
:
When it comes to replacing shingles on the edge of your roof, it is essential to remove the old shingles safely and effectively to ensure a smooth and successful replacement process. Taking the time to properly remove the damaged shingles will not only prevent any further damage to your roof but also lay the groundwork for a strong and stable installation of the new shingles.
To begin removing the old shingles, gather your tools and materials, including a pry bar, roofing hammer, utility knife, and a sturdy ladder. Before ascending the ladder, it is crucial to take proper safety precautions such as wearing work gloves and sturdy footwear, ensuring the ladder is stable, and being mindful of your surroundings.
Once you are safely positioned on the edge of the roof, carefully inspect the damaged shingles and identify the ones that need to be replaced. Using your pry bar, gently lift the edges of the shingles above the damaged ones, being cautious not to damage the surrounding intact shingles. This will allow you to access and remove the damaged shingles without causing further harm to the rest of the roof.
Next, use a roofing hammer to carefully remove any nails securing the damaged shingles in place. Take your time and work methodically to ensure the nails are completely removed, allowing the old shingle to be easily lifted away. If any stubborn nails remain in the roof deck, use the pry bar or a pair of pliers to remove them, being careful not to damage the underlying structure in the process.
Once the damaged shingles and nails have been fully removed, it is important to thoroughly clean the area before installing the new shingles. Remove any debris, dirt, or loose pieces of the old shingles to create a clean and smooth surface. This will ensure proper adhesion and a seamless appearance for the replacement shingles.
By following these steps and taking the necessary precautions, you can safely and effectively remove the old shingles on the edge of your roof. This careful process sets the stage for a successful replacement and helps maintain the integrity and longevity of your roof.
Installing New Shingles on the Edge of Your Roof
is a crucial step in repairing any damage and ensuring the longevity of your roof. Here, we will guide you through the process of properly installing new shingles to protect your roof and maintain its stability.
Before you begin the installation process, make sure you have gathered all the necessary tools and materials. This will include new shingles that match the color and style of your existing roof, roofing nails, a nail gun or hammer, a pry bar, a utility knife, a ladder, and safety equipment such as gloves and goggles.
To start the installation, carefully remove the damaged shingles using a pry bar. Take caution not to damage any surrounding shingles or the roof structure itself. Once the damaged shingles have been removed, clean any debris or loose nails from the area using a broom or brush.
Now it’s time to position the new shingles. Begin by cutting the shingles to the correct size using a utility knife. Measure the space where the old shingle was removed and adjust accordingly to ensure a proper fit.
Place the new shingle in the desired position, making sure it overlaps the adjacent shingles to create a watertight seal. Secure the shingle in place using roofing nails or a nail gun, placing the nails approximately 1 inch from the edge of the shingle. Be careful not to over-nail, as this can cause damage to the shingle.
Repeat this process for each damaged shingle along the edge of your roof until the entire area has been replaced. Make sure each shingle is securely fastened and aligned with the surrounding shingles to maintain a uniform and visually appealing appearance.
After all the shingles have been installed, inspect the area for any loose nails or debris that may have been left behind. Clean up any remaining mess and ensure that the newly installed shingles are securely attached and in proper alignment.
By following these steps and taking the necessary precautions, you can confidently install new shingles on the edge of your roof, ensuring its durability and protection for years to come. Remember to always prioritize safety and consult a professional if you encounter any challenges or concerns during the installation process.
Securing the Shingles to Ensure Longevity and Stability
Properly securing the shingles on the edge of your roof is crucial in ensuring their longevity and stability. The edge of the roof is particularly vulnerable to strong winds and other weather elements, so it is essential to take the necessary steps to prevent any future damage or displacement. By following these guidelines, you can ensure that your newly replaced shingles will withstand the test of time.
One of the first steps in securing the shingles is to use roofing nails that are specifically designed for this purpose. These nails are typically longer and have a larger head than regular nails, providing an extra level of stability. When placing the nails, it is essential to position them in the designated areas where the shingle meets the roof deck. Be sure to drive the nails in at an angle to ensure a tight grip and to prevent any potential water damage.
Additionally, applying roofing cement or adhesive to the edges of the shingles can further enhance their stability. This adhesive acts as an additional layer of protection, keeping the shingles firmly in place. When applying the roofing cement, ensure that it is evenly spread and covers the entire edge of the shingle. This will create a strong bond between the shingle and the roof, preventing any future shifts or movement.
Another technique to secure the shingles is to use roofing sealant on the nail heads. This helps to create a watertight seal and prevents any potential moisture from entering the roof structure. Apply the sealant generously over each nail head, making sure to cover it completely. This extra step adds an additional layer of protection against water damage, preserving the integrity of the shingles and ensuring their long lifespan.
In conclusion, securing the shingles on the edge of your roof is essential to ensure their longevity and stability. By using proper roofing nails, applying roofing cement or adhesive, and using roofing sealant on nail heads, you can effectively protect the shingles from potential damage and displacement. These measures will give you peace of mind, knowing that your newly replaced shingles will withstand the elements and remain secure for years to come.
People Also Ask
1. How do you remove shingles from the edge of a roof?
To remove shingles from the edge of a roof, start by carefully prying up the damaged shingles using a pry bar or a shingle remover tool. Once the damaged shingles are removed, you can proceed to replace them with new ones.
2. What tools do I need to replace shingles on the edge of a roof?
You will need a few basic tools to replace shingles on the edge of a roof, including a pry bar or shingle remover tool, a hammer, roofing nails, a utility knife, and replacement shingles. It is also recommended to have safety equipment such as gloves and goggles.
3. How do I know if I need to replace shingles at the edge of my roof?
You may need to replace shingles at the edge of your roof if you notice signs of damage such as curling, cracking, or missing shingles. Additionally, if there are leaks or water damage in the area, it is likely that the shingles need to be replaced.
4. Can I replace shingles on the edge of my roof myself?
Yes, you can replace shingles on the edge of your roof yourself if you have some basic DIY skills and the necessary tools. However, if you are unsure or uncomfortable with the process, it is always best to hire a professional roofer to ensure the job is done correctly and safely.
5. How long does it take to replace shingles on the edge of a roof?
The time it takes to replace shingles on the edge of a roof can vary depending on factors such as the extent of the damage and the size of the area that needs to be replaced. Generally, it can take a few hours to a full day to complete the task.
Insights and Conclusions
In conclusion, replacing shingles on the edge of a roof can be a straightforward process if done carefully and correctly. By following the steps outlined, homeowners can ensure a successful shingle replacement and maintain the structural integrity of their roofs. Remember to prioritize safety and use the appropriate tools and materials.
If you notice any signs of damage or wear on your roof’s edge, it is important to address it promptly to prevent further issues such as leaks or water damage. Regular inspections and maintenance can go a long way in prolonging the lifespan of your roof and avoiding costly repairs down the line.
By taking the time to learn and implement the proper techniques for their unique roofing system, homeowners can save money by handling small repairs themselves. However, it’s essential to know your limits and call in a professional roofing contractor if the task seems too challenging or if the damage seems extensive.
Remember, a well-maintained roof not only protects your home from the elements but also adds value and curb appeal. So, don’t neglect your roof, and if it’s time for shingle replacement on the edge of your roof, take action and ensure its longevity for years to come.

Alexander Johnson is a seasoned roofing professional with over 25 years in the industry and CEO at Fresno Roof Repair. His expertise blends traditional craftsmanship with cutting-edge technology, focusing on resilient roofing solutions tailored to Fresno’s diverse climate. As a leader at Fresno Roof Repair, Alexander emphasizes open communication, teamwork, and continual education, ensuring every client receives exceptional service. Beyond his role, Alexander is deeply committed to the Fresno community, supporting local initiatives. His dedication, technical proficiency, and customer-centric approach make him an invaluable asset to Fresno Roof Repair, embodying the company’s commitment to excellence and quality roofing solutions.