Are you noticing signs of wear and tear on your roof shingles? Perhaps you’ve spotted a leak or noticed some missing or damaged shingles. While it may seem like a daunting task, fear not! With the right knowledge and a little bit of patience, you can successfully replace a roof shingle and restore the integrity of your roof. In this article, we will guide you through the step-by-step process of replacing a roof shingle, ensuring that your roof remains strong and provides the protection your home deserves. Read on to discover expert tips and tricks that will help you tackle this DIY project with confidence and achieve professional-looking results. Get ready to save money and enhance the longevity of your roof by mastering the art of roof shingle replacement.
– Understanding the signs of a damaged roof shingle
Understanding the signs of a damaged roof shingle
Damaged roof shingles can lead to a host of problems, including leaks, water damage, and even structural issues. It’s important to be able to recognize the signs of a damaged shingle so that you can promptly address the issue and avoid further damage to your roof.
One of the most obvious signs of a damaged shingle is visible wear and tear. Look for shingles that are cracked, curling, or missing altogether. These are clear indications that the shingle is compromised and in need of replacement. Additionally, keep an eye out for shingles that have granule loss. If you notice excessive granules in your gutters or downspouts, it’s a likely sign that your shingles are deteriorating and need to be replaced.
Another sign to watch out for is shingles that are discolored or have dark spots. This could indicate that mold or algae is growing on your roof, which can weaken the shingles and cause them to deteriorate faster. If you notice any discoloration or dark spots on your shingles, it’s important to address the issue promptly to prevent further damage.
Furthermore, be aware of any leaks or water stains on your ceiling or walls. These are clear indications that water is penetrating your roof, often caused by damaged shingles. If left untreated, these leaks can lead to serious water damage and mold growth, so it’s crucial to identify and replace damaged shingles as soon as possible.
In summary, understanding the signs of a damaged roof shingle is essential for maintaining the integrity of your roof. Look for visible wear and tear, granule loss, discoloration or dark spots, as well as any leaks or water stains. By promptly addressing these issues, you can prevent further damage and ensure the longevity of your roof.
– Tools and materials needed for replacing a roof shingle
Tools and materials needed for replacing a roof shingle:
Replacing a roof shingle requires a specific set of tools and materials to ensure a successful repair. Here are the essential items you’ll need to have on hand before starting the replacement process:
1. Safety equipment: Before you begin any roof repair work, it’s important to put safety first. Make sure you have a sturdy ladder, safety harness, and non-slip footwear to prevent accidents or injuries.
2. Roofing hammer: A roofing hammer, also known as a roofing hatchet or roofing nailer, is a specialized tool designed for removing old shingles and installing new ones. It has a flat head for prying and a sharp side for cutting nails.
3. Pry bar or crowbar: These tools are used to gently lift and remove the damaged shingle without causing additional damage to surrounding areas.
4. Replacement shingles: Make sure you have enough replacement shingles to match the existing ones on your roof. It’s important to choose shingles that are the same size, color, and material to maintain the uniformity and visual appeal of your roof.
5. Roofing adhesive or sealant: A high-quality roofing adhesive or sealant is necessary to secure the replacement shingle in place and prevent leaks. Choose a product that is compatible with your shingle material for the best results.
6. Roofing nails: Stainless steel or galvanized roofing nails?”>roofing nails are recommended for securing the replacement shingle. These nails are corrosion-resistant and provide better durability, ensuring a long-lasting repair.
7. Roofing felt or underlayment: Depending on the condition of your roof, you may need to replace the underlying layers of felt or underlayment. This waterproof barrier helps protect the roof deck from moisture and provides an extra layer of insulation.
8. Roofing cement or tar: In some cases, you may need to use roofing cement or tar to reinforce the edges and corners of the replacement shingle for added stability and protection against wind and water infiltration.
By having these tools and materials readily available, you’ll be well-prepared to replace a damaged roof shingle effectively and efficiently. Remember to follow proper safety protocols and consult a professional roofer if you’re unsure about any aspect of the repair process.
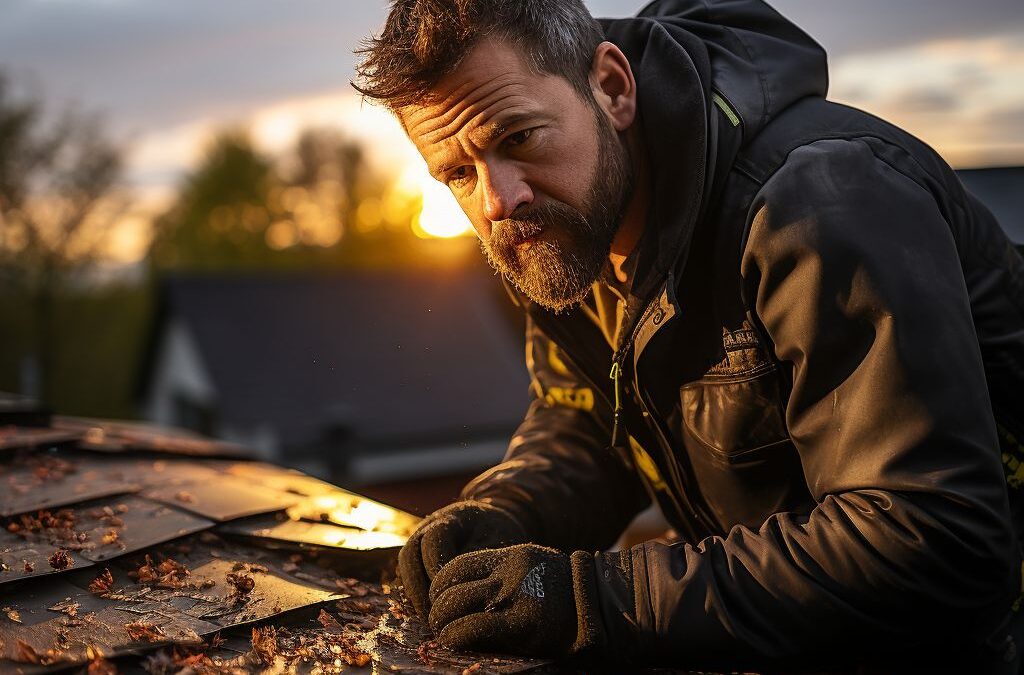
- Step-by-step guide to safely removing a damaged roof shingle
Step-by-step guide to safely removing a damaged roof shingle:
When it comes to replacing a damaged roof shingle, it’s important to follow a step-by-step process to ensure the safety of yourself and your roof. Here is a guide to safely removing a damaged roof shingle.
1. Prepare the necessary tools and materials: Before starting the process, gather the tools and materials you will need. This may include a pry bar, hammer, replacement shingles, roofing nails, a ladder, and safety equipment such as gloves and goggles.
2. Assess the damage: Begin by identifying the damaged shingle or shingles. Look for signs of cracking, curling, or missing granules. It’s crucial to only replace individual shingles rather than the entire roof if the damage is isolated.
3. Remove the damaged shingle: Start by loosening the adhesive on the damaged shingle using a pry bar. Gently lift the shingle and remove any roofing nails holding it in place. Be careful not to damage the surrounding shingles during the process.
4. Clean the area: Once the damaged shingle has been removed, clear any debris or remaining adhesive from the area. This will ensure a clean surface for the new shingle to be installed.
5. Prepare the replacement shingle: Take the replacement shingle and align it with the existing shingles. Trim the replacement shingle if necessary to fit properly. It’s important to use the same type and color of shingle to maintain a uniform look.
6. Install the replacement shingle: Apply a small amount of roofing adhesive to the back of the replacement shingle. Slide the shingle into place, aligning it with the surrounding shingles. Secure the shingle in place using roofing nails, making sure to drive the nails just below the surface of the shingle.
7. Check for proper installation: Once the replacement shingle is in place, double-check that it is securely fastened and aligned with the surrounding shingles. Ensure that it lays flat and that the edges are properly sealed.
By following this step-by-step guide, you can safely remove a damaged roof shingle and replace it with a new one. Remember to always prioritize your safety and take necessary precautions when working on your roof.
– Assessing the underlying roof condition before installing a new shingle
Assessing the Underlying Roof Condition Before Installing a New Shingle
Before installing a new roof shingle, it is essential to assess the underlying condition of your roof. This step is crucial as it ensures that the new shingle will be properly supported and that any underlying issues are addressed before installation.
First, visually inspect the area around the damaged shingle. Look for any signs of water damage, such as discoloration or soft spots on the roof surface. Additionally, check for any signs of rot or mold, which could indicate a larger problem with the roof structure.
Next, carefully remove the damaged shingle and examine the surrounding area. Check for any signs of damage to the roof deck, such as cracks or sagging. These issues should be repaired before installing a new shingle to prevent further damage to your roof.
Once you have assessed the condition of the roof deck, take a closer look at the surrounding shingles. Check for any signs of wear or damage, such as cracked or curled edges. These shingles may also need to be replaced to maintain the integrity of your roof.
It is important to note that if you notice widespread damage or deterioration during your assessment, it may be necessary to consult a professional roofer. They will have the expertise to determine if more extensive repairs or a full roof replacement are required.
By thoroughly assessing the underlying roof condition before installing a new shingle, you can ensure that your roof remains stable and secure. This step will not only improve the longevity of the new shingle but also help prevent future issues or leaks.
- Expert tips for correctly installing a replacement roof shingle
Expert Tips for Correctly Installing a Replacement Roof Shingle
When it comes to replacing a roof shingle, it is important to follow the correct installation procedure to ensure a long-lasting and effective fix. Here are some expert tips to help you properly install a replacement roof shingle:
1. Prepare the area: Before installing the new shingle, make sure to clean the area by removing any debris or loose materials. This will help create a smooth surface for the new shingle to adhere to. Use a roofing brush or broom to sweep away any dirt or dust.
2. Align the shingle correctly: Position the replacement shingle so that it lines up with the existing shingles on the roof. This will ensure a seamless appearance and maintain the integrity of the roof. Carefully slide the new shingle into place, making sure it fits snugly and securely.
3. Secure the shingle: Once the new shingle is in position, use roofing nails to fasten it securely to the roof deck. Hammer the nails into the designated nail line on the shingle, being careful not to overdrive or underdrive them. This will ensure that the shingle is properly anchored and won’t come loose in strong winds or storms.
4. Seal the shingle: To provide added protection against water damage, it is important to seal the edges and corners of the new shingle. Apply a generous amount of roofing cement or sealant to the exposed areas, using a putty knife or caulking gun. This will create a watertight seal and prevent any moisture from seeping under the shingle.
5. Check for proper alignment and snug fit: After installing the replacement shingle, double-check its alignment and ensure that it fits snugly with the surrounding shingles. This will help maintain the overall appearance of the roof and prevent any potential leaks or gaps.
Remember, it is always recommended to consult a professional roofing contractor if you are unsure about replacing a roof shingle yourself. They have the expertise and experience to handle any roof repair or replacement job efficiently and safely. By following these expert tips, you can successfully install a replacement roof shingle and maintain the structural integrity of your roof.
- Maintaining the integrity of your roof: additional measures to consider
Maintaining the Integrity of Your Roof: Additional Measures to Consider
Taking steps to maintain the integrity of your roof is essential to ensure its longevity and protect your home from further damage. In addition to replacing a damaged roof shingle, there are a few additional measures you can take to keep your roof in good condition.
1. Regular Roof Inspections:
Schedule regular roof inspections at least once a year, preferably in the fall or spring, to identify any potential issues before they become major problems. Hire a professional roofing contractor to conduct a thorough inspection and make necessary repairs.
2. Clean Gutters and Downspouts:
Clogged gutters and downspouts can cause water to back up onto your roof, leading to leaks and damage. Regularly clean your gutters and downspouts to ensure proper drainage and prevent debris buildup.
3. Trim Trees and Branches:
Overhanging trees and branches can scrape against your roof, causing damage to shingles and other roofing materials. Trim back any trees or branches that are in close proximity to your roof to minimize the risk of damage.
4. Install Proper Ventilation:
Proper attic ventilation is crucial for maintaining the integrity of your roof. It helps regulate temperature and moisture levels, preventing the formation of mold and mildew and reducing the risk of shingle damage. Consult with a roofing professional to determine if your attic ventilation is adequate and make necessary improvements.
5. Consider Roof Coating:
Applying a roof coating can provide an extra layer of protection against the elements. This protective barrier can help extend the lifespan of your roof and prevent further damage. Consult with a professional to determine the best type of roof coating for your specific roofing material.
Remember, consistently monitoring your roof’s condition and addressing any issues promptly is key to maintaining its integrity. By implementing these additional measures, you can ensure your roof remains sturdy and functional for years to come. Always consult with a professional roofing contractor for any major repairs or maintenance tasks to ensure the best results.
- Ensuring a long-lasting fix: crucial steps after replacing a roof shingle
Ensuring a long-lasting fix: crucial steps after replacing a roof shingle
After successfully replacing a damaged roof shingle, it is important to take a few additional steps to ensure a long-lasting fix and maintain the integrity of your roof. These steps will help prevent future damage and keep your roof in optimal condition.
Firstly, it is crucial to inspect the surrounding shingles. If any shingles appear loose or damaged, it is advisable to replace them as well. This will help maintain the overall stability of the roof and prevent further issues down the line. Inspect the neighboring shingles for any signs of wear, such as curling, cracking, or missing granules, and address any issues promptly.
Next, take the time to clean the area surrounding the newly installed shingle. Remove any debris or loose nails that may have accumulated during the replacement process. This will prevent these items from causing damage or becoming a potential hazard in the future.
Once the area is clean, consider applying a dab of roofing cement underneath the edges of the new shingle. This will provide an extra layer of protection and help secure the shingle in place. Apply the cement sparingly and only to the edges to avoid a messy appearance.
In addition, it is essential to perform regular maintenance on your roof. This includes cleaning out gutters and downspouts regularly to prevent debris buildup, which can lead to water damage. Keep an eye out for any signs of damage or leaks and address them promptly to prevent further issues.
Lastly, consider having your roof professionally inspected on a regular basis. A professional roofer can assess the overall condition of your roof, identify any potential problems, and provide necessary repairs or maintenance. Regular inspections can help catch issues early on, saving you time and money in the long run.
By following these crucial steps after replacing a roof shingle, you can ensure a long-lasting fix and maintain the integrity of your roof. Taking a proactive approach to roof maintenance will help extend its lifespan and prevent costly repairs. Remember, a well-maintained roof is essential to protecting your home and its occupants from the elements.
People Also Ask
1. Can I replace a single shingle on my roof?
Yes, it is possible to replace a single shingle on your roof. Start by carefully removing the damaged shingle, then clean the area and apply roofing cement before installing the new shingle.
2. How much does it cost to replace a roof shingle?
The cost of replacing a roof shingle can vary depending on various factors such as the type of shingle, the size and slope of your roof, and your location. On average, you can expect to pay between $100 and $300 per shingle replacement.
3. Do I need professional help to replace a roof shingle?
While it is possible to replace a roof shingle yourself, it is recommended to seek professional help, especially if you lack the necessary experience or if the roof is steep or complex. Professional roofers have the expertise and tools to ensure a safe and effective shingle replacement.
4. How long does it take to replace a roof shingle?
The time required to replace a roof shingle can vary depending on the skill level of the person performing the replacement, the accessibility of the damaged shingle, and the complexity of the roof. On average, a single shingle replacement can be completed in a few hours.
5. What are the signs that indicate a shingle needs to be replaced?
Some common signs that indicate a shingle needs to be replaced include cracked or curled shingles, missing shingles, visible signs of wear or aging, and water leaks or stains on the ceiling. If you notice any of these signs, it is essential to address the issue promptly to prevent further damage to your roof.
Key Takeaways
In conclusion, replacing a roof shingle can be a straightforward process if done correctly. By following the steps outlined above – identifying the damaged shingle, removing the old shingle, installing the new shingle, and securing it properly – homeowners can ensure that their roofs remain in good condition and free from leaks. It is important to prioritize safety throughout the entire process, using proper equipment and taking necessary precautions.
Regular roof inspections and maintenance can help prevent shingle damage and prolong the lifespan of the entire roof. If you are uncomfortable or unsure about replacing a shingle yourself, it is always recommended to seek professional help to ensure the job is done correctly and avoid any potential risks. Remember, a well-maintained roof is crucial for protecting your home from the elements, so taking care of any damaged shingles promptly is essential.

Customer Relations Manager
Benjamin Turner is a customer-centric professional, placing emphasis on open communication and transparency throughout the roofing process. His dedication to client satisfaction ensures a smooth and collaborative experience.