Roof leaks can be a nightmare for homeowners, causing water damage, mold growth, and expensive repairs. While there are various culprits behind these unwelcome intrusions, one often overlooked component is the roof scupper. If you’ve noticed signs of water seepage or are looking to upgrade your scupper system for better drainage, this informative article is here to help. In the following sections, we will guide you step-by-step through the process of replacing a roof scupper, equipping you with the knowledge and confidence to tackle this crucial repair and safeguard your home against the perils of a leaky roof. So, grab your tools, don your safety gear, and let’s get started on this essential journey to a watertight roof!
Preparation for Replacing a Roof Scupper
Preparation is key when it comes to replacing a roof scupper. Before diving into the process, it’s important to assess the condition of the existing scupper and gather the necessary tools and materials. This will ensure a smoother and more efficient replacement process.
The first step in preparing to replace a roof scupper is to inspect and assess the existing scupper. Check for any signs of damage, such as cracks, rust, or leaks. It’s also important to evaluate the overall condition of the roofing system surrounding the scupper to identify any potential underlying issues. This assessment will help determine the extent of the replacement required and inform your selection of the replacement scupper.
Once the assessment is complete, it’s time to choose the right replacement scupper for your roof. Consider factors such as material, size, and design, ensuring that the replacement scupper matches the specifications and requirements of your roof. Consulting with a professional or a knowledgeable roofing vendor can provide valuable guidance in making this selection.
With the appropriate replacement scupper chosen, gather the necessary tools and materials for the replacement process. This may include a utility knife, pry bar, hammer, screwdriver, roofing cement, sealant, and the new scupper itself. Having all the required tools and materials readily available will minimize delays and help maintain a smooth workflow during the replacement process.
Taking these preparatory steps will set the foundation for a successful roof scupper replacement. By carefully assessing the existing scupper, selecting the suitable replacement, and gathering the necessary tools and materials, you’ll be well-prepared to tackle the task at hand.
Inspection and Assessment of the Existing Scupper
Before replacing a roof scupper, it is essential to inspect and assess the condition of the existing scupper thoroughly. This step allows you to determine the extent of repair or replacement needed and ensure that the new scupper will be a suitable fit for your roof.
Begin by visually examining the scupper for any visible signs of damage or deterioration. Look for rust, corrosion, cracks, or loose components. Pay close attention to the flashing around the scupper, as it can often be a common area for leaks to occur. Check the surrounding roof area for any signs of water stains or mold, indicating possible leaks.
Next, carefully remove any debris, leaves, or blockages from the scupper. This will give you a better view of the scupper’s condition and help determine if the blockage was the cause of any leaks or other issues. Use gloves and a small brush or scraper to clear out any dirt or debris.
To assess the functionality of the scupper, run water through it to check for proper drainage. If water doesn’t flow smoothly or backs up, there may be a clog or structural issue that needs attention. Additionally, check the seals around the scupper to ensure they are intact and not deteriorating.
If you are unsure about the condition of the scupper or need a professional opinion, consider contacting a roofing contractor or inspector. They can provide a more detailed assessment and recommend the most appropriate course of action.
Overall, conducting a thorough is crucial in determining the next steps for replacing it. Identifying any damage, leaks, or functional issues will help guide you in choosing the right replacement and ensure the longevity and effectiveness of your roof scupper system.
Choosing the Right Replacement Scupper for Your Roof
is crucial to ensure proper drainage and prevent any future leaks or damage. A scupper is an essential component of your roofing system that allows water to flow off the roof and into the downspouts or gutters. When it comes to selecting a replacement scupper, there are a few factors to consider.
Firstly, you need to determine the size and shape of the existing scupper. Measure the length, width, and depth of the scupper to ensure that the replacement matches the dimensions accurately. It is essential to choose a scupper that fits seamlessly into the existing opening to avoid any installation complications.
Next, consider the material of the replacement scupper. Scuppers are commonly made from materials such as aluminum, copper, or PVC. Each material has its own pros and cons, so it’s important to choose one that suits your specific needs. Aluminum scuppers are lightweight, durable, and resistant to rust, making them a popular choice. Copper scuppers, on the other hand, offer a more aesthetically pleasing look but require regular maintenance to prevent oxidation. PVC scuppers are affordable and easy to install but may not be as durable as metal options.
Additionally, think about the design and style of the replacement scupper. While functionality is key, you can also choose a scupper that complements the overall appearance of your roof. Consider factors such as color, shape, and decorative elements that will enhance the visual appeal of your home.
When selecting a replacement scupper, it’s important to consult with a professional roofing contractor or supplier. They can provide expert advice and guidance based on your specific roof type and budget. They may also be able to recommend specific brands or models that are known for their quality and longevity.
In summary, requires careful consideration of factors such as size, material, design, and functionality. Take the time to measure the existing scupper, research different materials, and consult with professionals to ensure a successful replacement that will protect your roof for years to come.
Tools and Materials Required for Replacing a Roof Scupper
In order to replace a roof scupper, there are several tools and materials that you will need to have on hand. These items are essential for safely and effectively completing the replacement process.
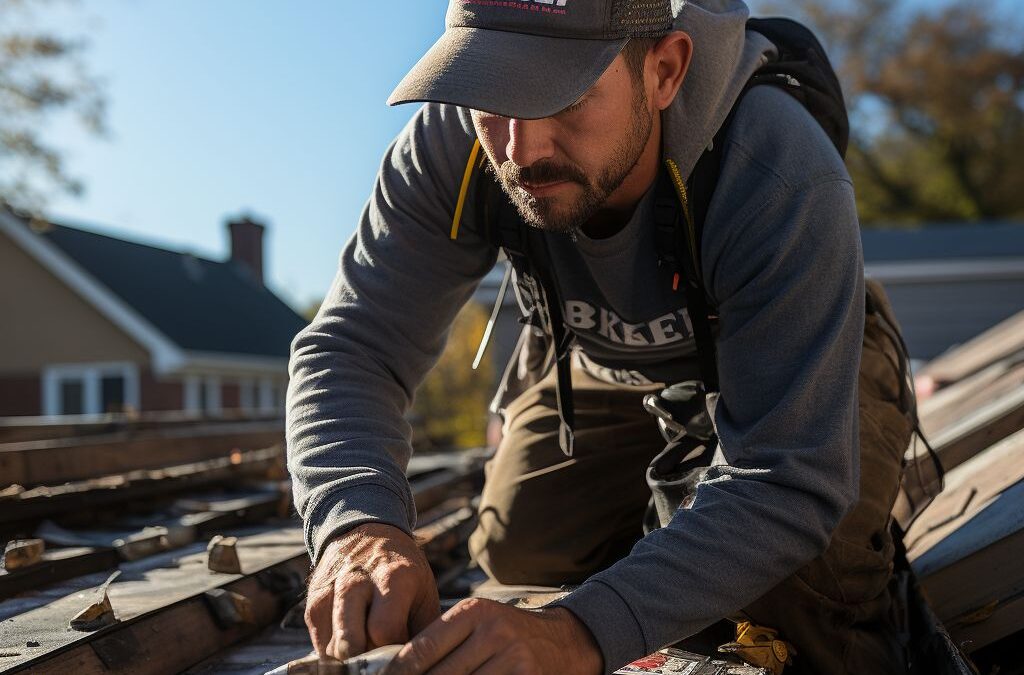
First and foremost, you will need a ladder or scaffolding system to safely access the roof. It is important to ensure that the ladder or scaffolding is sturdy and stable before climbing up. Additionally, you may need a safety harness or fall protection equipment, depending on the height and slope of the roof.
Next, you will need a variety of hand tools such as a pry bar, hammer, utility knife, and screwdriver. These tools will be used to remove the old scupper and install the new one. It is important to use the correct size and type of tools for the specific job to avoid damaging the roof or scupper.
In terms of materials, you will need a new scupper of the appropriate size and material to fit your roof’s needs. Scuppers can be made from various materials including metal, PVC, or rubber. The specific material you choose will depend on factors such as the climate, type of roof, and durability requirements.
Additionally, you may need roofing cement or adhesive to secure the scupper in place. This will help to ensure a watertight seal and prevent any leaks from occurring. It is important to choose a high-quality adhesive that is compatible with both the scupper material and the roof surface.
Overall, having the right tools and materials for replacing a roof scupper is crucial for a successful and long-lasting installation. By properly preparing and gathering all necessary items, you can confidently tackle this repair project and keep your roof in optimal condition.
Step-by-Step Guide: Removing the Old Scupper
Removing the old scupper is an essential step in replacing a roof scupper. This process ensures that the new scupper can be properly installed and functions effectively. Here is a step-by-step guide to help you remove the old scupper from your roof.
First, gather all the necessary tools and materials for the task. You will need a ladder, safety harness, gloves, pry bar, utility knife, drill, and screws. Make sure you have everything on hand before starting the removal process.
Begin by inspecting the existing scupper to determine the best approach for removal. Look for any visible screws or fasteners that may be holding it in place. If there are any sealants or caulking around the edges, use a utility knife to carefully cut through them.
Next, use a ladder and safety harness to access the roof area where the scupper is located. Take precautions to ensure your safety while working at heights.
Using a pry bar, carefully loosen and remove any screws or fasteners securing the old scupper to the roof. Take note of how the scupper is attached and keep track of any hardware that may need to be reused or replaced.
Once all the screws or fasteners are removed, gently pry the old scupper away from the roof surface. Take care not to damage the surrounding roofing materials or membrane.
If the scupper is still firmly attached, you may need to use a drill to remove any remaining fasteners or screws. Be cautious not to drill too deeply and damage the roofing structure.
Once the old scupper is completely removed, inspect the area for any damage or deterioration. It is crucial to address any underlying issues before installing the new scupper to ensure a proper fit and prevent future issues.
Remember to dispose of the old scupper and any debris responsibly. Check with local regulations for proper disposal methods.
By following this step-by-step guide, you can successfully remove the old scupper from your roof.
Step-by-Step Guide: Installing the New Scupper
Installing a new roof scupper is a crucial step in ensuring the proper functioning and longevity of your roof. This guide will provide you with step-by-step instructions on how to install a new scupper, ensuring a watertight seal and seamless integration into your roof system.
Before you begin the installation process, make sure you have all the necessary tools and materials at hand. These may include a ladder, tape measure, screwdriver, roofing adhesive, roofing cement, roofing nails, and a putty knife. Double-check that you have the correct replacement scupper that matches the specifications of your roof.
Once you have gathered all the required tools and materials, it’s time to start installing the new scupper. Begin by removing any debris or old caulking from the area where the scupper will be installed. Ensure that the surface is clean and dry before proceeding.
Next, position the new scupper in the desired location on the roof. Use a tape measure to ensure that it is properly aligned and centered. Once you are satisfied with the placement, mark the exact position of the scupper using a pencil or marker.
Now it’s time to secure the scupper in place. Apply a generous amount of roofing adhesive around the marked area. This will create a waterproof seal and prevent any leaks. Carefully place the scupper onto the adhesive and press it firmly against the roof surface.
Once the scupper is in position, use roofing nails to further secure it. Place nails around the edges of the scupper, ensuring that they are evenly spaced and provide sufficient support. Be careful not to damage the scupper or the roof material during this process.
After the scupper is securely fastened, apply roofing cement around its edges to reinforce the seal. This will provide an extra layer of protection against water infiltration and enhance the durability of the installation. Smooth out the roofing cement using a putty knife to create a neat and finished appearance.
Finally, allow the roofing adhesive and cement to fully cure according to the manufacturer’s instructions. Once cured, perform a thorough inspection to ensure that the scupper is securely attached and there are no signs of water leakage. Regularly maintain and clean the scupper to prevent clogs and prolong its lifespan.
By following these step-by-step instructions, you can successfully install a new roof scupper and ensure the efficient drainage of water from your roof. Remember to prioritize safety during the installation process and consult a professional if you are unsure about any aspect of the procedure.
Maintenance and Care Tips for a Newly Replaced Roof Scupper
After successfully replacing your roof scupper, it is important to understand the necessary maintenance and care required to ensure its longevity and optimal functionality. By following these tips, you can prolong the lifespan of your newly replaced roof scupper and prevent any potential issues that may arise in the future.
Regular Inspection and Cleaning: Just like any other component of your roof, the scupper requires regular inspection and cleaning. Inspect the scupper periodically for any debris, leaves, or other obstructions that might compromise its ability to drain water effectively. Use a sturdy ladder, gloves, and a brush to safely remove any build-up. Keeping the scupper clear of debris will prevent clogs and ensure proper water flow.
Sealant Maintenance: The sealant around the edges of the scupper is crucial for preventing leaks and water damage. Inspect the sealant regularly and look for any signs of cracking or deterioration. If you notice any issues, immediately remove the old sealant and reapply a fresh, high-quality sealant to ensure a watertight seal. This will help to protect your roof from leaks and potential structural damage.
Gutter System Maintenance: The scupper is an integral part of your roof’s gutter system. To maintain the effectiveness of the scupper, it is essential to keep the entire gutter system clean and free of debris. Regularly remove leaves, twigs, and other debris from the gutters to prevent clogs and blockages. This will help to maintain proper water flow through the scupper and prevent overflow.
Proper Water Flow: Ensure that water is flowing efficiently through the scupper by checking the downspouts and drainpipes connected to it. Make sure they are clear and free of any obstructions. Additionally, check the slope of your roof to ensure it is properly directing water towards the scupper. Proper water flow will prevent stagnant water from accumulating and potentially causing damage to your roof.
Scheduling Professional Maintenance: While regular maintenance and inspection can be done by homeowners, it is also beneficial to schedule professional maintenance for your roof scupper. A professional roofer can conduct a comprehensive inspection, perform any necessary repairs or replacements, and provide expert advice on maintaining your scupper. This ensures that any potential issues are addressed promptly and that your roof scupper remains in optimal condition.
By following these maintenance and care tips, you can extend the lifespan of your newly replaced roof scupper and prevent any potential issues that may arise. Regular inspection, cleaning, and sealant maintenance will help to keep your scupper functioning effectively, while proper water flow and scheduling professional maintenance will ensure its longevity and optimal performance. With proper care, your roof scupper will continue to protect your roof from water damage for years to come.
People Also Ask
1. Can I replace a roof scupper myself?
Yes, in most cases replacing a roof scupper can be done by a homeowner with some DIY experience. However, it is recommended to hire a professional if you are unsure of the process or do not have access to the necessary tools.
2. How much does it cost to replace a roof scupper?
The cost of replacing a roof scupper can vary depending on factors such as the size of the scupper, the complexity of the installation, and the materials used. On average, homeowners can expect to pay between $200 and $500 for a professional to replace a roof scupper.
3. What tools do I need to replace a roof scupper?
To replace a roof scupper, you will need various tools including a pry bar, a utility knife, a drill with metal cutting attachments, a caulk gun, roofing cement, a tape measure, and screws or nails depending on the type of scupper you are installing.
4. How long does it take to replace a roof scupper?
The time it takes to replace a roof scupper can vary depending on factors such as the size and complexity of the scupper, the condition of the roof, and the experience of the person performing the replacement. On average, it can take a few hours to a full day to complete the replacement.
5. Can I install a different type of scupper when replacing my roof scupper?
Yes, when replacing a roof scupper, you have the option to install a different type of scupper if desired. However, it is important to consider factors such as compatibility with the existing roofing system and whether any modifications or additional measures may be required to ensure proper installation and functionality.
Concluding Remarks
In conclusion, replacing a roof scupper is a manageable task that can be done by following a step-by-step process. Start by gathering the necessary tools and materials, then safely access the roof and remove the existing scupper. Measure and cut the new scupper according to specifications, and ensure a proper seal by applying sealant or flashing. Finally, test the new scupper for proper drainage and make any necessary adjustments.
Remember, if you are unsure about any part of the process or if you encounter any unexpected challenges, it is always recommended to seek professional assistance. By replacing a roof scupper correctly, you can ensure proper water drainage and prevent potential water damage to your roof and property.
Keep your roof in good condition and address any issues promptly to extend its lifespan and maintain the integrity of your property. Regular maintenance and professional inspections are also advisable to catch any problems early on and prevent them from escalating into more significant issues.

Alexander Johnson is a seasoned roofing professional with over 25 years in the industry and CEO at Fresno Roof Repair. His expertise blends traditional craftsmanship with cutting-edge technology, focusing on resilient roofing solutions tailored to Fresno’s diverse climate. As a leader at Fresno Roof Repair, Alexander emphasizes open communication, teamwork, and continual education, ensuring every client receives exceptional service. Beyond his role, Alexander is deeply committed to the Fresno community, supporting local initiatives. His dedication, technical proficiency, and customer-centric approach make him an invaluable asset to Fresno Roof Repair, embodying the company’s commitment to excellence and quality roofing solutions.