Is the relentless rain causing your roof to spring a few leaks? Or maybe a strong gust of wind has taken its toll on your concrete roof tiles? Regardless of the cause, dealing with a broken tile on your roof can be a daunting task. But fear not! With a little know-how and a bit of elbow grease, you can learn how to replace a concrete roof tile like a pro.
In this informative article, we will take you step-by-step through the process of safely and effectively replacing a broken concrete roof tile, ensuring that your home remains dry and secure. From gathering the necessary tools to removing the damaged tile and installing a new one, this guide will equip you with the knowledge to tackle this common issue head-on. So, let’s roll up our sleeves and start restoring your roof to its former glory!
Identifying the broken concrete roof tile
When it comes to replacing a broken concrete roof tile, the first step is to identify which tile needs to be replaced. This can be done by visually inspecting the roof for any noticeable damage or cracks. Look out for dislodged or misaligned tiles, as well as any signs of water leakage or moisture stains inside the house. It’s important to address a broken tile as soon as possible, as it can lead to further damage if left unattended.
Once you have located the broken tile, carefully examine its condition. Cracks or chips in the tile may indicate structural damage, while missing corners or sections could mean that the tile is beyond repair and needs to be replaced entirely. Take note of the size, shape, and color of the tile, as this will help you in finding a suitable replacement.
To ensure accuracy and to avoid any confusion when replacing the tile, take a picture or make a sketch of the broken tile. This will serve as a reference when purchasing the replacement tile, as there are various sizes and styles available in the market. Additionally, keep in mind that concrete roof tiles can be heavy and fragile, so handle them with care during the replacement process.
Preparing the necessary tools and materials
Before beginning the process of replacing a broken concrete roof tile, it is essential to gather all the necessary tools and materials. This will ensure a smooth and efficient repair process, minimizing the risk of any further damage to the roof or surrounding areas.
To complete this task, you will need the following tools and materials:
1. Safety equipment: Prioritize safety by wearing appropriate protective gear, such as gloves, safety goggles, and a hard hat. These will help protect you from any potential hazards while working on the roof.
2. Ladder or scaffolding: Depending on the height of your roof, you will require a stable ladder or scaffolding to provide safe and convenient access. Make sure the ladder or scaffolding is secure and properly positioned before climbing up.
3. Hammer and chisel: These tools will be necessary for removing the broken concrete roof tile. Use the chisel to carefully loosen any adhesive or mortar holding the tile in place, and the hammer to gently tap it out of position.
4. Replacement concrete roof tile: Purchase a new concrete roof tile that matches the size and color of the broken one. This will ensure a seamless repair and maintain the visual integrity of your roof.
5. Adhesive or mortar: Depending on the type of roof and specific requirements, you may need adhesive or mortar to attach the replacement tile securely in place. Consult with a roofing professional or refer to the manufacturer’s instructions for the appropriate adhesive or mortar to use.
6. Roofing nails: In some cases, you may need roofing nails to secure the replacement tile firmly in place. These nails should be specifically designed for roofing applications and should penetrate into the roof’s underlying structure for maximum stability.
7. Roofing sealant or waterproofing compound: After installing the replacement tile, you will want to seal any gaps or joints to ensure a watertight roof. Use a roofing sealant or waterproofing compound that is compatible with the type of roof and provides long-lasting protection.
Remember to gather all these tools and materials before beginning the repair process to prevent any unnecessary delays or interruptions. Safely accessing the roof and removing the broken concrete roof tile can be done efficiently with the appropriate tools, ensuring a successful replacement and restoration of your roof’s functionality and appearance.
Safely accessing the roof
is a crucial step in replacing a broken concrete roof tile. This ensures the safety of both the individual performing the repair and the structural integrity of the roof itself. Here are some important considerations and steps to follow to safely access the roof.
Before attempting to access the roof, it is important to check the weather conditions. Avoid working on the roof during windy or rainy weather, as this can increase the risk of accidents. Additionally, it is recommended to have a helper present to assist with the process and ensure safety.
To access the roof, start by gathering the necessary tools and equipment. This may include a sturdy ladder, safety harness, non-slip shoes, gloves, and any other tools specific to the replacement process. It is crucial to use a ladder that is in good condition and can adequately support your weight.
Once you have gathered your tools and equipment, position the ladder securely against a stable part of the house or structure. Make sure the ladder is extended at least three feet above the roofline for easy access. Double-check that the ladder is stable and secure before starting the ascent.
When climbing the ladder, always maintain three points of contact, such as two hands and one foot, or two feet and one hand. This ensures stability and reduces the risk of falling. Once you reach the roof, make sure to move slowly and cautiously to avoid any potential hazards, such as loose tiles or slippery surfaces.
Note: It is highly recommended to use a safety harness or be tied off to a secure anchor point when working on the roof. This provides an extra layer of protection in case of a fall.
Throughout the entire process, it is important to prioritize safety and exercise caution. If you are unsure about accessing the roof or are uncomfortable with heights, it is best to hire a professional to perform the repair. Remember, safety should always be the top priority when working on roof repairs.
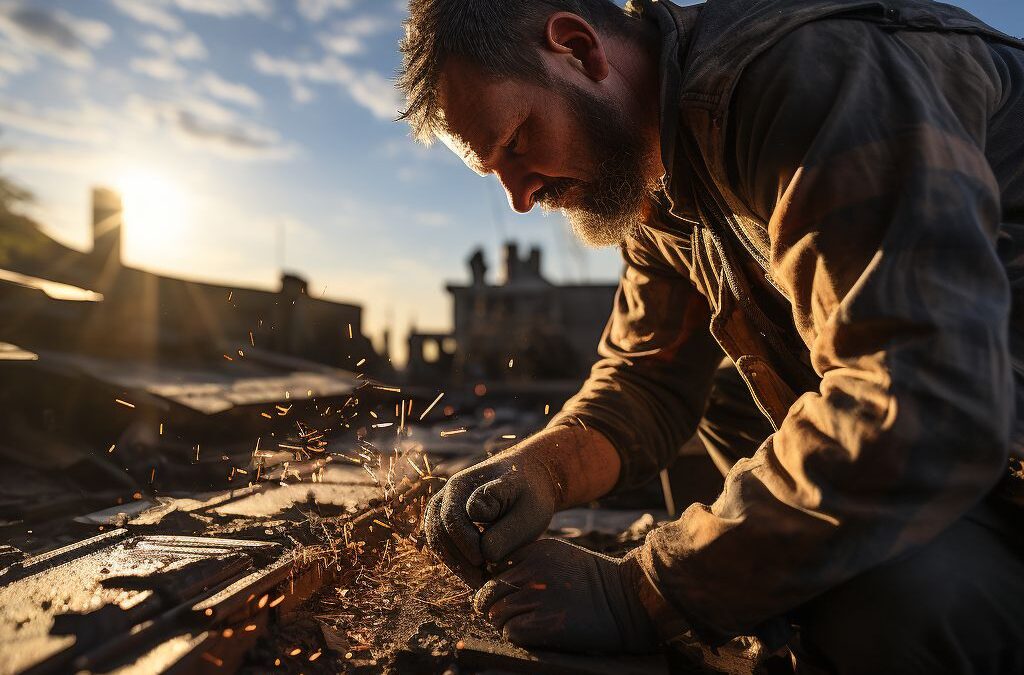
Removing the broken concrete roof tile
is a crucial step in the process of replacing it. This section will guide you through the necessary steps to safely remove the damaged tile without causing further damage to your roof.
First, ensure that you have gathered all the necessary tools and materials mentioned earlier in the article. This will include a ladder or scaffolding to safely access the roof, a trowel or pry bar to carefully loosen the tile, and protective gear such as gloves and goggles.
Once you are ready to begin, carefully climb up the ladder or use the scaffolding to reach the damaged area of the roof. It is important to prioritize your safety by wearing non-slip shoes and avoiding stepping on fragile areas of the roof. If necessary, lay down a protective tarp or blanket to prevent any falling debris from damaging the surrounding area.
Next, locate the broken concrete roof tile that needs to be replaced. Inspect the surrounding tiles to ensure they are securely in place and free from any signs of damage. Once you have identified the broken tile, use your trowel or pry bar to gently loosen the tile from the surrounding mortar or adhesive.
Using caution, carefully lift the broken tile out of its position. If it is completely damaged, it may come out in pieces, so be prepared to handle it carefully to prevent any injuries. Dispose of the broken tile properly to avoid any accidents or injury.
With the broken tile removed, inspect the area to ensure there are no loose debris or remnants of the old tile. Clear any debris away to maintain a clean working surface for the installation of the replacement tile.
Remember, safety should always be your top priority when working on your roof. Take necessary precautions, such as using protective gear and following proper ladder safety protocols, to prevent accidents or injuries. By following these steps and taking your time, you will be able to remove the broken concrete roof tile safely and prepare for the installation of the new tile.
Installing the new concrete roof tile
Once the broken concrete roof tile has been safely removed from the roof, it is time to install the new tile. This step is crucial in ensuring the protection and longevity of your roof.
Before beginning the installation process, it is important to measure the dimensions of the replacement tile to ensure a proper fit. This is especially important if you are using a different brand or type of tile than the original. Additionally, make sure to choose a replacement tile that matches the color and style of the existing tiles to maintain the overall aesthetic of your roof.
To install the new concrete roof tile, start by placing a layer of roofing cement along the bottom edge of the tile that will be placed directly above the replacement area. This will create a strong bond between the new tile and the existing ones, preventing water leakage and potential damage.
Next, carefully position the replacement tile in the designated spot, aligning it with the surrounding tiles. Gently press it down to ensure proper adhesion with the roofing cement. It is essential to ensure that the replacement tile is level and flush with the adjacent tiles to achieve a seamless appearance.
To further secure the replacement tile in place, use roofing nails to fasten it to the underlying roof deck. Place the nails near the top of the tile, at a distance of about 1 inch from the edge. This will provide stability and prevent the tile from shifting or coming loose during harsh weather conditions.
Once the new concrete roof tile is securely in place, it is important to seal it properly to avoid any potential water infiltration. Apply a layer of roofing cement around the edges of the tile, using a putty knife or a trowel. This will create a watertight seal and further reinforce the bond between the replacement tile and the surrounding ones.
Lastly, inspect the installed tile and make any necessary adjustments to ensure it is properly aligned and sealed. Take the time to clean up any excess roofing cement or debris from the installation process to maintain the overall appearance of your roof.
By following these steps, you can successfully install a new concrete roof tile and restore the integrity of your roof. Remember to exercise caution and take appropriate safety measures when working at heights. If you are unsure or uncomfortable with performing this task yourself, it is always advisable to seek professional assistance.
Securing and sealing the replacement tile
Once the new concrete roof tile is in place, it is important to ensure that it is properly secured and sealed to prevent any future issues with leaks or damage. Here are some steps to follow for :
1. Align the tile: Before fully securing the replacement tile, make sure it is properly aligned with the surrounding tiles. This will help maintain the aesthetic integrity of the roof and ensure a proper fit. Gently adjust the tile as needed to align it with the neighboring tiles.
2. Use roofing adhesive: Apply a generous amount of roofing adhesive on the back of the replacement tile. This will help secure the tile in place and provide a watertight seal. Be sure to use a roofing adhesive that is compatible with concrete tiles.
3. Press the tile down: Carefully press the replacement tile down onto the previously installed base tile. Apply even pressure to ensure that the adhesive spreads evenly and the tile sets properly. Make sure to check that the tile is flush with the surrounding tiles and sits snugly in its position.
4. Add roofing screws: In addition to the adhesive, it is highly recommended to use roofing screws for extra security. Place the screws near the corners of the replacement tile, making sure they go through the new tile and into the underlying base tile. This will help anchor the tile securely in place, especially in high wind or storm-prone areas.
5. Apply sealant: To ensure a watertight seal and prevent any potential leaks, apply a layer of roof sealant around the edges of the replacement tile. Use a caulk gun to apply a bead of sealant along the perimeter of the tile, covering any gaps or potential areas of water ingress. Smooth out the sealant using a putty knife or your finger for a clean finish.
6. Check for proper sealing: After securing the replacement tile, inspect the area to ensure that it is properly sealed. Look for any gaps or areas that may need additional sealant. It is important to address any issues promptly to avoid future problems.
By following these steps, you can effectively secure and seal the replacement concrete roof tile, ensuring its longevity and protecting your roof from potential damage or leaks. Remember to exercise caution and always prioritize safety when working on the roof. If you are unsure or uncomfortable with the process, it is recommended to consult a professional for assistance.
People Also Ask
1. Can I replace a broken concrete roof tile myself?
Yes, you can replace a broken concrete roof tile yourself by following a few simple steps. It involves carefully removing the damaged tile, cleaning the area, applying an adhesive or mortar, and placing the new tile in position.
2. How do I remove a broken concrete roof tile?
To remove a broken concrete roof tile, gently lift the surrounding tiles above it using a flat pry bar or putty knife. Then, carefully lift out the broken tile, being cautious not to damage any adjacent tiles.
3. What tools do I need to replace a broken concrete roof tile?
You will need a few basic tools to replace a broken concrete roof tile, including a flat pry bar or putty knife, a roofing adhesive or mortar, a hammer, a chisel, a wire brush, and safety gloves and goggles.
4. How do I clean the area before replacing a broken concrete roof tile?
To clean the area before replacing a broken concrete roof tile, use a wire brush to remove any debris or loose mortar. Ensure the area is clean and free from any dust or dirt so that the new tile can adhere properly to the roof surface.
5. What are the steps to replace a broken concrete roof tile?
The steps to replace a broken concrete roof tile include: (1) removing the surrounding tiles, (2) carefully lifting out the broken tile, (3) cleaning the area, (4) applying an adhesive or mortar, and (5) placing the new tile in position. It is important to take safety precautions and work with caution during the entire process.
Wrapping Up
In conclusion, replacing a broken concrete roof tile requires careful preparation and attention to detail. By following the steps outlined above, you can successfully remove the damaged tile and install a new one without causing further damage to your roof. Remember to prioritize safety and always take necessary precautions when working at heights.
If you are unsure about tackling this task yourself, it may be wise to seek professional help. Roofing contractors have the expertise and tools needed to efficiently replace broken tiles while ensuring the structural integrity of your roof. Don’t hesitate to reach out to a trusted professional if you find the process too challenging or if you have any doubts about your ability to complete the job effectively. With proper care and maintenance, your concrete roof tiles can last for years to come.

Alexander Johnson is a seasoned roofing professional with over 25 years in the industry and CEO at Fresno Roof Repair. His expertise blends traditional craftsmanship with cutting-edge technology, focusing on resilient roofing solutions tailored to Fresno’s diverse climate. As a leader at Fresno Roof Repair, Alexander emphasizes open communication, teamwork, and continual education, ensuring every client receives exceptional service. Beyond his role, Alexander is deeply committed to the Fresno community, supporting local initiatives. His dedication, technical proficiency, and customer-centric approach make him an invaluable asset to Fresno Roof Repair, embodying the company’s commitment to excellence and quality roofing solutions.