Are you the proud owner of a picturesque, cozy home with a charming wood shingle roof? Wood shingles have long been adored for their rustic beauty and timeless appeal. However, as with any roofing material, over time, wear and tear can take its toll. Whether it’s due to weathering, rot, or any number of other factors, the need for repairs may arise. But fear not! With a little know-how and some elbow grease, you too can restore your wood shingle roof to its former glory. In this article, we will guide you through the step-by-step process of repairing your wood shingle roof, offering valuable insights, tips, and techniques along the way. So, grab your tools and let’s get started on giving your cherished wood shingle roof the care and attention it deserves!
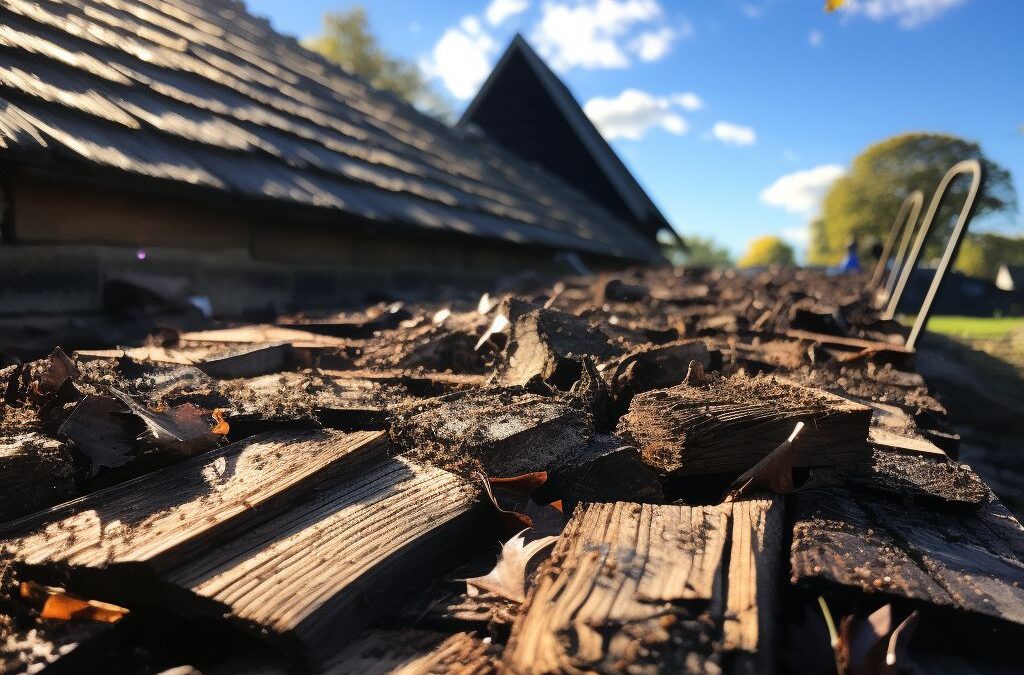
Identify damaged wood shingles on the roof
.
Wood shingle roofs offer a timeless and classic aesthetic to any home. However, over time, exposure to the elements can cause these shingles to become damaged or deteriorate. It’s important to identify and address these issues promptly to prevent further damage and ensure the longevity of your roof.
One of the first steps in repairing a wood shingle roof is to identify the damaged shingles. This can be done through a visual inspection from the ground or by climbing up onto the roof for a closer look. Look for signs of shingles that are cracked, split, or missing altogether. Additionally, keep an eye out for any shingles that appear discolored or warped, as these can also indicate damage.
Sometimes, the damage may not be obvious, especially if the shingles are covered in moss or other debris. In these cases, you may need to gently brush away the debris to get a clearer view of the shingles. Inspect the entire roof, paying close attention to areas around chimneys, vents, and skylights, as these are often prone to leaks and damage.
Once you have identified the damaged wood shingles, make note of their location and any specific issues they may have. This will help you later on when it comes time to remove and replace them. Remember, it’s best to address these repairs as soon as possible to prevent further damage and ensure the integrity of your wood shingle roof.
Prepare materials and tools for the repair process
In order to successfully repair a wood shingle roof, it is crucial to prepare the necessary materials and tools beforehand. This will ensure a smooth and efficient repair process, minimizing any potential delays or issues that may arise. By having everything ready and within reach, you can focus on the task at hand and complete the repair with confidence.
To prepare for repairing a wood shingle roof, gather the following materials: replacement wood shingles, roofing nails, a hammer, a pry bar or flat shovel, a ladder, safety goggles, work gloves, and a roofing adhesive or sealant. It is important to choose quality materials that will match the existing shingles in terms of size, shape, and color to maintain the aesthetic appeal of the roof.
Once you have assembled the necessary materials, ensure that you have the appropriate tools for the repair process. A hammer will be used to remove damaged shingles and secure the new ones in place. A pry bar or flat shovel can help loosen and remove the damaged shingles without causing further damage to the surrounding area. When working at heights, it is essential to have a sturdy ladder that can safely support your weight and provide easy access to the roof.
Prior to beginning the repair process, it is recommended to wear safety goggles and work gloves to protect yourself from any potential hazards. Safety should always be a top priority during roof repairs. Additionally, having a roofing adhesive or sealant on hand can be beneficial for reinforcing the new shingles and ensuring a secure and watertight seal.
By taking the time to properly , you can approach the task with confidence and increase the likelihood of a successful repair. This will contribute to the overall durability and longevity of your wood shingle roof.
Remove and replace damaged wood shingles
:
When it comes to repairing a wood shingle roof, the first step is to identify the damaged shingles. Before you begin the repair process, carefully inspect the roof for any visible signs of damage, such as cracked or broken shingles, curling, or missing pieces. Once you have identified the problem areas, you can proceed with removing and replacing the damaged wood shingles.
To begin the process, gather all the necessary tools and materials. You will need a ladder to access the roof safely, a pry bar or roofing shovel to remove the old shingles, replacement shingles, nails, a hammer, and roofing cement or adhesive. It is important to have these items handy before you get started to ensure a smooth and efficient repair process.
Once you have your tools ready, carefully remove the damaged shingles. Start by gently lifting the edge of the shingle above the damaged one using the pry bar or roofing shovel. Be cautious not to damage the surrounding shingles during this step. Gradually work your way towards the damaged shingle, carefully prying it up and removing any nails that may be holding it in place.
After removing the damaged shingle, it is time to replace it with a new one. Align the replacement shingle with the surrounding ones and secure it in place using roofing nails. Make sure the new shingle overlaps the neighboring ones to ensure a watertight seal. Use a hammer to drive the nails in, but be careful not to apply excessive force that may damage the wood or shingle.
In some cases, you may need to trim the replacement shingle to fit properly. Measure and mark the necessary adjustments and use a utility knife or a saw to cut the shingle accordingly. Ensure that the trimmed shingle fits snugly into place before securing it with nails.
TIP: To achieve a uniform and aesthetically pleasing look, it is recommended to replace multiple adjacent damaged shingles at once, rather than replacing them individually. This will make the repair less noticeable and ensure a consistent appearance.
Continue this process of removing and replacing damaged wood shingles until all the necessary repairs have been completed. Once you have replaced all the damaged shingles, inspect the roof to make sure they are securely in place and that there are no visible gaps or loose edges.
Next, proceed to the next step, which is securing the new shingles to ensure their durability and longevity.
Secure new shingles to ensure durability
To ensure durability and longevity of the newly replaced wood shingles, it is crucial to properly secure them to the roof. This step not only ensures that the shingles will withstand harsh weather conditions, but it also prevents them from becoming loose or dislodged over time.
When securing new shingles, start by aligning them with the existing shingles on the roof. This will create a seamless and uniform appearance. Use roofing nails or staples to secure the shingles in place, making sure they penetrate the wood beneath. Be cautious not to hammer the nails too forcefully, as this can damage the shingles or cause them to split.
Consider using roofing cement or adhesive to reinforce the installation of the shingles. Apply a small amount of roofing cement to the back of each shingle before placing it on the roof. This will provide an extra layer of protection against strong winds and water infiltration.
In addition to securing the shingles individually, it is important to pay attention to the overall roof structure. Check for any signs of sagging or structural issues that may affect the stability of the shingles. If necessary, reinforce the roof structure or consult a professional roofer for assistance.
Regular inspections are essential to ensure that the newly secured shingles remain intact. Strong winds, heavy rain, and other environmental factors can put stress on the roof, potentially causing shingles to become loose or damaged. It is recommended to inspect the roof at least once a year, ideally before the start of the rainy season, to identify any issues that may require repair. By promptly addressing any potential problems, you can extend the lifespan of your wood shingle roof and avoid costly repairs in the future.
By following these steps to secure new shingles, you can ensure the durability and longevity of your wood shingle roof. Taking the time to properly install and reinforce the shingles will protect your home from the elements and maintain its aesthetic appeal for years to come. Regular maintenance and inspections will further contribute to the overall health and durability of your wood shingle roof.
Seal and protect the repaired wood shingle roof
After replacing damaged wood shingles on your roof, it is crucial to seal and protect the area to ensure its longevity and resistance against weather elements. This step will help prevent moisture from seeping into the newly installed shingles and causing further damage. By sealing and protecting your repaired wood shingle roof, you can prolong its lifespan and maintain its aesthetic appeal.
Firstly, you will need to choose an appropriate sealant for your wood shingle roof. Look for a product specifically designed for wood surfaces and weatherproofing. This will ensure that the sealant adheres properly to the wood and provides the necessary protection. Consult with a roofing expert or your local home improvement store to find the best sealant for your needs.
Before applying the sealant, it is essential to clean the repaired area thoroughly. Use a broom or brush to remove any dirt, debris, or loose shingle particles. This will allow the sealant to bond effectively to the wood surface. Additionally, ensure that the area is completely dry before proceeding with the sealing process to avoid trapping moisture beneath the sealant.
Once the area is clean and dry, carefully apply the sealant using a brush or roller. Be sure to follow the manufacturer’s instructions for application and coverage. Pay extra attention to the edges and corners of the repaired shingles, as these areas are more prone to water penetration. Apply a generous amount of sealant to ensure a proper barrier against moisture.
After applying the initial coat of sealant, allow it to dry according to the manufacturer’s instructions. Depending on the product, this may take a few hours or even overnight. Once the first coat is dry, consider applying a second coat for added protection. This will create a more robust barrier against the elements and further enhance the durability of your wood shingle roof.
Remember, regular maintenance is essential for a wood shingle roof’s longevity. Inspect the roof periodically for any signs of damage or wear, such as cracked or curled shingles. Promptly address any issues to prevent them from worsening and causing further damage to your roof. Additionally, consider applying a protective coating or sealer every few years to maintain the roof’s integrity and prolong its lifespan.
Protecting and sealing your repaired wood shingle roof is a vital step in maintaining its structural integrity and aesthetic appeal. By choosing the right sealant, thoroughly cleaning the area, and applying multiple coats if necessary, you can ensure that your roof remains durable and resistant to the elements. Regular maintenance will further extend its lifespan, allowing you to enjoy the timeless beauty of a wood shingle roof for years to come.
Regular maintenance to prolong the lifespan of the wood shingle roof
Regular maintenance is crucial in prolonging the lifespan of a wood shingle roof. By taking the time to properly care for and maintain your roof, you can ensure that it remains in optimal condition and lasts for many years to come.
Inspect the Roof Annually
Performing an annual inspection of your wood shingle roof is essential to identify any potential issues that may arise. Look for signs of damage, such as cracked or broken shingles, loose nails, or areas where the shingles may have curled or lifted. Additionally, check for signs of moss or algae growth, which can lead to moisture retention and damage to the wood shingles.
Clear Debris and Clean Gutters
One of the best ways to maintain a wood shingle roof is to keep it free from debris. Fallen leaves, sticks, and other organic matter can trap moisture and accelerate the decay of the shingles. Regularly clear the roof of debris and make sure to clean out your gutters to prevent water buildup, which can also cause damage.
Trim Overhanging Branches
Overhanging branches can pose a risk to your wood shingle roof. Falling branches can cause significant damage, and branches that constantly rub against the shingles can wear them down over time. Trim any branches that hang over your roof to prevent potential damage and keep your wood shingles in good condition.
Address Repairs Promptly
If you notice any issues during your regular inspections, it’s important to address them promptly. Repair or replace any damaged or missing shingles, and secure any loose ones. Ignoring these issues can lead to further damage and even compromise the integrity of your roof.
Apply Protective Coatings
To further protect your wood shingle roof from the elements, consider applying a protective coating. These coatings can provide an extra layer of defense against UV rays, moisture, and mold growth. Consult with a professional or refer to the manufacturer’s recommendations to determine the best coating for your specific type of wood shingles.
By following these regular maintenance practices, you can ensure the longevity and durability of your wood shingle roof. Remember, prevention is always better than a costly repair, so schedule those inspections, clear debris, trim branches, address repairs promptly, and consider protective coatings. With the right care, your wood shingle roof will continue to provide shelter and beauty to your home for years to come.
People Also Ask
1. Can I repair a wood shingle roof on my own?
While it is possible to repair a wood shingle roof by yourself, it is a complex job that requires experience and knowledge. It is advisable to consult with a professional roofer for accurate assessment and appropriate repairs.
2. What are the common problems with wood shingle roofs?
Common problems with wood shingle roofs include cracking, splitting, curling, and rotting. These issues can occur due to age, weather exposure, poor installation, or lack of maintenance.
3. How can I identify damaged wood shingles?
You can identify damaged wood shingles by looking for signs such as cracks, splits, curling edges, or areas with missing shingles. Additionally, if you notice water leaks or sunlight coming through the roof, it may indicate damaged shingles.
4. What tools and materials do I need to repair a wood shingle roof?
To repair a wood shingle roof, you will typically need tools such as a pry bar, hammer, roofing nails, a utility knife, a circular saw, and a ladder. Additionally, you will need replacement shingles, roofing felt, and appropriate adhesive or caulk.
5. How do I replace a damaged wood shingle?
To replace a damaged wood shingle, start by carefully removing the nails holding the damaged shingle in place. Then, slide the new shingle into position, ensuring it aligns correctly with the surrounding shingles. Secure the new shingle with nails, and apply a layer of roofing cement to seal any gaps.
In Conclusion
In conclusion, repairing a wood shingle roof is a task that requires careful planning and attention to detail. By following the steps outlined in this guide, homeowners can ensure a successful repair process and extend the lifespan of their roof. Remember to always prioritize safety when working on a roofing project, and consider reaching out to professional help if necessary. Don’t hesitate to take action to repair your wood shingle roof and protect your home from potential damage.

Commercial Roofing Consultant
Matthew Carter’s forte lies in commercial roofing systems, particularly flat roofs and metal structures. His expertise and attention to detail guarantee reliable and tailored solutions for businesses in Fresno.