When it comes to ensuring the durability and longevity of your home, a well-maintained chimney is often overlooked. Yet, the chimney, standing tall atop your house, serves as a vital aspect of your roofing system. It channels harmful gases and smoke safely out of your home, while also withstanding the relentless onslaught of the elements. However, even the sturdiest chimneys can fall prey to wear and tear over time. From cracked bricks to crumbling mortar, a damaged chimney not only poses a threat to the safety of your household but can also lead to costly repairs if not addressed promptly. In this article, we will dive deep into the intricacies of chimney repair?”>chimney repair?”>chimney repair, focusing specifically on how to mend and restore the top section of your chimney, ensuring its integrity for years to come. So, if you are ready to unravel the secrets of chimney restoration and learning the essential steps, materials, and techniques required, read on.
Choosing the Right Materials for Chimney Repair
When it comes to repairing the top of a chimney, selecting the right materials is crucial for ensuring durability and longevity. The materials you choose will depend on the extent of the damage and the specific needs of your chimney. This section will provide you with insights into the different materials you can consider for chimney repair and their key features.
1. Mortar Mix: Mortar mix is commonly used to repair cracks and gaps in the chimney’s masonry. It is a versatile material that can be easily applied to fill in any voids and prevent further damage. Look for a high-quality mortar mix that is specifically designed for chimney repairs. Opt for a mortar with strong adhesive properties to ensure a more secure bond with the existing masonry.
2. Flashing: Flashing is an essential component for chimney repair as it helps to prevent water from seeping into the chimney and causing leaks. Copper and aluminum are popular choices for flashing due to their durability and resistance to corrosion. Copper flashing is known for its longevity and can effectively protect the chimney against moisture damage.
3. Sealant: Waterproofing the chimney is crucial to maintain its structural integrity. Applying a high-quality chimney sealant can help prevent water penetration and protect against future damage. Look for a sealant that is specifically formulated for masonry chimneys and is capable of withstanding extreme temperatures. Silicone-based sealants are often recommended for their flexibility and superior water resistance.
4. Replacement Bricks: If your chimney has damaged or deteriorated bricks, replacing them is necessary for proper repair. Choose bricks that closely match the size, texture, and color of the existing ones to maintain the aesthetic appeal of your chimney. Clay or firebrick are commonly used for chimney repair due to their durability and resistance to heat.
Remember, is essential to ensure effective and long-lasting results. Consult with a professional or chimney repair specialist to assess the damage and determine the most suitable materials for your specific needs. Following these guidelines will help you make informed decisions and restore your chimney to its optimal condition.
Assessing the Damage: Identifying Common Issues
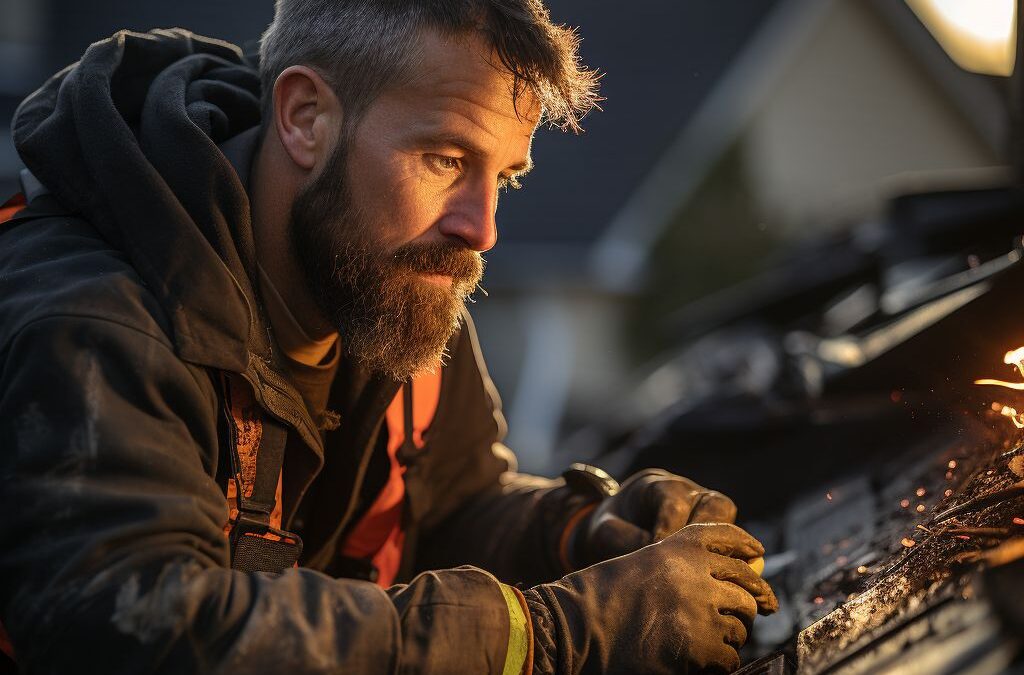
When it comes to repairing the top of a chimney, it is crucial to first assess the extent of the damage and identify any common issues. This step is essential as it helps determine the appropriate course of action and the materials needed for the repair.
One of the most common issues with chimney tops is the presence of cracks or deterioration in the mortar joints. Over time, exposure to harsh weather conditions and temperature changes can cause these joints to weaken and deteriorate. Additionally, the freeze-thaw cycle can further exacerbate the damage, leading to water penetration and potential structural problems.
Another common issue is the presence of loose or missing bricks or stones. This can occur due to years of wear and tear, high winds, or even damage caused by falling tree branches. These damaged areas not only compromise the structural integrity of the chimney but also increase the risk of water leakage and further damage.
Furthermore, chimney caps or covers may also be damaged or missing altogether. These caps serve as protective barriers, preventing debris, rainwater, and animals from entering the chimney. When these caps are damaged or missing, it exposes the chimney to potential water damage, as well as the entry of birds, squirrels, and other pests.
To properly assess the damage, visually inspect the chimney top from both the ground and the roof. Look for any cracks, visible deterioration in the mortar, or gaps between bricks or stones. Check for loose or missing bricks and stones, as well as any signs of water damage such as discoloration or moss growth. Similarly, inspect the chimney cap for any damage or absence.
By carefully identifying these common issues, homeowners can better understand the scope of the problem and make informed decisions about the necessary repairs. Whether it involves repairing cracks, replacing damaged bricks, or installing a new chimney cap, addressing these common issues promptly can help prolong the lifespan of the chimney and ensure its optimal performance.
Preparing the Chimney: Cleaning and Ongoing Maintenance
Regular cleaning and ongoing maintenance are crucial for ensuring the longevity and proper functioning of your chimney. Neglecting these tasks can lead to the accumulation of debris, blockages, and even potential fire hazards. By following a few essential steps, you can keep your chimney in excellent condition and minimize the risk of costly repairs down the line.
To begin with, regular cleaning of your chimney is essential to remove any soot, creosote, or debris that may have accumulated inside. This can be done using a chimney brush specifically designed for your chimney’s dimensions. Start by covering the area around the fireplace opening with a tarp or plastic sheet to catch any falling debris. Then, using a ladder, carefully climb onto the roof to access the chimney. Insert the chimney brush into the flue and scrub the walls in an up-and-down motion to dislodge any buildup. Repeat this process until the chimney is clean.
In addition to cleaning, ongoing maintenance is crucial to ensure your chimney’s proper functioning. One important task is to regularly check for any cracks, loose mortar, or signs of damage. Any issues should be addressed promptly before they worsen and require more extensive repairs. Inspect the chimney crown?”>chimney crown?”>chimney crown, which is the topmost part of the chimney, for cracks or gaps, and repair them with appropriate materials such as crown sealant or epoxy.
Another vital maintenance task is to keep an eye on your chimney’s flashing. The flashing is a thin layer of metal installed around the base of the chimney to prevent water leaks. Over time, flashing can become damaged or detached, which can lead to water seeping into the chimney and causing extensive damage. Inspect the flashing and repair or replace it as needed.
Regularly inspecting and cleaning your chimney also provides an opportunity to check the chimney cap or spark arrestor. This metal cover serves as a barrier against animals, debris, and rainwater entering the chimney. Make sure the cap is securely in place and free from any blockages. If it is damaged or missing, replace it immediately to prevent unwanted visitors from entering your chimney.
By incorporating these cleaning and ongoing maintenance tasks into your routine, you can ensure that your chimney remains in optimal condition. Regular cleaning removes hazardous substances and minimizes the risk of chimney fires, while ongoing maintenance allows you to detect and address any issues before they become major problems. Ultimately, a well-maintained chimney will provide peace of mind and extend the lifespan of your entire roofing system.
Repairing Cracks: Techniques and Materials to Consider
When it comes to chimney repair, one of the most common issues homeowners face is cracks in the chimney structure. These cracks can develop over time due to various factors such as age, weathering, and thermal expansion. If left unaddressed, these cracks can lead to further damage and compromise the safety and functionality of your chimney.
To repair cracks in your chimney, there are several techniques and materials that you can consider. One effective technique is using mortar mix or chimney cement to fill in the cracks. Mortar mix is ideal for smaller cracks, while chimney cement is more suitable for larger cracks or gaps. Both materials can be easily applied using a trowel or putty knife, ensuring a smooth and seamless finish.
Before applying any repair materials, it is crucial to clean the cracked area thoroughly. Use a wire brush to remove any loose debris, dirt, or old mortar from the cracks. This will create a clean and solid surface for the new materials to adhere to. In some cases, you may need to widen the cracks slightly to ensure better adhesion and cohesion of the repair materials.
Once the cracks are clean and prepped, the next step is to apply the repair materials. Start by dampening the cracked area with water using a spray bottle. This will prevent the bricks from absorbing moisture from the repair materials too quickly, ensuring a better bond. Then, using a trowel or putty knife, fill the cracks with mortar mix or chimney cement, making sure to press the material firmly into the cracks.
For larger cracks or gaps, consider using wire mesh or fiberglass strips as reinforcement before applying the repair materials. This will provide added strength and stability to the repaired area. Simply place the mesh or strips over the crack and embed them into the repair material, ensuring they are fully covered.
After applying the repair materials, smooth out any excess using the trowel or putty knife. It is important to work quickly, as mortar mix and chimney cement dry rapidly. Once the repair is complete, allow it to cure for at least 24 hours before using your chimney.
In conclusion, repairing cracks in your chimney is a crucial step in maintaining its structural integrity and preventing further damage. By choosing the right techniques and materials, such as mortar mix or chimney cement, and ensuring proper cleaning and preparation of the cracked area, you can effectively repair cracks and extend the lifespan of your chimney. Remember to follow the manufacturer’s instructions and safety guidelines when working with repair materials, and always consult a professional if you’re unsure about any aspect of the repair process.
Replacing Damaged Bricks: Step-by-Step Guide
If your chimney is showing signs of wear and tear, such as cracked or deteriorating bricks, it is crucial to address the issue as soon as possible. Replacing damaged bricks is a necessary step in chimney repair to ensure the structural integrity and safety of your chimney. Here is a step-by-step guide to help you navigate the process:
1. Safety First: Before you begin any repair work on your chimney, make sure to take the necessary safety precautions. Wear protective gear such as gloves and safety goggles to guard against any potential hazards.
2. Assess the Damage: Carefully examine the entire chimney and identify the damaged bricks that need to be replaced. Look for cracks, chips, or any signs of loose bricks that require attention. This step is crucial to determine the extent of the repair work needed.
3. Gather Materials: Once you have identified the damaged bricks, gather the necessary tools and materials for the repair. You will need new bricks, a bucket of mortar, a trowel, wire brush, and a hammer and chisel for removing the old bricks.
4. Remove Damaged Bricks: Carefully chisel away the mortar surrounding the damaged bricks. Start by creating small cracks in the mortar joint around the brick, then use the hammer and chisel to remove the old bricks. Be cautious not to damage the neighboring bricks during this process.
5. Clean the Area: After removing the damaged bricks, clean the area thoroughly using a wire brush to remove any loose debris or excess mortar. This step ensures proper adhesion and a seamless repair.
6. Apply Mortar: Prepare a batch of mortar according to the manufacturer’s instructions, ensuring the consistency is appropriate for bricklaying. Apply a layer of mortar to the cleaned area using a trowel, making sure to create an even and straight surface.
7. Lay the New Bricks: Carefully position the new bricks into the mortar, ensuring they are aligned with the existing bricks. Press them firmly into place, making sure there are no gaps or spaces between the bricks. Level and adjust them as needed.
8. Finishing Touches: Smooth out the mortar joints using the edge of the trowel to create an aesthetically pleasing finish. Allow the mortar to dry completely before utilizing the chimney again.
Remember, if you are unsure or uncomfortable with DIY chimney repairs, it is always wise to consult a professional chimney repair specialist. Their expertise will ensure a thorough and safe restoration of your chimney. By following this step-by-step guide, you can successfully replace damaged bricks and restore the functionality and appearance of your chimney.
Waterproofing the Chimney: Essential Tips and Techniques
Waterproofing the chimney is a crucial step in chimney repair to prevent future damage and maintain the integrity of your chimney. By taking the necessary precautions, you can ensure that your chimney remains protected from the elements and stands the test of time. Here are some essential tips and techniques for waterproofing your chimney.
Firstly, it is important to thoroughly inspect the chimney for any existing cracks or gaps. These can allow water to seep into the chimney and cause further damage. Sealant materials such as silicone or chimney crown sealer can be used to fill these gaps and prevent water penetration. Make sure to apply the sealant evenly and allow it to dry properly before moving on to the next step.
Additionally, protecting the chimney bricks from water damage is crucial. Applying a water repellent or masonry sealer to the exterior of the chimney can create a barrier that prevents water from seeping through. This step is especially important if you live in an area with harsh weather conditions or frequent rainfall. Be sure to choose a water repellent that is specifically designed for chimneys and follow the manufacturer’s instructions for application.
Properly maintaining the chimney cap is another essential aspect of waterproofing. The chimney cap acts as a protective barrier against rain, snow, and other debris. Regularly inspect the chimney cap for any signs of damage or deterioration. If you notice any issues, such as rust or cracks, it may be necessary to replace the cap.
In conclusion, waterproofing the chimney is an essential part of maintaining its durability and longevity. By following these essential tips and techniques, you can ensure that your chimney remains protected from water damage and extends its lifespan. Remember to regularly inspect and maintain your chimney to catch any potential issues early on and address them promptly. By doing so, you can enjoy a safe and functional chimney for years to come.
People Also Ask
1. How much does it cost to repair the top of a chimney?
The cost of repairing the top of a chimney can vary depending on the extent of the damage and the materials used, but it typically ranges from $500 to $1500.
2. Can I repair the top of my chimney myself?
Repairing the top of a chimney can be a complex task that requires specialized knowledge and equipment. It is recommended to hire a professional chimney repair company for safe and effective repairs.
3. What are the common issues with chimney tops?
Common issues with chimney tops include cracked or damaged mortar, loose or missing bricks, deteriorated flashing, and damaged chimney caps. These issues can lead to water leaks, structural damage, and reduced chimney performance.
4. How long does it take to repair the top of a chimney?
The duration of chimney top repairs depends on the extent of the damage and the size of the chimney. Minor repairs can typically be completed in a few hours, while more extensive repairs may take several days.
5. Can chimney top repairs prevent water leaks?
Yes, chimney top repairs such as fixing the mortar, replacing damaged bricks, and installing a new chimney cap can help prevent water leaks. Properly repairing the top of the chimney can also enhance its structural integrity and longevity.
Wrapping Up
In conclusion, repairing the top of a chimney is a crucial task for maintaining the functionality and safety of your chimney. By carefully inspecting and addressing any signs of damage or deterioration, you can prevent potential hazards such as leaks, chimney fires, or collapsing chimneys.
Remember to start by conducting a thorough inspection to identify the extent of the damage. Then, depending on the specific issues found, you may need to replace or repair the chimney cap, replace damaged bricks or mortar, or install a new crown. It is essential to prioritize safety by using proper tools, equipment, and protective gear to carry out the repairs.
While smaller repairs can be done independently, it is advisable to consult a professional chimney repair specialist for more extensive or complex issues. They have the expertise and experience to ensure thorough and proper repairs, guaranteeing the longevity and effectiveness of your chimney.
By taking prompt action and regularly maintaining your chimney, you can avoid costly repairs down the road and enjoy a warm, well-functioning fireplace for years to come. Stay proactive in your chimney care to keep your home safe and maximize its value.

Customer Relations Manager
Benjamin Turner is a customer-centric professional, placing emphasis on open communication and transparency throughout the roofing process. His dedication to client satisfaction ensures a smooth and collaborative experience.