Has a recent storm left your roof shingles disheveled and lifted? Or perhaps you live in an area prone to high winds, causing your shingles to regularly bear the brunt of nature’s fury. Whatever the case may be, it’s crucial to address this issue promptly before it leads to more significant problems, such as leaks or further damage to your roofing system. But fear not, for in this article, we will guide you through the step-by-step process of repairing those stubbornly lifted roof shingles. From identifying the damaged shingles to expertly securing them back in place, we’ve got you covered. So grab your tools and let’s restore the integrity of your roof together.
Identifying Lifted Roof Shingles
When a strong gust of wind blows through your neighborhood, it can cause damage to your roof shingles. Identifying these lifted shingles is crucial to preventing further damage and ensuring the integrity of your roof.
Assessing the impact of wind damage on your roof shingles is the first step in identifying lifted shingles. Take a careful look at your roof after a windstorm and check for any signs of damage. You may notice shingles that are no longer lying flat or are visibly lifted or curled at the edges. Additionally, there could be shingles that have completely blown off, leaving a gap in your roof’s protective layer.
Recognizing these signs of lifted shingles caused by wind is important because they can lead to more significant issues if left unattended. Loose or missing shingles expose your roof to the elements, potentially allowing water to seep in and cause leaks. This can lead to further damage to your roof structure and even impact the interior of your home. Additionally, lifted shingles create a potential weak spot for future wind damage, making it crucial to address this issue promptly.
Understanding the risks associated with loose or missing shingles helps emphasize the importance of identifying and repairing them. By allowing wind to lift or remove shingles, you risk compromising the overall stability and functionality of your roof. The exposed areas of your roof become vulnerable to water damage, mold growth, and even pest infestations. It’s essential to recognize the signs of lifted shingles and take immediate action to rectify the issue. By doing so, you can protect your home from further damage and ensure the longevity of your roof.
1. Assessing the impact of wind damage on your roof shingles
When a strong gust of wind blows through, it can take a toll on your roof shingles. Assessing the impact of wind damage is crucial to determine the extent of the problem and prepare for necessary repairs. Here are some factors to consider when evaluating the damage:
First, take a step back and observe your roof from ground level. Look for any obvious signs of lifted shingles, such as corners sticking up or noticeable gaps between shingles. Pay attention to any shingles that are completely missing as well. Wind damage may also cause shingles to curl or buckle, so keep an eye out for any irregularities in their appearance.
Next, it’s important to inspect your attic or crawl space for any signs of water leaks or daylight shining through cracks. Wind can loosen shingles, creating openings for water to seep in during rainstorms. These leaks can eventually lead to structural damage and costly repairs if not addressed promptly.
To further assess the impact of wind damage, grab a ladder and conduct a closer examination of the shingles themselves. Look for any visible signs of lifting, such as lifted edges or nails protruding from the roof. Take note of any shingles that have been torn or are noticeably out of place.
It’s essential to be thorough in this assessment, as even minor damage can worsen over time. While some wind damage may be obvious, other issues may require a closer inspection to identify. If you are unsure about the extent of the damage or uncomfortable assessing it yourself, it is recommended to consult a roofing professional who can provide a more accurate assessment.
Remember, timely identification of wind damage on your roof shingles is crucial to prevent further problems and costly repairs down the line. By promptly addressing lifted or damaged shingles, you can ensure the stability and longevity of your roof, protecting your home and your investment.
2. Recognizing signs of lifted shingles caused by wind
Strong winds can cause damage to your roof shingles, leading to potentially costly leaks and other issues. It’s essential to be able to recognize the signs of lifted shingles caused by wind so that you can address the problem promptly and prevent further damage.
One of the most obvious signs of wind damage is when shingles become visibly lifted or curled. Take a close look at your roof from the ground or use binoculars to inspect it more closely. If you notice any shingles that appear to be raised or flapping in the wind, it’s a clear indication that they have been affected by strong gusts. Additionally, keep an eye out for shingle tabs that are cracked or broken, as this is another sign of wind damage.
Water leaks inside your home can also be an indicator of lifted shingles. If you’re experiencing water stains on your ceiling or notice dampness in your attic, it could mean that wind has caused shingles to lift, allowing water to seep through. Addressing the issue promptly will help prevent further damage to your roof and the interior of your home.
Remember, it’s essential to exercise caution while examining your roof for wind damage. If you’re unsure or uncomfortable climbing onto your roof, it’s best to consult a professional roofer to assess the situation and make necessary repairs.
3. Understanding the risks associated with loose or missing shingles
ensures homeowners are aware of the potential consequences of neglecting roof repairs after wind damage. Ignoring this issue can lead to further damage, higher repair costs, and even jeopardize the integrity of your entire roof. It is essential to address loose or missing shingles promptly to prevent water leaks, structural damage, and the potential for mold growth.
Water Leaks:
Loose or missing shingles create openings in your roof, allowing water to penetrate into your home. This can lead to water leaks, which can cause extensive damage to your attic, ceiling, walls, and insulation. Over time, water leaks can result in rotting wood, compromised structural integrity, and even damage to electrical systems within your home. It is crucial to take immediate action to repair any loose or missing shingles to prevent water leaks and the costly repairs they entail.
Structural Damage:
When shingles become loose or go missing, it exposes the underlying structure of your roof to the elements. Wind, rain, and debris can now easily penetrate your roof, leading to structural damage. Over time, this can weaken your roof’s support system and compromise its overall integrity. If left unattended, this structural damage can result in costly repairs and, in severe cases, necessitate a complete roof replacement.
Mold Growth:
One of the less apparent risks of loose or missing shingles is the potential for mold growth. When water seeps into your home through compromised areas of your roof, it creates a damp and humid environment that is ideal for mold to thrive. Mold can cause health issues for you and your family, damage your home’s interior, and compromise the air quality within your living space. By promptly addressing loose or missing shingles, you can mitigate the risk of mold growth and preserve a healthy living environment.
To ensure the longevity and integrity of your roof, it is crucial to understand the risks associated with loose or missing shingles. Taking immediate action to repair wind-damaged shingles can save you from more extensive damage, higher repair costs, and potential health hazards caused by water leaks and mold growth.
Repairing Lifted Roof Shingles
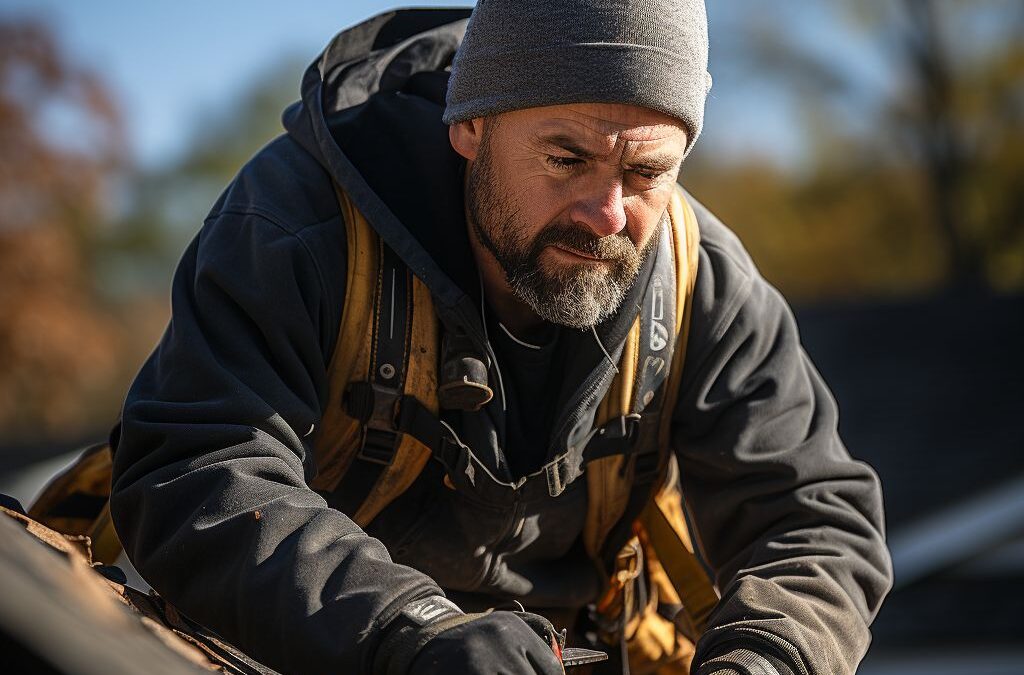
When strong winds blow through, they can cause damage to your roof shingles, resulting in them being lifted or even completely torn off. Repairing these lifted shingles is crucial to prevent further damage to your roof and protect your home from water leaks. In this section, we will guide you through the necessary steps and provide expert tips to efficiently repair your wind-damaged roof shingles.
Before you begin repairing the lifted shingles, gather the essential tools and materials to ensure a smooth repair process. These include a ladder, safety harness, roofing nails or screws, roofing cement or adhesive, a pry bar, a hammer, and replacement shingles, if necessary. Having these items readily available will save you time and effort as you work on your roof.
Now, let’s dive into the step-by-step guide for fixing lifted roof shingles. Start by carefully inspecting your roof for any signs of damage caused by the wind. Look for shingles that are lifted or curled at the edges, as well as any missing or loose shingles. Using a ladder and safety precautions, access the area where the lifted shingles are located.
Next, gently lift the lifted shingle and apply roofing cement or adhesive underneath it. Press the shingle down firmly to secure it in place. Make sure to use enough adhesive to ensure a strong bond between the shingle and the roof. If the shingle is completely torn off or cannot be repaired, carefully remove it using a pry bar and replace it with a new shingle. Secure the new shingle using roofing nails or screws, being mindful of proper placement and alignment.
To ensure a secure and long-lasting shingle repair, it is important to follow these expert tips. Firstly, always work on a dry day to prevent slipping accidents and to allow the adhesive to properly bond. Additionally, check the surrounding shingles for any signs of damage or lifting and address those issues as well to prevent future problems. Lastly, consider applying a coat of roofing sealant over the repaired area to provide extra protection against the elements.
By following these steps and expert tips, you can effectively repair roof shingles lifted by wind and safeguard your home from further damage. Remember to prioritize safety and take necessary precautions when working on your roof. And, if you’re unsure about the extent of the damage or lack the experience, it’s best to consult a professional roofing contractor for assistance.
4. Essential tools and materials for repairing wind-damaged shingles
Repairing roof shingles lifted by wind requires the use of specific tools and materials to ensure a successful and lasting repair. By having these essentials on hand, you can swiftly address any damage and prevent further problems.
1. Safety Equipment
Before starting any roofing project, it’s crucial to prioritize safety. Invest in proper safety equipment, such as a sturdy ladder, non-slip shoes, and a safety harness, to protect yourself from potential falls or accidents.
2. Roofing Adhesive or Sealant
To secure lifted shingles, you will need a high-quality roofing adhesive or sealant. Opt for one that is weather-resistant and designed specifically for shingle repairs. This will effectively bond the shingles back in place and create a strong seal to prevent leaks.
3. Roofing Nails and Hammer
In some cases, the lifted shingles may need to be re-secured with roofing nails. Make sure you have a hammer and a sufficient supply of roofing nails that are long and durable enough to penetrate both the shingle and the roof deck.
4. Pry Bar or Flathead Screwdriver
A pry bar or a flathead screwdriver will come in handy when you need to gently lift the damaged shingles for repair. These tools will allow you to safely loosen and lift the shingles without causing further damage.
5. Replacement Shingles
In the event that a shingle is beyond repair or missing altogether, having a few replacement shingles on hand is crucial. Make sure to purchase shingles that match the style and color of your existing roof to maintain a cohesive appearance.
6. Roofing Cement or Asphalt Roof Patch
In addition to adhesive or sealant, you may need roofing cement or asphalt roof patch for more substantial repairs. These materials can be used to fill gaps, cracks, or areas where the shingles have been damaged beyond repair.
By assembling these essential tools and materials upfront, you’ll be well-prepared to tackle any wind-damaged shingle repairs efficiently and effectively. Remember to always prioritize safety and follow the proper repair procedures to ensure a secure and long-lasting fix for your roof.
5. Step-by-step guide to fixing lifted roof shingles efficiently
Repairing lifted roof shingles caused by wind damage is an essential maintenance task to ensure the longevity and integrity of your roof. Follow this step-by-step guide to efficiently fix any lifted shingles and prevent further damage.
1. Gather the necessary tools and materials: Before you begin the repair process, make sure you have all the essential tools and materials at hand. These may include a ladder, roofing nails, a hammer, roofing adhesive, a pry bar, and replacement shingles. Double-check that you have the correct size and color of shingles to seamlessly blend in with your existing roof.
2. Inspect the extent of the damage: Carefully climb the ladder and visually examine your roof to identify the lifted shingles. Keep an eye out for any loose nails or missing shingles as well. It’s crucial to address these issues promptly to prevent further water damage or potential leaks.
3. Secure loose shingles: Using a pry bar, gently lift the lifted shingle and remove any loose nails. Apply a small amount of roofing adhesive on the underside of the shingle and press it back into place. Use a hammer and roofing nails to secure the shingle, making sure to drive the nails into the adhesive strip of the shingle above.
4. Replace missing shingles: If you notice any missing shingles or ones that are beyond repair, it’s essential to replace them promptly. Remove any remaining pieces of the damaged shingle and slide the new shingle into place. Secure it with roofing nails, ensuring that they are appropriately placed along the adhesive strip.
5. Check for proper alignment: After securing the lifted and replaced shingles, double-check that they are aligned correctly with the surrounding shingles. It’s crucial for the shingles to lay flat and snug against each other to create a watertight seal.
6. Evaluate the overall condition of your roof: While addressing the specific lifted shingles, take a moment to assess the overall condition of your roof. Look out for any other signs of damage, such as cracked or deteriorating shingles, and make note of them for future repairs or professional inspection.
By following these step-by-step instructions, you can efficiently repair lifted roof shingles and prevent further damage to your home. Remember, if you encounter any difficulty or have concerns about your safety, it’s always a wise decision to consult a professional roofing contractor to ensure the job is done correctly and safely.
6. Expert tips for ensuring a secure and long-lasting shingle repair
When it comes to repairing lifted roof shingles after wind damage, it’s essential to follow expert tips to ensure a secure and long-lasting repair. By implementing these recommendations, you can restore the integrity of your roof and protect your home from further damage.
Firstly, before you begin any repairs, it is crucial to prioritize safety. Ensure that you have the proper protective gear, including gloves, safety glasses, and a sturdy ladder, to avoid any accidents or injuries. Additionally, consider enlisting the help of a professional if the damage is extensive or if you’re uncomfortable working on your roof.
Once you’re ready to proceed with the repair, start by removing any nails or roofing debris from the damaged area. This step is crucial as it provides a clean surface for the new shingles to adhere to. Using a pry bar or a roofing shovel, carefully lift the damaged shingles and remove any remaining nails or adhesive.
Next, it’s essential to properly prepare the surface for the new shingles. Apply a roofing adhesive or cement to the underside of the lifted shingle and press it firmly back into place. Make sure to align the shingle with the surrounding ones to maintain a uniform appearance. To further enhance the adhesion, consider using roofing nails to secure the shingle in place.
To ensure a long-lasting repair, it’s recommended to reinforce the repaired area. This can be achieved by applying a layer of roofing cement or adhesive to the edges of the shingle, creating a watertight seal. Additionally, consider placing a few roofing nails along the edges for added stability.
Lastly, it’s crucial to inspect the rest of the roof for any potential weak spots or areas that may be susceptible to future wind damage. Addressing these areas proactively can help prevent further shingle lifts and potential leaks. Consider reinforcing vulnerable areas, such as roof edges, with additional nails or roofing cement.
By following these expert tips, you can confidently repair lifted roof shingles after wind damage, ensuring the longevity and stability of your roof. Remember, if you’re unsure or uncomfortable with the repair process, it’s always best to seek professional assistance to guarantee a secure and thorough repair.
Preventing Future Shingle Lifts
Proactive measures to protect your roof against wind damage
To prevent future shingle lifts and ensure the longevity of your roof, it is essential to take proactive measures to protect it against wind damage. Here are some effective strategies and precautions you can implement:
1. Regular Roof Inspections: Schedule regular inspections to assess the condition of your roof and check for any potential weak points or damage. Hire a professional roofing contractor who can identify areas prone to shingle lifts and provide recommendations for reinforcement or repairs.
2. Reinforce Shingles: Strengthening your roof’s shingles can significantly reduce the risk of them being lifted by strong winds. Consider installing adhesive or sealant strips under the edges of your shingles to secure them in place. These adhesive strips can create a stronger bond between the shingles and the roof surface, preventing them from being easily lifted.
3. Trim Overhanging Trees: Trees near your roof can pose a potential threat during storms or high winds. Overhanging branches or limbs can cause damage to your shingles if they fall or rub against the roof surfaces. Regularly trimming and maintaining trees close to your home can minimize the risk of shingles being lifted or damaged.
4. Improve Roof Ventilation: Adequate roof ventilation plays a crucial role in maintaining the structural integrity of your roof. Poor ventilation can cause uneven airflow, which can lead to increased pressure on the shingles during high winds. This pressure can lift or damage the shingles. Ensuring proper insulation and ventilation can help minimize the risk of shingle lifts and extend the lifespan of your roof.
5. Secure Loose Objects: Before a storm or high-wind event, secure any loose objects that could potentially become projectiles. Patio furniture, garbage cans, and other items left unsecured can cause significant damage to your roof in strong winds. Secure these items or store them indoors to prevent them from potentially coming into contact with your shingles and causing damage.
Taking these proactive measures can help protect your roof from wind damage and prevent future shingle lifts. By investing in regular inspections, reinforcing shingles, trimming overhanging trees, improving ventilation, and securing loose objects, you can strengthen your roof’s resistance to wind and ensure its long-term stability. Remember, prevention is always better than cure, and by implementing these protective measures, you can safeguard your roof and save yourself from potential costly repairs in the future.
7. Proactive measures to protect your roof against wind damage
How to Protect Your Roof Against Wind Damage
When it comes to safeguarding your roof against wind damage, taking proactive measures can save you both time and money in the long run. By implementing these preventative strategies, you can fortify your roof against the harsh effects of strong winds and minimize the risk of lifted shingles.
Firstly, it is crucial to ensure that your roof is properly installed and maintained. Hiring a professional roofing contractor to inspect your roof regularly can identify any potential vulnerabilities or weak spots. Additionally, investing in high-quality materials and shingles that are designed to resist strong winds can provide added protection. Opting for wind-resistant shingles, such as those with adhesive strips or reinforced edges, can significantly reduce the chances of shingle lift.
Moreover, it is essential to address any existing issues promptly. Repairing loose or damaged shingles immediately can prevent them from becoming lifted or even completely dislodged during a windstorm. Regularly cleaning gutters and removing debris from the roof can also help prevent clogs or blockages that can compromise the roof’s integrity in high winds.
In addition to these maintenance activities, consider implementing additional safeguards such as installing storm clips or straps. These metal fasteners can secure the roof to the underlying structure, providing extra reinforcement against wind uplift. Reinforcing the edges of the roof with sealant or weatherproofing tape can also help prevent shingle lift.
Lastly, consider landscaping adjustments to protect your roof from potential wind damage. Trimming overhanging tree branches near the roof can prevent them from falling onto the roof during a storm. Additionally, choosing wind-resistant plants and trees for your yard can help reduce the risk of branches or debris damaging the roof in high winds.
By taking these proactive measures, you can significantly increase the resistance of your roof to wind damage and minimize the chances of shingle lift. Remember, prevention is always more cost-effective than repair, so investing time and effort in protecting your roof now can save you from potential headaches and expenses down the line.
People Also Ask
1. How can I temporarily repair roof shingles lifted by wind?
You can temporarily repair roof shingles lifted by wind by applying roofing cement or sealant to secure the loose shingles back in place. Additionally, you can use roofing nails to fasten them down.
2. Can I repair roof shingles lifted by wind on my own?
Yes, you can repair roof shingles lifted by wind on your own if you have basic DIY skills. However, it’s important to prioritize safety and consider hiring a professional if you are unsure about the repair process.
3. What should I do if my roof shingles are completely blown off by wind?
If your roof shingles are completely blown off by wind, it’s best to contact a professional roofer to assess the damage and make the necessary repairs. They will have the expertise to replace missing shingles and ensure the roof’s integrity is maintained.
4. Are there any preventative measures to avoid roof shingles from lifting in high winds?
Yes, there are a few preventative measures you can take to avoid roof shingles from lifting in high winds. These include using asphalt sealant to secure shingles, ensuring proper installation with appropriate fasteners, and regular roof inspections to identify any potential issues before they become major problems.
5. How do I know if my roof shingles need to be replaced after being lifted by wind?
If your roof shingles have been lifted by wind, it’s important to inspect them for any signs of damage such as cracks, tears, or missing granules. If significant damage is present, it might be necessary to replace the damaged shingles to maintain the roof’s functionality and longevity.
Wrapping Up
In conclusion, repairing roof shingles that have been lifted by wind is critical to ensure the integrity and safety of your home. By carefully inspecting the damage, securing loose shingles, and replacing any that are beyond repair, you can effectively address this issue.
Remember to prioritize your safety during the repair process by using proper protective gear and exercising caution while working at heights. Additionally, seeking professional assistance, especially for extensive or complex damage, is highly recommended to guarantee a thorough and long-lasting repair.
Ultimately, maintaining a well-maintained and secure roof is essential for protecting your home from the elements and preventing further damage. Don’t hesitate to take action and address any lifted roof shingles promptly to avoid potential leaks and other costly repairs down the line.

Innovation and Technology Director
William Simmons is dedicated to bridging the gap between innovative roofing technologies and traditional craftsmanship. His focus on blending modern techniques with reliable practices ensures optimal results for our clients.