Your roof is the unsung hero of your home, protecting you and your loved ones from the harsh elements day in and day out. Yet, hidden beneath its shingles lies an essential component that often goes unnoticed – the roof sheathing?”>roof sheathing?”>roof sheathing. This vital layer provides the necessary structural support for your roof, acting as a foundation for the shingles and defending your household against moisture and leaks. Over time, however, this crucial component can deteriorate and require repair. Fear not, for in this article, we will guide you through the step-by-step process of restoring your roof sheathing, ensuring the strength and durability of your roof for years to come. So, grab your tools and let’s get started on this journey to a sturdy and secure roof!
Identifying Damaged Roof Sheathing
Roof sheathing is an essential component of any roofing system, providing a sturdy base for the shingles or other roofing materials. However, over time, it can become damaged due to various reasons. It is important to be able to identify and address these issues promptly to prevent further damage and maintain the integrity of your roof.
One common sign of damaged roof sheathing is sagging or uneven areas on your roof. If you notice areas where the roof appears to be dipping or bulging, it could be a sign that the sheathing beneath is compromised. Additionally, water stains or mold growth on your ceiling or in your attic could indicate a leak caused by damaged sheathing.
Another indication of roof sheathing damage is visible sunlight or daylight coming through the roof. If you are able to see light filtering through gaps or holes in your roof, it is a clear sign that the sheathing is weakened or deteriorated. This can lead to further issues such as leaks, so it is important to address this problem promptly.
In some cases, you may also notice that your shingles are not lying flat or are curling at the edges. This could be a result of damaged sheathing that is no longer able to provide a secure base for the shingles. If you observe any of these signs, it is crucial to take action and repair the damaged roof sheathing as soon as possible to prevent further damage to your roof and home.
To accurately identify damaged roof sheathing, it is recommended to have a professional inspection done. A qualified roofing contractor will have the expertise and knowledge to assess the condition of your sheathing and determine the best course of action for repair or replacement. They will be able to identify any underlying issues, such as rot or moisture damage, which may not be immediately visible to the untrained eye.
By promptly identifying and addressing damaged roof sheathing, you can avoid costly repairs down the line and ensure the longevity of your roof. Regular inspections and maintenance are key to preserving the integrity of your roof and protecting your home from potential damage.
Common Causes of Roof Sheathing Damage
Roof sheathing damage can be caused by a variety of factors, ranging from natural wear and tear to external forces. One common cause of roof sheathing damage is water intrusion. Over time, moisture can seep through cracks or gaps in the roofing materials and saturate the sheathing. This can lead to rot, mold, and warping, compromising the structural integrity of the roof.
Another cause of roof sheathing damage is improper ventilation. Without proper airflow, heat and moisture can build up in the attic, creating a breeding ground for mold and rot. This can slowly deteriorate the sheathing from the inside out, weakening it over time.
Extreme weather conditions, such as heavy snowfall or high winds, can also contribute to roof sheathing damage. Excessive snow accumulation can put added weight on the sheathing, causing it to sag or even collapse. Similarly, strong winds can lift or dislodge shingles, exposing the sheathing to potential damage.
Additionally, pests like termites and rodents can wreak havoc on roof sheathing. These pests can gnaw on the wood, causing significant structural damage. It’s essential to regularly inspect your roof for signs of infestation and take appropriate measures to prevent these pests from causing further harm.
To mitigate these , proper maintenance and regular inspections are crucial. Ensuring proper ventilation, promptly fixing roof leaks, and addressing pest control issues can go a long way in preventing extensive damage to your roof’s sheathing.
By being vigilant and addressing potential issues promptly, you can prolong the lifespan of your roof sheathing and avoid costly repairs down the line.
Tools and Materials Required for Roof Sheathing Repair
:
To effectively repair roof sheathing, it is essential to have the right tools and materials on hand. A well-equipped toolbox will help you tackle the job with confidence and ensure a successful repair. Here are some essential tools and materials you will need for roof sheathing repair:
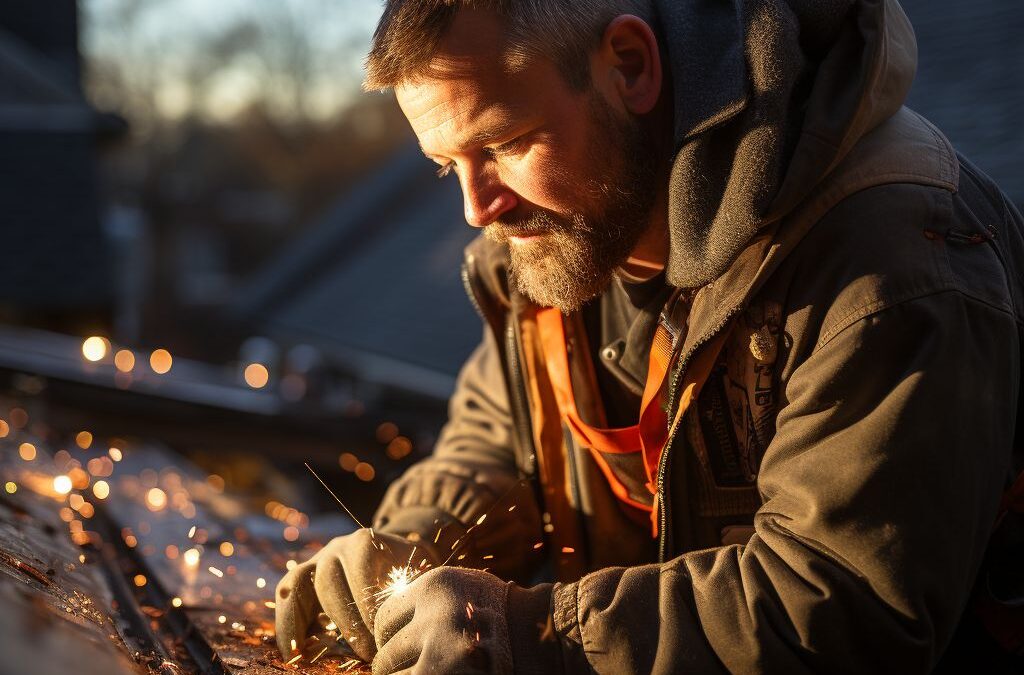
1. Safety equipment: Prioritize your safety by wearing appropriate protective gear, including gloves, safety glasses, and a hard hat. Working on a roof can be dangerous, so take every precaution to prevent accidents.
2. Ladders: A sturdy ladder is essential for accessing your roof safely. Choose a ladder that is tall enough to reach the damaged area and has sufficient weight capacity to support your weight and the materials you will be carrying.
3. Pry bar or roof shingle shovel: A pry bar or roof shingle shovel will come in handy for removing any damaged or rotted sheathing. These tools will help you carefully lift and remove the existing sheathing without causing further damage.
4. Circular saw or reciprocating saw: These types of saws will be necessary to cut through the damaged sections of sheathing. Make sure to use the appropriate blade for cutting through plywood or OSB (oriented strand board) sheathing.
5. Replacement sheathing materials: It is essential to have replacement sheathing materials readily available. Measure the size and thickness of the damaged sheathing to ensure you purchase the correct materials. Common options include plywood or OSB sheathing, depending on your specific roof construction.
6. Nails and a nail gun: You will need nails to secure the replacement sheathing to the roof rafters?”>roof rafters?”>roof rafters. Use galvanized or stainless-steel nails to prevent rust and corrosion. A nail gun will make the installation process faster and more efficient.
7. Hammer: A hammer can be used in conjunction with nails or as an alternative to a nail gun. Ensure it is appropriately sized and weighted for easy handling.
8. Roofing felt: This protective layer serves as a barrier between the sheathing and the final roofing material. It helps to prevent moisture penetration and adds an extra layer of insulation. Make sure to have enough roofing felt?”>roofing felt?”>roofing felt to cover the damaged area.
9. Roofing nails: Roofing nails are specifically designed to hold roofing felt securely in place. These nails have a larger head and a spiral, twisted shaft for increased grip. Make sure to choose nails that are compatible with your roofing material.
10. Roofing adhesive or caulk: Roofing adhesive or caulk can be used to seal any gaps or cracks in the sheathing, providing an additional layer of protection against moisture.
Having these tools and materials readily available will ensure a smoother and more efficient roof sheathing repair process. It’s always a good idea to double-check your inventory before starting the repair to avoid any delays or interruptions.
Step-by-Step Guide to Repairing Roof Sheathing
Repairing roof sheathing is a crucial step in maintaining the integrity and longevity of your roof. When damaged, roof sheathing can compromise the structural stability of the entire roof. In this section, we will provide a step-by-step guide to help you effectively repair your roof sheathing and ensure the safety of your home.
Step 1: Safety First
Before you begin any repair work, it is essential to prioritize your safety. Ensure you have a stable ladder and suitable safety equipment, such as gloves and protective eyewear. It is also recommended to have a helper present to assist throughout the process.
Step 2: Remove Damaged Sections
Identify the areas of the roof sheathing that are damaged and need to be replaced. Carefully remove the shingles or tiles covering these sections. Next, using a pry bar or hammer, gently remove any nails or screws securing the damaged sheathing to the roof structure. Take extra caution not to damage the surrounding areas as you remove the damaged sections.
Step 3: Measure and Cut New Sheathing
Now that the damaged sections are removed, it’s time to measure and cut new sheathing. Using a tape measure, carefully measure the dimensions of the space that needs to be filled. Transfer these measurements onto a new piece of sheathing material, such as plywood or oriented strand board (OSB). Use a saw to cut the new sheathing to the appropriate size.
Step 4: Install New Sheathing
With the new sheathing cut and ready, it’s time to install it onto the roof structure. Start by sliding the new piece of sheathing into the vacant space and aligning it properly. Use roofing nails or screws to secure the new sheathing to the roof structure, making sure to drive them through the existing roof sheathing and into the underlying rafters or trusses. Space the nails or screws appropriately, following local building codes and guidelines.
Step 5: Replace Shingles or Tiles
With the new sheathing in place, it’s time to reinstall the shingles or tiles that were previously removed. Make sure to realign them properly, ensuring a tight and secure fit. Use roofing nails or adhesive as necessary to fasten the shingles or tiles to the new sheathing and surrounding areas.
Step 6: Inspect and Test
Once the repair work is complete, take the time to thoroughly inspect the repaired roof sheathing. Look for any signs of loose or improperly secured sections. Additionally, conduct a water test by spraying the repaired area with a hose to check for any leaks or water penetration. Rectify any issues found during the inspection to ensure the repair is effective and long-lasting.
Following these step-by-step instructions will assist you in repairing roof sheathing effectively, reinforcing the structural stability of your roof. Remember, if you’re unsure about any aspect of the repair process, it’s always best to consult a professional roofer to avoid further damage or safety hazards.
Tips for Preventing Future Roof Sheathing Damage
Preventing future roof sheathing damage is essential to ensure the longevity and reliability of your roof. By following these tips, you can minimize the risk of encountering further issues and save yourself from costly repairs or replacements down the line.
Regular Maintenance:
Inspect your roof periodically for any signs of damage, such as sagging or soft spots. Pay attention to water stains on the ceiling, which could indicate a leak. Additionally, check the attic for any signs of moisture or mold growth, as this could be a result of roof sheathing damage.
Proper Ventilation:
Ensure that your roof has adequate ventilation to prevent heat and moisture buildup. Poor ventilation can cause the roof sheathing to expand and contract, leading to warping or rotting. Consider installing vents or a ridge vent system to maintain a balanced airflow.
Trim Surrounding Trees:
Overhanging tree branches can pose a risk to your roof, especially during storms or strong winds. Trim any branches that are in close proximity to your roof to prevent potential damage from falling branches or rubbing against the shingles.
Keep the Gutters Clean:
Clogged gutters can lead to water pooling on your roof, potentially seeping into the sheathing and causing rot or decay. Make sure to clean your gutters regularly to ensure proper drainage and prevent water from backing up onto the roof.
Inspect and Repair Flashings:
Flashings are the metal pieces that seal gaps and joints in your roof, such as around chimneys, vents, or skylights. Inspect these flashings for any cracks, gaps, or signs of deterioration. If necessary, replace or repair damaged flashings to prevent water intrusion and subsequent damage to the sheathing.
Address Roof Leaks Promptly:
If you notice any signs of a roof leak, such as water stains or dripping water, take immediate action to locate and address the source of the leak. Delaying repairs can lead to further damage to the sheathing and other parts of the roof, as well as potential interior structural damage.
By implementing these preventive measures, you can significantly reduce the risk of future roof sheathing damage and prolong the lifespan of your roof. Regular maintenance and prompt repairs are key to ensuring the integrity of your roof and avoiding more extensive issues in the long run.
Signs of a Professional Roof Sheathing Repair
When it comes to repairing roof sheathing, it is crucial to hire a professional who knows exactly what they are doing. A professional roof sheathing repair should leave your roof stronger and more secure than before. Here are some signs to look for to determine if a roof sheathing repair has been done by a professional:
1. Neat and Precise Workmanship: One of the tell-tale is the level of workmanship. A professional contractor will ensure that the repair is done with precision and attention to detail. This means that all damaged sheathing is properly removed and replaced, and the new sheathing is securely fastened to the roof structure. The repair work should be neat and seamless, blending in seamlessly with the rest of the roof.
2. Use of High-Quality Materials: Another sign of a professional roof sheathing repair is the use of high-quality materials. A professional contractor understands the importance of using durable and weather-resistant materials for the repair. They will not cut corners by using inferior products that may compromise the integrity of the repaired section. Instead, they will use materials that are designed to withstand the elements and provide long-lasting protection for your roof.
3. Attention to Structural Integrity: A professional roof sheathing repair goes beyond just fixing the visible damage. It also involves assessing and addressing any underlying structural issues that may have contributed to the damage in the first place. A professional contractor will inspect the entire roof system to ensure that there are no further issues affecting the sheathing. This includes checking for any signs of rot, water damage, or improper ventilation. By addressing these issues, a professional repair ensures the long-term stability and durability of your roof.
Overall, a professional roof sheathing repair should give you peace of mind knowing that your roof is in the hands of an experienced and skilled contractor. The work should be done with precision, using high-quality materials, and addressing any underlying structural concerns. If you notice these signs in a roof sheathing repair, you can be confident that you have received a professional repair job that will protect your home for years to come.
People Also Ask
1. How do you know if your roof sheathing needs to be repaired?
You may need to repair your roof sheathing if you notice sagging or bowing in the roof, leaks or water damage, or if there are signs of rot or decay.
2. Can you repair roof sheathing?”>repair roof sheathing without replacing it?
In some cases, you may be able to repair roof sheathing without having to replace it entirely. This can involve removing and replacing only the damaged sections, reinforcing weak areas, or applying protective coatings to prevent further damage.
3. What tools and materials are needed to repair roof sheathing?
To repair roof sheathing, you may need tools such as a circular saw, pry bar, hammer, nails or screws, and a tape measure. Materials you may need include new plywood or OSB sheathing, roofing felt, adhesive, and sealant.
4. How much does it cost to repair roof sheathing?
The cost of repairing roof sheathing can vary depending on the extent of the damage, the size of the area that needs repair, and the materials used. On average, you can expect to pay between $500 and $1,500 for roof sheathing repairs.
5. Can I repair roof sheathing myself or should I hire a professional?
While some minor roof sheathing repairs can be done by homeowners with DIY skills, it is generally recommended to hire a professional roofing contractor for larger or more complex repairs. They have the expertise and equipment to ensure the repair is done correctly and safely.
Key Takeaways
In conclusion, repairing roof sheathing can be a necessary step in maintaining the structural integrity of your roof. It is important to identify any signs of damage, such as sagging or leaks, and address them promptly to prevent further issues.
When it comes to repairing roof sheathing, it is crucial to ensure you have the necessary tools and materials, such as plywood sheets, roofing nails, and a pry bar. Carefully remove any damaged sections of sheathing and replace them with new ones, making sure to properly secure them to the rafters or trusses.
Remember to inspect the entire roof regularly and address any issues before they worsen. Proper maintenance and timely repairs can help extend the lifespan of your roof and prevent costly damage to your home.
If you are unsure or uncomfortable with the DIY approach, it is always recommended to seek professional help. Roof repairs can be complex and require specific skills and knowledge. Hiring a professional roofer will ensure that the job is done safely and effectively.
In conclusion, repairing roof sheathing may seem like a daunting task, but with the right tools, materials, and knowledge, it can be manageable. By taking proactive steps to maintain and repair your roof sheathing, you can protect your home and ensure its longevity. Don’t hesitate to seek professional assistance if needed, as it is better to address any potential issues sooner rather than later.

Emergency Services Manager
Andrew Foster, a seasoned roofing professional, specializes in storm damage repairs and emergency services. His swift response and effective solutions help clients safeguard their properties during challenging times.