Few things can make a home feel as cozy and inviting as a crackling fireplace on a chilly winter evening. And when it comes to fireplaces, there’s nothing quite as timeless and charming as a chimney adorned with a sturdy and well-maintained mortar chimney cap.
However, just like any other part of your home, chimney caps can suffer from wear and tear over time. From cracks and crumbling mortar to loose bricks, these issues not only compromise the aesthetic appeal of your chimney but also its functionality and safety. But fear not!
In this article, we will walk you through the steps to repair your mortar chimney cap, so you can bring back the beauty and functionality of your chimney, and enjoy those warm fires worry-free for years to come. So grab your tool belt and let’s get started on reviving your chimney cap to its former glory!
Precautions before beginning the repair process
Repairing a mortar chimney cap requires careful attention and adherence to certain precautions to ensure a safe and successful repair. Before starting the repair process, it is crucial to prioritize safety. First and foremost, ensure that you have the necessary safety equipment such as gloves, safety glasses, and a dust mask to protect yourself from any potential hazards.
Before climbing onto the roof, it is essential to assess the weather conditions. Repairing a chimney cap should not be undertaken during extreme weather conditions like heavy rain, strong winds, or freezing temperatures. Such conditions can make the repair process more challenging and potentially dangerous. It is preferable to choose a calm day with mild temperatures to carry out the repairs effectively.
Inspecting the overall condition of the chimney is another important precautionary measure. It is recommended to closely examine the chimney for any signs of damage or structural issues that might require professional assistance. Additionally, ensure that the chimney is clean and free from debris, as this can hinder the repair process and compromise the integrity of the repair work.
Lastly, if you are not experienced in roof repair or chimney maintenance, it is always advisable to consult with a professional before attempting any repairs. Chimneys can be complex structures, and improper repairs can lead to further damage or potential safety hazards. Seeking the guidance of a professional can help ensure that the repair is done correctly, minimizing any risks associated with DIY repairs.
Taking these will help ensure a safe and successful chimney cap repair, allowing you to maintain the functionality and longevity of your chimney.
Understanding the importance of a well-maintained chimney cap
The chimney cap is an integral part of any chimney system, and its maintenance should not be neglected. A well-maintained chimney cap not only adds to the aesthetic appeal of your home, but it also serves several important functions. is crucial for homeowners looking to ensure their chimney is in good working condition.
One of the primary functions of a chimney cap is to keep water out of the chimney system. When water enters the chimney, it can cause significant damage over time. The freeze-thaw cycle can lead to cracking and deterioration of the mortar, which can weaken the structure of the chimney and potentially lead to expensive repairs. A properly maintained chimney cap acts as a barrier against rainwater, preventing it from entering the chimney and causing damage.
In addition to water protection, a chimney cap also helps to prevent animals and debris from entering the chimney. Birds, squirrels, and other small animals can find their way into an open chimney, creating a potential hazard for both the animal and your home. Additionally, leaves, twigs, and other debris can accumulate in the chimney, obstructing the proper flow of air and increasing the risk of a chimney fire. A well-maintained chimney cap with mesh screen barriers effectively prevents such unwanted visitors and debris from entering your chimney.
Regular maintenance and timely repairs are crucial for ensuring the effectiveness of your chimney cap. Inspecting the cap regularly for any signs of wear and tear, such as cracks or loose mortar, is essential. Any damage should be addressed promptly to prevent further deterioration and potential structural issues. By investing in the care and maintenance of your chimney cap, you can prolong its lifespan and avoid costly repairs down the line.
In conclusion, a well-maintained chimney cap plays a vital role in protecting your chimney system and your home. It prevents water damage, keeps animals and debris out, and promotes the proper functioning of your chimney. Regular inspections and timely repairs are necessary to ensure its longevity and effectiveness. So, make it a priority to understand and appreciate the importance of maintaining a well-maintained chimney cap.
Identifying common issues with mortar chimney caps
Mortar chimney caps, though sturdy and long-lasting, can still face common issues over time due to exposure to the elements and wear and tear. These issues should be identified early on to prevent further damage and ensure the chimney cap continues to function effectively.
One common issue with mortar chimney caps is the development of cracks and deterioration. This can occur due to age, weathering, or improper installation. Cracks in the mortar can allow water to seep in, leading to further damage to the chimney and potential leaks inside the house. Deterioration can weaken the cap’s structure, making it vulnerable to collapse or dislodgement during inclement weather.
Another problem to watch out for is loose mortar joints. Over time, the mortar holding the bricks or stones together may become loose, leading to gaps and openings in the chimney cap. These gaps can compromise the cap’s ability to protect the chimney from rainwater, pests, and debris, thereby increasing the risk of damage to the chimney system.
Furthermore, chimney caps can also suffer from missing or damaged components. This could include cracked bricks, crumbling mortar, or even missing pieces altogether. These gaps or damaged areas not only compromise the cap’s functionality but also make it prone to further deterioration and damage if left unaddressed.
It is crucial to regularly inspect your mortar chimney cap for any signs of these common issues. Catching them early on will be beneficial in preventing more extensive damage and costly repairs. Taking the time to properly evaluate the state of your chimney cap can go a long way in maintaining the overall integrity of your chimney system and ensuring the safety and efficiency of your home.
Step-by-step guide for repairing mortar chimney caps
Repairing mortar chimney caps can be a daunting task, but with the right approach and materials, it is definitely achievable. Here is a step-by-step guide to help you effectively repair your mortar chimney cap.
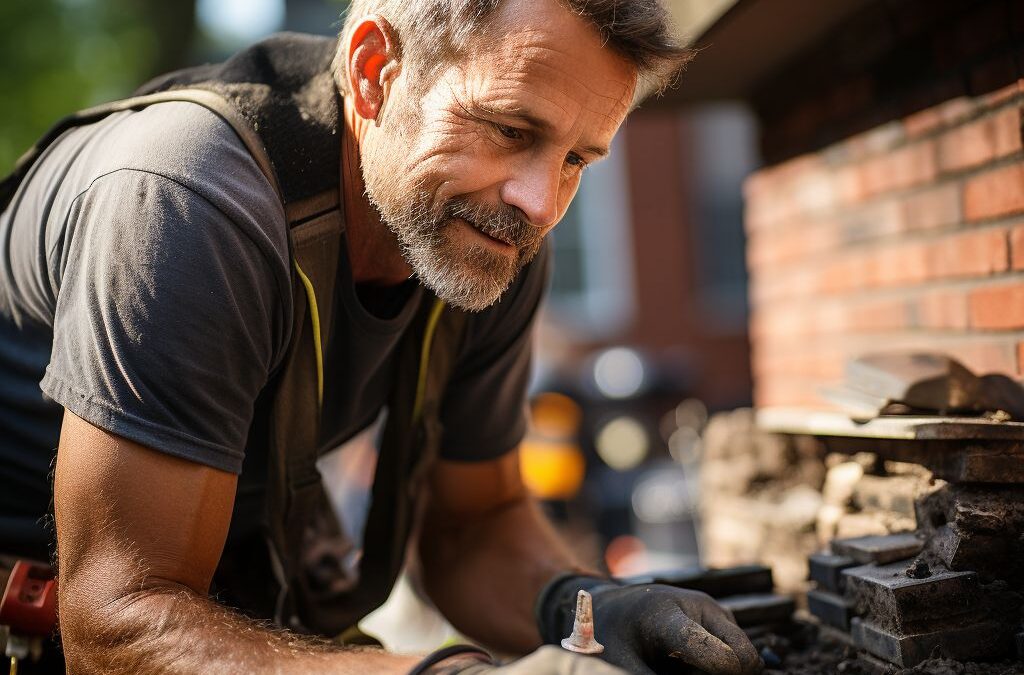
Firstly, start by inspecting the cap for any visible cracks, loose mortar, or damage. This will give you an idea of the extent of the repairs needed. Make sure to take necessary safety precautions before beginning the repair process, such as wearing gloves and protective eyewear.
Next, remove any loose or damaged mortar using a wire brush or chisel. Clean the surface thoroughly to ensure proper adhesion of the new mortar. Remove any debris or dust using a vacuum or brush.
Once the surface is clean, it’s time to mix the mortar. Choose a mortar mix specifically designed for chimney repairs. Mix the mortar according to the manufacturer’s instructions. It’s important to use the right consistency, not too dry or too wet.
Now comes the crucial step of applying the mortar mixture to the damaged area. Using a trowel, apply the mortar evenly to the cracks or gaps in the chimney cap. Fill in any voids or damaged sections, making sure the mortar is packed tightly.
After applying the mortar, use a trowel or jointing tool to create a smooth and even finish. This will help the repaired area blend in seamlessly with the rest of the cap. Pay attention to the surrounding mortar joints and blend them in well for aesthetic purposes.
Allow the mortar to cure as per the manufacturer’s instructions. This typically takes about 24 to 48 hours. During this time, it’s important to protect the repaired area from any moisture or excessive temperatures.
Once the mortar has cured, inspect the repaired area for any imperfections or unevenness. Use sandpaper or a wire brush to smooth out any rough patches. Additionally, consider applying a waterproof sealant to enhance the longevity of the repair.
Remember, proper maintenance of your chimney cap is essential to prevent further damage in the future. Regularly inspect your cap for any signs of wear and tear, and address any issues promptly. By following this step-by-step guide, you can effectively repair your mortar chimney cap and ensure its durability for years to come.
Choosing the right mortar mix for a durable repair
When it comes to repairing a mortar chimney cap, selecting the right mortar mix is crucial for ensuring a long-lasting and durable repair. The wrong mortar mix can result in weak bonds, cracking, and potential water penetration, leading to further damage and more costly repairs down the line. Therefore, it is essential to understand the different types of mortar mixes available and choose the one that suits your specific needs.
One commonly used mortar mix for chimney cap repair is Type S mortar. Type S mortar is a high-strength mortar mix that contains a higher proportion of Portland cement, lime, and sand compared to other mortar types. This mix is ideal for chimney caps as it offers excellent durability and weather resistance. The high cement content ensures a strong bond, while the lime improves workability, reduces shrinkage, and enhances water resistance.
Another option is a premixed mortar specifically formulated for chimney cap repairs. These prepackaged mixes are conveniently blended with the optimal ratios of Portland cement, lime, and sand, offering a hassle-free solution for DIY enthusiasts and professionals alike. These premixed mortar mixes are often designed to provide superior bond strength, flexibility, and water resistance, making them ideal for chimney cap repairs.
Regardless of the type of mortar mix you choose, it’s crucial to follow the manufacturer’s instructions for proper mixing and application. This will help ensure optimal performance and maximum longevity of the repair. Generally, the mortar mix should be mixed with water to achieve a consistency similar to that of peanut butter. The mixture should be workable but not too runny, allowing for easy application and shaping.
Remember, a proper mortar mix is fundamental for a durable and long-lasting repair of your chimney cap. Taking the time to select the right mix and applying it accurately will help preserve the structural integrity of your chimney, prevent further damage, and ensure the safety of your home.
Key Points:
- Choosing the right mortar mix is crucial for a durable repair of a chimney cap.
- Type S mortar is a high-strength mix ideal for chimney caps, offering durability and weather resistance.
- Premixed mortar mixes specifically formulated for chimney cap repairs are also available.
- Follow the manufacturer’s instructions for proper mixing and application.
Applying the mortar mixture accurately to ensure effective repairs
When it comes to repairing mortar chimney caps, applying the mortar mixture accurately is crucial for achieving long-lasting and effective repairs. The mortar acts as the binding agent that holds the cap together, so it’s essential to follow the correct application process. Here, we will discuss the necessary steps to ensure accurate application and effective repairs.
1. Prepare the mortar mixture: Start by mixing the mortar according to the manufacturer’s instructions. Make sure to use the right amount of water for a consistent and workable mixture. It’s important to choose a high-quality mortar mix that is specifically designed for chimney cap repairs. This will ensure durability and resist the elements.
2. Clean the chimney cap: Before applying the mortar, thoroughly clean the chimney cap, removing any loose debris, dirt, or existing mortar. Use a wire brush or scraper to get rid of any built-up residue. Cleaning the surface will allow the mortar to bond effectively and create a strong repair.
3. Apply the mortar mixture: Using a trowel, carefully apply the mortar mixture onto the damaged areas of the chimney cap. Start with the cracks or gaps, ensuring that the mortar fills the spaces completely. Use the edge of the trowel to smooth and level the surface of the repaired area.
4. Use the right technique: When applying the mortar, it’s important to use the correct technique to achieve a seamless repair. Hold the trowel at a slight angle and apply pressure to ensure that the mortar adheres properly. Work in small sections, applying the mortar evenly and without any gaps or voids.
5. Finish the repair: Once you have applied the mortar to all the damaged areas, give it some time to set. Depending on the specific mortar mix, this may take a few hours or even days. Keep the repaired area protected from rain or extreme weather conditions during the curing process.
Remember, accuracy and attention to detail are key when applying the mortar mixture. Taking the time to properly apply the mortar will ensure that your chimney cap is effectively repaired and able to withstand the elements for years to come.
People Also Ask
1. Can I repair a mortar chimney cap myself?
Yes, repairing a mortar chimney cap can often be a DIY project. However, it is crucial to have the necessary knowledge and skills to ensure that the repair is done correctly and safely.
2. What materials do I need to repair a mortar chimney cap?
You will typically need mortar mix, a trowel, a wire brush, and a masonry waterproofing sealer. Additionally, depending on the extent of the damage, you may also require a chimney crown repair product or a replacement chimney cap.
3. How do I repair a cracked mortar chimney cap?
To repair a cracked mortar chimney cap, start by removing loose debris and cleaning the area thoroughly. Then apply a layer of mortar mix over the crack, ensuring it is evenly distributed and smoothed. Finally, allow the mortar to dry and cure according to the manufacturer’s instructions.
4. Should I repair or replace a severely damaged mortar chimney cap?
If the mortar chimney cap is severely damaged, it is often best to replace it instead of attempting repairs. This is especially true if the damage extends beyond superficial cracks and includes significant deterioration or structural issues.
5. How can I prevent further damage to my mortar chimney cap?
To prevent further damage to your mortar chimney cap, it is essential to perform regular inspections and maintenance. This includes identifying and repairing any cracks or deterioration promptly, ensuring proper drainage, and applying a masonry waterproofing sealer as a protective measure.
In Retrospect
In conclusion, repairing a mortar chimney cap is a relatively straightforward task that can be done by following a few simple steps. By inspecting the cap for any cracks or damages, removing any loose or deteriorated mortar, and replacing it with new mortar specifically designed for chimney repair, you can easily restore the integrity and functionality of your chimney cap.
Regular maintenance and inspection of your chimney cap is crucial to ensure its longevity and prevent any potential issues. It is recommended to carry out these repairs as soon as any damage is spotted, as neglecting them can lead to more extensive and costly repairs in the future.
By taking the time to repair your mortar chimney cap, you not only ensure the safety of your home and its occupants but also maintain the efficiency of your fireplace or heating system. So don’t delay, follow these steps and give your chimney cap the attention it deserves, keeping your home cozy and protected for years to come.

Roof Replacement Supervisor
Daniel Mitchell’s expertise lies in comprehensive roof replacements, utilizing top-quality materials to ensure durability and longevity. His meticulous approach and commitment to excellence make him a trusted professional.