A sturdy roof is the guardian of our homes, shielding us from the harsh elements that nature throws our way. However, even the most well-maintained roofs are not immune to damage, and when those dreaded broken roof tiles occur, it can leave homeowners feeling overwhelmed and unsure of how to proceed. Fear not! In this comprehensive guide, we will unveil the secrets of repairing those pesky cracked and broken tiles, ensuring your roof remains resilient, beautiful, and fully intact. Whether you’re a seasoned DIY enthusiast or a newcomer to home repairs, this article will equip you with the knowledge and techniques needed to restore your roof to its former glory. So, put on your gloves, grab your tools, and let’s dive into the world of repairing broken roof tiles!
Identifying the damaged roof tiles
:
One of the first steps in repairing broken roof tiles is identifying which tiles are damaged and need to be replaced. This can be done by visually inspecting the roof for any visible signs of damage such as cracks, chips, or missing pieces. Additionally, it is important to check for any water leaks or stains on the ceiling or walls inside the house, as these can also indicate a problem with the roof tiles.
To thoroughly inspect the roof, it is recommended to use a ladder to get a closer look at the tiles. Take note of any tiles that look significantly different from the others, as this could indicate a break or crack. Pay attention to any areas that may be more susceptible to damage, such as around vents, chimneys, or areas that are exposed to excessive sunlight or heavy rainfall.
In some cases, the damage may not be as obvious, and it might be necessary to tap gently on the tiles using a rubber mallet or a gloved hand to identify any loose or hollow-sounding tiles. Be careful not to tap too hard, as this can cause further damage. Once you have identified the damaged tiles, it is time to gather the necessary tools and materials for the repair.
Gathering the necessary tools and materials
is an essential step in repairing broken roof tiles. By having everything you need in one place, you can work efficiently and effectively to complete the repair. Here are some tools and materials that you will need:
Tools:
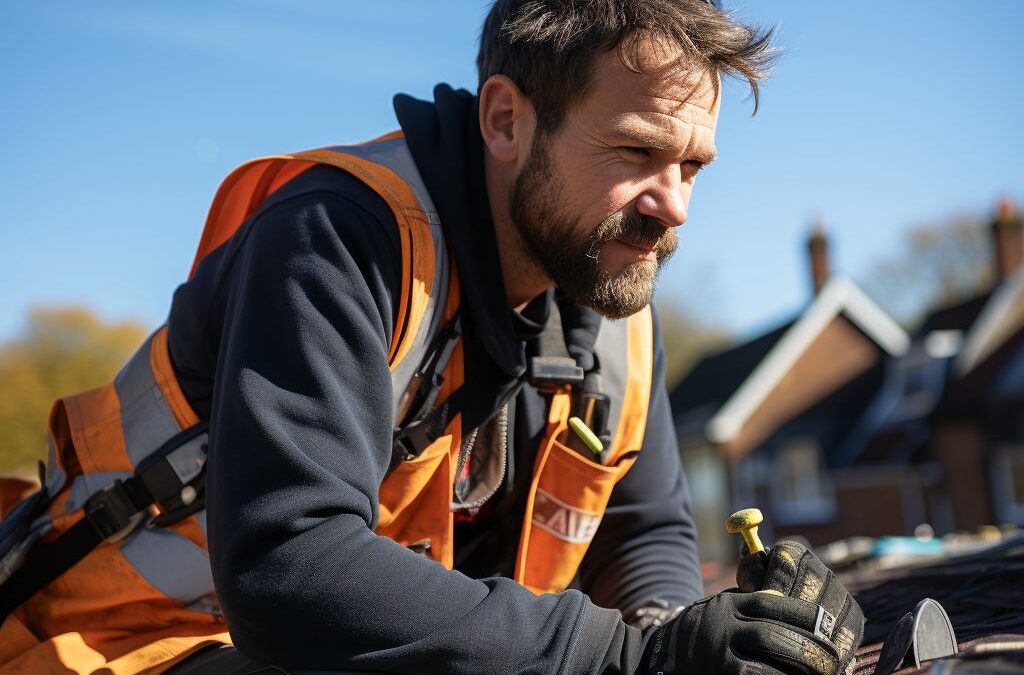
– Safety gloves and goggles: Protect yourself from any potential hazards while working on the roof.
– Ladder: Use a stable ladder that is appropriate for the height of your roof.
- Roof tile lifter tool: This will help you safely remove the broken tiles without damaging surrounding tiles.
– Pry bar: Ideal for lifting and removing any damaged or loose tiles.
– Hammer: Use this to gently tap in any loose nails or secure tiles in place.
– Chalk line: Helps to mark guidelines for aligning the new tiles.
Materials:
– Replacement roof tiles: Choose tiles that are the same shape, size, and color as the ones you are replacing to maintain a cohesive appearance.
- Roof tile adhesive: A strong adhesive is necessary to secure the new tiles in place.
- Roofing nails: Use nails that are specifically designed for roofing applications.
– Roof sealant: Apply sealant around the repaired tiles to protect against leaks and further damage.
Before starting the repair process, make sure you have all the necessary tools and materials readily available. This will save you time and ensure a smoother repair job.
Removing and replacing broken roof tiles
When it comes to repairing broken roof tiles, the first step is to identify the damaged tiles. This can be done by visually inspecting the roof or looking for signs of leaks or missing pieces. Once you have located the damaged tiles, it is important to gather all the necessary tools and materials before starting the repair process.
To remove broken roof tiles, you will need a few essential tools including a pry bar or flathead screwdriver, a hammer, and a bucket to collect any broken pieces. It is important to use caution and wear protective gloves and goggles during this process to avoid any injuries.
Begin by carefully inserting the pry bar or flathead screwdriver under the damaged tile. Gently lift the tile and use the hammer to create enough space to remove it completely. Be careful not to damage the surrounding tiles during this process.
Once the tile is removed, inspect the area underneath for any signs of damage or decay. It is crucial to address any issues at this stage to prevent further problems in the future. Replace any damaged underlayment or insulation before proceeding with the tile replacement.
When it comes to replacing the broken tile, ensure that you have a replacement tile that matches the size, shape, and color of the existing tiles on your roof. This will help maintain the visual cohesiveness of your roof while also ensuring a proper fit.
Carefully slide the replacement tile into place and secure it using roof tile adhesive or nails. Make sure to position the tile in such a way that it aligns properly with the surrounding tiles. Use a level to ensure the tile is flat and even with the rest of the roof.
Repeat the process for any additional broken tiles, taking the necessary precautions to protect yourself and the surrounding tiles. Remember that proper installation is key to ensuring a long-lasting repair.
By following these steps, you can confidently remove and replace broken roof tiles, restoring the integrity and functionality of your roof. Regular inspections and timely repairs can help prolong the lifespan of your roof, saving you both time and money in the long run.
Repairing cracks and leaks in roof tiles
is an essential part of the overall process of fixing a damaged roof. Cracks and leaks can occur due to various reasons such as weather changes, age, or improper installation. If left unattended, they can lead to further damage and potentially cause water leakage into your property. In this section, we will discuss some effective methods to fix these cracks and leaks, ensuring the longevity and durability of your roof.
1. Inspect the extent of the damage: Before beginning the repair process, it is crucial to identify the cracks and leaks in your roof tiles. Carefully examine the tiles for any visible signs of damage, such as cracks or gaps. Pay close attention to the areas where water might be penetrating, such as around chimneys, vents, or skylights. Identifying the extent of the damage will help you determine the necessary steps and materials required for the repair.
2. Clean the damaged area: Cleaning the area is an important step before attempting any repair. Use a stiff brush or a broom to remove any loose debris or dirt from the cracked or leaking tiles. This ensures proper adhesion and prevents further damage during the repair process. If there is any moisture present, allow the area to dry completely before proceeding.
3. Fill the cracks and leaks: Once the area is clean and dry, it’s time to fill the cracks and leaks in your roof tiles. There are different methods and materials available for this purpose, such as roofing cement or specialized tile repairs kits. Apply the chosen material carefully into the cracks and gaps, ensuring it fills the entire damaged area. Smooth out the surface using a putty knife or a trowel for a seamless finish.
4. Allow the repair to cure: After filling the cracks and leaks, it is crucial to allow sufficient time for the repair material to cure. Follow the manufacturer’s instructions for the recommended curing time. Avoid any foot traffic or heavy objects on the repaired area during this period to ensure the material sets properly.
5. Inspect for additional leaks: Once the repaired area has fully cured, it is essential to inspect for any potential leaks. Use a garden hose or a watering can to simulate rainfall over the repaired section. Watch closely for any signs of water seepage or leakage. If you notice any leaks, repeat the filling and curing process until the issue is resolved.
By following these steps, you can effectively repair cracks and leaks in your roof tiles, safeguarding your property from any further damage. Regular maintenance and timely repairs can significantly prolong the lifespan of your roof, ensuring its ability to protect your home for years to come.
Applying roof tile adhesive for stronger repair
Applying roof tile adhesive is an essential step in repairing broken roof tiles as it helps strengthen and secure the new tiles in place. Roof tile adhesive is a specially formulated adhesive that provides a secure bond between the tile and the roof surface, ensuring long-lasting and durable repairs. Here’s how you can apply roof tile adhesive for a stronger repair:
Clean the roof surface: Before applying the adhesive, it is crucial to clean the roof surface thoroughly. Remove any debris, dirt, or loose cement from the area where the new tile will be placed. This will ensure better adhesion and prevent any interference with the adhesive bond.
Apply the adhesive: Using a caulking gun or a trowel, apply roof tile adhesive evenly onto the underside of the new tile. The adhesive should cover the entire surface of the tile, creating a strong bond when pressed against the roof surface.
Press firmly: Once the adhesive is applied, carefully position the new tile on the repaired area, gently pressing it into place. Ensure that the tile is aligned properly and sits flush with the surrounding tiles. Apply firm pressure to ensure proper adhesion between the adhesive, tile, and roof surface.
Allow for curing time: After the new tile is securely in place, allow the adhesive to cure according to the manufacturer’s instructions. This curing time typically ranges from a few hours to a full day. Avoid any foot traffic or activities that may disturb the newly repaired tile during this time.
Check for proper bond: Once the adhesive has cured, check the bond between the tile and the roof surface. Gently tap on the tile to ensure it is firmly secured and does not move or shift. If there are any concerns about the bond, apply additional adhesive and repeat the pressing process.
Remember, the proper application of roof tile adhesive is crucial to the strength and durability of the repair. Following these steps will help ensure a strong bond between the new tile and the roof surface, providing a long-lasting solution for your broken roof tiles.
Applying sealant to protect the repaired tiles
:
Applying a sealant is an essential step in the roof tile repair process as it helps protect the repaired tiles from further damage caused by weather elements such as rain, wind, and UV rays. Sealants act as a barrier, preventing water leakage and helping to maintain the integrity of the repaired roof tiles. Here’s what you need to know about .
1. Choose the right sealant: Before starting the application process, make sure to select a high-quality sealant that is specifically designed for roof tiles. Look for a sealant that is weather-resistant, UV-stable, and flexible, as these characteristics will ensure its long-lasting effectiveness in protecting the repaired tiles.
2. Clean the repaired area: Before applying the sealant, it’s crucial to clean the repaired area thoroughly. Use a brush or a high-pressure washer to remove any debris, dust, or loose particles from the surface of the repaired roof tiles. This will ensure proper adhesion and help the sealant bond effectively to the tiles.
3. Apply the sealant: Using a caulk gun, carefully apply the sealant to the repaired area. Start from the bottom and work your way up, making sure to cover all the cracks, joints, and edges of the repaired tiles. Apply the sealant in a smooth and even manner, ensuring that it fills any gaps or openings.
4. Smooth and shape the sealant: After applying the sealant, use a putty knife or your fingers (using gloves) to smooth and shape the sealant. This step is important as it ensures that the sealant forms a tight and secure seal, preventing any potential water infiltration.
5. Allow for drying time: Finally, allow the sealant to dry completely before exposing the roof to any water or heavy rain. The drying time may vary depending on the specific product used, so make sure to follow the manufacturer’s instructions for the recommended drying time.
Remember, applying a sealant is not only about protecting the repaired tiles, but it also helps in maintaining the overall lifespan of your roof. Regularly inspect and reapply sealant as needed to ensure ongoing protection and extend the life of your roof tiles.
People Also Ask
1. Can broken roof tiles be repaired?
Yes, broken roof tiles can typically be repaired rather than replaced, depending on the extent of the damage. This can involve techniques such as sealing cracks with roofing cement or using adhesive to reattach broken pieces.
2. What tools are needed to repair broken roof tiles?
Some common tools needed to repair broken roof tiles include a crowbar or a slate ripper to remove damaged tiles, a hammer to secure new tiles in place, roofing cement or adhesive to seal or attach tiles, and a ladder or scaffolding for safe access to the roof.
3. How do you identify broken roof tiles?
To identify broken roof tiles, look for visible cracks, chips, or missing pieces on the roof’s surface. Additionally, inspect the attic for any signs of water leaks or daylight coming in through the roof, which may indicate broken or cracked tiles.
4. Can I replace a single broken roof tile?
Yes, it is possible to replace a single broken roof tile without needing to replace the entire roof. However, it is crucial to ensure that the replacement tile matches the existing tiles in terms of size, color, and material for a seamless repair.
5. Is it necessary to hire a professional for roof tile repairs?
While it is possible to repair broken roof tiles as a DIY project, it is often recommended to hire a professional roofer or a specialized repair contractor. They have the expertise and experience to correctly identify and fix the issue, ensuring a durable and long-lasting repair.
Closing Remarks
In conclusion, repairing broken roof tiles is a necessary task to ensure the integrity and longevity of your roof. By following the steps outlined above, you can effectively repair and replace damaged tiles on your own.
Remember to prioritize safety by using appropriate protective gear and taking precautions when working at heights. Regularly inspecting your roof and addressing any issues promptly can help prevent further damage and more expensive repairs in the future.
If you are unsure or uncomfortable with repairing the broken tiles yourself, it is recommended to seek professional help from a roofing contractor. They have the necessary expertise and experience to handle the job efficiently and safely.
Taking care of your roof is an essential part of maintaining your home’s overall condition. With proper repair and maintenance, you can ensure that your roof provides the protection and functionality it is designed for, keeping your home safe and secure for years to come.

Lead Roofing Specialist
Michael Thompson brings over two decades of roofing expertise to Fresno Roof Repair. His dedication to quality craftsmanship and customer satisfaction has earned him a reputation as a reliable authority in the roofing industry.