Chimneys have long been regarded as an iconic and beloved feature of our homes. Whether they are roaring with the warmth of a crackling fire or standing tall against the elements, these sturdy structures have provided comfort and functionality throughout the ages. However, over time, brick chimneys can succumb to wear and tear, leaving homeowners in need of repair solutions to preserve their beauty and functionality.
In this comprehensive guide, we will delve into the world of brick chimney repairs, equipping you with the knowledge and techniques necessary to bring your chimney back to its former glory. Whether you are a seasoned DIY enthusiast or a homeowner seeking professional assistance, read on to discover the secrets of rejuvenating your brick chimney and ensuring many more years of cozy warmth and architectural splendor.
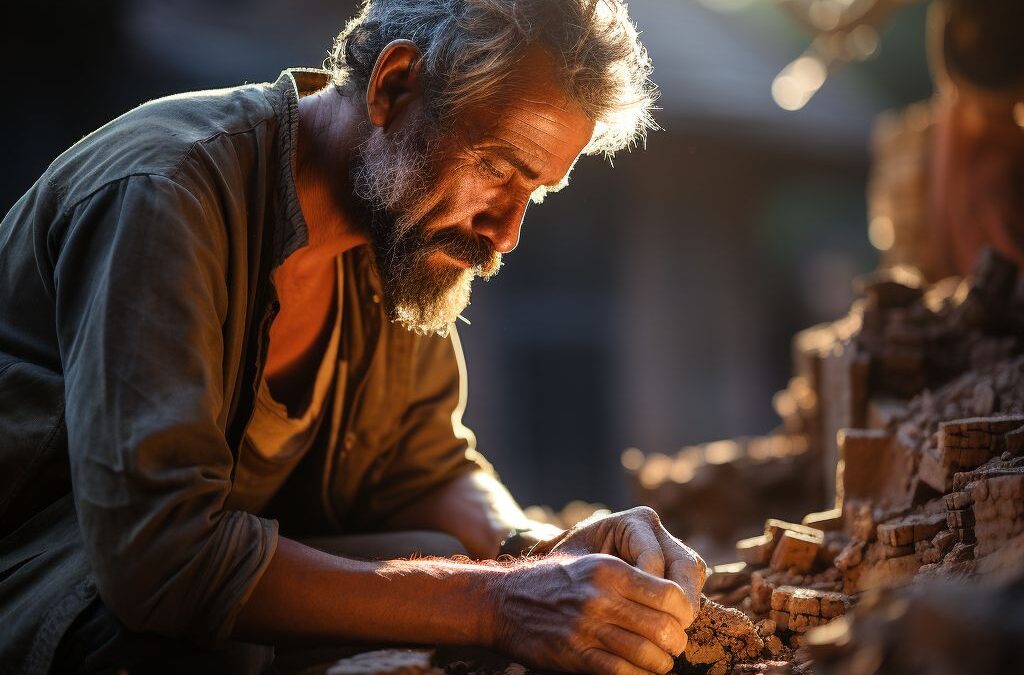
Step-by-Step Guide to Repairing Minor Brick Chimney Cracks
When it comes to brick chimney repairs, addressing minor cracks promptly can help prevent further damage and costly repairs down the line. Minor cracks, typically less than 1/8 inch in width, can be repaired by following a simple step-by-step process.
Step 1: Inspect and Clean
Begin by thoroughly inspecting the chimney for any cracks. Utilize a flashlight and ladder to get a closer look at all areas of the chimney structure. Once you have identified the cracks, use a wire brush or a stiff-bristle brush to clean the area. Remove any loose mortar or debris that may impede the repair process, ensuring that the surface is clean and smooth.
Step 2: Choose the Right Mortar Mix
Next, choose a mortar mix that is suitable for chimney repairs. Opt for a mortar specifically designed for use on chimneys, as it will provide the necessary strength and durability. Consult with an expert at your local home improvement store to ensure you select the right mortar mix for your specific project.
Step 3: Prepare the Mortar and Apply
Follow the instructions on the mortar mix packaging to prepare the mortar. Make sure to wear protective gloves during the mixing process. Once the mortar is ready, use a trowel to apply a generous amount to the crack. Press the mortar firmly into the crack, ensuring it fills all the gaps. Use the trowel to smooth the surface, creating an even finish that matches the existing brickwork. Allow the mortar to dry for the recommended timeframe specified by the manufacturer.
Step 4: Complete the Finishing Touches
After the mortar has dried, use a soft brush or sponge to lightly brush away any excess mortar and create a clean finish. If necessary, apply a sealant or water repellent to protect the repaired area from moisture and future damage. Regularly inspect the repaired crack to ensure its integrity and make any necessary touch-ups as needed.
- Clean the area thoroughly before applying mortar.
- Choose a suitable mortar mix for chimney repairs.
- Follow the instructions for mixing and applying the mortar.
- Complete the repair by brushing away excess mortar and applying a sealant if necessary.
By following this step-by-step guide, you can effectively repair minor cracks in your brick chimney and maintain its structural integrity. However, it is important to note that more significant repairs may require professional assistance.
1. Understanding the Common Causes of Brick Chimney Damage
Brick chimneys are a traditional and timeless feature of many homes, providing both warmth and charm. However, over time, these structures can become susceptible to various forms of damage. is crucial for homeowners looking to maintain their chimney’s structural integrity and prevent further deterioration.
One of the primary causes of brick chimney damage is water infiltration. Water can enter through cracks in the mortar joints or chimney cap, leading to moisture buildup and eventual deterioration of the bricks. Freezing and thawing cycles can also worsen this damage, as water expands when it freezes and further weakens the bricks.
Additionally, the settlement of the chimney foundation can cause structural issues. This occurs when the ground underneath the chimney shifts or sinks, causing the chimney to crack or lean. Poor construction practices or insufficient footings can contribute to this problem.
Another common cause of brick chimney damage is the natural wear and tear that comes with aging. Over time, exposure to the elements, including rain, wind, and sunlight, can cause the bricks to erode and weaken. This can lead to loose bricks, crumbling mortar, and overall instability of the chimney.
To prevent these common causes of brick chimney damage, homeowners should regularly inspect their chimneys for signs of deterioration and address any issues promptly. By understanding these causes, homeowners can take the necessary steps to protect and preserve their brick chimneys for years to come.
Signs of Water Damage:
- Stains or discoloration on the chimney exterior or interior walls.
- Cracks or gaps in the mortar joints.
- Efflorescence, which appears as a white powdery substance on the bricks.
- Deterioration or spalling of the bricks, where the surface starts to flake or break away.
Signs of Foundation Settlement:
- Uneven or sloping chimney.
- Cracks in the chimney structure.
- Gaps between the chimney and the roofline.
- Interior wall cracks near the chimney.
Signs of Aging and Wear:
- Loose or dislodged bricks.
- Crumbling or deteriorating mortar joints.
- Visible erosion or deterioration of individual bricks.
- Leaning or tilting of the chimney.
By being aware of these common causes of brick chimney damage and recognizing the signs, homeowners can take proactive steps to address and repair any issues. Regular chimney maintenance, including inspections and repairs, can help extend the lifespan of the chimney and ensure its safe operation.
2. Assessing the Extent of the Brick Chimney’s Structural Issues
In order to effectively repair a brick chimney, it is crucial to assess the extent of the structural issues it may have. This step is essential to determine the best course of action for the repair process.
Evaluating the Exterior
Begin by carefully examining the exterior of the chimney. Look for any visible signs of damage such as cracks, loose or missing bricks, deteriorating mortar joints, or leaning sections. Take note of the areas that require attention and assess the severity of the issues.
Inspecting the Interior
Next, it is important to inspect the interior of the brick chimney. This can be done by accessing the chimney’s firebox or by using specialized tools like a chimney camera. Look for any signs of water leakage, discoloration, or spalling bricks. Pay close attention to the chimney liner and make sure it is intact and functioning properly.
Seeking Professional Help
If you are unsure about the extent of the structural issues or lack the knowledge and experience to assess them accurately, it is recommended to seek the assistance of a professional chimney inspector. They have the expertise to thoroughly evaluate the condition of your brick chimney and provide you with a detailed report on the necessary repairs and maintenance.
Documenting the Findings
Lastly, it is crucial to document the findings of the assessment. Take clear photographs of the damaged areas and make notes of any specific concerns. This documentation will not only serve as a reference during the repair process but also help in communicating the issues to professionals if needed.
By thoroughly assessing the extent of your brick chimney’s structural issues, you will be able to determine the right course of action for its repair. Whether it requires minor crack repairs or major rebuilding, understanding the severity of the damage is key to ensuring a successful repair that will prolong the longevity of your chimney.
3. Step-by-Step Guide to Repairing Minor Brick Chimney Cracks
When it comes to brick chimney repair, addressing minor cracks promptly can save you from more extensive damage down the line. Here is a step-by-step guide to help you effectively repair minor brick chimney cracks and ensure the structural integrity of your chimney.
1. Assess the Crack: Start by thoroughly examining the crack to determine its width and depth. Minor cracks are typically less than 1/8 inch wide and do not compromise the structural stability of the chimney. However, if the crack is wider or deeper, it may require additional attention and professional assistance.
2. Clean the Crack: Before proceeding with any repairs, it is crucial to clean the crack properly. Use a wire brush to remove any loose debris, dirt, or old mortar from the crack. Ensure that the area is clear of any loose particles to achieve a strong bond during the repair process.
3. Prepare the Mortar Mix: Next, prepare a mortar mix using a pre-mixed mortar or by mixing one part Portland cement, one part hydrated lime, and six parts sand. Adjust the consistency to ensure it is workable but not too runny. Consistency is key for effective crack repair.
4. Wet the Crack: Before applying the mortar mix, wet the crack with water. This helps the mortar adhere better and prevents it from drying too quickly, which can result in weaker bonds.
5. Apply the Mortar Mix: Using a pointing trowel or a small putty knife, carefully fill the crack with the mortar mix. Press it firmly into the crack, ensuring that there are no voids or air pockets. Smooth out the surface of the mortar to match the existing brickwork.
6. Finishing Touches: Once the mortar has set for about 15-30 minutes (but hasn’t fully cured), use a damp sponge to gently sponge off any excess mortar and create a consistent texture. This step ensures that the repaired area blends seamlessly with the surrounding bricks.
Remember, this step-by-step guide is intended for minor brick chimney cracks only. If you encounter larger or more severe cracks in your chimney, it is advisable to seek professional assistance to assess and repair the issues properly. Neglecting significant structural issues can lead to more extensive damage and potential safety hazards.
4. Tackling Major Brick Chimney Repairs: Rebuilding and Re-pointing
When dealing with major brick chimney damage, such as extensive cracking or deterioration, rebuilding and re-pointing are often necessary to restore the structure’s integrity. Rebuilding refers to removing and replacing damaged bricks, while re-pointing involves removing deteriorated mortar and replacing it with fresh mortar.
Rebuilding the Brick Chimney
Rebuilding a brick chimney requires a systematic approach to ensure a sturdy and long-lasting outcome. Begin by thoroughly assessing the extent of the damage and identifying which bricks need replacement. Using a masonry chisel and hammer, carefully remove the damaged bricks, making sure to protect the surrounding intact bricks.
Once the damaged bricks are removed, clean out any loose debris or mortar residue from the area. It is essential to use bricks that are similar in size, type, and appearance to the original ones. This will ensure a seamless blend with the existing structure. Apply a layer of mortar to the bottom of the hole and carefully place each replacement brick, applying mortar between each layer. Make sure to check for proper alignment and levelness throughout the process. Allow the new bricks to set and cure for at least 24 hours before further work.
Re-pointing the Brick Chimney
Re-pointing, also known as tuckpointing, is crucial for addressing mortar damage and maintaining the structural integrity of a brick chimney. Over time, the mortar can become eroded or cracked, leaving gaps that allow moisture to penetrate the chimney. Re-pointing involves removing the damaged mortar and replacing it with a fresh mixture.
To re-point a brick chimney, start by carefully removing the old mortar using a chisel or grinder. Be cautious not to damage the bricks themselves. Once the old mortar is removed, thoroughly clean out the joints to ensure proper adhesion of the new mortar. Mix a batch of mortar to match the color and consistency of the existing mortar. Apply the mortar into the joints using a pointing trowel, making sure to pack it tightly and smooth the surface.
It is essential to work in small sections to prevent the mortar from drying before it can be tooled. Use a jointing tool or a rounded piece of wood to achieve a concave finish, matching the appearance of the original mortar joints. Allow the new mortar to cure and dry for at least 24 hours before exposing it to any moisture.
By correctly rebuilding and re-pointing your brick chimney, you can overcome major structural issues and ensure the longevity of your chimney. However, it’s important to remember that these repairs can be challenging and time-consuming. If you lack the necessary skills or if the damage seems extensive, it may be wise to seek professional assistance from a brick chimney repair expert. They will have the expertise and specialized tools to tackle any major repairs efficiently and effectively.
5. Ensuring Proper Brick Chimney Maintenance and Prevention for Longevity
Regular maintenance and preventive measures are crucial in keeping your brick chimney in good condition and extending its lifespan. By implementing these practices, you can minimize the risk of encountering major issues and the need for extensive repairs. Here are some steps you can take to ensure proper maintenance and prevention for the longevity of your brick chimney.
1. Regularly Inspect Your Brick Chimney
Performing routine inspections of your brick chimney is essential to identify any signs of damage, cracks, or deterioration early on. Schedule visual inspections at least twice a year or after severe weather events. Look for loose or missing bricks, damaged mortar joints, leaning or unstable sections, and signs of water penetration. Promptly addressing these issues can prevent further damage and costly repairs.
2. Clean and Clear Debris
Regularly clean your brick chimney to remove debris and ensure proper air circulation. Accumulated leaves, branches, and other debris can obstruct the chimney and prevent smoke from properly venting. Use a chimney brush to remove any soot or creosote buildup from the inside of the chimney. It is also important to ensure that surrounding trees or vegetation do not pose a risk of falling branches or roots that could damage the chimney.
3. Maintain Good Flashing and Waterproofing
Inspect the flashing around your brick chimney regularly to ensure it is in good condition. Flashing is a metal strip that seals the joint between the chimney and the rest of the roof, preventing water from entering. If you notice any signs of loose or damaged flashing, repair or replace it promptly to prevent water leakage. Additionally, consider applying a waterproofing sealer to protect the bricks and mortar from moisture penetration. This can help prevent water damage and freeze-thaw cycles that lead to cracks and deterioration.
4. Monitor Moisture and Ventilation
Limiting moisture buildup and ensuring proper ventilation is vital for maintaining the structural integrity of your brick chimney. Monitor the area surrounding the chimney for signs of excessive moisture, such as mold or mildew growth. Ensure that there are no obstructions to the chimney’s airflow and that the chimney cap is properly installed to prevent rain, debris, and animals from entering.
By following these maintenance and prevention practices, you can significantly prolong the lifespan of your brick chimney and minimize the risk of costly repairs. Remember that if you encounter any significant issues or are uncomfortable performing maintenance tasks yourself, it is always advisable to seek professional assistance from a qualified brick chimney repair expert.
6. Exploring Professional Assistance: When to Hire a Brick Chimney Repair Expert
When it comes to repairing a brick chimney, there are instances where hiring a professional brick chimney repair expert becomes necessary. While minor cracks and maintenance can often be handled by homeowners with some basic knowledge and skills, there are specific situations that require the expertise and experience of a professional. Here are some scenarios where it is advisable to seek the assistance of a brick chimney repair expert.
1. Extensive damage
If your brick chimney exhibits extensive damage, such as large cracks, bulging, or crumbling bricks, it is recommended to consult a professional repair expert. Repairing major structural issues on a brick chimney can be complex and require specialized skills and tools. Professionals have the expertise to assess the extent of the damage and offer appropriate solutions to ensure the chimney’s stability and longevity.
2. Safety concerns
Safety should always be a top priority when it comes to brick chimney repair. If your chimney poses a safety risk due to loose bricks, a leaning structure, or missing mortar joints, it is crucial to involve a professional. They have the knowledge and experience to safely handle the repair process, including accessing hard-to-reach areas and using appropriate safety equipment. Ignoring safety issues can lead to further damage, accidents, or even serious injuries.
3. Lack of experience or confidence
If you lack experience in brick chimney repair or are not confident in your abilities, it is wise to seek professional assistance. Repairing a brick chimney requires precision and attention to detail to ensure proper structural integrity. Hiring an expert can give you peace of mind knowing that the repair work is being handled by someone with the necessary skills and knowledge.
4. Time constraints
Repairing a brick chimney can be a time-consuming task, especially for those with limited experience. If you need the repairs to be done in a timely manner, it is advisable to hire a professional. They can prioritize the repair work and efficiently complete the task, saving you valuable time and reducing the risk of potential issues or delays.
Regardless of the specific circumstances, hiring a brick chimney repair expert can save you time, effort, and ensure a high-quality, long-lasting repair. Be sure to carefully choose a reputable professional who has adequate experience and the necessary certifications to ensure the best results for your brick chimney.
7. Selecting the Right Materials and Tools for Effective Brick Chimney Repair
When it comes to repairing a brick chimney, selecting the right materials and tools is essential to ensure a successful and long-lasting repair. Using the wrong materials or tools can lead to further damage or even compromise the structural integrity of the chimney. Here are some key factors to consider when choosing materials and tools for your brick chimney repair project.
Materials:
Brick:
Selecting the right bricks is crucial for the repair of a brick chimney. It is important to choose bricks that are similar in composition, density, and color to the existing ones. This will help maintain the aesthetic appeal and structural integrity of the chimney. Consult a professional or local supplier to ensure you choose the appropriate bricks for your specific repair needs.
Mortar:
The type of mortar used in brick chimney repair is also crucial. It should match the existing mortar in terms of composition and strength. Using the wrong mortar can result in weak joints, which may lead to further damage. Make sure to consult the original building plans or seek professional advice to determine the appropriate mortar mix for your repair.
Waterproofing Sealant:
To protect your brick chimney from water damage, it is important to apply a waterproofing sealant. Look for a high-quality sealant specifically designed for brick and masonry surfaces. Apply the sealant in multiple coats, ensuring a thorough and even coverage. This will help prevent water penetration and prolong the lifespan of your chimney.
Tools:
Trowel:
A trowel is an essential tool for brick chimney repair. It is used for applying mortar, filling cracks, and smoothing the surface. Choose a trowel with a comfortable handle and a wide, flat blade for efficient and precise application.
Brick Hammer and Chisel:
When dealing with major repairs such as rebuilding or re-pointing, a brick hammer and chisel are necessary tools. The brick hammer is used to break and remove damaged bricks, while the chisel helps in removing old mortar. Look for durable tools with sturdy handles for maximum effectiveness.
Masonry Brush:
A masonry brush is useful for cleaning the surface of the bricks before repair and applying the waterproofing sealant. Opt for a brush with stiff bristles that can remove dirt, debris, and loose material effectively.
In conclusion, selecting the right materials and tools for brick chimney repair is essential to ensure a successful and durable outcome. Choose bricks, mortar, and sealants that match the existing components, and invest in quality tools that will enable you to carry out the necessary repairs effectively. Remember to consult professionals or local suppliers for expert advice to ensure long-term stability and aesthetic appeal of your brick chimney.
People Also Ask
How much does it cost to repair a brick chimney?
The cost of repairing a brick chimney can vary depending on the extent of the damage and the size of the chimney. On average, homeowners can expect to pay between $300 and $1,500 for chimney repairs, but more complex repairs can cost upwards of $5,000.
Can I repair a brick chimney myself?
While some minor chimney repairs can be done by homeowners with the right tools and experience, it is generally recommended to hire a professional for brick chimney repairs. A professional will have the necessary knowledge and expertise to properly assess and address any structural issues.
How long does it take to repair a brick chimney?
The duration of brick chimney repairs can vary depending on the extent of the damage and the complexity of the repair work required. Simple repairs such as repointing or replacing a few bricks may take a few hours, whereas more extensive repairs or rebuilding a chimney from scratch could take several days to complete.
What causes brick chimneys to deteriorate?
Brick chimneys can deteriorate due to a variety of factors, including weather exposure, water damage, poor construction, and lack of regular maintenance. Freeze-thaw cycles, in particular, can cause the bricks to crack and mortar to deteriorate over time, leading to structural issues and chimney damage.
Can a brick chimney be repaired without scaffolding?
In some cases, minor brick chimney repairs can be done without the need for scaffolding. However, for more extensive repairs or if the chimney is at a significant height, scaffolding is often necessary to ensure safe access and proper repair work. It is best to consult with a professional to determine the appropriate method of repair for your specific chimney.
Insights and Conclusions
In conclusion, repairing a brick chimney is a process that requires careful assessment and execution. The first step is to thoroughly inspect the chimney for any signs of damage, such as crumbling mortar or loose bricks. This assessment will help determine the extent of repairs needed and guide the next steps.
Once identified, the damaged areas should be cleaned, removing any debris or loose materials. Repointing the mortar joints with a suitable mixture is crucial, ensuring a strong and stable structure. Proper technique and materials must be used for this process to guarantee the durability and longevity of the repair.
It is essential to pay attention to weather conditions, as repairs should not be carried out in adverse weather. Moreover, maintaining the chimney after repair is crucial, including regular inspection and addressing any further issues promptly. By following these guidelines and seeking professional assistance when needed, homeowners can successfully repair their brick chimneys, ensuring their safety and functionality for years to come.

Roof Replacement Supervisor
Daniel Mitchell’s expertise lies in comprehensive roof replacements, utilizing top-quality materials to ensure durability and longevity. His meticulous approach and commitment to excellence make him a trusted professional.