A strong roof is the backbone of any home. It protects us from the elements, shields our loved ones from harm, and gives us peace of mind. But over time, even the sturdiest of roofs can develop problems, like that nagging leak or those unsightly damaged shingles. If your asphalt shingle roof has seen better days, fear not! With a little knowledge and some elbow grease, you can learn how to repair it yourself and save a hefty sum on professional roofers. In this guide, we will walk you through the steps to revive your roof, from identifying the damaged areas to choosing the right tools and materials for the job. So put on your DIY hat and get ready to tackle the challenge of restoring your asphalt shingle roof to its former glory!
Identifying and Evaluating Asphalt Shingle Roof Damage
Identifying and evaluating the damage on your asphalt shingle roof is the first crucial step in the repair process. By properly assessing the extent of the damage, you can plan and execute the necessary repairs effectively. Here’s a step-by-step guide to help you accurately identify and evaluate the damage on your asphalt shingle roof:
1. Visual Inspection: Start by conducting a thorough visual inspection of your roof. Look for missing, cracked, curled, or damaged shingles. Pay close attention to areas where the shingles overlap, as these are prone to leaks. Also, check for any signs of algae or moss growth, which can deteriorate the shingles over time.
2. Roof Leaks: Check your attic or ceiling for any signs of water leakage. Water stains, damp spots, or discoloration on the ceiling can indicate roof leaks. Follow the path of the water to pinpoint the location of the damage on your roof.
3. Flashing Damage: Examine the flashing around roof penetrations such as chimneys, vents, and skylights. Damaged or deteriorated flashing can cause leaks and compromise the integrity of your roof.
4. Granule Loss: Run your hands gently over the shingles to check for granule loss. Excessive granules in the gutters or downspouts can indicate shingle wear and require attention.
5. Roof Age: Consider the age of your roof when evaluating its condition. Most asphalt shingle roofs have a lifespan of about 20 to 30 years. If your roof is nearing the end of its lifespan, it may require more extensive repairs or even a full replacement.
By carefully assessing the damage on your asphalt shingle roof, you can determine the scope of the repairs needed. Whether it’s a small crack, missing shingles, or damaged flashing, understanding the extent of the damage will help you gather the necessary tools and materials for the repair process. Remember, if you’re unsure about the severity of the damage or feel uncomfortable performing the repairs yourself, it’s always best to consult a professional roofing contractor for guidance.
Gathering the Necessary Tools and Materials for Repair
When it comes to repairing an asphalt shingle roof, having the right tools and materials is essential. Without them, you’ll find yourself struggling to complete the repairs properly and efficiently. In this section, we will discuss the various tools and materials you will need to gather before you begin your asphalt shingle roof repair project.
1. Safety Gear: Before you start any repair work, it’s important to prioritize safety. Make sure to have appropriate safety gear such as work gloves, safety glasses, and sturdy footwear. These items will protect you from potential hazards while working at heights.
2. Roofing Tools: To repair asphalt shingles, you will need a few specific roofing tools. A utility knife with a fresh blade will come in handy for cutting and trimming shingles. A pry bar or a roofing shovel will be necessary for removing damaged shingles. Additionally, a hammer or a roofing nail gun will be needed for securing new shingles into place.
3. Roofing Materials: Apart from the tools, you will also need certain materials to carry out the repairs. Start by having a sufficient supply of replacement asphalt shingles that closely match your existing ones. It’s important to choose the correct size and color to maintain a uniform look on your roof. You will also need roofing nails, roofing cement, and caulk to secure and seal the shingles properly.
4. Ladder: Since asphalt roofs are usually pitched, you’ll need a sturdy ladder to gain access to your roof safely. Make sure you have a ladder that is tall enough to reach the roof and has a weight capacity that can support your weight and any tools or materials you may be carrying.
Remember, having the right tools and materials will make your asphalt shingle roof repair project go much smoother. By being prepared and having everything you need on hand, you can ensure a more efficient process and a successful repair job.
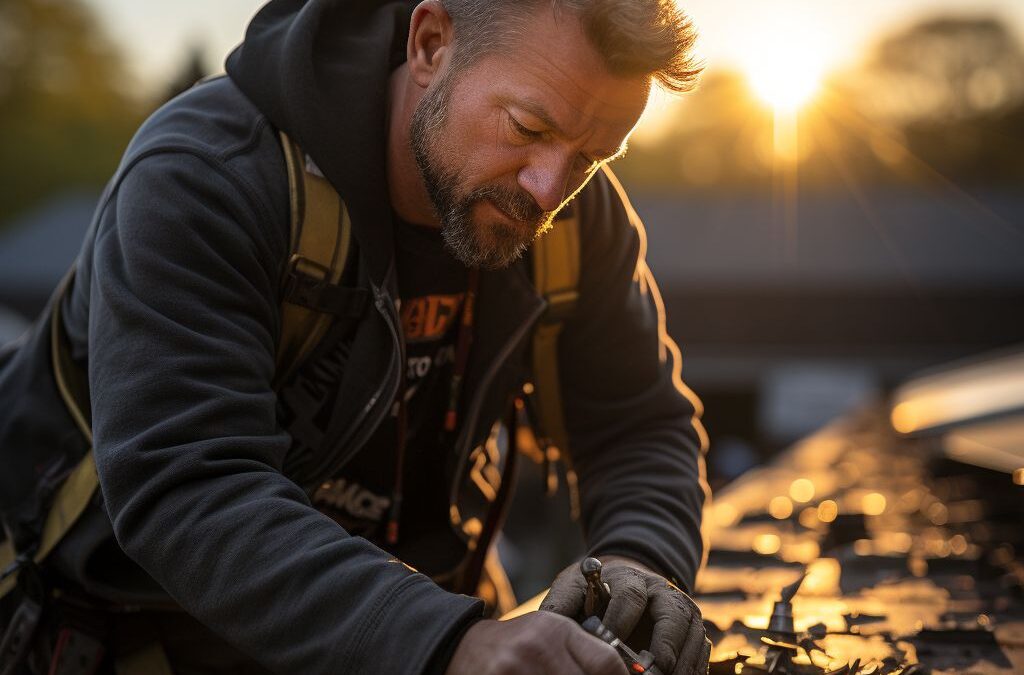
Removing and Replacing Damaged Asphalt Shingles
Asphalt shingles are a common roofing material due to their durability and affordability. However, over time they can become damaged by severe weather, age, or improper installation. When this happens, it is crucial to remove and replace the damaged shingles promptly to prevent further roof damage and leaks.
To begin the process of , gather the necessary tools and materials, including a hammer, pry bar, roofing nails, replacement shingles, and a utility knife. Once you have all the items, start by identifying the damaged shingles. Look for signs of curling, cracking, missing granules, or any noticeable holes or tears.
Next, carefully lift the tabs of the shingle above the damaged one using a pry bar. This will expose the nails securing the damaged shingle in place. Using the pry bar, gently lift the nails and remove them from the shingle. Take care not to damage the surrounding shingles during this process.
Once the nails are removed, slide the damaged shingle out from under the surrounding shingles. If the shingle is difficult to slide out, you may need to trim it using a utility knife to loosen it from the adhesive strip. Be cautious not to cut into any surrounding shingles or roofing materials.
With the damaged shingle removed, it is time to replace it with a new one. Place the new shingle in the same position as the old one and align it with the neighboring shingles. Ensure that it is properly seated by pressing down firmly to activate the adhesive strip on the underside of the shingle.
Take a roofing nail and secure the new shingle in place by driving it through the adhesive strip and into the roof deck. Repeat this process for any additional damaged shingles that need to be replaced.
Remember, it is essential to inspect the surrounding shingles for any signs of damage or wear while performing this repair. If you notice any other compromised shingles, it is wise to replace them at the same time to ensure the longevity and integrity of your roof.
Sealing Cracks and Small Leaks in the Roof
:
When it comes to maintaining the integrity of your asphalt shingle roof, it’s crucial to address any cracks or leaks promptly. Even small openings can lead to significant water damage and potentially compromise the entire structure of your roof. In this section, we will discuss how to effectively seal cracks and small leaks in your asphalt shingle roof to prevent further damage and extend its lifespan.
To begin with, you will need to gather the necessary tools and materials for this repair. These may include a caulking gun, high-quality roofing sealant, a putty knife, a wire brush, and safety equipment such as gloves and goggles. Ensure you have these items on hand before proceeding with the repairs.
Firstly, visually inspect the roof for any cracks or small leaks. Pay close attention to areas such as valleys, chimney flashing, and ridge caps, as these are commonly prone to leaks. Once you have identified the problem areas, remove any loose debris, dirt, or moss with a wire brush. This will provide a clean surface for the sealant to adhere to.
Next, apply a generous amount of roofing sealant directly into the crack or small leak using a caulking gun. Make sure to spread the sealant evenly and cover the entire affected area. Use a putty knife to smooth out the sealant, ensuring it forms a watertight seal. Remember to follow the manufacturer’s instructions for the specific sealant product you are using.
For larger cracks or leaks, it may be necessary to use roofing tape or fabric to reinforce the repair. Apply the sealant to the crack or leak, and then place the tape or fabric over it, pressing it firmly into place. Apply another layer of sealant over the tape or fabric to ensure a secure and waterproof seal.
Once the sealing process is complete, allow sufficient time for the sealant to dry and cure. This will typically vary depending on the weather conditions and the specific sealant product used. It’s important to monitor the repaired areas to ensure that no further leaks occur. If you notice any additional cracks or leaks, repeat the sealing process as necessary.
Remember, timely attention to cracks and small leaks in your asphalt shingle roof can save you from costly repairs down the line. By following these steps and implementing preventive measures, you can ensure the long-term health and durability of your roof. Regular roof inspections, prompt repairs, and proactive maintenance will help safeguard your home against potential water damage and keep your asphalt shingle roof in optimal condition for years to come.
Repairing and Reinforcing Roof Flashing
—
One essential aspect of repairing an asphalt shingle roof is addressing any issues with the roof flashing. Roof flashing refers to the strips of metal or other materials that are installed in vulnerable areas of the roof, such as around chimneys, vents, and skylights, to prevent water from seeping through and causing damage. Over time, flashing can become loose, damaged, or degraded, compromising its effectiveness and potentially leading to leaks and further roof damage.
To repair and reinforce roof flashing, start by inspecting the existing flashing for any signs of wear or damage. Look for loose or dislodged sections, rust, cracks, or gaps between the flashing and the roof surface. It’s important to address these issues promptly to prevent water from infiltrating the roof.
Once you have identified the areas of concern, gather the necessary tools and materials for the repair. This may include a hammer, roofing nails, roofing cement or sealant, a pry bar, and replacement flashing if needed. Make sure to choose appropriate materials that are compatible with your roof’s existing flashing and shingles.
To begin the repair process, carefully remove any loose or damaged flashing using a pry bar. Be gentle to avoid causing additional damage to the surrounding roofing materials. Once the damaged flashing is removed, clean the area thoroughly to ensure a proper bond between the new flashing and the roof surface.
Next, cut a piece of replacement flashing to the appropriate size, ensuring that it matches the shape and contours of the existing flashing. Apply roofing cement or sealant to the underside of the new flashing, then position it in place over the cleaned area. Use roofing nails or other appropriate fasteners to secure the flashing firmly in place. Be sure to follow the manufacturer’s instructions for the specific type of flashing and sealant being used.
Additionally, if you encounter any cracks or gaps in the existing flashing during the inspection, it is crucial to seal them to prevent further damage. Apply roofing cement or sealant into the cracks or gaps using a putty knife or caulking gun. Smooth out the sealant to ensure a watertight seal and a neat appearance.
Remember, proper maintenance and reinforcement of roof flashing is essential for preventing leaks and prolonging the lifespan of your asphalt shingle roof. By addressing any issues promptly and using quality materials and techniques, you can ensure the integrity of your roof’s flashing system and protect your home from water damage.
Implementing Preventive Measures for Long-Term Roof Health
To ensure the long-term health and durability of your asphalt shingle roof, it is essential to implement preventive measures. By taking proactive steps, you can minimize the risk of damage and prolong the lifespan of your roof. Here are some preventive measures you can implement:
Regular Inspections: Conducting regular inspections is crucial in detecting any potential issues before they escalate. Inspect your roof at least twice a year, preferably in the spring and fall, and after severe weather events. Look out for signs of wear and tear, missing or damaged shingles, cracks, leaks, and any other visible damage. If you notice any problems, address them promptly to prevent further deterioration.
Gutter Maintenance: Proper gutter maintenance is essential for the overall health of your roof. Clogged gutters can lead to water backup, which can cause damage to your shingles and roof structure. Regularly clean your gutters, removing leaves, debris, and any other obstructions. Additionally, ensure that your gutters are securely attached and free from leaks.
Trim Overhanging Branches: Overhanging branches can pose a significant risk to your roof, especially during storms or windy conditions. Trim any branches that are hanging over your roof to prevent them from snapping and causing damage. Falling branches can break or dislodge shingles, leading to leaks and other issues. By keeping trees well-maintained and trimmed, you can minimize the risk of roof damage.
Address Ventilation Issues: Proper roof ventilation is essential in regulating temperature and moisture levels, preventing the accumulation of heat and condensation. Improper ventilation can lead to moisture buildup, which can deteriorate your shingles and cause mold or mildew growth. Ensure that your attic is adequately ventilated, allowing for proper airflow and preventing heat and moisture from getting trapped.
Professional Roof Maintenance: While some maintenance tasks can be done by homeowners, it is highly recommended to hire professional roofers for comprehensive inspections and maintenance. Professional roofers have the necessary expertise and experience to identify and address potential issues or weaknesses to keep your roof in optimal condition.
By implementing these preventive measures, you can significantly enhance the long-term health and durability of your asphalt shingle roof. Take the time to perform regular inspections, maintain your gutters, trim overhanging branches, address ventilation issues, and enlist the help of professionals when needed. With a proactive approach to roof maintenance, you can enjoy a sturdy and reliable roof for years to come.
People Also Ask
What tools are needed to repair an asphalt shingle roof?
The tools needed to repair an asphalt shingle roof typically include a hammer, roofing nails, a pry bar, roofing cement, a utility knife, and replacement shingles.
Can I repair an asphalt shingle roof myself?
Yes, it is possible to repair an asphalt shingle roof yourself if the damage is minimal. However, it is recommended to consult a professional if the damage is significant or extensive to ensure proper repair and avoid the risk of further damage.
How long does it take to repair an asphalt shingle roof?
The time required to repair an asphalt shingle roof depends on the extent of the damage and the expertise of the person performing the repair. Minor repairs can typically be completed in a few hours, while larger repairs may take a full day or longer.
What are the steps to repair an asphalt shingle roof?
The general steps to repair an asphalt shingle roof involve removing the damaged shingles, replacing them with new ones, sealing any gaps or cracks with roofing cement, and ensuring proper alignment and secure attachment of the new shingles.
When should I repair an asphalt shingle roof versus replacing it?
Minor damage, such as a few missing or damaged shingles, can often be repaired. However, if the roof has extensive damage, significant leaks, or is reaching the end of its lifespan, it is generally more practical and cost-effective to consider a full roof replacement instead of multiple repairs.
Key Takeaways
In conclusion, repairing an asphalt shingle roof can be a manageable task that can save you time and money in the long run. By identifying the problem areas, preparing the materials and tools, and following the proper repair techniques, you can successfully fix minor damages on your asphalt shingle roof.
It is important to remember that if the damage is significant or beyond your expertise, it is always wise to consult a professional roofer for assistance. They have the necessary skills and experience to handle more complex repairs and ensure the safety and durability of your roof.
Regular maintenance and inspection of your roof can also help prevent future problems. By keeping an eye out for any signs of damage, addressing them promptly, and maintaining proper ventilation in your attic, you can extend the lifespan of your asphalt shingle roof.
Remember, taking care of your roof is an essential part of protecting your home investment. By being proactive in repair and maintenance, you can ensure the long-term stability and functionality of your asphalt shingle roof. So, give your roof the attention it deserves and keep it in top shape for years to come.

Climate Resilience Specialist
Christopher Clark’s extensive knowledge of Fresno’s unique climate challenges drives him to provide resilient roofing solutions. His commitment to community values and fair pricing makes him a trusted partner in roofing projects.