When it comes to maintaining your shed, one of the most critical areas to focus on is the roof. Over time, weathering and wear can cause damage, leading to leaks, weakened structures, and a diminished lifespan for your beloved outdoor storage space. But fear not! Repairing a shed roof doesn’t have to be a daunting task. With a little bit of know-how and some simple steps, you can restore your shed’s roof to its former durable and weather-resistant glory. In this article, we will delve into the essential techniques and tips to help you navigate the world of shed roof repair like a seasoned pro. So grab your tools and let’s get started on transforming your sagging, leaky roof into a robust and protective shield for your valued possessions.
Preparation and Evaluation of Damages
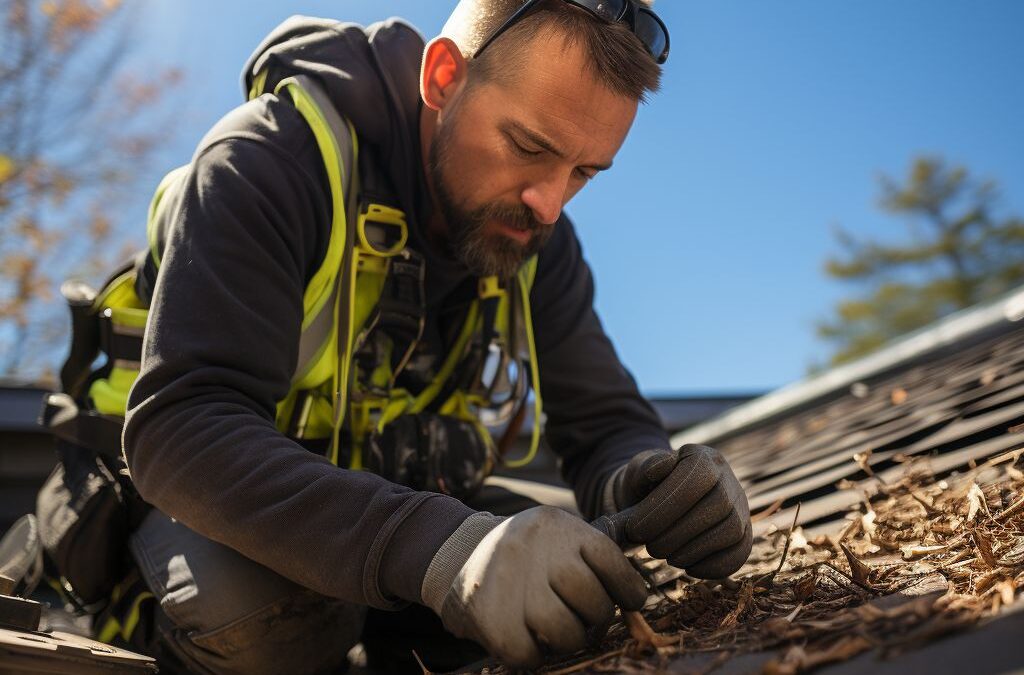
The first step in repairing a shed roof is to thoroughly prepare and evaluate the damages. This is crucial to ensure that the repairs are effective and long-lasting. Before you can determine the necessary repairs, it’s important to inspect the roof for any signs of damage or wear.
Start by visually inspecting the entire roof, looking for cracked or missing shingles, bent flashing, or any other signs of damage. Pay close attention to areas where the roof meets the walls, as these areas are prone to leaks and water damage. Additionally, inspect the underside of the roof for any signs of leaks or water stains.
Once you have identified the damages, assess the severity of each issue. Determine if the damaged shingles can be repaired or if they need to be replaced entirely. Consider factors such as the age and condition of the shingles, as well as the extent of the damage.
To ensure a thorough evaluation, it may be helpful to document the damages with photographs or notes. This will assist you in creating a comprehensive plan for the repairs and may also be useful for insurance purposes.
Remember, safety should always be a priority when inspecting a shed roof. Use caution when climbing ladders and walking on the roof, and be aware of potential hazards such as loose debris or unstable surfaces. If you are uncomfortable or unsure about performing the inspection yourself, it is recommended to consult a professional roofer for assistance.
By carefully preparing and evaluating the damages, you can effectively plan the necessary repairs and ensure the longevity of your shed roof.
Determining the Type of Shed Roof
When it comes to repairing a shed roof, one of the first steps is to determine the type of roof you are working with. This is essential because different types of roofs require different repair techniques and materials. By correctly identifying the type of shed roof, you can ensure that you are using the right tools and techniques to fix any damages effectively.
There are several common types of shed roofs, including gable, gambrel, saltbox, and flat roofs. Each type has its own distinct characteristics and may require specific repair methods.
For example, a gable roof is one of the most common types found on sheds. It has two roof slopes that meet at a peak in the center, forming a triangular shape. This type of roof is relatively easy to repair as it typically consists of shingles that can be easily removed and replaced.
On the other hand, a gambrel roof is characterized by its symmetrical double-sloped design, resembling the shape of a barn roof. Repairing a gambrel roof may be more complex because of its multiple angles and pitches. It often requires careful attention to detail and precision when removing and replacing damaged shingles.
A saltbox roof features an asymmetrical design with one side being significantly longer and with a steeper slope than the other. This type of roof requires careful evaluation of damages, as the varying angles can create unique challenges during the repair process.
Lastly, a flat roof is commonly found on sheds with a modern or minimalist design. These roofs are typically easier to repair compared to sloped roofs, as they often require straightforward patching or sealing to address leaks or damages.
By you have, you can better navigate the repair process with the right approach and techniques. This ensures that the repairs are done effectively, providing a longer-lasting and more durable solution for your shed.
Gathering the Necessary Tools and Materials
In order to successfully repair a shed roof, it is important to gather all the necessary tools and materials beforehand. This will ensure that you have everything you need on hand and can complete the job efficiently.
To begin, you will need a ladder that is tall enough to safely reach the roof of the shed. Make sure it is sturdy and secure before climbing up. Additionally, you will need a good pair of work gloves to protect your hands from any sharp edges or debris. Safety glasses are also recommended to protect your eyes from any flying particles.
Next, gather the appropriate roofing tools such as a pry bar or flat bar for removing damaged shingles, a hammer for nailing down new shingles, and a utility knife for cutting and trimming materials. A good-quality roofing nail gun can also save time and effort, but if you don’t have access to one, a regular hammer will do the job.
In terms of materials, you will need replacement shingles that match the existing ones on your shed roof. It is important to choose the same type and color to maintain consistency. Additionally, gather roofing cement or adhesive for securing the shingles, roofing nails for fastening them, and a waterproof sealant to ensure a leak-free roof.
Consider investing in a roofing felt or underlayment if your shed roof doesn’t have one. This will provide an extra layer of protection against water damage and improve the longevity of your repairs. Lastly, have a supply of caulk, flashing, and any other accessories that may be necessary based on the condition and requirements of your shed roof.
By gathering all the necessary tools and materials beforehand, you will be well-prepared to tackle the repair task at hand. This will save you time and prevent any delays or frustration during the process. Take inventory of what you currently have and make a list of anything you need to purchase or acquire to ensure a smooth and successful shed roof repair.
Removing and Replacing Damaged Shingles
When it comes to repairing a shed roof, one of the most common issues homeowners face is damaged shingles. Whether they are cracked, broken, or missing altogether, damaged shingles can compromise the integrity of your shed roof and expose it to further damage. Fortunately, is a relatively simple process that can be done with some basic tools and materials.
To begin, carefully assess the extent of the damage to your shed roof. Look for any shingles that are visibly cracked, broken, or missing. Additionally, inspect the surrounding shingles to ensure they are not damaged as well. This evaluation will help you determine the number of shingles you need to replace and assist in determining the appropriate replacement method.
Once you have identified the damaged shingles, gather the necessary tools and materials. You will need a ladder or scaffolding to safely reach your shed roof, a pry bar or shingle removal tool to remove the damaged shingles, a hammer or roofing nails to secure the new shingles, and replacement shingles that match the existing ones in size, color, and style. Make sure to wear appropriate safety gear, such as gloves and goggles, to protect yourself during the repair process.
To remove the damaged shingles, carefully insert the pry bar or shingle removal tool under the edge of the shingle above the damaged area. Gently lift the shingle and pry out the nails holding it in place. Once the nails are removed, slide the damaged shingle out from under the surrounding shingles. Take this opportunity to inspect the underlying roof for any signs of additional damage or leaks.
Next, position the new shingle in place of the removed one, ensuring that it aligns with the existing shingles. Secure the shingle in place by driving roofing nails through the designated nail holes along the top edge of the shingle. Use the hammer to carefully drive the nails into the roof, taking care not to damage neighboring shingles. Repeat this process for each damaged shingle until all replacements have been installed.
Finally, double-check that the newly installed shingles are securely attached and properly aligned with the surrounding shingles. This will help guarantee a watertight seal and prevent any potential leaks. Take a moment to inspect the entire roof for any other damage or areas that may need attention.
By following these steps, you can effectively remove and replace damaged shingles on your shed roof, ensuring its longevity and protecting your belongings from the elements. Remember, if you are unsure or uncomfortable with performing roof repairs yourself, it is always best to consult a professional in the field.
Repairing Leaks and Waterproofing the Shed Roof
When it comes to repairing leaks and waterproofing your shed roof, it is essential to address these issues promptly to prevent further damage and potential future leaks. Leaks can not only damage the interior of your shed but also compromise the structure itself. This section will guide you through the necessary steps to effectively repair leaks and ensure your shed remains watertight for years to come.
First, locate the source of the leak by thoroughly inspecting the roof for any visible damage, such as cracked or missing shingles, flashing issues, or gaps around vents and chimneys. Once identified, it’s crucial to address these issues promptly to prevent further water penetration.
To repair the damaged areas, start by removing any damaged shingles or flashing. Using a pry bar or a roofing shovel, carefully lift the shingles above the damaged section, exposing the underlying roof deck. Replace any damaged or missing shingles with new ones, making sure to align them properly to maintain a seamless appearance. Seal the edges of the shingles with roofing cement to prevent water infiltration.
Next, focus on waterproofing the shed roof to provide an extra layer of protection against moisture. One effective method is to apply a layer of roofing sealant or coating on the entire roof surface. This helps to create a waterproof barrier that prevents water from seeping through the roof material.
Before applying the sealant, clean the roof surface thoroughly by brushing away any debris or dirt. Then, using a paintbrush or a roller, evenly coat the entire roof surface with the sealant. Pay close attention to seams, edges, and any areas prone to water pooling or leakage. Allow the sealant to dry completely according to the manufacturer’s instructions.
To further reinforce the waterproofing, consider installing a roof membrane or underlayment beneath the shingles. Roof membranes are designed to prevent water infiltration and help protect the roof deck from potential damage. Install the membrane according to the manufacturer’s instructions, ensuring proper overlap and secure fastening.
Additionally, inspect and seal any potential entry points for water, such as vents, chimneys, or skylights. Use roofing cement or specialized waterproofing products to create a watertight seal around these areas.
By following these steps to repair leaks and waterproof your shed roof, you can ensure its longevity and protect your valuable items stored inside. Regularly inspecting and maintaining your shed roof will help identify any issues early on and prevent costly repairs in the future.
Applying Finishing Touches and Ensuring Longevity
Once the repairs to your shed roof are complete, it’s important to take the time to apply some finishing touches that will not only enhance its appearance but also ensure its longevity. By following these steps, you’ll be able to maintain the integrity of your shed roof and prevent future damage.
First and foremost, it’s crucial to thoroughly clean the entire roof surface. This will not only improve the overall aesthetics but also remove any dirt, debris, or algae that may have accumulated. Use a broom or leaf blower to remove loose debris, and then follow up with a gentle scrub using a mild detergent and water solution. Rinse thoroughly with a hose to remove any residue and allow the roof to dry completely before moving on to the next step.
Next, inspect the entire roof for any signs of wear or potential issues. Look for loose or damaged shingles, cracked flashing, or any other areas that may require attention. This is also a good time to check the gutters and downspouts for any clogs or damage that may affect the roof’s drainage system. Address any repairs promptly to prevent further damage or leaks.
To further protect your shed roof, consider applying a protective coating or sealant. There are several options available, including elastomeric roof coatings that provide an extra layer of waterproofing and UV protection. These coatings are easy to apply and can extend the lifespan of your roof by preventing water penetration and reducing heat absorption.
Additionally, take proactive measures to prevent future damage by trimming any overhanging tree branches that may scrape or damage the roof during storms or high winds. It’s also a good idea to regularly inspect the roof for any signs of water damage or leaks, and address them promptly to prevent further deterioration.
By following these steps and applying the necessary finishing touches, you can ensure the longevity of your shed roof and keep it in excellent condition for years to come. Remember to stay proactive with maintenance and address any repairs promptly to prevent small issues from turning into larger, costlier problems. With proper care, your shed roof will continue to protect your belongings and provide a durable shelter for years to come.
People Also Ask
1. Can I repair a shed roof without professional help?
Yes, it is possible to repair a shed roof yourself, especially if the damage is minor. However, if you lack experience or the damage is extensive, it is advisable to seek professional assistance.
2. What materials do I need to repair a shed roof?
To repair a shed roof, you may need materials such as roofing shingles, adhesive or sealant, nails or screws, a pry bar, hammer, roofing felt, and a ladder. The specific materials required may vary based on the type of roof and extent of the damage.
3. How do I identify the source of a leak in my shed roof?
To find the source of a leak in a shed roof, you can conduct a visual inspection from both inside and outside the shed. Look for any visible cracks, holes, missing shingles, or damaged flashing. You may also use a hose to simulate rain and observe where the water is entering the shed.
4. Can I patch a small hole in my shed roof?
Yes, small holes in shed roofs can usually be patched. Clean the area around the hole, apply roofing adhesive or sealant to cover the hole, and press down firmly to ensure it adheres well. For added protection, you may cover the patched spot with a piece of roofing felt.
5. Do I need to replace my entire shed roof if it is damaged?
The necessity of replacing the entire shed roof depends on the extent of the damage. If only a small section is affected, you may be able to repair or replace that section. However, if the damage is widespread, it may be more cost-effective and efficient to replace the entire roof.
Wrapping Up
In conclusion, repairing a shed roof can be a manageable task if approached with the right knowledge and tools. By following the steps outlined in this guide, such as assessing the damage, gathering necessary materials, removing damaged materials, and installing new ones, you can successfully repair your shed roof.
It is important to prioritize safety throughout the process by using proper safety equipment and working on dry and stable surfaces. Regular roof inspections and timely repairs can help prevent further damage and increase the lifespan of your shed roof.
If you feel unsure about carrying out the repairs yourself or if the damage is extensive, it’s recommended to seek professional assistance. They have the expertise and experience to handle more complex repairs and ensure a durable and long-lasting solution.
Remember, proper maintenance and care can significantly extend the life of your shed’s roof, allowing you to enjoy a functional and protected space for years to come.

Commercial Roofing Consultant
Matthew Carter’s forte lies in commercial roofing systems, particularly flat roofs and metal structures. His expertise and attention to detail guarantee reliable and tailored solutions for businesses in Fresno.