A leaky roof can quickly become a homeowner’s worst nightmare. And while there are many potential culprits when it comes to roof leaks, one problem area that often goes unnoticed is the roof valley. The roof valley is the section where two intersecting roof planes meet, creating a V-shaped channel. Over time, the constant exposure to rain, snow, and debris can cause the roof valley to deteriorate, leading to leaks and water damage inside your home. But fear not, for in this article, we will walk you through the step-by-step process of repairing a roof valley, ensuring that your home stays dry and protected. So grab your tools and let’s get started on restoring the integrity of your roof!
Identifying the Damage in Your Roof Valley
The roof valley is an important part of your roof system that channels water and debris away from the surface. As such, it is prone to damage over time due to weather conditions, aging, and improper installation. In order to effectively repair your roof valley, it is crucial to first identify the extent of the damage.
One of the most common signs of damage in a roof valley is water leakage. If you notice water stains or dripping in the area where two roof slopes meet, it is likely that your roof valley has been compromised. Additionally, you may observe missing or broken shingles, as well as debris buildup in the valley. These issues can obstruct the flow of water and lead to further damage if left untreated.
During your inspection, pay close attention to the condition of the flashing in the roof valley. Flashing is a thin, metal material that acts as a barrier against water penetration. If you notice any signs of rust, cracks, or gaps in the flashing, it may be contributing to the damage in your roof valley. Don’t forget to examine the surrounding areas for any signs of damage as well, as issues in adjacent sections can often spread to the roof valley.
By carefully examining the roof valley and its components, you can gain a better understanding of the extent of the damage and determine the appropriate course of action for repairs. Remember, it is always recommended to consult with a professional roofer if you are unsure about the severity of the damage or if you are not comfortable performing the repairs yourself.
Preparation and Safety Measures Before Repairing a Roof Valley
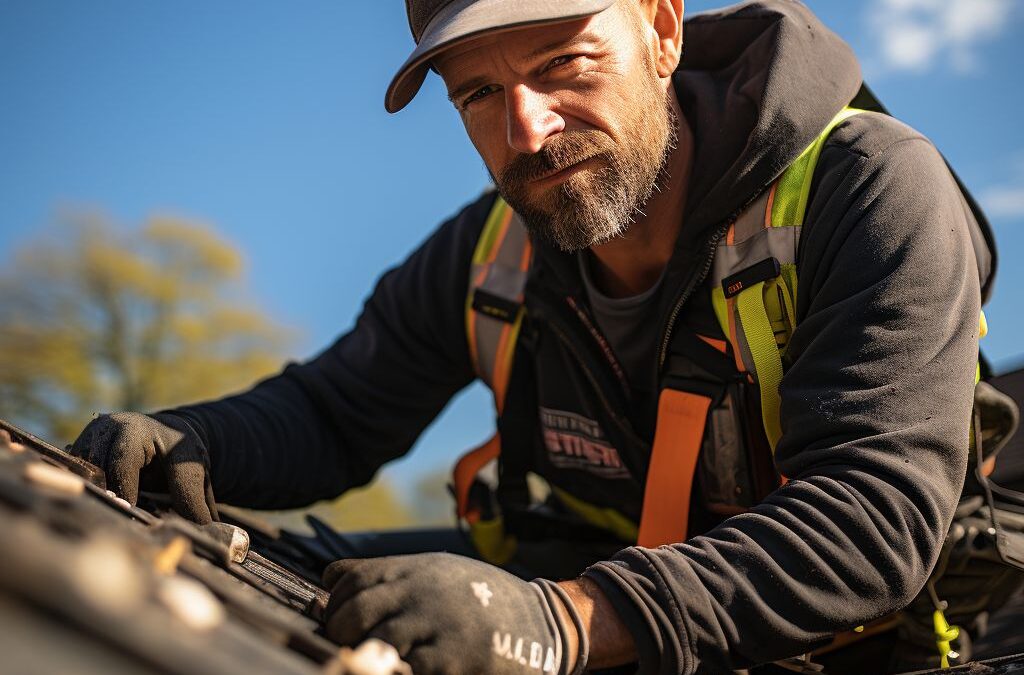
Before attempting to repair a roof valley, it is important to take proper precautions and follow safety measures to ensure the task is carried out safely and efficiently. The roof valley, where two slopes meet, is particularly vulnerable to damage and requires careful attention during the repair process.
To begin with, it is essential to assess the condition of the roof valley and identify any potential risks or hazards. This can be done by visually inspecting the area for signs of wear and tear, such as loose shingles, cracked tiles, or sagging sections. Additionally, it is crucial to check for any structural damage or leaks, as these issues may need to be addressed before proceeding with the repair.
Once the damage has been identified, it is important to gather the necessary tools and materials before starting the repair process. This includes items such as a ladder, safety harness, roofing nails, roofing cement, pry bar, and replacement shingles or tiles. It is essential to use the right materials specifically designed for roof repairs to ensure the longevity and effectiveness of the fix.
Safety should always be a top priority when working on a roof valley repair. It is strongly recommended to use a sturdy and stable ladder that is positioned on a flat and level surface. Additionally, wearing appropriate personal protective equipment, such as gloves, goggles, and non-slip footwear, is crucial to prevent any accidents or injuries. If the roof is steep or the repair work involves a higher slope, it is advisable to use a safety harness for added security.
Taking these necessary will not only mitigate potential risks but also ensure a more successful and efficient repair job. By carefully assessing the damage, gathering the right tools and materials, and following proper safety guidelines, homeowners can tackle this task with confidence and protect their roof from further damage.
Step-by-Step Guide to Repairing a Roof Valley
Repairing a roof valley can be a challenging task, but with the right tools and guidance, it can be done effectively. Here is a step-by-step guide to help you navigate the process and ensure a successful repair.
To begin, gather all the necessary tools and materials before starting the repair. You will need a ladder, safety harness, nail puller, hammer, roofing nails, adhesive, roofing cement, and new shingles or metal flashing, depending on the type of roof valley you have.
Start by removing the damaged shingles or metal flashing in the affected area. Use a nail puller to carefully lift the nails and remove the damaged material. Be cautious not to damage the surrounding roofing components while doing this.
Once the damaged material is removed, inspect the underlying structure for any signs of rot or decay. If any issues are found, it’s important to address and repair them before proceeding with the roof valley repair. This could involve replacing damaged roof decking or adding additional support.
Next, carefully clean the area to remove any debris, dirt, or loose material. This will ensure proper adhesion of the new roofing materials. Use a broom or brush to sweep away any loose particles and make sure the surface is clean and dry.
Now, it’s time to install the new roofing material. If you are using shingles, slide the new shingle into place, making sure it overlaps with the adjacent shingles. Secure it by nailing it down with roofing nails. Apply a small amount of roofing cement under the edges of the shingle to provide extra adhesion and protection against water infiltration.
If you are using metal flashing, position it in the valley, ensuring it extends a few inches beyond the damaged area. Secure it in place using roofing nails or adhesive, depending on the type of flashing used. Apply a layer of roofing cement over the edges of the flashing to seal it and prevent water leakage.
Finally, inspect the repaired area to ensure everything is securely in place and there are no visible gaps or loose materials. Take a step back and evaluate the repair from a distance to ensure it blends in well with the rest of the roof.
Remember, safety is of utmost importance throughout the entire roof valley repair process. Always use proper safety equipment such as a safety harness and work on a stable ladder. If you are not comfortable or confident in your abilities, it’s recommended to hire a professional roofing contractor to handle the repairs.
By following these step-by-step instructions, you can successfully repair a roof valley and safeguard your roof against further damage. Regular maintenance and inspections will also help prevent future issues with your roof valley and ensure its longevity.
Choosing the Right Materials for Roof Valley Repair
When it comes to repairing a roof valley, choosing the right materials is crucial. The materials you select can determine the longevity and effectiveness of your repair job. It’s important to use materials that are durable, weather-resistant, and compatible with your existing roofing system. In this section, we will explore the different options available for roof valley repair.
One popular material for roof valley repair is metal flashing. Metal flashing, such as aluminum or galvanized steel, is known for its durability and resistance to corrosion. It is often used in areas prone to heavy rainfall or snowfall, as it provides excellent protection against moisture. Metal flashing can be easily shaped to fit the contours of your roof valley, ensuring a tight and secure seal.
Another option for roof valley repair is synthetic roof underlayment. This material is made from high-quality synthetic fibers, making it resistant to tearing, moisture, and UV rays. Synthetic underlayment is lightweight and easy to install, providing an added layer of protection to your roof valley. It can also serve as a temporary measure while you wait for more extensive repairs.
In addition to metal flashing and synthetic underlayment, there are also adhesive-backed waterproofing membranes available for roof valley repair. These membranes are made from a combination of asphalt and synthetic polymers, providing excellent waterproofing properties. They are easy to install and offer a long-lasting solution for roof valley repair.
When , it is important to consider the specific needs of your roof and the severity of the damage. Consulting with a professional roofing contractor can help ensure that you select the appropriate materials for your repair job. Remember, using high-quality materials is essential for a successful and long-lasting roof valley repair.
Common Mistakes to Avoid When Repairing a Roof Valley
When it comes to repairing a roof valley, it’s important to be aware of the common mistakes that homeowners often make. These mistakes can lead to further damage and costly repairs down the line. By avoiding these errors, you can ensure that your roof valley is fixed properly and will continue to protect your home for years to come.
One common mistake that people make when repairing a roof valley is neglecting to properly identify the underlying cause of the damage. It’s important to thoroughly inspect the valley area and determine whether the issue is due to a damaged flashing, a missing shingle, or another underlying problem. By addressing the root cause of the damage, you can prevent it from reoccurring and save yourself from future repair expenses.
Another mistake to avoid is using subpar materials for the repair. Choosing cheap or low-quality materials may seem like a cost-effective solution, but it can actually lead to more problems in the long run. Investing in high-quality roofing materials ensures durability and longevity, saving you money on future repairs. Additionally, using mismatched or incompatible materials can compromise the integrity of your roof valley, leading to leaks and other issues.
Additionally, rushing the repair process is a mistake that should be avoided. Taking the time to properly prepare the area and follow a step-by-step guide will ensure a successful repair. Skipping important steps, such as cleaning out debris or properly sealing the repaired area, can result in inadequate repairs and further damage. Paying attention to detail and following proper repair techniques are crucial in avoiding costly mistakes.
In conclusion, when it comes to repairing a roof valley, it’s important to avoid common mistakes that can lead to further damage and costly repairs. By properly identifying the cause of the damage, using high-quality materials, and following a step-by-step guide, you can ensure a successful and long-lasting repair. Taking the time to do the job right the first time will save you time, money, and headaches in the future.
Maintenance Tips to Prevent Future Roof Valley Issues
To ensure the longevity of your roof valley and prevent any future issues, regular maintenance is essential. By following these simple tips, you can keep your roof valley in optimal condition and avoid costly repairs:
1. Clear Debris Regularly: One of the main culprits for roof valley damage is accumulated debris. Leaves, branches, and other debris can block the flow of water, causing it to overflow and seep into the underlying layers of your roof. This can lead to leaks and water damage. Regularly clearing debris from your roof valley is crucial to prevent these issues.
2. Check for Damaged Shingles: Over time, shingles can become cracked, damaged, or loose. These damaged shingles can allow water to penetrate into the roof valley, leading to leaks and water damage. Inspect your roof valley regularly, and if you notice any damaged shingles, replace them promptly to maintain the integrity of your roof valley.
3. Ensure Proper Ventilation: Improper ventilation can trap moisture in your roof valley, leading to the growth of mold and mildew. This not only damages your roof valley but also poses health risks. Ensure that your attic is properly ventilated to allow for proper airflow and prevent the accumulation of moisture.
4. Trim Overhanging Branches: Tree branches that hang over your roof can scrape against the roof valley during strong winds, causing damage over time. Regularly trim overhanging branches to prevent them from coming into contact with your roof valley and causing unnecessary wear and tear.
5. Schedule Regular Inspections: Even if you don’t notice any visible issues, it is still important to schedule regular professional inspections for your roof valley. Roofing experts can identify potential problems early on and take necessary preventive measures to extend the lifespan of your roof valley.
By following these maintenance tips, you can protect your roof valley and avoid expensive repairs in the future. Remember, prevention is key when it comes to maintaining the overall health and durability of your roof valley.
People Also Ask
1. How do you know if a roof valley needs repair?
You may need to repair a roof valley if you notice water leaks, missing shingles, or dampness around the area. Additionally, if there are visible cracks or damage to the valley, it is likely in need of repair.
2. Can I repair a roof valley myself?
While it is possible to repair a roof valley yourself, it is recommended to hire a professional for this task. Roof valleys can be complex to repair, and it is essential to have the proper knowledge and skills to ensure the repair is done correctly.
3. What materials are required to repair a roof valley?
The materials needed to repair a roof valley typically include roofing cement, metal flashing, roof shingles, nails, and roofing sealant. Depending on the extent of the damage, additional materials such as underlayment or plywood may be necessary.
4. How much does it cost to repair a roof valley?
The cost of repairing a roof valley can vary depending on several factors, including the extent of the damage, the type of roofing material, and the location. On average, homeowners can expect to pay between $300 and $1,000 for roof valley repairs.
5. How long does it take to repair a roof valley?
The time required to repair a roof valley will depend on the complexity of the repair and the size of the affected area. Generally, a roof valley repair can take anywhere from a few hours to a full day, but it may take longer if there are underlying issues or extensive damage.
Key Takeaways
In conclusion, repairing a roof valley can be a challenging task, but with the right knowledge and tools, it is possible to successfully undertake the project.
Remember to assess the extent of the damage and determine whether a repair or replacement is necessary. Patching up minor leaks with roofing cement is a temporary solution, while replacing the valley flashing or shingles may be required for more significant issues.
It is important to prioritize safety, so be sure to use the necessary safety equipment and follow proper procedures when working at heights. Additionally, consider seeking professional help if you are unsure or uncomfortable with the repair process.
By following these steps and taking necessary precautions, you can successfully repair your roof valley and ensure the longevity and durability of your home’s roof. Don’t hesitate to seek advice from experts or professionals when needed. Good luck with your roof repair!

Roof Replacement Supervisor
Daniel Mitchell’s expertise lies in comprehensive roof replacements, utilizing top-quality materials to ensure durability and longevity. His meticulous approach and commitment to excellence make him a trusted professional.