Has a relentless drip from above your head turned your peaceful sanctuary into a chaotic mess? If the answer is yes, then it’s time to grab your DIY tools and fix that leaky roof on a travel trailer?”>leaky roof before it turns into a full-blown disaster. But don’t fret if you’re not a seasoned handyman – with the power of knowledge and a step-by-step video guide, you can become your own roofing hero. In this article, we’ll equip you with the essential tips, expert advice, and an enlightening video demonstration to take on this common household issue like a pro. So, fasten your seatbelts (or should we say, roof straps) as we embark on this educational journey, ensuring you finally bid farewell to that bothersome leak.
Identifying the Source of the Leak: Tips and Techniques
When it comes to repairing a leaky roof, the first and most crucial step is identifying the source of the leak. This can be a daunting task, as the actual point where the water is entering your home may not always correspond to the visible signs of water damage on the interior. However, with the right tips and techniques, you can successfully pinpoint the source of the leak and proceed with the necessary repairs.
One effective technique for identifying the source of a leaky roof is conducting a thorough visual inspection. Start by examining the interior of your home for any signs of water damage, such as damp spots, discoloration, or peeling paint on the ceiling or walls. It’s important to note that the water may travel along the roof decking need to be replaced?”>roof decking or other interior structures before dripping down, so be sure to follow the path of any visible water stains to determine the potential entry point on the roof.
Next, it’s time to take a closer look at the exterior of your roof. Grab a ladder and carefully climb up to get a better view. Look for damaged or missing shingles, cracked flashing, or clogged gutters and downspouts. Pay attention to any areas where the roof meets other structures, such as chimneys, vents, or skylights, as these are common trouble spots for leaks. Remember to take safety precautions while inspecting the roof, such as wearing appropriate footwear and using a secure ladder.
In addition to visual inspection, it may be necessary to use water testing techniques to determine the exact source of the leak. With the help of a friend or family member, use a hose to saturate different sections of the roof while the other person stays indoors to monitor for any signs of water penetration. Start at the lowest point of the roof and gradually work your way up, paying close attention to where the water enters the interior of the house. This method can be time-consuming but is often effective in identifying even the most elusive leaks.
By combining visual inspection with water testing techniques, you can increase your chances of successfully identifying the source of a leaky roof. Remember, each roof is unique, so it’s important to approach the task with patience and a methodical mindset. Once you have determined the entry point, you can move on to the next step in the repair process, armed with the knowledge of what needs to be fixed or replaced.
Understanding the Common Causes of Roof Leaks
Roof leaks can occur for a variety of reasons, and identifying the common causes is crucial for effectively repairing and preventing them. By understanding what leads to roof leaks?”>roof leaks, homeowners can take proactive measures to protect their roofs and avoid potential damage to their homes. Here are some of the most common causes of roof leaks:
1. Damaged or Missing Shingles: One of the primary culprits behind a leaky roof is damaged or missing shingles. Over time, shingles can be damaged by severe weather conditions, such as high winds, hailstorms, or heavy rain. Additionally, shingles can deteriorate due to age and general wear and tear. When shingles are compromised, they can allow water to seep through and infiltrate the underlying layers of the roof, leading to leaks.
2. Improperly Installed Flashing: Flashing is a thin strip of metal or other water-resistant material that is installed around roof openings, such as chimneys, vents, or skylights, to prevent water from infiltrating these vulnerable areas. However, if flashing is improperly installed or becomes damaged, it can create a pathway for water to enter the roof. Common issues with flashing include corrosion, loosening, or inadequate sealant, all of which can lead to leaks.
3. Clogged Gutters and Downspouts: Gutters and downspouts play a vital role in diverting water away from the roof and the foundation of a home. When gutters and downspouts become clogged with debris, such as leaves, branches, or dirt, they can obstruct the flow of water, causing it to back up and overflow onto the roof. This stagnant water can then seep into the layers of the roof through gaps or weak points, resulting in leaks.
4. Roof Valley Damage: The roof valley?”>roof valley?”>roof valley, where two sloping sections of a roof meet, is especially prone to leaks. Roof valleys are high-risk areas as they collect a significant amount of rainwater and direct it towards the gutters. If the roof valley has deteriorated, has loose or missing shingles, or has been improperly sealed, water can penetrate the roof and cause leaks.
5. Condensation and Moisture Build-Up: Inadequate ventilation in the attic can lead to condensation and moisture build-up, which can gradually weaken the roof structure and cause leaks. When warm, moist air from the interior of a home rises to the attic and comes into contact with a colder roof surface, it can create condensation. Over time, this moisture can compromise the integrity of the roof and result in leaks.
It is important to note that these are just a few of the common causes of roof leaks, and each case may have its unique set of circumstances. It is advisable to consult a professional roofing contractor for a thorough assessment and proper diagnosis of the specific cause of the leak. Proper identification of the underlying issue will ensure that the necessary repairs are carried out effectively, preventing further damage and extending the lifespan of the roof.
Essential Tools and Materials for Repairing a Leaky Roof
When it comes to repairing a leaky roof, having the right tools and materials is crucial. Whether you’re a seasoned DIY enthusiast or tackling this project for the first time, having the necessary supplies will make the process smoother and more efficient. Here are some essential tools and materials you’ll need to fix that pesky leak in your roof.
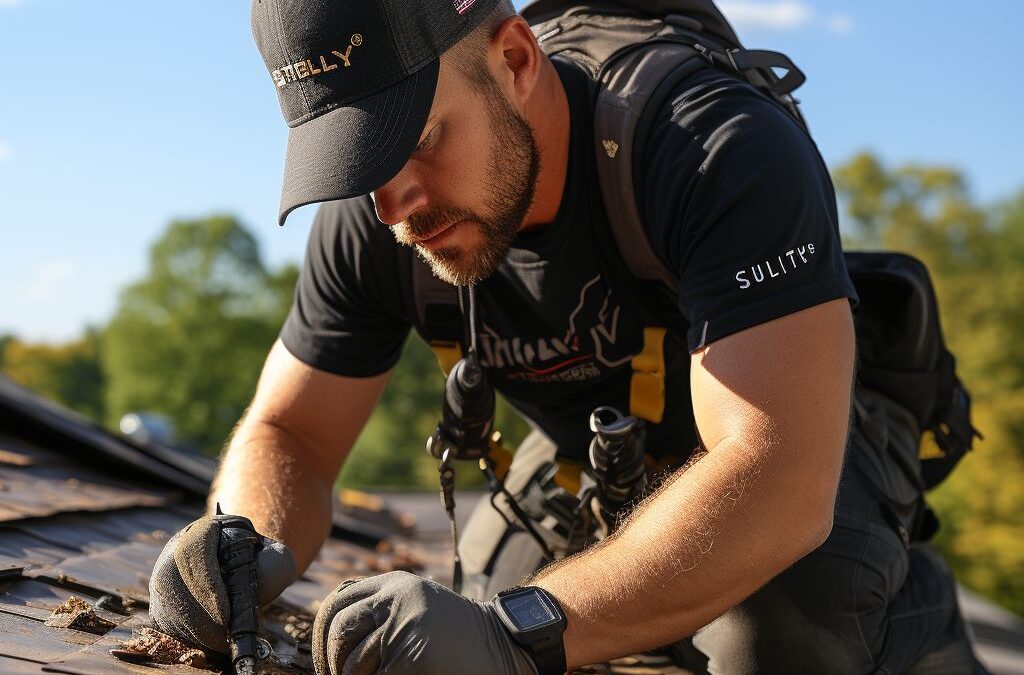
First and foremost, safety should be your top priority. Before starting any roof repair project, make sure you have a sturdy ladder and proper safety equipment, such as a harness and hard hat. Additionally, have someone available to spot you while you work on the roof to ensure stability and prevent accidents.
Now, let’s talk about the tools you’ll need. A trusty hammer with a claw will come in handy for removing damaged shingles and nails. A utility knife or roofing knife will be essential for cutting new shingles to size or removing old ones. It’s also a good idea to have a pry bar or a roofing shovel to carefully lift and remove any damaged materials.
When it comes to materials, you’ll need roofing cement or roofing tar to seal any gaps or cracks in the roof. This will help prevent water from penetrating through the repaired area. Roofing nails or screws will be necessary for securing new shingles or replacing loose ones. It’s important to choose the right type and length of nails or screws for your specific roof type.
In addition to these tools and materials, having a roll of roofing felt?”>roofing felt?”>roofing felt, a tube of caulk, and a sturdy ladder stabilizer will make your repair job much more effective. Roofing felt acts as an extra layer of protection between the shingles and the roof deck, while caulk can be used to seal smaller cracks or gaps that may be causing the leak.
Remember, every roof repair project is unique, and the tools and materials you’ll need can vary depending on the extent of the damage and the type of roof you have. It’s always a good idea to consult with a professional or do thorough research before starting your repair.
Now that you’re equipped with the knowledge of the , you’ll be well-prepared to tackle this project confidently. Stay safe, take your time, and ensure you have everything you need before getting started. Happy roofing!
Step-by-Step Guide to Fixing a Leaky Roof: Expert Tips
Fixing a leaky roof can be a daunting task, but with the right guidance and tools, you can successfully repair it yourself. Here’s a step-by-step guide to help you fix a leaky roof like a pro.
1. Safety First: Before you start any roof repair, it’s crucial to prioritize your safety. Make sure to wear proper safety gear such as gloves, goggles, and a hard hat. Additionally, use a sturdy ladder and have someone assist you if possible.
2. Locate the Leak: Start by identifying the source of the leak from the inside of your home. Look for water stains on the ceiling or walls, and trace the path to find the exact spot where the leak is coming from. This will help you determine the area that needs repair.
3. Gather Your Tools: To fix a leaky roof, you’ll need a few essential tools and materials. These include a ladder, roofing cement, roofing nails, a pry bar, a trowel, roofing adhesive, a hammer, and replacement shingles. Ensure you have all of these items ready before you begin.
4. Prepare the Area: Once you’ve identified the leak, remove any debris or loose shingles around the damaged area. Use a pry bar to carefully lift the damaged shingle or tiles, making sure not to damage the surrounding ones.
5. Apply Roofing Cement: Apply a generous amount of roofing cement underneath the lifted shingle or tile and press it down firmly. Use a trowel to smooth out the cement and ensure it adheres properly.
6. Secure with Nails: To secure the repaired shingle in place, gently hammer roofing nails?”>roofing nails?”>roofing nails along the edges. Be careful not to hit too hard as this might damage the shingle or tile further. Make sure the nails are adequately spaced and driven securely into the roof.
7. Check for Proper Sealing: Once you’ve completed the repairs, inspect the area to ensure that no gaps or cracks are visible. Apply roofing cement or adhesive as needed to seal any remaining openings.
Remember, this step-by-step guide provides a general overview of how to fix a leaky roof, but it’s always recommended to consult a professional if you’re unsure or dealing with extensive damage. With proper care and maintenance, you can prevent future roof leaks and ensure the longevity of your home’s roof.
Preventing Future Roof Leaks: Maintenance and Best Practices
To ensure your roof remains leak-free and in optimal condition, regular maintenance and adopting best practices are essential. By implementing these preventive measures, you can save yourself from future headaches and costly repairs.
Regular inspections are vital in identifying potential issues before they become significant problems. It is advisable to inspect your roof at least twice a year, ideally during spring and fall. During these inspections, pay close attention to areas prone to leaks such as flashing, vents, and chimney stacks. Look for any signs of damage, including cracked or missing shingles, deteriorated sealant, or loose nails. By catching these issues early, you can act promptly to prevent further damage.
In addition to inspections, routine cleaning is crucial to preventing roof leaks. Accumulated debris such as leaves, twigs, and dirt can trap moisture and promote the growth of mold and moss, which can damage your roof over time. Regularly clearing your roof of debris will not only prevent leaks but also extend its lifespan.
Proper gutter maintenance is another essential aspect of preventing future roof leaks. A clogged or malfunctioning gutter system can cause water to overflow and seep into the roof, leading to leaks. Ensure that your gutters are clean and free from debris, and that they are properly aligned and securely attached to your roof. Regularly inspect and repair any damages or leaks in your gutter system to prevent water from infiltrating your roof.
To further safeguard your roof from leaks, it is important to address any small issues promptly. Even minor problems like cracked or missing shingles should not be ignored, as they can quickly escalate into significant leaks during heavy rain or snow. By replacing damaged shingles or repairing small cracks in sealant immediately, you can prevent water from infiltrating your roof and causing more extensive damage.
Lastly, invest in professional roof maintenance services. Hiring a qualified roofer to inspect and maintain your roof on a regular basis can provide you with invaluable peace of mind and ensure any potential issues are promptly addressed. Professional roofers have the necessary expertise, tools, and knowledge to identify and fix problems before they escalate, saving you time, money, and stress in the long run.
By incorporating these maintenance and best practices into your routine, you can effectively prevent future roof leaks and prolong the life of your roof. Remember, regular inspections, routine cleaning, proper gutter maintenance, addressing small issues promptly, and seeking professional help when needed are the key steps to enjoy a leak-free and durable roof for years to come.
People Also Ask
1. How do I locate a leak in my roof?
To locate a leak in your roof, start by inspecting the attic for any signs of water damage or stains. You can also use a hose to simulate rainfall and check for any leaking areas. Infrared cameras or moisture detectors can be helpful in pinpointing the exact location.
2. What tools do I need to repair a leaky roof?
Some essential tools for repairing a leaky roof include a ladder, safety harness, roofing cement, roofing nails, a hammer, a pry bar, a putty knife, roofing tape, and a caulking gun. It is important to prioritize safety and wear appropriate protective gear while working on the roof.
3. Can a leaky roof be repaired without professional help?
In some cases, minor leaks in the roof can be repaired without professional help. However, it is crucial to assess the scope and complexity of the repair needed. If you lack experience or if the leak is extensive, it is advisable to seek professional assistance to ensure the job is done safely and effectively.
4. How much does it cost to repair a leaky roof?
The cost of repairing a leaky roof can vary depending on various factors such as the extent of the damage, type of roofing material, and location. On average, homeowners can expect to spend between $300 and $1,100 for minor roof repairs. However, larger repairs or complete roof replacements can cost significantly more.
5. How long does it take to repair a leaky roof?
The time it takes to repair a leaky roof depends on several factors, including the severity of the damage and the size of the repair area. Minor repairs can often be completed in a few hours, while more extensive repairs may take several days. It is advisable to plan accordingly and allow extra time for unforeseen complications.
Insights and Conclusions
In conclusion, learning how to repair a leaky roof through a video tutorial can be an effective way to address this common household issue. The step-by-step instructions provided in the video can guide homeowners in identifying and fixing the leak, saving them both time and money. It is important to remember, however, that tackling a roof repair requires caution and proper safety measures.
By following the techniques and tips highlighted in the video, homeowners can gain the confidence to address minor roof leaks on their own. However, for more significant roofing problems or situations where safety is a concern, it is advisable to seek professional assistance. Remember, regular maintenance and prompt repairs are key to extending the lifespan of your roof and protecting your home from potential water damage.
If you find this topic helpful and want to gain a better understanding of how to repair a leaky roof, consider watching some reputable video tutorials available online. By familiarizing yourself with the process, you can be better prepared to take immediate action when needed, ensuring the longevity and integrity of your roof. Stay informed and proactive in maintaining the health of your home.

Emergency Services Manager
Andrew Foster, a seasoned roofing professional, specializes in storm damage repairs and emergency services. His swift response and effective solutions help clients safeguard their properties during challenging times.