If you’re looking to replace or update your roof, you may have come across the growing popularity of tin roofing. With its durability, affordability, and classic aesthetic appeal, tin roofing is becoming a sought-after option for many homeowners. However, the installation process can seem daunting, especially for those new to the world of roof repairs. In this comprehensive guide, we will walk you through the step-by-step process of installing tin roofing, including essential materials, techniques, and expert tips to ensure a successful and long-lasting installation. So, whether you’re a seasoned DIY enthusiast or a homeowner looking to save money by tackling the project yourself, read on to discover all you need to know about installing tin roofing.
Materials needed for installing tin roofing
are essential to ensure a successful installation process. These materials will not only make your job easier but also help to achieve a long-lasting and durable tin roof. Here are the key materials you will need:
1. Tin roofing sheets: The most important material for installing tin roofing is, of course, the tin roofing sheets themselves. These sheets are usually made of galvanized steel, which provides excellent weather resistance and protection against rusting. Ensure that you purchase enough sheets to cover the entire roof area, accounting for any overlaps and wastage.
2. Roofing nails: To secure the tin roofing sheets to the roof, you will need roofing nails specifically designed for this purpose. These nails should be long enough to penetrate through the tin sheets and into the roof structure, providing a secure hold. Using the right size and type of nails is crucial for preventing leaks and maintaining the structural integrity of the tin roof.
3. Underlayment: Before installing the tin roofing sheets, it is recommended to lay down an underlayment to provide additional waterproofing and insulation. A popular choice for underlayment is roofing felt or synthetic underlayment. This layer acts as a barrier against moisture and helps to protect the roof from potential damage.
4. Flashing: Flashing is used to seal the edges, corners, and joints of the tin roofing to prevent water from seeping through. It is typically made of metal or weatherproof material. Flashing is essential for maintaining the waterproof integrity of the tin roof and ensuring its longevity.
5. Ridge caps and trim: For a finished and polished look, you will also need ridge caps and trim pieces that match the tin roofing sheets. These components are installed along the ridges, edges, and corners of the roof to provide a clean and professional appearance while also enhancing the roof’s weather resistance.
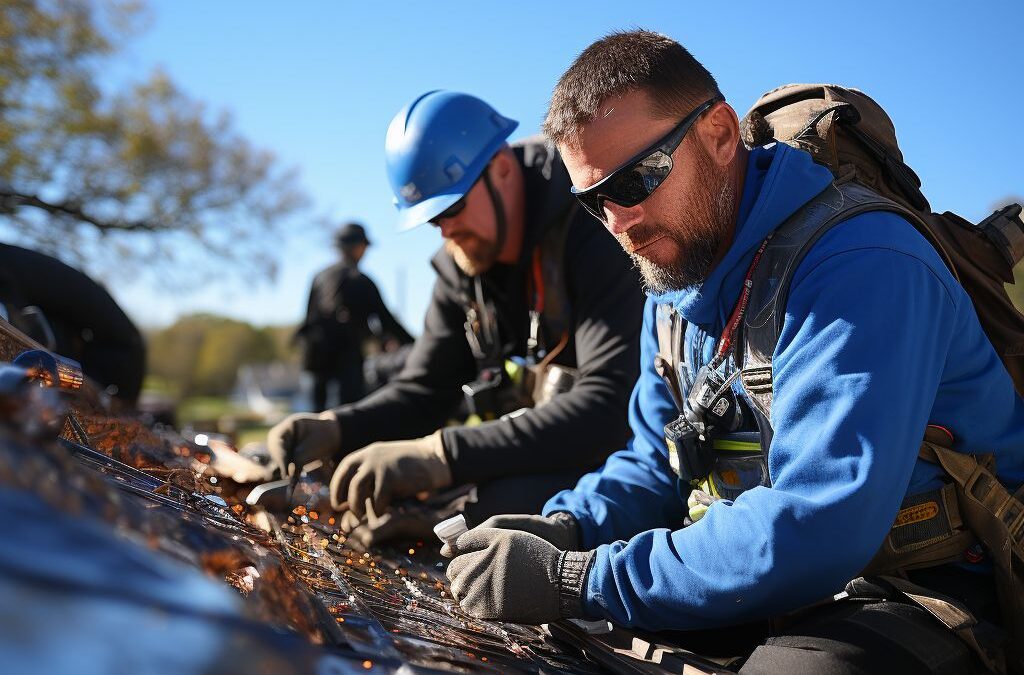
6. Safety equipment: Lastly, don’t forget about safety equipment! Installing tin roofing can be a demanding task, so it is crucial to prioritize safety. Make sure you have gloves, safety glasses, a sturdy ladder, and appropriate footwear. Additionally, consider using a harness system if working on a steep roof to prevent accidents and injuries.
Before starting the installation process, ensure that you have all the necessary materials readily available. This will save you time and allow for a smooth and efficient installation of your new tin roof. Remember, using quality materials and following proper installation techniques are key to achieving a durable and visually appealing tin roof that withstands the test of time.
Preparing the roof for tin installation
involves several important steps to ensure a smooth and successful installation process. Before you begin, ensure that you have all the necessary materials and tools on hand. This may include safety equipment such as gloves, goggles, and a ladder, as well as the tin roofing sheets, nails, screws, and a tape measure.
To start, clear the entire roof surface of any debris, including leaves, dirt, and old roofing materials. This will provide a clean and solid base for the tin roofing installation. Inspect the roof for any damaged or rotten areas, and repair or replace them as needed.
Next, measure the dimensions of the roof to determine how much tin roofing material you will need. Take precise measurements of the length, width, and slope of the roof. This will help you calculate the number of tin sheets required and minimize waste.
Once you have your measurements, it’s time to cut the tin roofing to size. Take proper safety precautions when handling the metal sheets, as they can be sharp. Use a tape measure to mark the desired dimensions on the tin, and then use tin snips or a power shearer to cut the sheets accordingly.
Before installing the tin roofing, it’s important to make sure that the roof is properly ventilated. Poor ventilation can lead to excessive moisture buildup, which can cause damage to both the tin roofing and the underlying structure. Install vents or ridge caps as necessary to ensure proper airflow.
Lastly, inspect the roof for any protruding nails, screws, or other obstructions that could interfere with the tin installation process. Remove or secure any loose nails or screws, and smooth out any uneven areas on the roof surface.
By taking the time to properly prepare the roof for tin installation, you will ensure a more efficient and long-lasting roofing system. With a clean and level surface, accurate measurements, and adequate ventilation, you can proceed with confidence to the next step of your tin roofing project.
Proper measurement and cutting techniques for tin roofing
Proper measurement and cutting techniques are crucial for a successful tin roofing installation. By accurately measuring your roofing area and using precise cutting techniques, you can ensure a proper fit and maximize the durability of your new tin roof.
When it comes to measuring, it’s important to take accurate measurements of your roof’s dimensions. Start by measuring the length and width of each section of your roof. Take into account any protrusions or angles, as these can affect the overall measurements. It’s always better to measure twice to avoid any mistakes before cutting the tin roofing material.
Once you have your measurements, it’s time to cut the tin roofing panels to fit your roof. Start by marking the dimensions onto the tin sheet using a permanent marker or chalk. It’s important to measure and mark the panels carefully to avoid any errors or waste.
When cutting the tin sheets, you will need a pair of snips specifically designed for cutting metal. These snips typically have compound leverage and serrated blades to make the cutting process easier. Position the snips at the marked line and make a straight cut, applying steady pressure to ensure a clean and precise cut.
To prevent any sharp edges or protrusions from the cut tin sheets, you can use a file or sandpaper to smooth out the edges. This will not only make the installation safer but also enhance the overall appearance of your tin roof.
Remember, accuracy and precision are key when measuring and cutting tin roofing panels. A well-fitted roof will not only enhance the aesthetic appeal of your home or building but also contribute to its durability and longevity. Take your time, follow the proper techniques, and ensure that your tin roofing installation is done right the first time.
Step-by-step guide to installing tin roofing
Installing tin roofing can be a straightforward process if you follow the right steps. Here is a step-by-step guide to help you install tin roofing effectively and efficiently.
To begin with, make sure you have all the necessary materials and tools for the installation. This includes tin roofing panels, metal screws, roof underlayment, roofing nails, a chalk line, a tape measure, tin snips, and a drill with a metal bit.
1. Prepare the roof for tin installation: Start by removing the old roofing material and inspect the roof surface for any damage. Repair any leaks or weak spots before installing the tin roofing. Install a roofing underlayment to provide a waterproof barrier and protect the roof structure.
2. Proper measurement and cutting techniques for tin roofing: Measure the dimensions of the roof and calculate the number of tin roofing panels needed. Use a tape measure and a chalk line to mark the lines where the panels will be installed. Cut the tin roofing panels to the required size using tin snips or electric sheers. Ensure that the panels are cut accurately to fit the roof dimensions.
3. Installing the tin roofing panels: Start at one corner of the roof and align the first panel, leaving a small overhang at the edges. Secure the panel using metal screws, placing them at least 6 inches apart. Continue installing the panels in a row, overlapping each panel by at least 2 inches. Trim the last panel to fit if necessary.
4. Securing the tin roofing for long-lasting durability: Ensure that the tin roofing panels are securely fastened to the roof structure. Use roofing nails to reinforce the panels if needed. Pay attention to the edges and seams of the panels, as these are potential areas for water infiltration. Apply sealant or roofing tape to create a watertight seal.
5. Tips for preventing common issues during tin roofing installation: To avoid scratching the tin roofing panels, always use a soft cloth or gloves when handling them. Maintain safety by wearing appropriate protective gear such as gloves, goggles, and a hard hat. Check the weather forecast before starting the installation to avoid working in adverse conditions.
By following these step-by-step instructions, you can successfully install tin roofing and provide your roof with a durable and attractive protective covering. Remember to take your time, measure accurately, and ensure proper fastening for a long-lasting tin roof.
Securing tin roofing for long-lasting durability
After the meticulous process of measuring, cutting, and installing tin roofing, it is crucial to ensure its long-lasting durability by properly securing it. This step is essential to ensure that the roofing panels withstand various weather conditions and do not become loose or damaged over time. Here are some effective practices to secure tin roofing and enhance its durability.
1. Use appropriate fasteners: To secure tin roofing, it is essential to choose the right fasteners that are suitable for this type of material. Stainless steel or galvanized screws are recommended as they offer excellent resistance against rust and corrosion, ensuring the durability of the roof. Additionally, opt for screws with EPDM (ethylene propylene diene terpolymer) washers, which provide a watertight seal.
2. Place fasteners strategically: It is crucial to strategically place the fasteners along the panels to ensure a secure and tight fit. Start by placing the first fastener in the center of the panel, approximately 2 inches from the top edge. Then, position subsequent fasteners every 12 inches along the panel’s length. This spacing allows for proper distribution of weight and avoids creating stress points on the roofing panels.
3. Secure the overlapping seams: To create a weatherproof and durable tin roof, ensure that the overlapping seams are adequately secured. Apply a bead of high-quality silicone sealant along the overlap of adjacent panels before fastening them together. This creates a watertight barrier and prevents water infiltration, ultimately enhancing the durability of the tin roofing.
4. Consider expansion and contraction: Tin roofing, like any other metal roofing material, expands and contracts with changes in temperature. To accommodate this movement, it is crucial to leave a small gap between the roofing panels during the installation process. This gap allows the panels to move without causing stress and potential damage. However, it is essential to consult the manufacturer’s guidelines to determine the appropriate size of the gap based on the specific tin roofing product being installed.
By adhering to these practices, you can secure your tin roofing and ensure its long-lasting durability. Proper fastening, strategic placement of fasteners, sealing overlapping seams, and accounting for expansion and contraction are vital steps in maintaining the integrity of your tin roof for years to come. Remember to follow the manufacturer’s instructions and consult with roofing professionals for specific advice related to your project.
Tips for preventing common issues during tin roofing installation
:
Proper installation of tin roofing is crucial to ensure its longevity and durability. However, various issues can arise during the installation process that may compromise the effectiveness of the roofing system. To avoid these common issues and ensure a successful tin roofing installation, here are some helpful tips:
1. Prepare the roof surface adequately: Before installing the tin panels, it is essential to ensure the roof surface is clean, dry, and free from any debris or moisture. This prevents the formation of rust and promotes better adhesion of the roofing material.
2. Use the right fasteners: Choosing the correct fasteners, such as screws or nails, is vital in preventing issues like leaks and loose panels. It is recommended to use stainless steel or galvanized fasteners as they are resistant to corrosion and provide a secure hold. Additionally, using airtight washers beneath the fasteners can further enhance the waterproofing capabilities of the tin roofing system.
3. Properly overlap and seal joints: For optimal weatherproofing, it is crucial to ensure that the tin panels are overlapped correctly and securely sealed. This prevents water infiltration and reduces the risk of leaks. Utilize weather-resistant sealants or tapes specifically designed for metal roofs to seal all joints, overlaps, and any potential entry points.
4. Handle tin panels with care: Tin roofing panels can be prone to damage if mishandled during installation. Avoid dragging or sliding the panels to prevent scratches or bends. Additionally, take precautions while walking on the roof to avoid denting or warping the tin panels. Using plywood or a similar protective barrier under your weight can distribute pressure more evenly.
5. Consider thermal expansion and contraction: Tin roofing expands and contracts with changes in temperature. This movement can lead to issues such as warped panels or gaps between fasteners. To mitigate these problems, it is crucial to allow for proper spacing and use specialized techniques like floating clips or expansion joints. These components accommodate the metal’s natural movement and prevent potential damage.
By following these tips, you can minimize common issues that may arise during the installation of tin roofing. Proper surface preparation, choosing the right fasteners, correctly sealing joints, handling panels with care, and accounting for thermal expansion are crucial aspects to ensure a smooth and long-lasting tin roofing installation. Remember, attention to detail and adherence to manufacturer’s guidelines are key to achieving the best results.
People Also Ask
1. Can I install tin roofing over shingles?
Yes, it is possible to install tin roofing over existing shingles. However, it is essential to ensure that the roof structure can support the added weight and that the shingles are in good condition to provide a proper base for the tin roofing.
2. What tools do I need to install tin roofing?
To install tin roofing, you will need a variety of tools including a tape measure, chalk line, tin shears, drill/driver, roofing nails, hammer, roofing screws, roofing adhesive, and a ladder or scaffolding for access.
3. How do I prepare the roof before installing tin roofing?
Prior to installing tin roofing, you should first clean and remove any existing roofing materials, repair any damaged areas, and ensure the roof deck is sturdy and free of debris. It is also advisable to install an underlayment, such as roofing felt, for added protection against moisture.
4. What is the recommended pitch for tin roofing?
Tin roofing is typically recommended for roofs with a minimum pitch of 3:12, meaning for every 3 inches of horizontal run, the roof should rise 1 inch vertically. This helps ensure proper water runoff and prevents leaks.
5. Can I install tin roofing myself?
While it is possible to install tin roofing yourself, it is advisable to have some level of roofing experience or consult a professional. Proper installation techniques, knowledge of local building codes, and safety precautions are crucial for a successful and long-lasting tin roof installation.
Key Takeaways
In conclusion, installing tin roofing is a manageable task that can be accomplished with the right tools and knowledge. By following the steps outlined in this guide, you can ensure a successful installation process. Remember to thoroughly prepare the roof surface, measure and cut the tin sheets accurately, and secure them properly using the appropriate fasteners.
Additionally, it is crucial to prioritize safety throughout the installation process by using proper protective gear such as gloves and goggles. Regularly inspect your roof for any signs of damage or issues that may require maintenance.
If you are unsure about any step or lack the necessary tools, it is always best to consult with a professional roofing contractor. They can provide expert advice and assistance to ensure that your tin roofing installation is done correctly and efficiently.
By taking the time to install tin roofing correctly, you can enjoy its durability, longevity, and aesthetic appeal for many years to come. So, whether you are a DIY enthusiast or looking to hire a professional, don’t hesitate to explore the benefits and beauty of tin roofing for your home or building.

Commercial Roofing Consultant
Matthew Carter’s forte lies in commercial roofing systems, particularly flat roofs and metal structures. His expertise and attention to detail guarantee reliable and tailored solutions for businesses in Fresno.