Installing a Thule roof rack can be the perfect solution for all your roof repair needs. Whether you’re an adventure enthusiast seeking to transport bikes, kayaks, or skis, or simply someone in need of extra storage space, a Thule roof rack offers both functionality and peace of mind. But, you may be wondering, how exactly do you go about installing one? In this article, we will guide you through the step-by-step process of installing a Thule roof rack, ensuring that you have all the information necessary to tackle this task with confidence and precision. So, let’s dive in and explore the world of Thule roof rack installation, unlocking the potential to transform your vehicle into a versatile carrier of all your essential gear.
Choosing the Right Thule Roof Rack for Your Vehicle
Finding the perfect Thule roof rack for your vehicle is essential to ensure a secure and hassle-free installation. With a wide range of options available, it can be challenging to determine the best fit for your specific needs. However, by considering a few key factors, you can make an informed decision that will provide optimal functionality and durability.
Firstly, it is crucial to determine the type of Thule roof rack that is compatible with your vehicle. Thule offers various models such as the AeroBlade, SquareBar, and ProBar, each designed to fit specific types of roofs. To identify the correct model, consult the Thule Fit Guide, which provides a comprehensive list of compatible racks based on your car’s make, model, and year.
Furthermore, take into account the intended function of your roof rack. If you plan on transporting bikes, skis, or large equipment, consider racks with specific attachments or features designed for these purposes. Thule offers a wide range of accessories, such as bike carriers, ski/snowboard carriers, and cargo boxes, that can be seamlessly integrated with their roof racks.
Lastly, consider your budget and desired level of quality. Thule roof racks come in various price ranges, with each offering different features and materials. While it can be tempting to opt for the most affordable option, investing in a higher-quality rack can provide greater durability and longevity, especially if you plan on using it frequently or for heavy-duty purposes.
By carefully considering compatibility, functionality, and budget, you can confidently choose the right Thule roof rack for your vehicle. Remember to consult the Thule Fit Guide, assess your specific needs, and prioritize quality, ensuring a secure and dependable solution for all your cargo transportation requirements.
Gathering the Necessary Tools and Equipment
When it comes to installing a Thule roof rack on your vehicle, it is essential to gather all the necessary tools and equipment beforehand to ensure a smooth and efficient installation process. By having everything you need at hand, you can avoid unnecessary delays and complications. So, let’s go through the essential tools and equipment required for a successful Thule roof rack installation.
Firstly, you’ll need a tape measure to accurately measure the dimensions of your vehicle’s roof. This will help you determine which Thule roof rack model is compatible with your vehicle and ensure a proper fit. Additionally, having a level will aid in ensuring that the roof rack is installed evenly and securely.
Next, you’ll require a set of wrenches and screwdrivers. These tools will be necessary for tightening and loosening bolts and screws during the installation process. It’s important to choose the correct sizes to ensure a snug fit and prevent any potential damage to the roof rack or your vehicle.
In addition to the basic hand tools, it’s also advisable to have a power drill and drill bits on hand. This will come in handy when drilling holes into the roof of your vehicle, if required by the specific Thule roof rack model you’ve chosen. Be sure to use the appropriate drill bits for your vehicle’s roof material to avoid any unnecessary complications.
Furthermore, a ladder or step stool may be necessary to safely access the roof of your vehicle. This will provide you with the needed height and stability to install the roof rack accurately. Safety should always be a priority when working at heights, so ensure that your ladder or step stool is stable and secure before attempting to climb on it.
Lastly, it’s important to have the Thule roof rack kit itself, which typically includes all the necessary components and hardware for installation. Be sure to check that all the parts are included in the package before beginning the installation process. If any parts are missing, contact Thule or the retailer from where you purchased the kit to have them sent to you.
By gathering these necessary tools and equipment, you’ll be well-prepared to install your Thule roof rack and enjoy the added convenience and versatility it provides. Remember to always follow the manufacturer’s instructions and guidelines for a proper installation. With the right tools and a little patience, you’ll have your Thule roof rack securely mounted on your vehicle in no time.
Preparing Your Vehicle for Installation
Before you begin the installation process for your Thule roof rack, it is important to properly prepare your vehicle. This will ensure a smooth and successful installation, as well as help protect your vehicle from any potential damage.
Firstly, start by cleaning the roof of your vehicle. Remove any dirt, dust, or debris from the surface. This will help create a clean and secure base for the roof rack installation. Use a gentle car wash soap and a sponge or cloth to clean the roof. Rinse it thoroughly with water and dry it with a clean towel or microfiber cloth.
Next, inspect the roof of your vehicle to ensure it is in good condition and free from any damage. Check for any dents, scratches, or rust that could affect the installation or compromise the integrity of the roof rack. If you notice any issues, it is recommended to address them before proceeding with the installation.
Once the roof is clean and in good condition, locate the mounting points on your vehicle. These are typically found along the roofline and may vary depending on the make and model of your vehicle. Consult the Thule fit guide or your vehicle’s user manual to determine the specific location of the mounting points.
If your vehicle does not have pre-installed mounting points, you may need to install a roof rack system of fixed points or tracks. This will require drilling holes into the roof of your vehicle. It is highly recommended to consult a professional or a Thule dealer for assistance with this installation process to ensure it is done correctly and safely.
By properly preparing your vehicle, you will create a solid foundation for the installation of your Thule roof rack. Taking the time to clean the roof, inspect for any damage, and locate the mounting points or install the necessary components will help ensure a successful and secure roof rack installation.
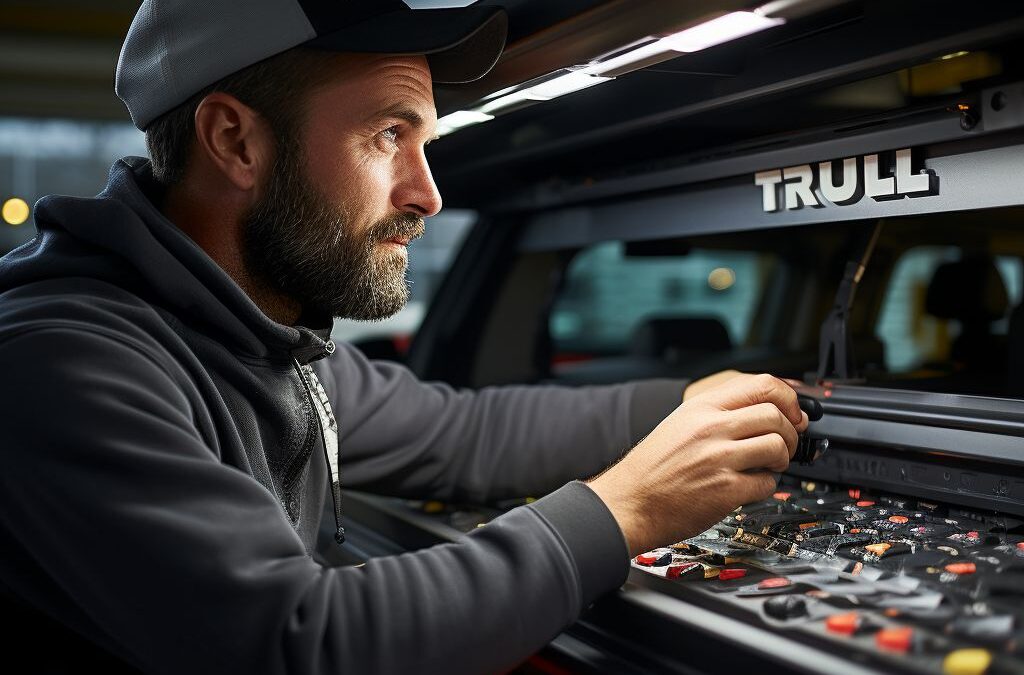
Installing the Thule Roof Rack
:
When it comes to installing your Thule roof rack, following the proper steps and using the right techniques is crucial for a secure and stable fit. Whether you’re a seasoned DIY enthusiast or new to roof rack installation, this section will guide you through the process to ensure a successful installation.
Firstly, it’s important to carefully read the instructions that come with your Thule roof rack. These instructions will provide you with specific details on how to install the rack properly for your specific vehicle make and model. Make sure to familiarize yourself with the instructions and any accompanying diagrams before beginning the installation process.
Once you’re comfortable with the instructions, gather the necessary tools and equipment needed for the installation. Common tools you may need include a tape measure, screwdriver or socket set, and a wrench. It’s always a good idea to have these tools readily available to make the installation process smoother.
To begin the installation, position the Thule roof rack on top of your vehicle according to the instructions provided. Use caution as the roof rack can be heavy, so it’s helpful to have another person assist you during this step. Ensure that the rack is aligned correctly and centered on your vehicle’s roof.
Next, secure the rack using the provided hardware and fasteners. Thule roof racks typically require tightening screws or bolts to securely attach the rack to your vehicle’s roof. Each attachment point will have its own specific hardware, so refer to the instructions for the correct type and size of fasteners.
After securing the roof rack to your vehicle, check for any loose connections or gaps. It’s essential to ensure that the roof rack is securely fastened and tightly in place. Double-check that all screws or bolts are tightened properly, using a wrench or screwdriver if necessary.
To further stabilize the roof rack, you may need to adjust the crossbars to fit the width of your vehicle. This adjustment will depend on your specific Thule roof rack model. Follow the instructions to properly adjust the crossbars, and ensure they are parallel and evenly spaced.
Lastly, take a step back and inspect the roof rack installation. Check for any signs of instability or loose fittings. Give the roof rack a gentle shake to ensure it is securely attached and doesn’t shift. If everything looks and feels secure, then you have successfully installed your Thule roof rack!
By carefully following the installation process and taking the time to ensure a proper fit, you can confidently enjoy the benefits of your Thule roof rack. Now that the roof rack is installed, it’s time to move on to the next step and secure any additional accessories or equipment to enhance your roof rack’s functionality.
Securing and Adjusting the Roof Rack
Once you have successfully installed the Thule roof rack on your vehicle, the next step is to ensure that it is securely fastened and properly adjusted. This will not only provide stability while driving but also prevent any potential damage or accidents. Here are a few important steps to follow for securing and adjusting your Thule roof rack:
1. Tighten the Fastening Hardware: Begin by double-checking all the fastening hardware, such as bolts and screws, to ensure that they are properly tightened. Use a wrench or screwdriver, as required, to tighten any loose components. This step is crucial in preventing any unwanted movement or shifting of the roof rack during transportation.
2. Check the Correct Positioning: Verify that the roof rack is aligned and positioned correctly on your vehicle’s roof. Refer to the manufacturer’s instructions or guidelines to ensure it is installed in the recommended location. Improper positioning may lead to instability or damage to your vehicle.
3. Adjust the Crossbars: The next step is to adjust the crossbars of your Thule roof rack to accommodate the specific needs of your cargo. If you plan to carry larger items, such as kayaks or snowboards, you may need to adjust the spacing between the bars to provide sufficient clearance. Remember to always refer to the load capacity recommendations provided by Thule to avoid exceeding the weight limit.
4. Verify and Set the Height: It is crucial to consider the height of your vehicle with the roof rack installed, especially when entering low-clearance areas or garages. Carefully measure and adjust the height of your roof rack to ensure it is within safe limits. This will help prevent any accidental collisions or damage.
5. Test the Stability: Once the roof rack is securely fastened and adjusted, it is essential to test its stability. Gently shake and apply pressure to the rack to ensure it is firmly secured. Additionally, double-check all connections and attachments to make sure everything is properly locked and in place.
Remember, while securing and adjusting your Thule roof rack, it is vital to prioritize safety and ensure that your vehicle’s load capacity is not exceeded. Regularly inspect your roof rack before each use and make any necessary adjustments or repairs to maintain its effectiveness and longevity. By following these steps, you can confidently transport your cargo with peace of mind, knowing that your Thule roof rack is securely installed.
Finalizing the Installation and Ensuring a Proper Fit
To complete the installation of your Thule roof rack and ensure a proper fit, there are a few additional steps you should take. By following these guidelines, you can ensure that your roof rack is secure and ready to carry your belongings safely.
First, double-check all the screws and bolts to ensure they are tightened properly. Use a torque wrench if necessary to achieve the recommended torque settings specified by Thule. This will prevent any vibrations or loosening of the roof rack while driving.
Next, give the roof rack a gentle shake to check for any movement or play. If you notice any excessive movement, re-tighten the screws or contact Thule customer support for assistance. It’s crucial to have a sturdy and stable roof rack to ensure the safety of your cargo.
After confirming the stability of the roof rack, take a step back and visually inspect the overall fit. Ensure that the crossbars are parallel to each other and perpendicular to the vehicle’s roofline. Adjust the placement of the roof rack if necessary until it looks symmetrical and aligned with the vehicle.
In addition to the visual inspection, consider taking the vehicle for a test drive before fully loading any cargo onto the roof rack. This will allow you to assess if there are any unusual noises or vibrations that may indicate an improper fit. Make any necessary adjustments before loading your belongings onto the roof rack.
Lastly, once you are satisfied with the installation and fit of your Thule roof rack, it’s a good idea to periodically check the tightness of the screws and bolts. This will help ensure that the roof rack remains secure throughout its lifespan and prevent any potential issues down the road.
By following these final steps, you can confidently finalize the installation of your Thule roof rack and ensure that it provides a safe and secure attachment for all your future adventures. Remember, a properly installed and fitted roof rack is essential for the safety of both your vehicle and your cargo.
People Also Ask
1. How do you install a Thule roof rack on a car?
To install a Thule roof rack on a car, start by assembling the components of the rack system according to the manufacturer’s instructions. Then, place the base rack onto the car’s roof and align it with the predetermined mounting points. Finally, secure the rack in place by tightening the mounting hardware.
2. Which tools are required to install a Thule roof rack?
The tools required to install a Thule roof rack may vary depending on the specific system, but commonly needed tools include a hex key or wrench, a tape measure, a screwdriver, and possibly a drill. Always refer to the installation instructions provided with the rack system to determine the necessary tools.
3. Can I install a Thule roof rack on any car?
Thule offers a wide range of roof rack models designed to fit various car makes and models. However, not all Thule roof racks are compatible with every car. It is essential to check Thule’s fit guide or consult with a Thule retailer to ensure you purchase a roof rack system that fits your specific car.
4. Are there any weight limitations for a Thule roof rack?
Yes, Thule provides weight limitations for its roof rack systems, and it is crucial to adhere to these limits to ensure safe and proper usage. The weight limit varies depending on the specific rack model and the car’s roof capacity. Always refer to the instruction manual or contact Thule’s customer support for the correct weight limit for your roof rack model.
5. Can I install a Thule roof rack myself, or should I seek professional help?
While it is possible to install a Thule roof rack yourself by following the provided instructions, seeking professional help may be beneficial to ensure proper installation. A professional can provide expert advice, ensure the rack is correctly fitted, and guarantee optimal safety and performance.
Final Thoughts
In conclusion, installing a Thule roof rack can be done by following a few simple steps. Start by gathering all the necessary parts and tools needed for the installation. Next, carefully read the instruction manual provided by Thule to understand the specific steps required for your vehicle’s model.
Once you have familiarized yourself with the instructions, begin the installation process by attaching the roof rack feet to your vehicle’s roof rails or factory-installed mounts. Secure them tightly using the provided wrench or key. Then, attach the crossbars onto the feet and adjust them to the desired width.
After ensuring that the crossbars are evenly aligned and tightened, you can add any additional accessories such as bike racks, ski carriers, or cargo boxes to the roof rack system, following the specific instructions for each accessory.
Lastly, it is crucial to double-check the tightness of all connections and test the stability of the roof rack before placing any heavy items on it. Regularly inspect the installation and tighten any loose parts as needed to ensure the roof rack remains securely in place.
By following these instructions and taking care during the installation process, you can safely and effectively install a Thule roof rack on your vehicle. Enjoy the added convenience and versatility that a roof rack provides for transporting your gear and equipment. Happy travels!

Certified Roofing Specialist
Jonathan Parker, a certified roofing specialist, is known for his problem-solving skills and proactive approach to roof maintenance. His goal is to provide sustainable roofing solutions that withstand Fresno’s diverse weather conditions.